“Wait, these are just egg whites and sugar?” My friend Jenna squinted at the baking sheet on my counter, a row of tiny white peaks staring back at her. She had texted me earlier, frantic about a last-minute Halloween party the next night. She needed something spooky, something cute, and something that didn’t require a trip to three different grocery stores. I told her I had the answer before she could even finish her sentence. She looked from the ghostly meringues to my face, clearly skeptical. “You’re telling me I can make these for the party without buying anything weird?”
That moment—the mix of disbelief and relief in her voice—is exactly why I love these two-ingredient ghost meringue cookies. They are the ultimate last-minute Halloween trick that feels like a treat. No fancy piping bags, no scary food coloring, just a simple, airy cookie that melts in your mouth and looks like it floated right out of a haunted house. Honestly, the first time I made them, I was just as surprised. I had leftover egg whites from a batch of pumpkin chocolate chip bread and couldn’t stand the thought of tossing them. A quick search and a little patience later, I had a tray of the most adorable little ghosts. They vanished in minutes.
There is something quietly satisfying about a recipe that relies on technique over a long list of ingredients. It forces you to slow down, to watch the sugar dissolve, to see the mixture transform from a runny liquid into a glossy, stiff cloud. It feels a bit like kitchen magic. And when you pipe those little ghosts onto the tray and add their tiny chocolate chip eyes, it’s hard not to smile. These aren’t just cookies; they are a tiny, edible celebration of doing a lot with a little. I promise, if you can whip an egg white, you can make these.
Why You’ll Love This Recipe
Let me tell you why these ghost meringue cookies are going to be your new go-to for Halloween. I have tested this recipe more times than I can count, tweaking the oven temperature and the whipping time until I got it just right. It’s the kind of recipe that makes you look like a pro with almost zero effort.
- Two Simple Ingredients: Seriously. Just egg whites and sugar. You probably have them in your kitchen right now. No grocery store run required for obscure extracts or special flours.
- Quick to Make, Fun to Decorate: The active prep time is about 15 minutes. The rest is just waiting for them to bake low and slow. It is a perfect activity to do with kids or while you are catching up on a podcast.
- Perfect for Halloween Parties: These little ghosts are a total crowd-pleaser. They are light, airy, and not too sweet. Kids love them because they look cute, and adults love them because they are a lighter option among all the heavy candy and chocolate.
- Incredibly Versatile: Once you master the basic meringue, you can adapt it for any holiday. Think little green trees for Christmas or pink hearts for Valentine’s Day. The base is a blank canvas.
- Naturally Gluten-Free and Low-Fat: If you are hosting a party with guests who have dietary restrictions, these are a lifesaver. They are naturally gluten-free and have almost no fat. It is a win for everyone.
What makes this version different from other meringue recipes is the focus on foolproof technique. I have learned the hard way what happens when you get a speck of yolk in the bowl (disaster) or when you rush the sugar (gritty, sad ghosts). This recipe walks you through every step to make sure your meringues come out glossy, crisp, and perfectly shaped. It is not just another recipe—it’s the one I trust every single time.
Ingredients You Will Need
This recipe is the definition of minimalism. You only need two main ingredients to make the magic happen, plus a tiny bit for the faces. Here is everything you need and a few tips I have picked up along the way.
- 3 Large Egg Whites: The foundation of your ghosts. For the best results, use eggs that are a few days old, not super fresh. Older egg whites whip up higher and more stable because they have a lower pH. Make sure your eggs are at room temperature before you start. Cold egg whites are harder to whip to their full volume. I usually take my eggs out of the fridge about 30 minutes before I start baking. Be very careful when separating the eggs. Any trace of yolk will prevent the whites from whipping properly. If you get a little yolk in the bowl, it is better to start over than to try and fish it out.
- ¾ Cup (150g) Granulated Sugar: This is not just for sweetness. The sugar stabilizes the meringue and gives it that signature glossy, crisp texture. I recommend using fine, standard granulated sugar. Superfine sugar or caster sugar works even better because it dissolves faster, but regular white sugar is perfectly fine. Do not use powdered sugar or brown sugar—they will change the texture and color completely.
- ¼ Teaspoon Cream of Tartar (Optional but Recommended): This is not technically one of the two main ingredients, but I always add it. Cream of tartar is an acid that helps stabilize the egg whites, making them less likely to deflate. It also helps create a stiffer, glossier meringue. If you don’t have it, you can substitute with a few drops of lemon juice or white vinegar. You won’t taste it, I promise.
- ¼ Cup Mini Chocolate Chips: For the ghost faces. You will need two tiny chips per ghost for the eyes. You can also use melted dark chocolate and a toothpick to paint on little faces. I prefer the mini chips because they are the perfect size and add a little chocolate crunch.
Ingredient Selection Tip: I usually buy organic eggs, but any large egg will do. The most important thing is freshness when it comes to flavor, but for whipping, slightly older eggs are actually better. For the sugar, any standard brand works fine. I have used store-brand sugar for years with perfect results.
Equipment Needed
You do not need a professional bakery setup for these cookies, but having the right tools makes the job much easier. Here is what you will need.
- Electric Mixer (Stand or Handheld): You can technically whip egg whites by hand with a whisk, but it takes a very long time and a lot of arm strength. A stand mixer with a whisk attachment is my favorite for this, but a handheld electric mixer works just as well.
- Large, Clean Glass or Metal Mixing Bowl: Do not use a plastic bowl. Plastic can hold onto oils and grease, which will ruin your meringue. A glass or metal bowl is best. Make sure it is spotlessly clean and completely dry. A drop of water or grease is the enemy of stiff peaks.
- Piping Bag with a Round Tip: You can use a piping bag fitted with a large round tip (like a Wilton 1A) to create the ghost shape. If you don’t have a piping bag, you can use a sturdy zip-top bag with a small corner snipped off. It won’t be as precise, but it will work in a pinch.
- Baking Sheets and Parchment Paper: Line your baking sheets with parchment paper. Do not use wax paper or greased foil. The meringues need a non-stick surface to release easily, and parchment paper is the best option.
- Rubber Spatula: For scraping down the sides of the bowl and transferring the meringue to the piping bag.
Preparation Method
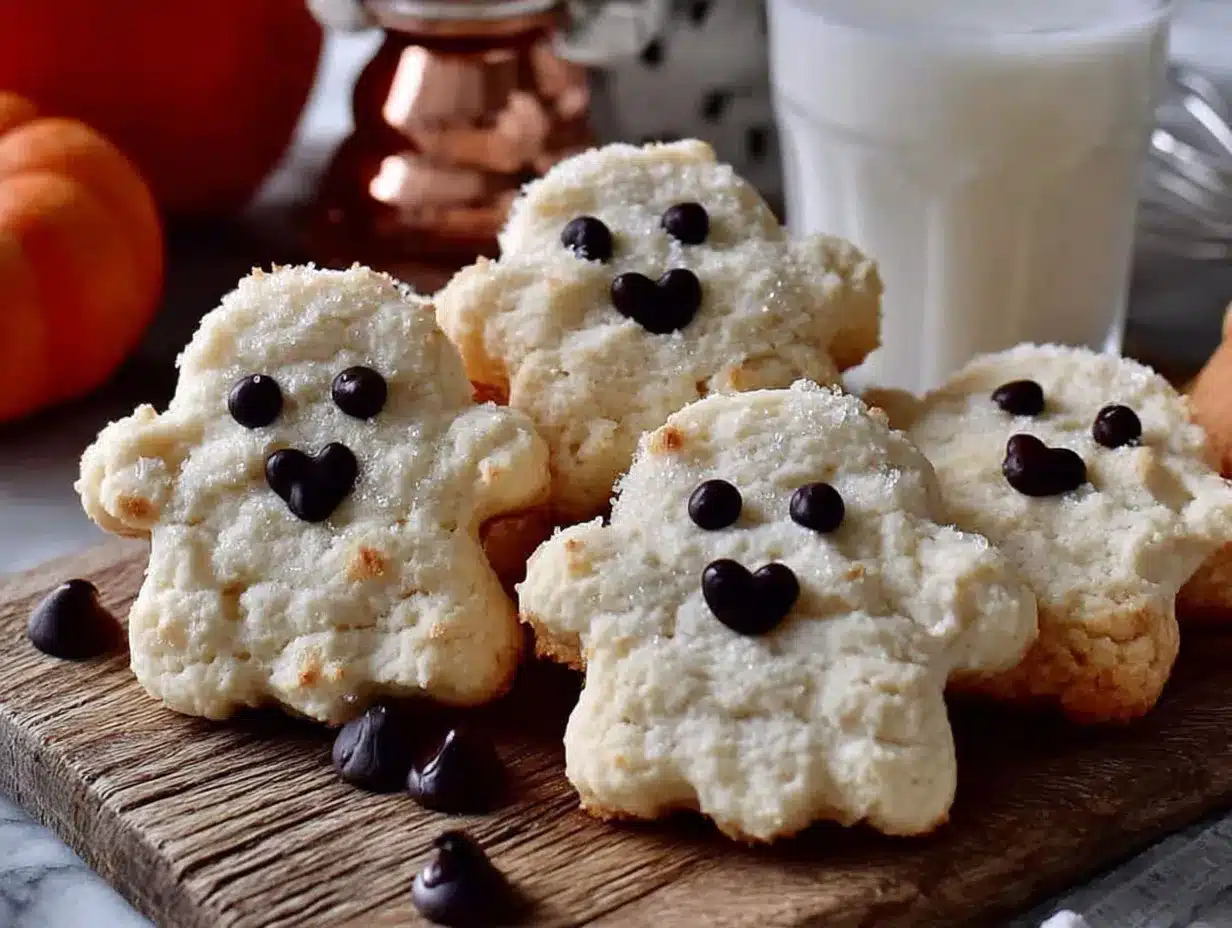
Alright, let’s get to the fun part. Follow these steps carefully, and you will have a tray of adorable ghost meringue cookies in no time.
- Preheat and Prepare: Preheat your oven to 200°F (95°C). This is a very low temperature. We are not baking the meringues; we are drying them out. Line two large baking sheets with parchment paper. Set them aside.
- Whip the Egg Whites: Place your room-temperature egg whites and the cream of tartar (if using) into your clean, dry mixing bowl. Start mixing on medium-low speed. You want to get the whites foamy and bubbly. This usually takes about 1-2 minutes. The mixture will look like a light, frothy sea foam. Do not rush this step.
- Add the Sugar Slowly: With the mixer running on medium speed, start adding the sugar, one tablespoon at a time. I know it feels tedious, but this is crucial. If you dump all the sugar in at once, the meringue can collapse. Let each addition dissolve for about 15-20 seconds before adding the next. This whole process should take about 3-4 minutes.
- Whip to Stiff Peaks: Once all the sugar is added, increase the speed to medium-high. Whip the meringue until it is thick, glossy, and forms stiff peaks. How do you test this? Stop the mixer and lift the whisk attachment straight up. The meringue should form a sharp, upright peak that does not flop over. If the peak droops, keep whipping. This can take anywhere from 5 to 10 minutes, depending on your mixer. Another test: rub a tiny bit of the meringue between your fingers. If it feels smooth and not grainy, the sugar is fully dissolved. If it feels gritty, keep whipping.
- Pipe the Ghosts: Spoon the meringue into your piping bag fitted with the round tip. Hold the bag straight up and down, about ½ inch above the parchment paper. Squeeze gently to create a round, plump base. Then, as you lift the bag straight up, ease up on the pressure to create a tall, wispy peak on top. This is the ghost’s head. It takes a little practice, but even imperfect ones look cute. Leave about 1 inch of space between each ghost.
- Add the Eyes: Before the meringue starts to dry, gently press two mini chocolate chips into each ghost for eyes. Place them close together near the top of the base. You can also add a tiny chip for a mouth if you want, but I like the simple two-eye look.
- Bake Low and Slow: Place the baking sheets in the preheated oven. Bake for 60-75 minutes. Do not open the oven door during the first 45 minutes! The meringues need consistent heat to dry out properly. They are done when they are firm to the touch and easily peel off the parchment paper. They should be dry all the way through, not chewy or sticky in the center.
- Cool Completely: Turn off the oven and leave the meringues inside with the door slightly ajar (use a wooden spoon to prop it open) for another 30-60 minutes. This helps them cool down slowly and prevents cracking. Then, transfer them to a wire rack to cool completely.
Cooking Tips & Techniques
I have made a lot of mistakes with meringue over the years, and I am sharing them so you do not have to. Here are my best tips for perfect ghost meringue cookies.
- Humidity is the Enemy: Do not make meringues on a rainy or humid day. They absorb moisture from the air and will turn sticky and soft. Pick a dry, crisp day for the best results. Trust me on this one—I learned the hard way.
- Don’t Overwhip: It is possible to overwhip meringue. The mixture will start to look grainy and curdled, and water will separate out. If this happens, you have to start over. Stop whipping as soon as you have stiff, glossy peaks.
- Use the Oven Door Trick: After baking, leaving the meringues in the oven with the door cracked is a game-changer. It prevents the sudden temperature change that causes cracking. I have lost many a perfect ghost to a slammed oven door.
- Perfect Piping: If you do not have a piping bag, a zip-top bag with a corner snipped off works fine. Just make sure the hole is not too big. You want to be able to control the flow. Hold the bag straight up and down for the best shape.
- Check for Doneness: A perfectly baked meringue should lift cleanly off the parchment paper. If it sticks, it needs more time. They should be light as a feather and snap when you bite into them.
Variations & Adaptations
Once you have the basic ghost shape down, the possibilities are endless. Here are a few fun ways to change things up.
- Spooky Flavor Twist: Add a few drops of peppermint extract or vanilla extract to the egg whites before whipping. A little goes a long way. For a truly Halloween vibe, try a drop of orange or lemon extract. You can also add a tiny pinch of cinnamon or pumpkin pie spice for a fall flavor.
- Colorful Ghosts: Want to make your ghosts a little more festive? After you have stiff peaks, gently fold in a tiny drop of gel food coloring. Do not use liquid food coloring, as it will deflate the meringue. A swirl of purple, orange, or green looks amazing.
- Different Faces: Instead of chocolate chips, you can use a tiny dot of black gel icing or melted dark chocolate to paint on different faces. Try a spooky open mouth or little eyebrows. You can also sprinkle a tiny bit of edible glitter on top before baking for a magical touch.
- Dietary Adaptation: This recipe is already gluten-free and dairy-free (as long as you use dairy-free chocolate chips). For a sugar-free version, you can try using a granulated monk fruit sweetener that measures like sugar, but the texture will be slightly different and less crisp.
- Pumpkin Patch Ghosts: Pipe a tiny green stem on top of each ghost before baking, or place them on a bed of crushed chocolate cookies to look like they are floating in a graveyard. I have also made a batch of candy corn jello cups to serve alongside them for a full spooky spread.
Serving & Storage Suggestions
These ghost meringue cookies are best served the day they are made, but they can last for a while if stored properly. Here is how to handle them.
Serving: Serve them at room temperature. They are perfect on a Halloween dessert table, alongside a bowl of football charcuterie board for a game-day party, or packed in a cute bag as a party favor. They look amazing stacked on a cake stand. The light, airy texture is a great palate cleanser after heavier dishes.
Storage: Store the meringues in an airtight container at room temperature. Do not refrigerate them—the moisture in the fridge will make them sticky. They will stay crisp for about 2 to 3 weeks if kept in a cool, dry place. To keep them extra safe, you can add a food-safe silica gel packet to the container to absorb any excess moisture.
Freezing: You can freeze baked meringues for up to 3 months. Place them in a single layer in a freezer-safe container with parchment paper between the layers. Thaw them at room temperature for about 30 minutes before serving. Do not open the container while they are thawing, or they might absorb moisture and get sticky.
Reheating: You do not need to reheat meringues. If they have lost their crispness (which can happen in humid weather), you can pop them back into a 200°F (95°C) oven for 10-15 minutes to dry them out again. Let them cool completely in the oven.
Nutritional Information & Benefits
These ghost meringue cookies are a surprisingly light treat. Here is a quick breakdown of what you are getting in one cookie (about 15g).
| Nutrient | Amount per Cookie |
|---|---|
| Calories | ~25 kcal |
| Carbohydrates | ~6 g |
| Protein | ~1 g |
| Fat | 0 g |
| Sugar | ~6 g |
Health Benefits: These cookies are naturally fat-free and very low in calories. Egg whites are a great source of protein and contain no cholesterol. They are also naturally gluten-free, making them a safe option for those with celiac disease or gluten sensitivity. The sugar content is the main consideration, but since they are so light and airy, you get a lot of volume for a small amount of sugar.
Dietary Considerations: This recipe is naturally gluten-free, dairy-free, and nut-free. It is also vegetarian. The only potential allergen is eggs. If you have an egg allergy, this recipe is not suitable. For a vegan option, you would need to use aquafaba (the liquid from a can of chickpeas), which is a different process entirely.
Conclusion
These two-ingredient ghost meringue cookies are proof that you do not need a complicated recipe or a pantry full of exotic ingredients to create something truly special. They are simple, elegant, and endlessly fun to make. Whether you are a seasoned baker or someone who is just looking for a quick, impressive treat for a Halloween party, this recipe is for you.
I love how these little ghosts make people smile. They are a conversation starter, a tiny piece of edible art, and a deliciously light way to celebrate the spooky season. I encourage you to play around with the flavors and decorations. Make them your own. Add a little cinnamon, use different colored chocolate chips, or turn them into pumpkins for Thanksgiving.
If you make these, I would love to hear about it. Drop a comment below and let me know how they turned out. Did your kids help pipe the ghosts? Did you try a different flavor? Share your photos and tag me on social media. Happy Halloween, and happy baking! You have got this.
Frequently Asked Questions
Why did my meringue cookies turn out sticky or chewy?
This usually happens because of humidity. Meringues are sensitive to moisture in the air. They can also be under-baked. Make sure you are baking them long enough at a low temperature until they are completely dry and firm to the touch. Storing them in an airtight container immediately after baking helps too.
Can I use liquid egg whites from a carton?
I do not recommend it. Liquid egg whites from a carton are often pasteurized differently and may contain stabilizers that prevent them from whipping to stiff peaks. They also lack the structure of fresh egg whites. For the best results, always use fresh egg whites.
Can I make these without a piping bag?
Absolutely! You can use a sturdy zip-top plastic bag. Spoon the meringue into the bag, seal it, and snip off a small corner. You will not get as defined a shape as with a piping tip, but you can still make cute, ghost-like dollops. You can even just use two spoons to drop the meringue onto the baking sheet.
How do I know when the meringue is whipped enough?
The best test is the stiff peak test. Lift the whisk attachment straight up. The meringue should form a sharp, upright peak that holds its shape. Another good test is the bowl test: turn the bowl upside down. If the meringue stays put, it is ready. If it slides, keep whipping. Also, rub a little between your fingers—it should feel smooth, not grainy.
Can I double this recipe?
Yes, you can easily double or triple this recipe. Just keep in mind that you will need to whip the meringue for a bit longer to reach stiff peaks. You will also need more baking sheets and might need to bake them in batches depending on your oven size. The baking time should remain the same.
Pin This Recipe!
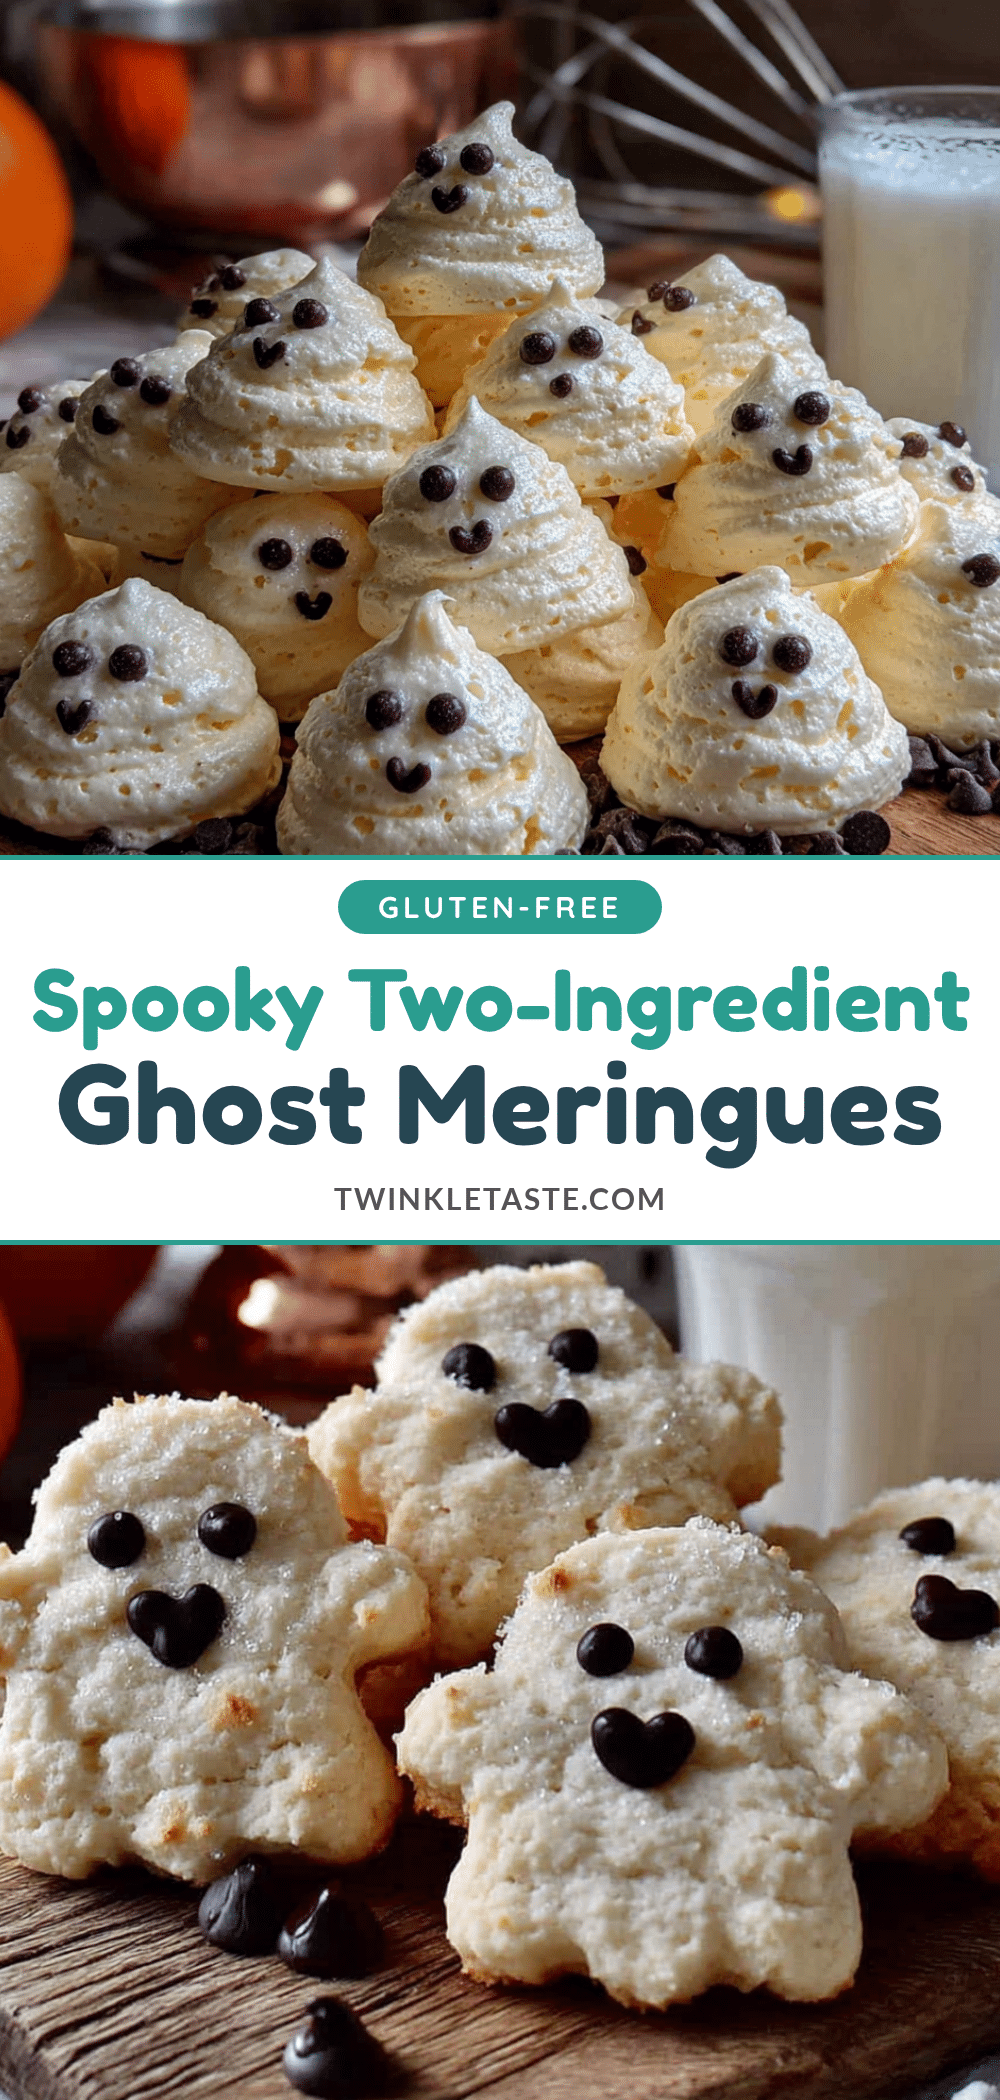
Two-Ingredient Ghost Meringue Cookies: Easy Halloween Treat
These two-ingredient ghost meringue cookies are the ultimate last-minute Halloween trick that feels like a treat. Made with just egg whites and sugar, they are light, airy, and naturally gluten-free.
- Prep Time: 15 minutes
- Cook Time: 60-75 minutes
- Total Time: 1 hour 45 minutes
- Yield: 24 servings 1x
- Category: Dessert
- Cuisine: American
Ingredients
- 3 large egg whites, at room temperature
- 3/4 cup (150g) granulated sugar
- 1/4 teaspoon cream of tartar (optional but recommended)
- 1/4 cup mini chocolate chips
Instructions
- Preheat oven to 200°F (95°C). Line two large baking sheets with parchment paper.
- Place room-temperature egg whites and cream of tartar (if using) in a clean, dry mixing bowl. Beat on medium-low speed until foamy and bubbly, about 1-2 minutes.
- With mixer running on medium speed, add sugar one tablespoon at a time, letting each addition dissolve for 15-20 seconds. This should take about 3-4 minutes.
- Increase speed to medium-high and whip until thick, glossy, and stiff peaks form, about 5-10 minutes. The meringue should form a sharp, upright peak when the whisk is lifted.
- Spoon meringue into a piping bag fitted with a large round tip. Pipe ghosts onto prepared baking sheets: squeeze a round base, then lift straight up while easing pressure to create a tall, wispy peak.
- Before meringue dries, gently press two mini chocolate chips into each ghost for eyes.
- Bake for 60-75 minutes, without opening the oven door for the first 45 minutes. Meringues are done when firm to the touch and easily peel off parchment.
- Turn off oven and leave meringues inside with door slightly ajar for 30-60 minutes to cool slowly. Transfer to a wire rack to cool completely.
Notes
Do not make meringues on a humid day. Ensure bowls and utensils are completely clean and dry. For best results, use eggs that are a few days old and at room temperature. Store in an airtight container at room temperature for up to 2-3 weeks.
Nutrition
- Serving Size: 1 cookie (about 15g)
- Calories: 25
- Sugar: 6
- Sodium: 10
- Carbohydrates: 6
- Protein: 1
Keywords: ghost meringue cookies, Halloween cookies, two-ingredient cookies, meringue cookies, gluten-free cookies, low-fat cookies


