It was 11:17 PM on a random Wednesday in October, and I was hit with the most specific craving for something deeply savory, buttery, and herbaceous. I didn’t have the fancy artisan bread a normal recipe would call for, but I had a half-stale bag of sourdough from last weekend and a stick of butter that was begging to be pushed past its usual limits. The idea of browning that butter and tossing it with sage felt like a late-night revelation, the kind of thing you only try when no one is watching and you have nothing to lose.
Honestly, I wasn’t even planning on making stuffing. It was too early for Thanksgiving, and the weather hadn’t even turned properly cold yet. But that night, the air had that specific chill that creeps through the window cracks, and I just needed something warm and grounding. I pulled out the sage from the back of the fridge—slightly wilted, but still fragrant—and started chopping. The whole kitchen smelled like a cozy sweater by the time I was done. I burned the first batch of butter a little (let’s be real, I was tired), but the second batch came out a perfect, nutty amber. That’s the thing about cooking late at night—you get a second chance to get it right.
This stuffing turned into something I keep making, not just for holidays, but for those quiet, cold nights when you need to feel a little bit taken care of. Maybe you’ve been there, staring into your pantry at 11 PM, wondering what magic you can make from what’s left behind. This one’s for you.
Why You’ll Love This Recipe
This isn’t just another stuffing recipe—it’s the one that will make everyone at the table ask for seconds before they’ve even finished their first helping. I’ve tested this version through three different Thanksgiving dinners and countless random weeknights, and I can confidently say it delivers every single time.
- Rich, Nutty Flavor: The brown butter is the star here. It adds a deep, toasty complexity that regular melted butter just can’t touch. It’s the kind of flavor that makes you close your eyes after the first bite.
- Perfect Texture: Crispy on top, tender and moist underneath. No soggy bread here—just the perfect balance of crunch and softness.
- Simple Ingredients: You likely have most of these in your kitchen right now. No weird specialty items or expensive grocery trips required.
- Make-Ahead Friendly: This stuffing actually gets better after a day in the fridge. The flavors meld together, and the texture stays spot-on.
- Crowd-Pleaser: I’ve served this to kids, grandparents, and picky eaters. Everyone loves it. It’s comfort food at its finest.
What makes this recipe different is the technique. Instead of just mixing melted butter into bread, you take the extra few minutes to brown it. That simple step transforms the entire dish. The sage gets crispy in the hot butter, releasing its essential oils, and the whole thing comes together in a way that feels both rustic and refined. It’s comfort food reimagined—faster than you’d think, but with the same soul-soothing satisfaction.
What Ingredients You Will Need
This recipe uses simple, wholesome ingredients to deliver bold flavor and satisfying texture without the fuss. Most of these are pantry staples, which makes it perfect for those last-minute cravings or holiday prep.
- 1 loaf (about 1 lb) day-old sourdough bread, cut into 1-inch cubes (I prefer sourdough for its tangy flavor and sturdy texture, but any good quality bread works; if your bread is fresh, toast the cubes at 300°F for 10 minutes)
- 1/2 cup (1 stick) unsalted butter (I recommend Kerrygold for its rich flavor, but any good quality butter works; do not use margarine)
- 1/4 cup fresh sage leaves, roughly chopped (about 15-20 leaves; fresh is non-negotiable here—dried sage won’t give you the same aromatic punch)
- 1 large yellow onion, diced (about 2 cups; sweet onions like Vidalia also work well)
- 3 celery stalks, diced (about 1 cup; include the leaves for extra flavor)
- 3 cloves garlic, minced (fresh garlic only, please)
- 2 cups low-sodium chicken or vegetable broth (homemade is great, but store-bought works fine; just watch the salt level)
- 2 large eggs, lightly beaten (room temperature is best for even incorporation)
- 1 teaspoon salt (plus more to taste; I use fine sea salt)
- 1/2 teaspoon black pepper (freshly ground is always better)
- 1/4 teaspoon dried thyme (or 1 teaspoon fresh thyme leaves)
- 1/4 cup fresh parsley, chopped (for garnish and freshness)
A few notes on ingredients: If you’re gluten-free, use a sturdy gluten-free bread—nothing too airy or it will turn to mush. For a vegetarian version, use vegetable broth and you’re good to go. The sage is the real star here, so don’t skimp on it. I once tried using dried sage in a pinch, and the whole dish felt flat. Fresh sage has this peppery, almost minty quality that becomes sweet and nutty when fried in the brown butter.
Equipment Needed
You don’t need any fancy gadgets for this recipe, which is part of its charm. Here’s what you’ll need:
- Large skillet or frying pan (preferably stainless steel or non-stick; cast iron works great too, just watch the heat)
- 9×13-inch baking dish (or any 3-quart casserole dish; glass or ceramic works best for even heating)
- Large mixing bowl (for combining the ingredients)
- Wooden spoon or spatula (for stirring the butter—metal can scratch your pan)
- Sharp knife and cutting board (for dicing the onion, celery, and herbs)
- Measuring cups and spoons (accuracy matters with the broth and butter)
- Whisk (for beating the eggs and broth together)
If you don’t have a 9×13 dish, you can use a 10-inch cast iron skillet for a more rustic presentation. I’ve done it both ways, and the cast iron gives you extra crispy edges. Just make sure to adjust the baking time slightly—a skillet heats faster, so check it 5 minutes early.
Preparation Method

Let’s get cooking. This recipe comes together in about an hour, and I promise the extra steps are worth it.
- Preheat your oven to 375°F (190°C). While it’s heating, spread the bread cubes on a baking sheet and toast them for 10 minutes. This dries them out and ensures they hold their shape when mixed with the liquid. You want them lightly golden, not dark brown.
- Make the brown butter. Place a large skillet over medium heat and add the butter. Let it melt completely, then continue cooking. Swirl the pan occasionally. You’ll see it start to foam, then the foam will subside, and small brown specks will appear at the bottom of the pan. This takes about 5-7 minutes. As soon as it smells nutty and toasty, add the chopped sage leaves. They’ll sizzle and crisp up in about 30 seconds. Immediately remove the pan from the heat and pour the butter and sage into a heatproof bowl. Be careful not to burn it—if it smells burnt, start over. Trust me, I’ve done it.
- Sauté the aromatics. In the same skillet (no need to clean it), add a tablespoon of olive oil and set it over medium heat. Add the diced onion and celery. Cook for 6-8 minutes, stirring occasionally, until the onion is translucent and the celery is softened. Add the minced garlic and cook for one more minute until fragrant. Season with a pinch of salt and pepper.
- Combine the wet ingredients. In a small bowl or measuring cup, whisk together the chicken broth and beaten eggs. Set aside.
- Assemble the stuffing. In a large mixing bowl, combine the toasted bread cubes, sautéed onion and celery, and the brown butter with sage. Pour the broth and egg mixture over the top. Add the salt, pepper, and dried thyme. Using your hands (or a large spatula), gently toss everything together until the bread is evenly coated. Don’t overmix—you want some texture, not a paste. Let it sit for 5 minutes so the bread can absorb the liquid.
- Transfer to baking dish. Grease your 9×13 dish with butter or non-stick spray. Pour the stuffing mixture into the dish and spread it into an even layer. Don’t press it down too hard—you want some air pockets for crispy bits.
- Bake. Place the dish in the preheated oven and bake for 30-35 minutes, until the top is golden brown and crispy. If you like it extra crunchy on top, broil it for the last 2 minutes—but watch it closely, it can burn fast.
- Rest and serve. Let the stuffing sit for 5-10 minutes before serving. This allows it to set and makes it easier to scoop. Garnish with fresh parsley and a few extra crispy sage leaves if you’re feeling fancy.
Cooking Tips & Techniques
I’ve made this stuffing more times than I can count, and I’ve learned a few things the hard way. Here’s what I wish someone had told me:
- Don’t skip toasting the bread. I know it’s an extra step, but it’s the difference between fluffy stuffing and soggy bread. Stale bread works best because it’s already dry, but if you only have fresh bread, toasting is non-negotiable.
- Watch the butter like a hawk. Brown butter goes from perfect to burnt in about 30 seconds. The second you smell that nutty aroma and see golden-brown specks, pull it off the heat. I’ve had to start over twice because I got distracted by my phone.
- Use your hands to mix. Spatulas are fine, but your hands are better. You can feel when the bread is evenly coated without crushing it. Just make sure your hands are clean, obviously.
- Let it rest before baking. That 5-minute wait after mixing isn’t just for show. The bread needs time to soak up the liquid, or you’ll end up with dry spots in the finished dish.
- Don’t overcrowd the pan. If you’re doubling the recipe, use two dishes instead of one big one. Overcrowding leads to steaming instead of browning, and you’ll lose those crispy bits we all fight over.
Variations & Adaptations
This recipe is wonderfully versatile. Here are some ways to make it your own:
- Add sausage. Brown 1/2 pound of Italian sausage (casings removed) in the skillet before sautéing the onion and celery. Crumble it up and add it to the bread mixture. It turns this into a full meal.
- Make it vegetarian. Use vegetable broth instead of chicken broth. Add 1 cup of sautéed mushrooms for an earthy, umami boost that mimics the meatiness.
- Try different breads. I’ve made this with brioche for a richer version (it’s incredible), and with whole wheat for a heartier texture. Gluten-free bread works too—just make sure it’s sturdy.
- Add dried fruit. For a sweet-savory twist, fold in 1/2 cup of dried cranberries or chopped dried apricots. The sweetness plays beautifully with the brown butter and sage.
- Go nutty. Toasted pecans or walnuts add a lovely crunch. Add 1/2 cup when you mix everything together. I tried this for a Friendsgiving once, and it was the first thing to disappear.
- Spice it up. A pinch of red pepper flakes or a dash of smoked paprika adds warmth without overwhelming the sage and butter.
Serving & Storage Suggestions
This stuffing is best served warm, straight from the oven, with the top still crispy. Spoon it onto plates alongside roasted chicken, turkey, or a simple green salad. It also pairs beautifully with a rich gravy or cranberry sauce for the full holiday experience.
For leftovers, store the stuffing in an airtight container in the refrigerator for up to 4 days. The flavors actually deepen overnight, making it even better the next day. To reheat, place it in a 350°F oven for 10-15 minutes until warmed through. You can also microwave it in 30-second bursts, but the top won’t be as crispy.
If you want to freeze it, assemble the stuffing but don’t bake it. Cover the dish tightly with foil and freeze for up to 3 months. When you’re ready to eat, thaw it in the refrigerator overnight, then bake as directed, adding 10 minutes to the cooking time. I’ve done this for holiday prep, and it works like a charm.
Nutritional Information & Benefits
Per serving (based on 8 servings): approximately 320 calories, 18g fat, 35g carbohydrates, 8g protein, 3g fiber, 480mg sodium.
This stuffing offers some surprising nutritional benefits. The brown butter provides vitamin A and healthy fats that help absorb fat-soluble vitamins from other foods. Sage is packed with antioxidants and has anti-inflammatory properties—it’s been used for centuries in traditional medicine. The onions and garlic add prebiotic fiber that supports gut health.
If you’re watching your sodium, use low-sodium broth and go easy on the added salt. For a lower-carb version, use a low-carb bread or reduce the bread quantity and add more vegetables like mushrooms or cauliflower. This recipe is naturally vegetarian if you use vegetable broth, and can be made gluten-free with the right bread choice.
Conclusion
This brown butter sage stuffing has become my go-to for cold nights and holiday tables alike. It’s the kind of recipe that feels special without being fussy, and it always makes people smile. The nutty butter, the fragrant sage, the crispy top, the tender middle—every bite is a little moment of comfort.
I hope you give this a try, whether it’s for Thanksgiving, a cozy Sunday dinner, or a random Wednesday when you just need something warm and good. Feel free to make it your own—add sausage, swap the bread, toss in some cranberries. The best recipes are the ones you adapt to your own taste.
If you make it, I’d love to hear how it turned out. Leave a comment below, share your photos, or tag me on social media. And if you have a favorite variation, please share it—I’m always looking for new ideas. Happy cooking, friends.
Frequently Asked Questions
Can I make this stuffing ahead of time?
Absolutely. You can assemble the stuffing up to 24 hours in advance, cover it, and refrigerate it. Just add 10 minutes to the baking time since you’re starting from cold. The flavors actually meld together beautifully overnight.
Can I use dried sage instead of fresh?
I really don’t recommend it. Dried sage has a different, more medicinal flavor and won’t crisp up in the brown butter the same way. Fresh sage is worth seeking out for this recipe—it’s what makes it special.
How do I know when the brown butter is done?
Watch for the butter to turn a golden-amber color with small brown specks at the bottom of the pan. It should smell nutty and toasty, like toasted hazelnuts. If it smells burnt or looks dark brown, you’ve gone too far and should start over.
Can I use a different type of bread?
Yes! Sourdough is my favorite for its tang and sturdy texture, but brioche makes a richer version, whole wheat adds heartiness, and even a good quality Italian bread works. Just avoid anything too soft or airy, like sandwich bread, which can turn mushy.
Is this recipe gluten-free?
It can be. Simply use a sturdy gluten-free bread—look for one that’s designed for toasting or stuffing. I’ve had good luck with gluten-free sourdough from the bakery section. Everything else in the recipe is naturally gluten-free.
Pin This Recipe!
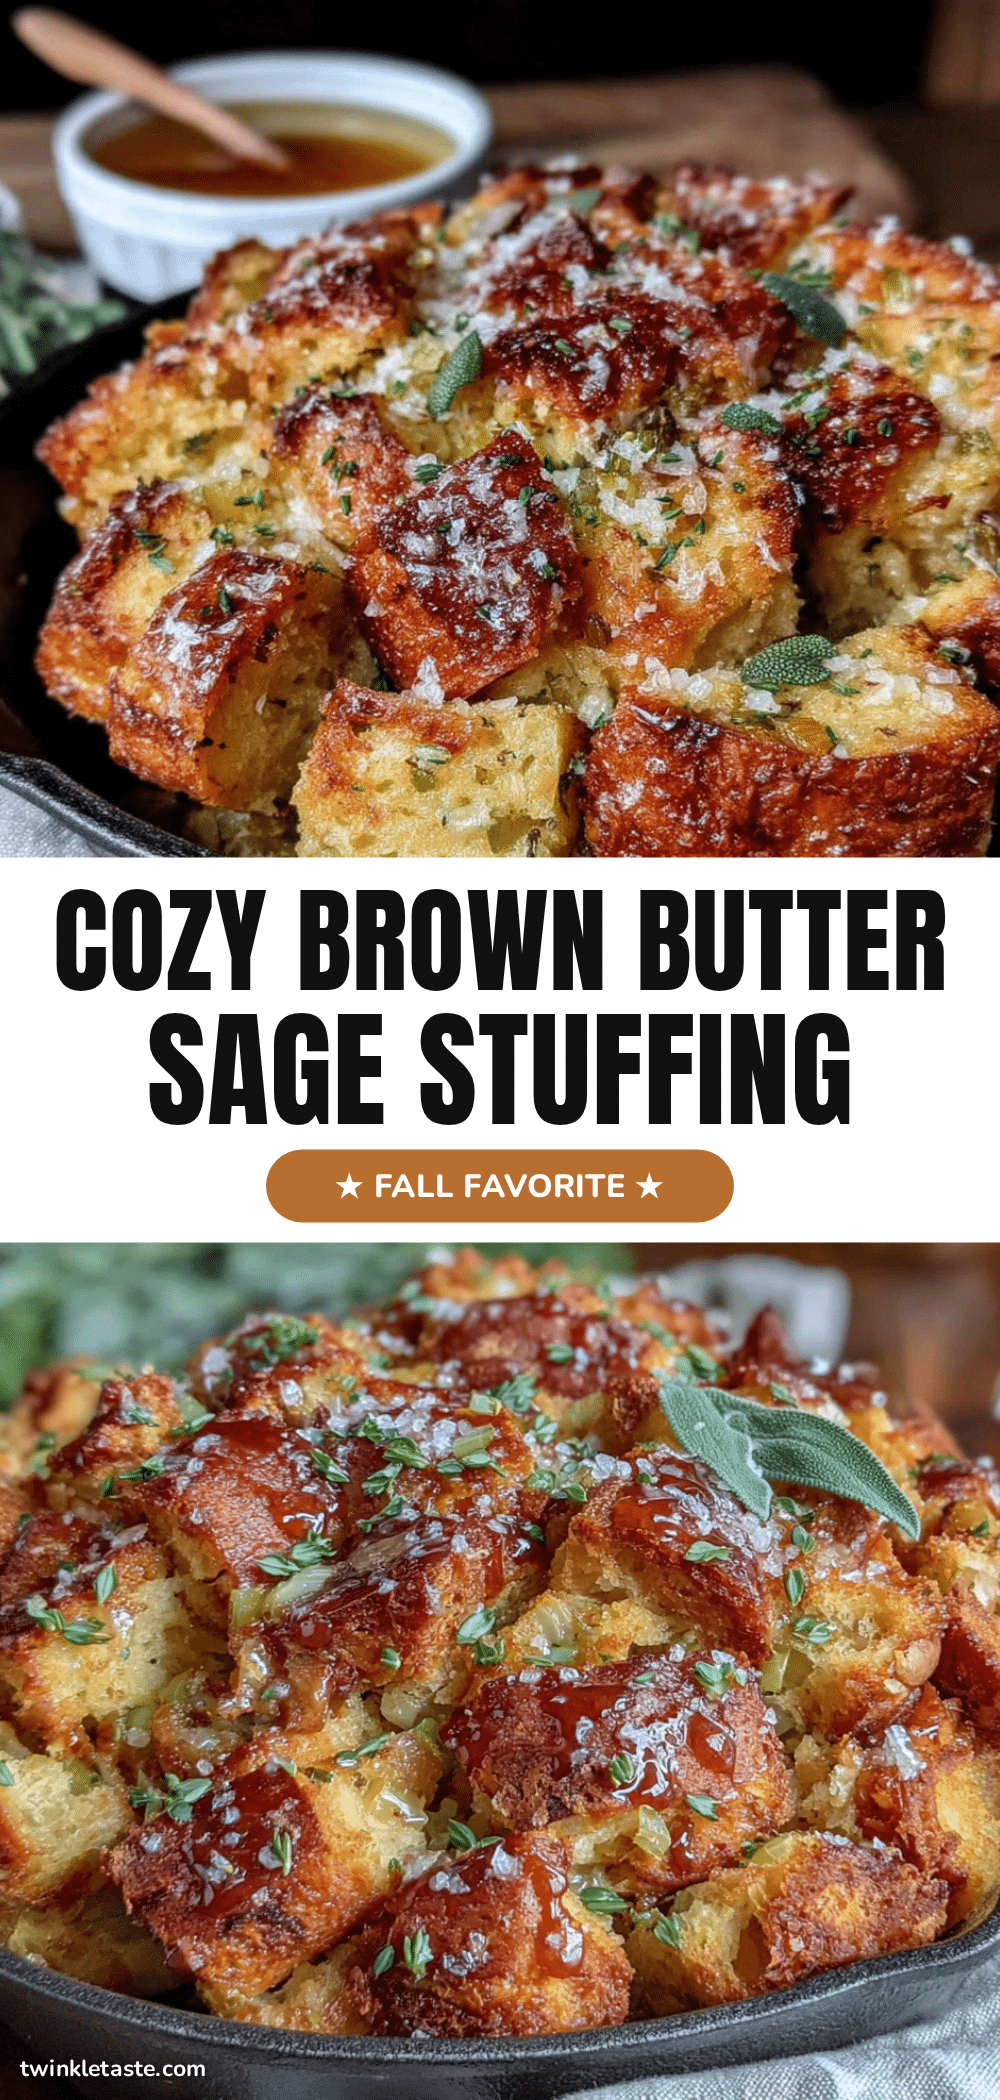
The Best Brown Butter Sage Stuffing Recipe

This brown butter sage stuffing is the ultimate comfort food, featuring crispy, nutty brown butter and fragrant sage. Perfect for holidays or cozy weeknights, it’s a crowd-pleaser with a perfect crispy top and tender interior.
- Prep Time: 15 minutes
- Cook Time: 35 minutes
- Total Time: 50 minutes
- Yield: 8 servings 1x
- Category: Side Dish
- Cuisine: American
Ingredients
- 1 loaf (about 1 lb) day-old sourdough bread, cut into 1-inch cubes
- 1/2 cup (1 stick) unsalted butter
- 1/4 cup fresh sage leaves, roughly chopped (about 15–20 leaves)
- 1 large yellow onion, diced (about 2 cups)
- 3 celery stalks, diced (about 1 cup)
- 3 cloves garlic, minced
- 2 cups low-sodium chicken or vegetable broth
- 2 large eggs, lightly beaten
- 1 teaspoon salt
- 1/2 teaspoon black pepper
- 1/4 teaspoon dried thyme
- 1/4 cup fresh parsley, chopped
Instructions
- Preheat your oven to 375°F (190°C). Spread the bread cubes on a baking sheet and toast them for 10 minutes until lightly golden.
- Make the brown butter: Place a large skillet over medium heat and add the butter. Let it melt completely, then continue cooking, swirling occasionally, until it foams, the foam subsides, and small brown specks appear (about 5-7 minutes). As soon as it smells nutty and toasty, add the chopped sage leaves and cook for 30 seconds. Immediately remove from heat and pour into a heatproof bowl.
- In the same skillet, add a tablespoon of olive oil over medium heat. Add the diced onion and celery and cook for 6-8 minutes until translucent and softened. Add the minced garlic and cook for one more minute. Season with a pinch of salt and pepper.
- In a small bowl, whisk together the chicken broth and beaten eggs. Set aside.
- In a large mixing bowl, combine the toasted bread cubes, sautéed onion and celery, and the brown butter with sage. Pour the broth and egg mixture over the top. Add the salt, pepper, and dried thyme. Gently toss everything together until the bread is evenly coated. Let it sit for 5 minutes.
- Grease a 9×13-inch baking dish with butter or non-stick spray. Pour the stuffing mixture into the dish and spread it into an even layer without pressing down too hard.
- Bake for 30-35 minutes until the top is golden brown and crispy. For extra crunch, broil for the last 2 minutes, watching closely.
- Let the stuffing rest for 5-10 minutes before serving. Garnish with fresh parsley and extra crispy sage leaves if desired.
Notes
Don’t skip toasting the bread to avoid soggy stuffing. Watch the brown butter closely as it can burn quickly. Let the stuffing rest before baking for even moisture. For extra crispy edges, use a cast iron skillet. This recipe can be made ahead and refrigerated for up to 24 hours before baking.
Nutrition
- Serving Size: 1 serving (1/8 of re
- Calories: 320
- Sugar: 4
- Sodium: 480
- Fat: 18
- Saturated Fat: 10
- Carbohydrates: 35
- Fiber: 3
- Protein: 8
Keywords: brown butter sage stuffing, Thanksgiving stuffing, holiday side dish, sourdough stuffing, easy stuffing recipe


