I completely forgot to take the cheese out of the fridge. That’s how my first batch of Spooky Mummy Stuffed Peppers ended up looking less like adorable bandaged creatures and more like sad, melted ghosts. It was the night before Halloween, the kids were buzzing on candy anticipation, and I was frantically trying to make dinner that was both fun and, you know, actual food. The pepper was hot, the cheese was cold, and the mozzarella strips I’d carefully laid on top just slid right off into a puddle at the bottom of the baking dish. Honestly, I sat there staring at the mess, thinking I’d ruined the whole concept. But my son took one look at the gooey, cheese-less pepper and said, “It’s a zombie mummy! Even cooler!” And that’s when I realized this recipe had more wiggle room than I thought. It wasn’t about perfection—it was about making something that felt like a little Halloween magic, even when everything went slightly wrong. These mummy peppers have been a staple ever since, and I’ve learned all the little tricks to make them look (and taste) exactly how you want them to.
Why You’ll Love This Recipe
Let’s be real for a second. Halloween dinner is usually a battlefield of sugar rushes, half-eaten candy bars, and the desperate hope that your kids eat something green before bed. This recipe is the truce you’ve been looking for. It’s a full meal disguised as a craft project. You get the satisfaction of serving a balanced dinner with protein, veggies, and a bit of dairy, all wrapped up in a presentation that makes the kids actually excited to sit down at the table.
- Fun Factor is Through the Roof: The kids can help wrap the “bandages.” It’s interactive dinner theater. You get to serve “mummies” on a plate, and they get to unwrap them.
- Actually Filling: This isn’t a snack. It’s a real meal. The ground meat, rice, and roasted pepper are hearty enough to keep everyone full past the trick-or-treating route.
- Easy to Customize: Don’t like beef? Use ground turkey or chicken. Want it vegetarian? A mix of black beans and quinoa works perfectly. The “mummy” part is just the wrapper, so the inside can be whatever your family loves.
- Surprisingly Simple: I know the presentation looks fancy, but it’s just stuffed peppers with a twist. If you can boil rice and brown meat, you can make these. The “bandages” are just strips of crescent dough or puff pastry—no special skills required.
- Perfect for a Crowd: This recipe scales beautifully. You can make a whole army of mummies for a Halloween party. They hold up well and can be prepared ahead of time.
This isn’t just another stuffed pepper recipe. It’s a Spooky Mummy Stuffed Pepper—a dish that turns a weeknight dinner into a seasonal event. The combination of the savory, juicy filling with the flaky, golden “bandages” and the sweet pop of roasted red pepper is genuinely delicious. It’s the kind of meal that makes you forget you’re even trying to be healthy. And that’s the point, isn’t it?
What Ingredients You Will Need
This recipe uses simple, pantry-friendly ingredients to build something genuinely spooky and satisfying. The magic is in the layering and the presentation, not in hard-to-find items.
- Bell Peppers (4 large): The base of our mummies. Use red, orange, or yellow peppers for the sweetest flavor. Green peppers work, but they have a slightly bitter, grassy taste. I prefer red or orange for a sweeter, more kid-friendly flavor. Look for peppers that are wide and squat so they stand up easily in the baking dish.
- Ground Beef (1 lb / 450g): I use 85/15 ground beef for a good balance of flavor and moisture. You can swap it for ground turkey or chicken—just add a tablespoon of olive oil to the pan so it doesn’t dry out.
- Cooked Rice (1 cup / 180g): Leftover white or brown rice works perfectly. It bulks up the filling and soaks up all the juices. Quinoa or even cooked lentils are great substitutes.
- Onion (1 medium, diced): Yellow or white onion. It adds a savory backbone to the filling.
- Garlic (3 cloves, minced): Because what’s a savory dish without garlic? It’s non-negotiable in my kitchen.
- Tomato Sauce (1 can / 15 oz / 425g): This keeps the filling moist and adds a tangy richness. I like Muir Glen for its clean flavor, but any brand works.
- Shredded Mozzarella Cheese (1 cup / 112g): For that gooey, cheesy interior. Part-skim works fine, but whole-milk mozzarella melts beautifully. You can also use a Mexican blend.
- Dried Italian Seasoning (1 tsp): A simple blend of oregano, basil, rosemary, and thyme. It gives the filling a familiar, comforting taste.
- Salt and Black Pepper (to taste): Essential for seasoning the filling properly.
- Refrigerated Crescent Roll Dough (1 can / 8 oz / 226g): This is the secret weapon for the mummy bandages. It’s flaky, buttery, and puffs up beautifully in the oven. Puff pastry sheets also work, but crescent rolls are easier to cut into strips.
- Candy Eyes (or Olive Slices): For the face! You can find edible candy eyes at most grocery stores or craft stores. If you want a savory option, use slices of black olive. Just cut a small slit in the dough to tuck them in before baking.
Equipment Needed
You don’t need a lot of fancy gear for this one. Most of it is standard kitchen equipment.
- Large Skillet: For browning the meat and sautéing the onions. A 12-inch skillet gives you plenty of room.
- Large Baking Dish: A 9×13 inch dish works perfectly. It holds 4 large peppers snugly.
- Sharp Knife and Cutting Board: For dicing the onion, mincing the garlic, and cutting the peppers.
- Mixing Bowl: For combining the filling ingredients.
- Pizza Cutter or Sharp Knife: For cutting the crescent roll dough into thin strips. A pizza cutter makes this job much easier and cleaner.
- Small Spoon: For stuffing the peppers and for placing the candy eyes.
- Aluminum Foil: To tent the peppers if the “bandages” start browning too quickly.
I’ve made these with a cheap $10 skillet and they turned out great. Don’t stress about the equipment. The pizza cutter is the only “special” tool, and you can easily use a sharp knife.
Preparation Method
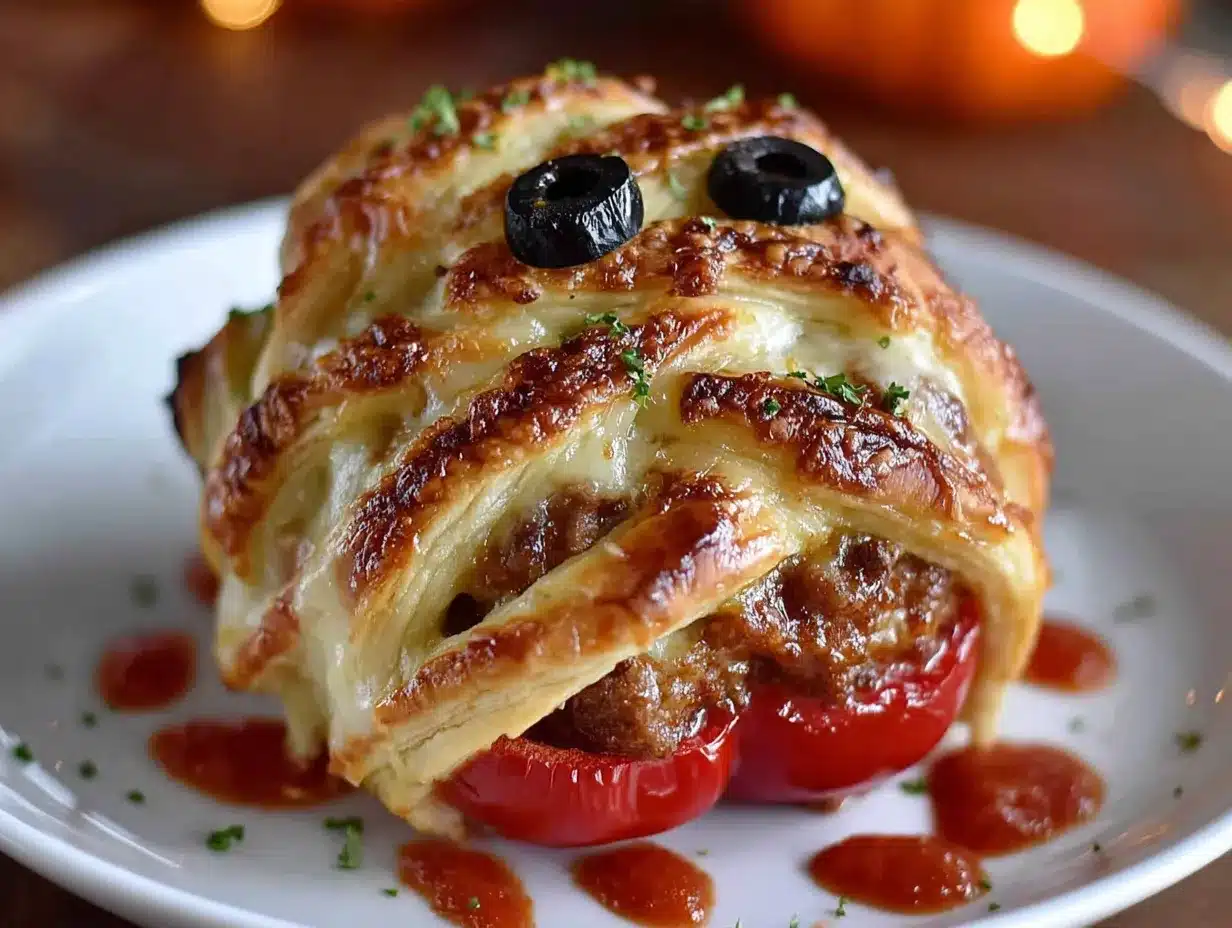
Follow these steps carefully, and you’ll have a plate of spooky mummies that would make Frankenstein proud.
- Preheat and Prep (5 minutes): Preheat your oven to 375°F (190°C). While it’s heating, wash your bell peppers. Cut the top off each pepper (about 1/2 inch from the top) and carefully remove the seeds and white membranes from the inside. Don’t throw the tops away! You can chop them up and add them to the filling for extra veggie goodness.
- Cook the Filling (15 minutes): Place your large skillet over medium-high heat. Add the ground beef and cook, breaking it up with a spoon, until it’s browned all over—about 6-8 minutes. Drain off any excess fat. Add the diced onion and cook for another 3-4 minutes until it becomes soft and translucent. Stir in the minced garlic and cook for just 30 seconds until it’s fragrant. You’ll know it’s ready when your kitchen smells amazing.
- Combine the Filling (5 minutes): Reduce the heat to low. Add the cooked rice, tomato sauce, Italian seasoning, and a generous pinch of salt and pepper. Stir everything together until it’s well combined. Let it simmer for 2-3 minutes so the rice can absorb some of the sauce. Remove the skillet from the heat and stir in 3/4 cup of the shredded mozzarella cheese. Reserve the rest for topping.
- Stuff the Peppers (5 minutes): Place the hollowed-out peppers standing up in your 9×13 inch baking dish. Using your small spoon, carefully fill each pepper with the meat and rice mixture. Pack it in gently—don’t force it, or the pepper might split. You want the filling to be level with the top of the pepper. Sprinkle the remaining 1/4 cup of mozzarella cheese on top of each pepper.
- Create the Mummy Bandages (10 minutes): This is the fun part. Open your can of crescent roll dough. Do not unroll it into a sheet. Instead, carefully unroll the dough and separate it along the perforated lines to create 8 triangles. Using your pizza cutter or a sharp knife, cut each triangle lengthwise into 3-4 thin strips. You should have about 24-32 strips total. They don’t need to be perfectly straight—a little wobbly looks more like a mummy anyway!
- Wrap the Mummies (10 minutes): Take 4-6 strips of dough and wrap them around each stuffed pepper. Start at the bottom and work your way up, slightly overlapping the strips. Leave a small gap near the top for the eyes. Don’t wrap too tightly, as the dough will expand as it bakes. Tuck the ends of the strips under the bottom of the pepper to secure them. If a strip breaks, just press it back together—it will fuse in the oven.
- Add the Eyes and Bake (20-25 minutes): Before baking, gently press two candy eyes (or olive slices) into the dough in the gap you left at the top. If the dough feels sticky, that’s fine. Bake the peppers for 20-25 minutes, or until the dough is golden brown and puffed, and the peppers are tender when pierced with a fork. If the “bandages” are browning too fast but the peppers aren’t soft yet, loosely tent the dish with aluminum foil for the last 5-10 minutes of baking.
- Rest and Serve (5 minutes): Let the mummy peppers rest in the dish for 5 minutes before serving. This allows the filling to set and the dough to firm up slightly. They will be very hot!
Cooking Tips & Techniques
I’ve made these Spooky Mummy Stuffed Peppers more times than I can count, and I’ve learned a few things the hard way. Here’s how to avoid my early mistakes.
- Don’t Overcook the Filling: The filling will continue to cook inside the pepper in the oven. If you cook it completely on the stovetop, it can become dry. Cook it just until the meat is browned and the onions are soft.
- The Cold Dough Trick: Keep the crescent roll dough refrigerated until you’re ready to use it. Cold dough is much easier to cut into thin strips without it getting sticky or tearing. If it gets too warm, just pop it in the fridge for 5 minutes.
- Preventing Soggy Bottoms: To avoid a soggy pepper, make sure you drain the fat from the ground beef thoroughly. Also, if your peppers are very watery, you can pre-bake them (unfilled) for 10 minutes at 375°F (190°C) to draw out some moisture. I don’t usually do this, but it’s a great trick for particularly juicy peppers.
- My Biggest Failure: My first time making these, I used pre-shredded mozzarella from a bag. It’s coated in starch to prevent clumping, which means it doesn’t melt as smoothly. It turned into a weird, rubbery layer. Now I always shred my own block of mozzarella. It melts like a dream and tastes so much better.
- Timing is Everything: If you’re making these for a Halloween party, you can prepare the filling and hollow out the peppers up to 2 days in advance. Store them separately in the fridge. Then, on the day of, just stuff, wrap, and bake. It makes the whole process feel like a 20-minute job.
Variations & Adaptations
This recipe is incredibly forgiving. Here are a few ways I’ve twisted it up over the years.
- Vegetarian Mummies: Swap the ground beef for a can of drained and rinsed black beans and 1 cup of cooked quinoa. Add a little extra cumin and chili powder for a Mexican-inspired flavor. They’re just as hearty and filling.
- Spicy Mummies: Add 1/2 teaspoon of red pepper flakes or a diced jalapeño to the filling with the onions. The heat pairs wonderfully with the sweet pepper and the flaky dough.
- Cheesy Mummy Dip: Instead of stuffing the peppers, chop them into bite-sized pieces and mix them into the filling. Pour the whole thing into a baking dish, top with the crescent dough strips (in a criss-cross pattern), and bake until bubbly. It’s a fantastic appetizer for a party.
- Gluten-Free Option: Use a gluten-free pizza dough or puff pastry for the bandages. There are some great store-bought options now. Just follow the package directions for baking time, as gluten-free doughs can behave differently.
- My Favorite Twist: I once made these with a filling inspired by my Football Sunday Chili. I added a can of drained kidney beans, a little extra chili powder, and a dash of smoked paprika to the beef and rice mixture. The smoky flavor was incredible with the roasted pepper and the buttery dough. It was a total accident, but now it’s my go-to variation.
Serving & Storage Suggestions
These mummy peppers are best served hot, right out of the oven. The contrast between the warm, savory filling and the cool, crisp pepper is part of the magic.
- Serving Temperature: Let them rest for 5 minutes as instructed. They should be piping hot but not so hot that they burn your mouth. The candy eyes can get a little soft, so warn the kids to let them cool for a minute.
- Presentation: Serve them on a dark plate or a black platter to make the golden “bandages” pop. A little smear of extra tomato sauce on the plate can look like a spooky “blood” stain. For a full Halloween spread, they pair perfectly with my Mummy Sausage Bites and a bowl of Candy Corn Jello Cups for dessert.
- Storage: Store leftover mummy peppers in an airtight container in the refrigerator for up to 3 days. The dough will soften a bit, but the flavor is still fantastic.
- Reheating: The best way to reheat them is in the oven or air fryer. Place them on a baking sheet and warm at 350°F (175°C) for 10-12 minutes, or until the filling is hot and the dough crisps back up. The microwave works in a pinch, but the dough will be very soft and chewy.
- Freezing: You can freeze the fully baked and cooled mummy peppers. Wrap each one individually in plastic wrap, then place them in a freezer-safe bag. They’ll keep for up to 2 months. Thaw overnight in the fridge and reheat in the oven as described above.
One thing I love is that the flavors actually meld together even more the next day. The pepper absorbs the tomato sauce, and everything becomes wonderfully cohesive. They’re almost better as leftovers.
Nutritional Information & Benefits
This recipe is a surprisingly balanced meal that doesn’t feel like “health food.” It’s comfort food with a nutritional backbone.
- Estimated Nutritional Values (per serving, 1 pepper): Approximately 450-550 calories, 25g protein, 35g carbohydrates, 25g fat. This is an estimate and will vary based on your specific ingredients and portion sizes.
- Health Highlights: Bell peppers are an excellent source of Vitamin C and Vitamin A. They’re also packed with antioxidants. The ground beef provides high-quality protein and iron, while the rice adds complex carbohydrates for sustained energy. It’s a meal that will keep you full and satisfied.
- Dietary Considerations: This recipe can be easily adapted. For a lower-carb version, swap the rice for cauliflower rice. For a gluten-free version, use gluten-free dough. For a dairy-free version, omit the cheese or use a dairy-free shred.
- Potential Allergens: This recipe contains dairy (cheese) and gluten (crescent roll dough). If you’re serving a crowd, be sure to label the dish or offer an alternative.
- My Personal Take: I love that this recipe lets me feel good about what my family is eating on a night that’s usually all about candy. It’s a way to get a serving of vegetables into them without a single complaint. I don’t count calories, but I do feel good knowing they’re getting a real meal before the sugar rush.
Conclusion
These Spooky Mummy Stuffed Peppers are more than just a Halloween dinner—they’re a memory in the making. They’re the kind of recipe that gets kids into the kitchen, gets everyone laughing at the wobbly bandages, and makes a regular Tuesday night feel like a holiday. I love that they’re forgiving enough for a beginner but impressive enough to serve at a party. You can make them your own, mess them up a little, and they’ll still turn out perfect. So go ahead, raid your pantry, grab some peppers, and wrap up a little bit of Halloween fun. I promise, the first time you pull a tray of these golden, googly-eyed mummies out of the oven, you’ll feel like a kitchen wizard. If you try them, I’d love to hear about it! Drop a comment below and tell me how your mummies turned out, or share a photo with me on social media. Happy Halloween, and happy cooking!
Frequently Asked Questions
Can I make these Spooky Mummy Stuffed Peppers ahead of time?
Yes! You can prepare the filling and hollow out the peppers up to 2 days in advance. Store them separately in the fridge. On the day you want to serve them, just stuff the peppers, wrap them with the dough, and bake. You can also assemble the whole dish (without baking) up to 8 hours ahead. Keep it covered in the fridge, then add 5-10 minutes to the baking time.
My crescent dough tore when I was wrapping the peppers. What do I do?
Don’t panic! This happens to me all the time. Just press the torn pieces back together. The dough will fuse as it bakes, so you won’t even notice the tear in the final product. If the dough is too sticky, try chilling it in the fridge for 5 minutes before cutting and wrapping.
Can I use puff pastry instead of crescent rolls?
Absolutely. Puff pastry will give you an even flakier, more buttery “bandage.” Thaw the puff pastry sheet according to the package directions, then cut it into thin strips with a pizza cutter. The baking time might be slightly longer, so keep an eye on it and look for a deep golden brown color.
My peppers are too tall and won’t stand up in the dish. What should I do?
If your peppers are particularly tall or wobbly, you can slice a very thin piece off the bottom to create a flat base. Be careful not to cut all the way through the pepper. You can also nestle them together in the baking dish so they support each other. If all else fails, just lay them on their side—they’ll still be delicious!
Can I use a different type of meat for the filling?
Definitely. Ground turkey, chicken, or even pork sausage (casings removed) all work beautifully. If you’re using a lean meat like turkey, add a tablespoon of olive oil to the pan to keep it moist. For a vegetarian option, a mix of black beans and quinoa or lentils is fantastic.
Pin This Recipe!
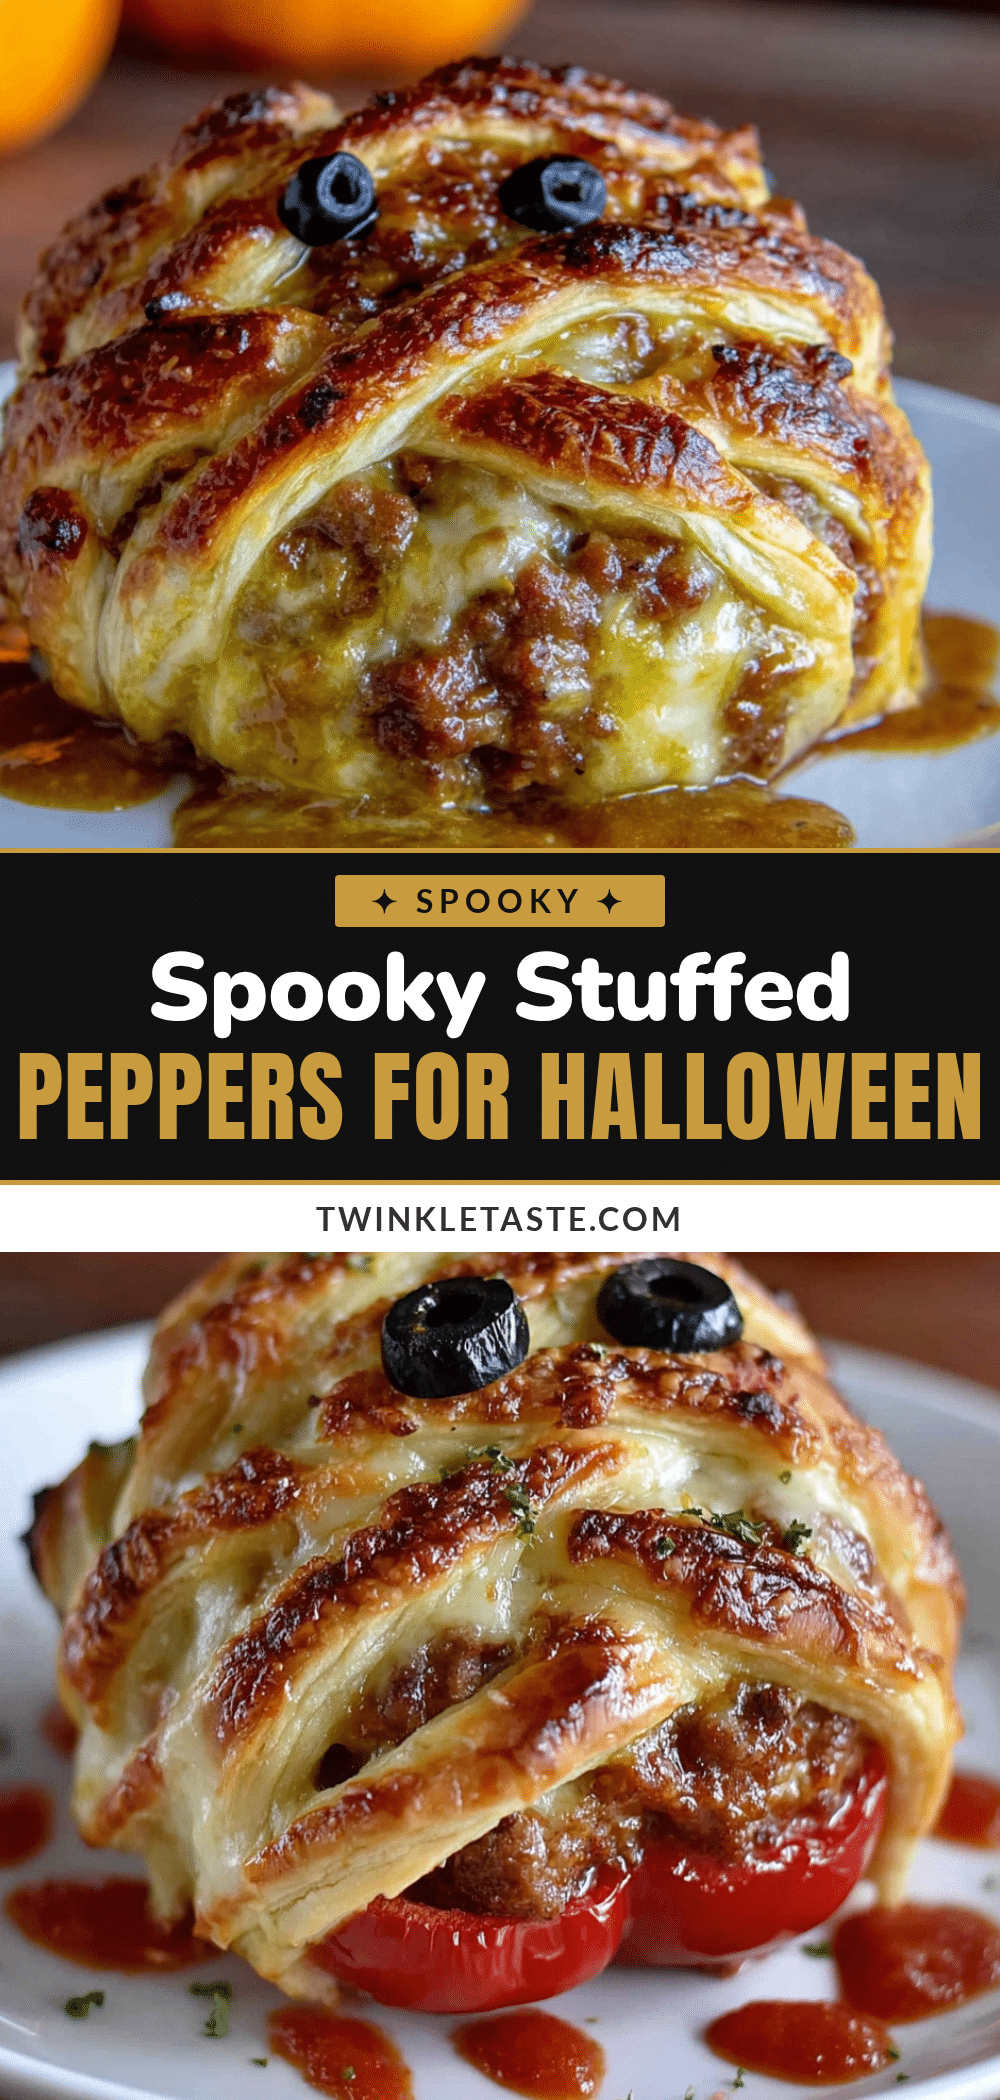
Spooky Mummy Stuffed Peppers: Easy Halloween Dinner
These Spooky Mummy Stuffed Peppers are a fun and festive Halloween dinner that’s actually a balanced meal. Bell peppers are stuffed with a savory beef and rice filling, then wrapped in crescent dough ‘bandages’ and baked until golden and gooey.
- Prep Time: 20 minutes
- Cook Time: 25 minutes
- Total Time: 45 minutes
- Yield: 4 servings 1x
- Category: Main Course
- Cuisine: American
Ingredients
- 4 large bell peppers (red, orange, or yellow)
- 1 lb (450g) ground beef (85/15)
- 1 cup (180g) cooked rice (white or brown)
- 1 medium onion, diced
- 3 cloves garlic, minced
- 1 can (15 oz / 425g) tomato sauce
- 1 cup (112g) shredded mozzarella cheese
- 1 tsp dried Italian seasoning
- Salt and black pepper to taste
- 1 can (8 oz / 226g) refrigerated crescent roll dough
- Candy eyes or black olive slices for decoration
Instructions
- Preheat oven to 375°F (190°C). Wash bell peppers, cut off tops, and remove seeds and membranes. Chop tops and set aside for filling if desired.
- In a large skillet over medium-high heat, cook ground beef until browned, about 6-8 minutes. Drain excess fat. Add diced onion and cook 3-4 minutes until soft. Add minced garlic and cook 30 seconds until fragrant.
- Reduce heat to low. Stir in cooked rice, tomato sauce, Italian seasoning, salt, and pepper. Simmer 2-3 minutes. Remove from heat and stir in 3/4 cup shredded mozzarella. Reserve remaining 1/4 cup.
- Place hollowed peppers upright in a 9×13 inch baking dish. Fill each pepper with the meat mixture, packing gently. Sprinkle remaining mozzarella on top.
- Unroll crescent dough and separate into 8 triangles. Cut each triangle lengthwise into 3-4 thin strips using a pizza cutter or sharp knife.
- Wrap 4-6 dough strips around each pepper, starting at the bottom and overlapping slightly. Leave a small gap near the top for eyes. Tuck ends under the pepper.
- Press candy eyes or olive slices into the dough gap. Bake for 20-25 minutes until dough is golden brown and peppers are tender. If browning too fast, tent with foil for last 5-10 minutes.
- Let rest 5 minutes before serving.
Notes
For best results, shred your own mozzarella from a block instead of using pre-shredded. Keep crescent dough cold until ready to use. Filling and peppers can be prepped up to 2 days ahead. For a vegetarian version, substitute black beans and quinoa for the beef.
Nutrition
- Serving Size: 1 stuffed pepper
- Calories: 500
- Sugar: 8
- Sodium: 800
- Fat: 25
- Saturated Fat: 10
- Carbohydrates: 35
- Fiber: 4
- Protein: 25
Keywords: Halloween dinner, stuffed peppers, mummy peppers, easy Halloween recipe, kid-friendly dinner


