My friend Jenna texted me last October with a photo that made me laugh out loud. It was a tray of Rice Krispie treats, but they were on sticks, and they had these giant googly eyes staring up at the camera. She said, “I made these for my kid’s class party and they were gone in five minutes. You need to try them.” I looked at the picture and honestly, my first thought was, That’s cute, but is it worth the extra effort? I mean, Rice Krispie treats are already perfect. Why mess with a good thing by putting them on a stick and adding candy eyes?
But Jenna is persistent, and she kept insisting they were easier than they looked. So, I gave in. I melted the butter, stirred in the marshmallows, and pressed the mixture into the pan like always. The only difference was that I let it cool just enough to handle, then I shaped them into little balls, stuck a pretzel rod in each one, and dipped them in melted candy melts. The candy eyes went on last, and I have to say, watching them come together was oddly satisfying. They looked ridiculous in the best way possible.
The first bite was pure nostalgia—crunchy, chewy, sweet—but the extra layer of chocolate coating and the silly eyes made it feel like a completely new treat. My kids saw them and immediately started planning which ones they were going to eat first. That’s when I knew this Easy Halloween Rice Krispie Treat Pops recipe was a keeper. It’s not just a dessert; it’s an activity. And honestly, that’s the kind of magic Halloween needs.
These little pops have a way of making everyone smile, even the grown-ups who pretend they’re too cool for googly eyes. They are the kind of treat that turns a regular October afternoon into a mini celebration.
Why You’ll Love This Recipe
I have tested this recipe more times than I care to admit, and I can confidently say it delivers every single time. Here is why these pops deserve a spot on your Halloween menu:
- Quick & Easy: From start to finish, you are looking at about 30 minutes of active time. No complicated techniques, no fancy equipment. Just simple steps that anyone can follow.
- Simple Ingredients: You probably already have most of what you need in your pantry. Butter, marshmallows, Rice Krispies cereal, and candy melts. The candy eyes are the only specialty item, and you can find them at any craft store or online.
- Perfect for Halloween Parties: These are great for classroom celebrations, trunk-or-treat events, or just a fun family activity on Halloween night. They travel well and look impressive on a dessert table.
- Kid-Friendly Activity: This is one of those recipes where the kids can actually help. Shaping the balls, sticking in the pretzel rods, and adding the eyes are all tasks little hands can manage with minimal supervision.
- Completely Customizable: You can change the color of the candy melts, use different sprinkles, or even add a drizzle of white chocolate on top. The possibilities are endless, and that is part of the fun.
- Unbelievably Delicious: The combination of the classic crispy, marshmallow center with a smooth chocolate shell is next-level. It is like a Rice Krispie treat and a chocolate bar had a baby, and that baby is wearing googly eyes.
What Ingredients You Will Need
This recipe uses straightforward ingredients that come together to create something truly special. Here is everything you need to make these Easy Halloween Rice Krispie Treat Pops:
For the Rice Krispie Treat Base
- 3 tablespoons unsalted butter – I use salted butter in a pinch, but unsalted gives you better control over the overall saltiness. Cut it into a few pieces so it melts evenly.
- 1 package (10 ounces) mini marshmallows – Mini marshmallows melt faster and more evenly than the big ones. If all you have are large marshmallows, chop them up first.
- 6 cups Rice Krispies cereal – Make sure it is fresh. Stale cereal will result in a less crispy treat. I have used generic crispy rice cereal before, and it works fine, but the texture is slightly different.
- ¼ teaspoon vanilla extract – This is optional, but I love the subtle warmth it adds. A little goes a long way.
- Pinch of salt – Salt balances the sweetness. Do not skip it.
For the Coating and Decoration
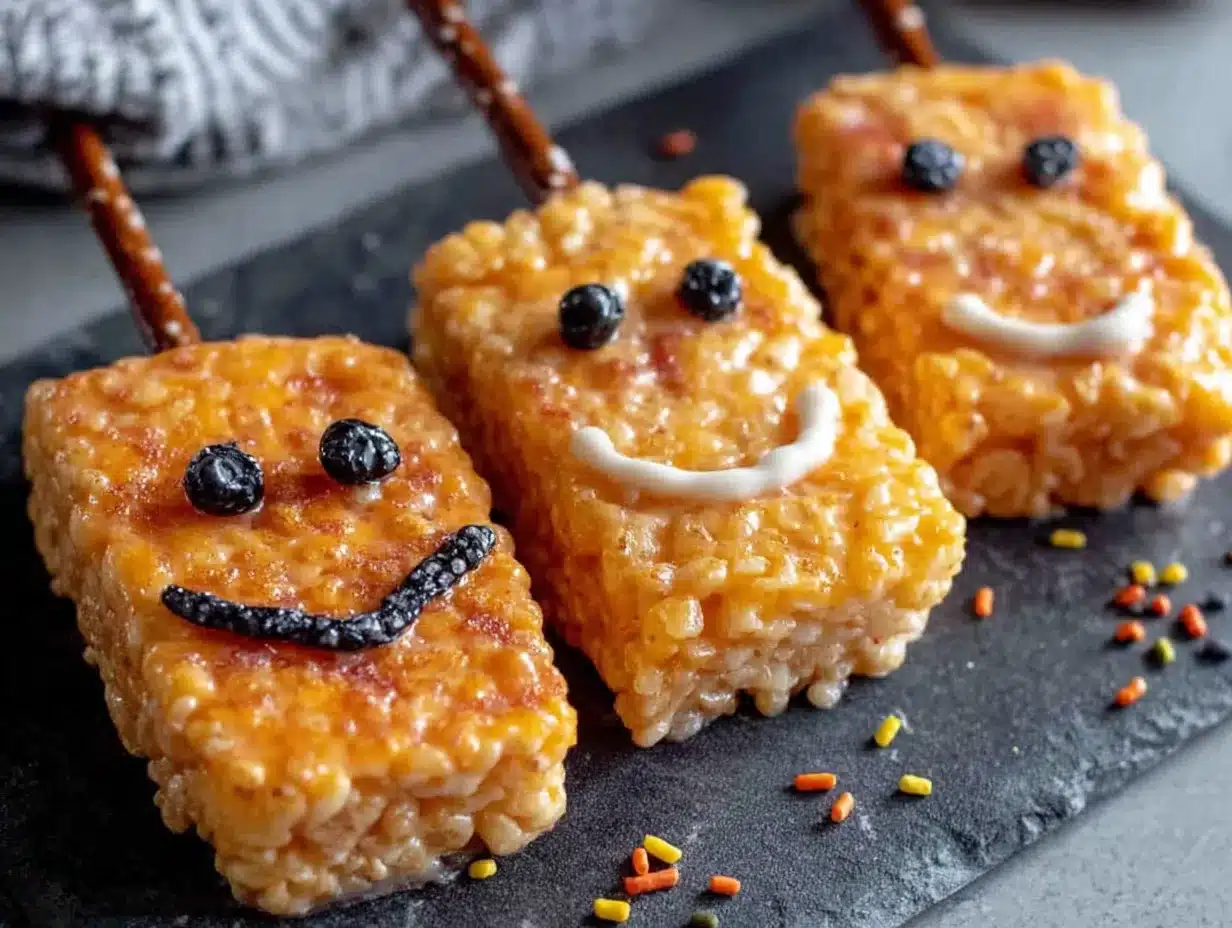
- 1 bag (12 ounces) orange candy melts – Orange is classic for Halloween, but you can use green, purple, or even black. I prefer the Wilton brand because they melt smoothly and set up nicely.
- 1 bag (12 ounces) white candy melts – These are for the ghosts or just for a two-tone look. You can also use them to drizzle over the orange coating.
- 1 tablespoon coconut oil or vegetable shortening – This helps thin out the candy melts for a smoother dip. Do not use water; it will seize the chocolate.
- 24 pretzel rods – These are the sticks for the pops. They are sturdy enough to hold the weight of the treat. You can also use lollipop sticks, but pretzel rods add a salty crunch that I love.
- 1 bag (about 100 pieces) candy eyes – You want the ones with the flat backs. They stick better to the candy coating. I buy the Wilton brand at Michael’s or Joann.
- Halloween sprinkles (optional) – Sprinkles add extra color and texture. Look for mixes with bats, pumpkins, or just orange and black jimmies.
Substitution Notes
If you are dairy-free, use a vegan butter stick and dairy-free marshmallows. Dandies brand makes excellent vegan marshmallows. For the candy melts, there are dairy-free options available, but check the label carefully. You can also use dark or milk chocolate chips instead of candy melts, but you will need to temper them for a shiny finish.
Equipment Needed
You do not need a lot of fancy tools for this recipe, which is part of the appeal. Here is what you will need:
- Large saucepan – For melting the butter and marshmallows. A non-stick pan makes cleanup much easier.
- Large mixing bowl – To combine the cereal and marshmallow mixture.
- 9×13-inch baking pan – For pressing the mixture into an even layer. You can also use a 9×9-inch pan for thicker treats.
- Parchment paper or wax paper – Lining the pan prevents sticking. You will also need it for placing the finished pops on.
- Microwave-safe bowl – For melting the candy coatings. Glass or ceramic works best.
- Small spatula or spoon – For stirring the candy melts and dipping the pops.
- Cookie scoop (optional) – For portioning the Rice Krispie mixture into equal-sized balls. A 2-tablespoon scoop is perfect.
- Baking sheet – To hold the pops while the coating sets. Line it with parchment or wax paper.
- Plastic wrap or a silicone mat – For pressing the mixture without it sticking to your hands. Trust me, you will need this.
I have made these pops using just a pot and a spoon when I was at my parents’ house, and they turned out fine. The most important tool is patience, especially when you are dipping the pops in the candy coating.
Preparation Method
Now for the fun part. Follow these steps carefully, and you will have a batch of adorable Easy Halloween Rice Krispie Treat Pops that will steal the show.
Step 1: Prepare the Rice Krispie Treat Base
Line a 9×13-inch baking pan with parchment paper, leaving some overhang on the sides. This makes lifting the treats out later a breeze. Set it aside.
In a large saucepan over low heat, melt the 3 tablespoons of unsalted butter. Once it is fully melted, add the entire package of mini marshmallows. Stir constantly with a rubber spatula until the marshmallows are completely melted and smooth. This takes about 5 to 7 minutes. Do not walk away; burnt marshmallows smell terrible and taste worse.
Remove the pan from the heat and stir in the vanilla extract and a pinch of salt. The mixture will be very sticky and glossy. Now, add the 6 cups of Rice Krispies cereal all at once. Fold everything together gently but thoroughly. You want every piece of cereal coated in marshmallow, but you do not want to crush the cereal. Overmixing will make the treats dense and hard.
Step 2: Shape and Assemble the Pops
Here is where the magic happens. Let the mixture cool in the pan for about 5 minutes. It needs to be cool enough to handle but still warm and pliable. Lightly grease your hands with a little butter or cooking spray to prevent sticking.
Scoop out about 2 tablespoons of the mixture (a cookie scoop is perfect here) and roll it into a ball. Press the ball gently to form a slightly flattened disc, about 2 inches wide. Insert a pretzel rod into the center of the disc, pushing it about halfway through. Gently press the mixture around the pretzel rod to secure it. The treat should feel secure but not squished.
Place each finished pop on the prepared baking sheet lined with parchment paper. Repeat until you have used all the mixture. You should get about 20 to 24 pops, depending on the size. Let them cool completely at room temperature. This takes about 30 minutes. Do not rush this step; if the treats are warm, the candy coating will slide right off.
Step 3: Melt and Dip the Coating
Once the pops are completely cool, it is time for the coating. Place the orange candy melts in a microwave-safe bowl. Add 1 tablespoon of coconut oil or shortening. Microwave in 30-second intervals, stirring well after each, until the coating is completely smooth and runny. This usually takes about 90 seconds total. Be careful not to overheat; candy melts burn easily and become lumpy.
Now, hold a pop by the pretzel rod and dip it into the melted orange coating. Submerge it completely, then lift it out and let the excess drip back into the bowl. Gently tap the pretzel rod against the side of the bowl to encourage the coating to drip off. You want a thin, even layer. Too much coating will make the pop heavy and messy.
Place the dipped pop back on the parchment-lined baking sheet. While the coating is still wet, press two candy eyes onto the front of the pop. Add any sprinkles you like at this point. Work quickly; the coating sets fast.
Repeat with the remaining pops. If the coating starts to thicken, microwave it for 10 seconds to loosen it up again.
Step 4: Add the Ghost Pops (Optional)
For a fun variation, melt the white candy melts the same way. Dip a cooled pop into the white coating, then place it on the parchment. While it is still wet, add two candy eyes close together near the top. The white coating creates a ghost effect that is adorable and spooky at the same time.
Step 5: Let Everything Set
Allow the coated pops to set completely at room temperature. This takes about 20 to 30 minutes. Do not put them in the refrigerator; condensation will make the coating sticky and dull. Once set, they are ready to serve or store.
Cooking Tips & Techniques
I have made a lot of mistakes in the kitchen, and these pops were no exception. Here are the lessons I learned so you do not have to repeat them.
Do not overcook the marshmallows. I once left them on the heat too long, and the treats turned out hard and brittle. Low and slow is the way to go. The marshmallows should be just melted and smooth, not bubbling.
Let the mixture cool before shaping. If you try to shape the pops while the mixture is hot, it will stick to everything, including your hands, the counter, and your soul. Give it those 5 minutes to cool down. It makes a world of difference.
Use a light hand when pressing. I used to press the mixture into the pan like I was making a brick wall. The result was a dense, hard treat. You want them to be light and airy, so press gently. Just enough to hold the shape.
Thin the candy coating. Straight out of the bag, candy melts are thick. Adding a little coconut oil or shortening makes them fluid and easy to dip. Do not skip this step. I have tried dipping without thinning, and the coating was clumpy and uneven.
Work in batches. Do not try to dip all 24 pops at once. The coating will start to set, and you will be rushing. Dip 4 or 5 pops at a time, add the eyes, then move on. It keeps everything manageable.
Use a tall container for dipping. A deep, narrow bowl or a tall glass works best for dipping. It allows you to submerge the pop completely without getting coating all over the pretzel rod. A wide bowl makes a mess.
Variations & Adaptations
One of the best things about this recipe is how easy it is to change it up. Here are some variations I have tried and loved.
Monster Pops: Use green candy melts for the coating. Add two candy eyes and a small dollop of red frosting for a mouth. They look like little monsters, and kids go crazy for them.
Pumpkin Pops: Use orange coating and add a small piece of green candy melt on top for a stem. You can also draw a little face with black edible marker to make them look like jack-o-lanterns.
Spider Pops: Use black candy melts. After dipping, press eight mini pretzel sticks into the sides of the pop for legs. Add two candy eyes on top. These are a little more work but worth it for the wow factor.
Ghost Pops: As mentioned above, use white candy melts and add two eyes close together. You can also add a small dot of black frosting for a mouth. They are simple but so cute.
Gluten-Free Option: Rice Krispies are naturally gluten-free, but some brands use malt flavoring that contains gluten. Look for a certified gluten-free crispy rice cereal. The rest of the ingredients are typically gluten-free, but always check labels.
Nut-Free Option: This recipe is naturally nut-free if you use a nut-free brand of candy melts. Always check the packaging to be safe.
I once made a batch of witch finger pretzel rods alongside these pops for a Halloween party, and they were a huge hit. The combination of sweet and salty treats was perfect.
Serving & Storage Suggestions
These pops are best served at room temperature. The coating is firm but not hard, and the Rice Krispie center stays perfectly chewy. Arrange them on a platter or stand them up in a jar or vase for a fun display. They are great for Halloween parties, classroom celebrations, or just a fun after-school snack.
For storage, place the pops in an airtight container at room temperature. Layer them between sheets of parchment paper to prevent them from sticking together. They will stay fresh for up to 3 days. Do not refrigerate them; the coating will develop condensation and become sticky.
If you want to make them ahead of time, you can prepare the Rice Krispie treat base and shape the pops up to 2 days in advance. Store them in an airtight container at room temperature. Then, dip them in the coating on the day you plan to serve them. This saves time and keeps the coating looking its best.
These pops also freeze well. Place them in a single layer on a baking sheet and freeze until solid. Then, transfer them to a freezer-safe bag or container. They will keep for up to 2 months. Thaw them at room temperature before serving. The coating might get a little dull, but they still taste great.
If you are looking for another easy Halloween treat to add to your lineup, try these mummy sausage bites. They are savory and perfect for balancing out all the sugar.
Nutritional Information & Benefits
Let us be real: these are a treat, not a health food. But here is the estimated nutritional breakdown for one pop (based on a batch of 24).
- Calories: 180
- Fat: 8g
- Carbohydrates: 28g
- Protein: 1g
- Sugar: 18g
The Rice Krispies provide a small amount of iron and B vitamins, and the butter adds a touch of vitamin A. The candy melts are mostly sugar and fat, so these are definitely an occasional treat. If you are looking for a slightly lighter option, you can use a sugar-free marshmallow and a sugar-free chocolate coating, but the texture will be different.
For those with dietary restrictions, this recipe can be adapted to be gluten-free and nut-free as mentioned above. Always check the labels on your ingredients to ensure they meet your dietary needs.
I personally think these pops are worth every calorie. They bring so much joy and are a fun way to celebrate the season. Balance is key, and these fit perfectly into a Halloween celebration.
Conclusion
These Easy Halloween Rice Krispie Treat Pops are more than just a dessert. They are a memory in the making. I love how they bring people together, whether it is my kids helping me shape the balls or my friends laughing at the silly faces. They are simple enough for a weeknight project but special enough for a party.
I encourage you to make these your own. Change the colors, try different decorations, or let the kids go wild with the sprinkles. The best part is seeing everyone smile when they see those googly eyes staring back at them.
If you make these pops, I would love to hear about it. Leave a comment below and tell me how they turned out. Share a photo on social media and tag me. Your feedback helps me create better recipes for you. And if you are looking for another fun Halloween dessert, check out these spooky black velvet cupcakes.
Happy Halloween, and happy snacking!
Frequently Asked Questions
Can I use lollipop sticks instead of pretzel rods?
Absolutely. Lollipop sticks work great and are available at most craft stores. The only difference is that pretzel rods add a salty crunch that complements the sweet coating. If you use lollipop sticks, the treat will be all sweet, which is fine too.
My candy melts are lumpy. What did I do wrong?
This usually happens when the candy melts get too hot or when moisture gets into the bowl. Always microwave in short intervals and stir well. If the melts are already lumpy, you can try adding a little more coconut oil and stirring vigorously. If that does not work, you might need to start over with fresh melts.
How do I keep the candy eyes from falling off?
Press the eyes into the coating while it is still wet. If the coating has already set, you can dab a tiny bit of melted candy melt on the back of the eye and stick it on. The eyes should stay put once the coating is fully set.
Can I make these without the candy coating?
Yes. You can skip the coating entirely and just shape the Rice Krispie treats into balls on sticks. They will still be delicious and fun, just less festive. You can also dust them with powdered sugar or drizzle with melted chocolate for a simpler finish.
How far in advance can I make these?
You can make the Rice Krispie treat base and shape the pops up to 2 days ahead. Store them in an airtight container at room temperature. Dip them in the coating on the day you plan to serve them for the best appearance. The finished pops are best within 3 days.
If you are planning a Halloween party, you might also love these candy corn layered Jello cups. They are another no-bake treat that looks impressive.
Pin This Recipe!

Easy Halloween Rice Krispie Treat Pops
These adorable Rice Krispie treat pops on pretzel rods are dipped in orange candy melts and decorated with googly eyes, making them a fun and easy Halloween treat that kids and adults love.
- Prep Time: 15 minutes
- Cook Time: 10 minutes
- Total Time: 55 minutes
- Yield: 24 servings 1x
- Category: Dessert
- Cuisine: American
Ingredients
- 3 tablespoons unsalted butter
- 1 package (10 ounces) mini marshmallows
- 6 cups Rice Krispies cereal
- 1/4 teaspoon vanilla extract
- Pinch of salt
- 1 bag (12 ounces) orange candy melts
- 1 bag (12 ounces) white candy melts (optional)
- 1 tablespoon coconut oil or vegetable shortening
- 24 pretzel rods
- 1 bag (about 100 pieces) candy eyes
- Halloween sprinkles (optional)
Instructions
- Line a 9×13-inch baking pan with parchment paper, leaving overhang on the sides. Set aside.
- In a large saucepan over low heat, melt the butter. Add the mini marshmallows and stir constantly until completely melted and smooth, about 5 to 7 minutes.
- Remove from heat and stir in vanilla extract and a pinch of salt.
- Add the Rice Krispies cereal all at once and fold gently until every piece is coated. Do not overmix.
- Let the mixture cool in the pan for about 5 minutes. Lightly grease your hands with butter or cooking spray.
- Scoop about 2 tablespoons of the mixture and roll into a ball, then press into a slightly flattened disc about 2 inches wide.
- Insert a pretzel rod into the center of the disc, pushing about halfway through. Gently press the mixture around the pretzel rod to secure it.
- Place each finished pop on a parchment-lined baking sheet. Repeat until all mixture is used (about 20 to 24 pops). Let cool completely at room temperature, about 30 minutes.
- Once pops are cool, place orange candy melts in a microwave-safe bowl with 1 tablespoon coconut oil or shortening. Microwave in 30-second intervals, stirring well after each, until smooth and runny (about 90 seconds total).
- Hold a pop by the pretzel rod and dip it into the melted orange coating. Submerge completely, then lift and let excess drip off. Gently tap the rod against the bowl to remove excess.
- Place the dipped pop back on the parchment-lined baking sheet. While coating is still wet, press two candy eyes onto the front. Add sprinkles if desired. Work quickly.
- Repeat with remaining pops. If coating thickens, microwave for 10 seconds to loosen.
- For ghost pops (optional), melt white candy melts the same way. Dip a cooled pop into white coating, then add two candy eyes close together near the top.
- Let coated pops set at room temperature for 20 to 30 minutes. Do not refrigerate.
Notes
Do not overcook marshmallows; they should be just melted and smooth. Let mixture cool before shaping to prevent sticking. Use a light hand when pressing to keep treats light and airy. Thin candy coating with coconut oil or shortening for smooth dipping. Work in batches to prevent coating from setting. Use a tall container for dipping to avoid mess.
Nutrition
- Serving Size: 1 pop
- Calories: 180
- Sugar: 18
- Sodium: 120
- Fat: 8
- Saturated Fat: 5
- Carbohydrates: 28
- Protein: 1
Keywords: Halloween, Rice Krispie treats, pops, candy melts, googly eyes, easy, kid-friendly


