I figured three ingredients couldn’t possibly be enough to make something that felt like real fudge. It took about ten minutes of staring at a bowl of melted white chocolate chips, sweetened condensed milk, and a bag of candy corn for that assumption to fall completely apart. Honestly, I was waiting for something to go wrong — for the texture to turn grainy, or the candy corn to seize up, or the whole thing to just taste like sugar in the wrong way. None of that happened.
The first time I made this, I was testing it out for a Halloween party where I didn’t want to spend the whole day in the kitchen. I needed something that looked impressive but didn’t require a candy thermometer or any of that careful stirring you read about in traditional fudge recipes. This one just comes together in a bowl, gets poured into a pan, and sets up in the fridge while you go do literally anything else. That’s the kind of cooking I can get behind — especially during the chaos of October.
What surprised me most was how the candy corn doesn’t just disappear into the fudge. It stays in little chewy pockets throughout, so every bite has these bursts of that classic marshmallow-vanilla flavor. The fudge itself is creamy and dense, the way proper fudge should be, but it doesn’t take itself too seriously. It’s Halloween in dessert form, and it’s exactly the kind of thing you want sitting on a platter next to a bowl of spooky witch finger pretzel rods at a party.
I’ve made this recipe maybe a dozen times now, and I still get a little kick out of how simple it is. There’s no boiling sugar, no waiting for a soft-ball stage, no stress. Just three ingredients, a microwave, and about fifteen minutes of active work. If that’s not a Halloween miracle, I don’t know what is.
Why You’ll Love This Recipe
Let me tell you why this candy corn fudge has become my go-to Halloween treat — and why it might just become yours too.
- Only Three Ingredients : White chocolate chips, sweetened condensed milk, and candy corn. That’s it. No heavy cream, no butter, no corn syrup, no weird stabilizers. Everything you need is probably already in your pantry or an aisle away at the grocery store.
- No Candy Thermometer Required : Traditional fudge recipes make you babysit a pot of boiling sugar until it hits exactly 234°F. This one? You melt everything in the microwave, stir it together, and pour. No special equipment, no burned sugar disasters.
- Ready in Under 2 Hours : The active prep time is about 15 minutes. After that, the fridge does all the work. You can make this in the morning and have it ready for an afternoon Halloween party or an after-school treat.
- Perfect for Halloween Parties : The orange and yellow layers look festive without any extra effort. Slice it into squares, arrange them on a platter, and watch them disappear. It’s also fantastic for Halloween bake sales or classroom treats.
- Kid-Friendly to Make : My niece helped me make a batch last week, and she handled most of the stirring herself. There’s no hot sugar to worry about, just melted chocolate that’s warm but not dangerous. It’s a great recipe for getting little ones excited about baking.
- Customizable for Any Holiday : Swap the candy corn for chopped peppermint candies at Christmas, pastel mints at Easter, or red and green M&Ms for a festive twist. The base fudge recipe works with pretty much any candy you can chop up.
This isn’t fancy bakery fudge. It’s not trying to be. It’s the kind of fudge that makes people smile because it reminds them of Halloween as a kid — the excitement of dumping out your candy stash and finding all the candy corn first. There’s something nostalgic about it that feels right for this time of year.
What Ingredients You Will Need
This recipe keeps things refreshingly simple. Every ingredient has a specific job, and together they create a fudge that’s creamy, slightly chewy, and perfectly sweet without being overwhelming.
- 12 ounces (about 2 cups) white chocolate chips : The base of the fudge. I recommend using a brand you trust for melting, like Ghirardelli or Guittard. White chocolate chips that contain cocoa butter melt more smoothly and give you a creamier texture. Avoid generic store-brand chips if you can — they sometimes contain added waxes that prevent smooth melting. If you want to use a white chocolate bar instead, chop it into small, even pieces so it melts uniformly.
- 14 ounces (1 standard can) sweetened condensed milk : This is your secret weapon. Sweetened condensed milk adds sweetness, creaminess, and structure without requiring any additional sugar or butter. It stabilizes the fudge and gives it that dense, melt-in-your-mouth texture that traditional fudge has. Do not substitute evaporated milk — they are not the same thing. Evaporated milk is unsweetened and thinner, and it won’t set up properly. One can is exactly the right amount, so don’t be tempted to add more.
- 1 cup candy corn : The star of the show. Candy corn adds color, texture, and that signature honey-vanilla flavor that screams Halloween. You can use regular candy corn or the autumn mix that includes the little pumpkins. If you want the classic orange-and-yellow striped look, standard candy corn is your best bet. For a slightly different texture, try chopping the candy corn into smaller pieces before adding it — this distributes it more evenly throughout the fudge. I’ve also used the candy corn that comes in the “harvest” mix with the brown tips, and it works just fine.
A quick note on ingredient temperatures: You want everything at room temperature before you start. Cold ingredients can cause the white chocolate to seize up when you melt it, leading to a grainy texture. Let your sweetened condensed milk sit out for about 20 minutes before you begin, and make sure your bowl and spatula are completely dry. Even a drop of water can cause melted white chocolate to turn into a stiff, unusable mess.
Equipment Needed
You don’t need a fully stocked bakery kitchen for this recipe. Here’s what you’ll actually use:
- 8×8-inch baking pan : This is the perfect size for a single batch. If you only have a 9×9-inch pan, the fudge will be slightly thinner but will still work. Line it with parchment paper or aluminum foil for easy removal — leave a little overhang on two sides so you can lift the whole block out.
- Large microwave-safe bowl : Glass or ceramic works best. I use a 4-cup Pyrex measuring cup because it’s easy to pour from, but any large bowl will do. Make sure it’s completely dry.
- Silicone spatula : For stirring and scraping every last bit of fudge into the pan. A wooden spoon works too, but a spatula gets into the corners better.
- Sharp knife : For cutting the fudge into clean squares. A chef’s knife or a long serrated knife both work well. Wipe the blade clean between cuts for the neatest edges.
- Parchment paper or aluminum foil : For lining the pan. Parchment paper is non-stick and easier to work with, but foil works fine if you grease it lightly with butter or cooking spray.
If you don’t have a microwave, you can melt everything in a double boiler on the stovetop. Just put the white chocolate chips and sweetened condensed milk in a heatproof bowl set over a pot of simmering water, stirring until smooth. It takes a few minutes longer but works perfectly.
Preparation Method
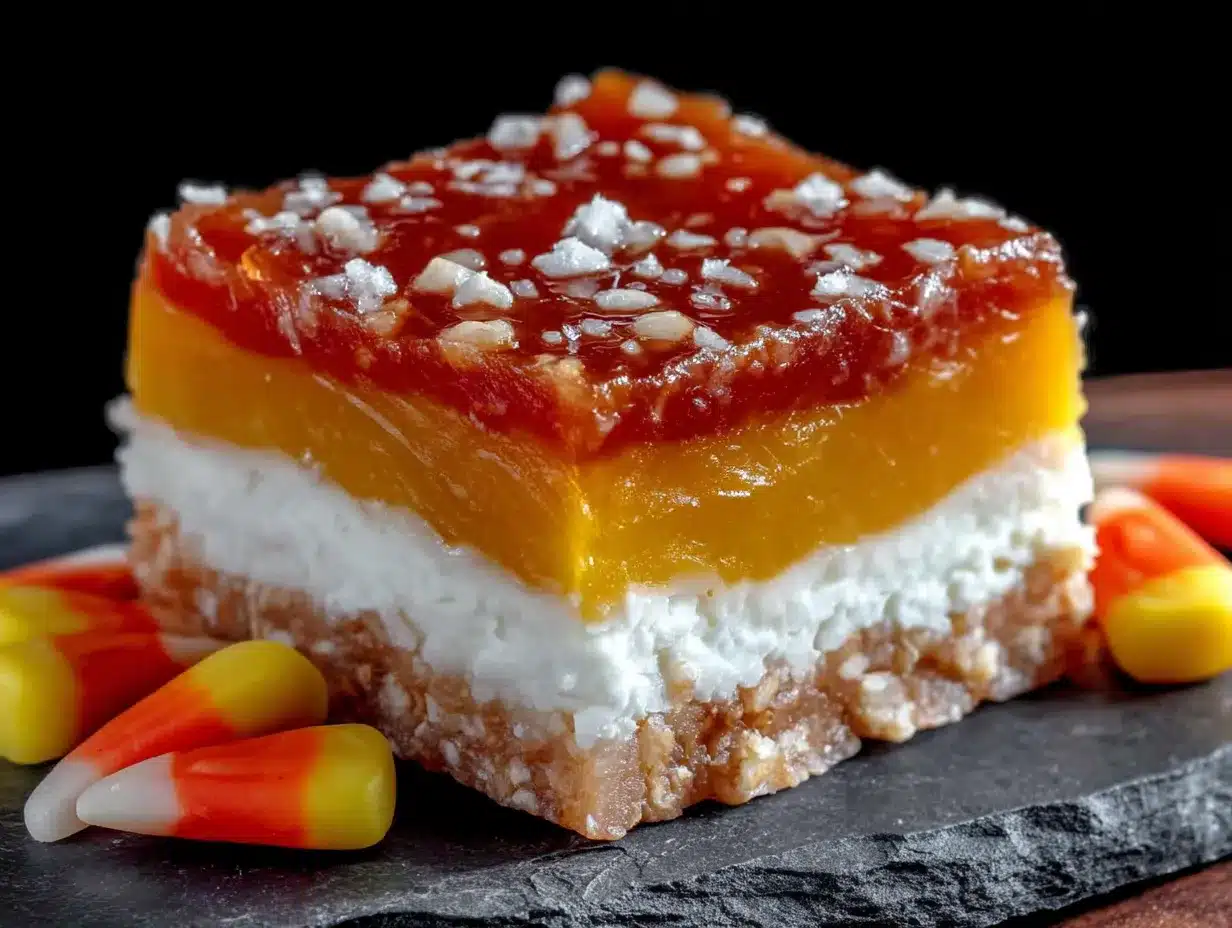
Let me walk you through this step by step. It’s almost embarrassingly simple, but I’ll include all the little details that make the difference between good fudge and great fudge.
- Prepare your pan. Line an 8×8-inch baking pan with parchment paper or aluminum foil, leaving about 2 inches of overhang on two opposite sides. This creates handles that make it easy to lift the fudge out later. If you’re using foil, lightly grease it with butter or nonstick cooking spray so the fudge doesn’t stick. Set the pan aside.
- Melt the white chocolate and sweetened condensed milk. Pour the entire can of sweetened condensed milk into a large microwave-safe bowl. Add the white chocolate chips on top. Microwave in 30-second intervals on medium power (50% power is ideal), stirring well after each interval. This usually takes about 2 to 3 minutes total. Don’t rush this step — high power can scorch the white chocolate and make it grainy. Stir until the mixture is completely smooth and glossy. It should look like thick, creamy white sauce.
- Add the candy corn. Gently fold in ¾ cup of the candy corn, reserving the remaining ¼ cup for the top. Stir just until the candy corn is evenly distributed. Don’t overmix, or the candy corn might start to melt and streak the fudge. You want those little pockets of chewy candy corn throughout.
- Pour into the pan. Scrape the fudge mixture into your prepared pan using the silicone spatula. Spread it into an even layer, making sure it reaches all four corners. Give the pan a gentle tap on the counter to release any air bubbles. Sprinkle the reserved ¼ cup of candy corn over the top, pressing them in lightly so they stick.
- Chill until firm. Place the pan in the refrigerator and let it set for at least 1 hour, or until the fudge is completely firm to the touch. For best results, let it chill for 2 hours. The fudge will be soft and sliceable after 1 hour, but it gets cleaner cuts after a longer chill. If you’re in a hurry, you can pop it in the freezer for 30 minutes, but watch it closely — you don’t want it to freeze solid.
- Slice and serve. Once the fudge is firm, lift it out of the pan using the parchment paper handles. Place it on a cutting board and use a sharp knife to cut it into squares. I usually go for 1-inch squares, which gives you about 64 pieces from one batch. For the cleanest cuts, wipe the knife blade clean between each slice. If the fudge starts to soften while you’re cutting, pop it back in the fridge for 10 minutes.
One thing I learned the hard way: Don’t try to cut the fudge while it’s still warm. It will be a sticky, melty mess. Patience is your friend here. Let it chill completely, and you’ll get those beautiful, clean squares that look like they came from a bakery.
Cooking Tips & Techniques
After making this fudge more times than I can count, I’ve picked up a few tricks that make the process smoother and the results more consistent.
Watch your microwave power. White chocolate is more delicate than dark or milk chocolate. It burns easily and seizes up when overheated. Always use medium power (50%) and stir frequently. If you see any lumps forming, stop microwaving immediately and stir vigorously — the residual heat might be enough to smooth everything out. If it’s still lumpy, add a teaspoon of coconut oil or vegetable oil and stir. That usually fixes it.
Room temperature ingredients matter. I mentioned this earlier, but it’s worth repeating. Cold sweetened condensed milk can cause the white chocolate to seize. Let everything sit out for 20 minutes before you start. Also, make sure your bowl and spatula are bone dry. Water is white chocolate’s enemy.
Don’t overmix the candy corn. Stir it in gently and stop as soon as it’s distributed. If you keep stirring, the candy corn will start to melt and you’ll lose those distinct pockets of chewy texture. The contrast between the creamy fudge and the slightly chewy candy corn is what makes this recipe special.
Use a hot knife for cleaner cuts. Run your knife under hot water, dry it off, and then slice. The heat helps the knife glide through the fudge without dragging or sticking. Wipe the blade clean between each cut for the neatest edges. This is especially helpful if you’re making these for a Halloween party and want them to look picture-perfect.
Chill overnight for the best texture. While 1 hour is enough for the fudge to set, letting it chill overnight in the fridge gives it a denser, creamier texture that’s closer to traditional fudge. The flavors also meld together more, and the candy corn softens slightly, becoming almost like little caramel bits. If you can plan ahead, make this the day before you need it.
I once tried to rush this recipe by putting the fudge in the freezer for 15 minutes and then attempting to cut it. The outside was firm, but the center was still soft, and I ended up with a sticky, misshapen mess. Learn from my mistakes — give it the full chill time.
Variations & Adaptations
One of the best things about this simple fudge base is how easily it adapts to different flavors and occasions. Here are some variations I’ve tried and loved.
- Chocolate Candy Corn Fudge : Swap the white chocolate chips for semi-sweet or milk chocolate chips. The chocolate flavor pairs surprisingly well with the honey-vanilla notes of the candy corn. It’s like a chocolate bar with hidden candy surprises. Use the same method — melt the chocolate chips with the sweetened condensed milk, then fold in the candy corn.
- Peanut Butter Candy Corn Fudge : Add ¼ cup of creamy peanut butter to the white chocolate mixture before melting. Stir until smooth, then proceed with the recipe. The peanut butter adds a savory richness that balances the sweetness of the candy corn. This one disappears fastest at parties, I’ve noticed.
- Spiced Pumpkin Fudge : For a fall twist, add ¼ cup of pumpkin puree and 1 teaspoon of pumpkin pie spice to the white chocolate mixture. Stir well before adding the candy corn. The pumpkin adds a subtle earthiness and a beautiful pale orange color. This pairs beautifully with a batch of cozy pumpkin scones with maple glaze for a full fall dessert spread.
- Vegan Version : Use vegan white chocolate chips (look for ones made with rice milk or oat milk) and a can of sweetened condensed coconut milk. The texture is slightly softer than the original, but it sets up well in the fridge. Make sure your candy corn is vegan-friendly — most brands are, but check the label to be sure.
- Low-Sugar Version : Use sugar-free white chocolate chips and a can of low-fat sweetened condensed milk (or make your own with a sugar substitute and dry milk powder). The texture will be slightly less creamy, but it’s a decent option if you’re watching your sugar intake. The candy corn still adds plenty of sweetness, so this version is best for those who don’t mind a less sweet treat.
My personal favorite variation is the peanut butter one. I made it for a Halloween party last year, and someone asked me if I had bought it from a fancy candy shop. I told them it took about 15 minutes to make, and they didn’t believe me until I showed them the recipe. That’s the kind of reaction that makes all the stirring worth it.
Serving & Storage Suggestions
This fudge is versatile enough for all kinds of occasions. Here’s how to serve it and keep it fresh.
Serving Temperature: Serve the fudge cold or at room temperature. Cold fudge is firmer and cleaner to bite into, while room temperature fudge is softer and more melt-in-your-mouth. I prefer it cold for Halloween parties because it holds its shape better on a platter. If you’re serving it at room temperature, let it sit out for about 10 minutes after taking it out of the fridge.
Presentation Ideas: Arrange the fudge squares on a platter lined with orange and black napkins for a festive look. You can also stack them in a glass jar tied with a ribbon for a cute Halloween gift. For a party, I like to serve them alongside spooky black velvet cupcakes and a bowl of candy corn for a full Halloween dessert table.
Storage: Store the fudge in an airtight container in the refrigerator for up to 2 weeks. Layer the pieces between sheets of wax paper or parchment paper to prevent them from sticking together. If you’re stacking them, make sure they’re completely firm before layering.
Freezing: This fudge freezes beautifully. Place the squares in a single layer on a baking sheet and freeze for 1 hour, then transfer them to a freezer-safe bag or container. They’ll keep for up to 3 months. Thaw in the refrigerator overnight before serving. The texture remains creamy and delicious — I’ve done this several times for holiday prep.
Flavor Development: The fudge actually gets better after a day or two in the fridge. The candy corn softens slightly and melds with the white chocolate base, creating a more unified flavor. If you can resist eating it all on day one, you’ll be rewarded on day two.
Nutritional Information & Benefits
Let’s be honest — this is a treat, not a health food. But here’s what you should know about what’s in each square.
Estimated Nutritional Values (per 1-inch square):
- Calories: approximately 85
- Total Fat: 3.5g
- Saturated Fat: 2g
- Carbohydrates: 13g
- Sugar: 11g
- Protein: 1g
Dietary Considerations: This recipe is vegetarian. It contains dairy from the white chocolate and sweetened condensed milk, so it’s not suitable for vegans (unless you use the vegan variations above). It’s also not gluten-free in all cases — check your candy corn label, as some brands may contain wheat starch. Most major brands are gluten-free, but always double-check.
Potential Allergens: Dairy (white chocolate, sweetened condensed milk), soy (often in white chocolate chips), and corn (candy corn is made from corn syrup). If you’re serving this at a party, label it clearly so guests with allergies can make informed choices.
A Note on Portion Control: This fudge is sweet and rich, so a little goes a long way. One or two squares is plenty for a satisfying treat. I like to make a batch and keep it in the fridge for those moments when I want something sweet but don’t want to bake an entire cake. It’s a great way to satisfy a sugar craving without overindulging.
Conclusion
This easy 3-ingredient candy corn fudge has become my secret weapon for Halloween entertaining. It’s the recipe I turn to when I need something festive, delicious, and completely stress-free. No candy thermometers, no complicated techniques, no hours of standing over a hot stove. Just three ingredients, a microwave, and about fifteen minutes of your time.
What I love most about this recipe is how it brings people together. There’s something about homemade fudge that feels special, even when it’s this simple. When you set out a platter of these little orange-and-yellow squares at a party, people light up. They remember making fudge with their grandmothers or finding candy corn in their Halloween bags. It’s nostalgia in edible form.
I’d love to hear how this recipe turns out for you. Did you try any of the variations? Did you add your own twist? Drop a comment below and let me know — I read every single one. And if you’re looking for more Halloween treats to round out your dessert table, check out easy mummy sausage bites for a savory option that balances out all the sweetness.
Happy Halloween, and happy fudge-making! Trust me when I say — once you make this once, you’ll be making it every year.
Frequently Asked Questions
Can I use white chocolate melting wafers instead of chips?
Yes, you can. Melting wafers are designed to melt smoothly and often contain added oil, which makes them even more forgiving than regular white chocolate chips. They work perfectly in this recipe. Just use the same amount — about 2 cups or 12 ounces.
Why did my fudge turn out grainy?
Grainy fudge usually happens when the white chocolate gets overheated or comes into contact with a small amount of water. Make sure your bowl and spatula are completely dry, and always microwave at 50% power in short intervals. If your fudge does turn grainy, you can sometimes fix it by stirring in a teaspoon of coconut oil or vegetable oil while the mixture is still warm.
Can I use homemade candy corn or a different brand?
Absolutely. Any brand of candy corn will work, including homemade versions. The texture might vary slightly — some brands are softer and chewier, while others are firmer. Brach’s is the most common brand and works perfectly. If you’re using a gourmet or homemade candy corn, just be aware that it might melt more easily into the fudge, so stir gently and briefly.
How do I get clean, even cuts without the fudge cracking?
Use a sharp knife and wipe it clean between each cut. For the cleanest results, chill the fudge for at least 2 hours before slicing. If the fudge starts to crack, it might be too cold — let it sit at room temperature for 5 minutes before continuing. A hot knife (run under hot water and dried) also helps create smooth, clean edges.
Can I double this recipe for a larger batch?
Yes, you can easily double the recipe. Use a 9×13-inch pan instead of an 8×8-inch pan, and increase the chilling time to at least 2 hours. The larger pan will give you fudge that’s about the same thickness as the original recipe. If you want thicker fudge, use a 9×9-inch pan for a double batch.
Pin This Recipe!
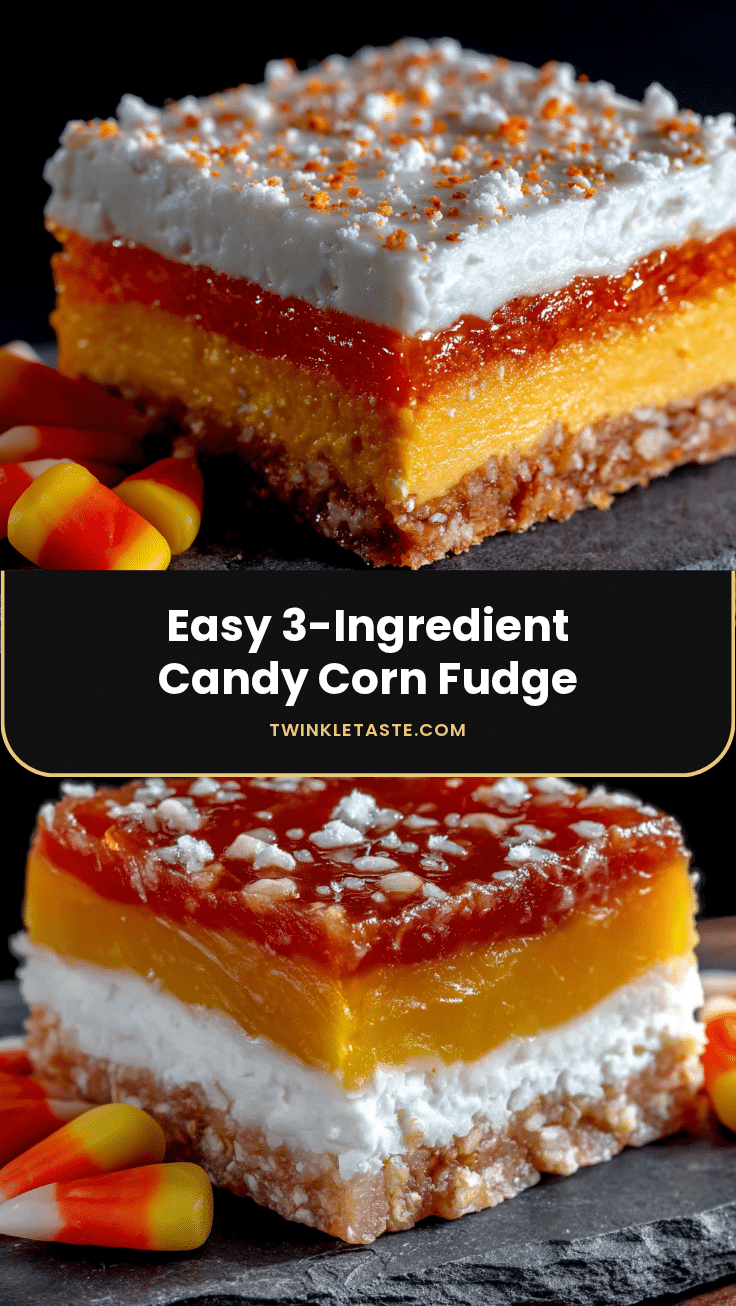
Easy 3-Ingredient Candy Corn Fudge: Best Homemade Halloween Treat
This easy 3-ingredient candy corn fudge is creamy, chewy, and perfectly sweet. Made with white chocolate chips, sweetened condensed milk, and candy corn, it’s a no-fuss Halloween treat that comes together in minutes and sets in the fridge.
- Prep Time: 15 minutes
- Cook Time: 3 minutes
- Total Time: 1 hour 18 minutes (includes chilling)
- Yield: 64 servings 1x
- Category: Dessert
- Cuisine: American
Ingredients
- 12 ounces (about 2 cups) white chocolate chips
- 14 ounces (1 standard can) sweetened condensed milk
- 1 cup candy corn
Instructions
- Line an 8×8-inch baking pan with parchment paper or aluminum foil, leaving about 2 inches of overhang on two opposite sides. If using foil, lightly grease it with butter or nonstick cooking spray.
- Pour the entire can of sweetened condensed milk into a large microwave-safe bowl. Add the white chocolate chips on top. Microwave in 30-second intervals on medium power (50% power), stirring well after each interval, until the mixture is completely smooth and glossy (about 2 to 3 minutes total).
- Gently fold in ¾ cup of the candy corn, reserving the remaining ¼ cup for the top. Stir just until evenly distributed; do not overmix.
- Scrape the fudge mixture into the prepared pan and spread into an even layer. Tap the pan gently on the counter to release air bubbles. Sprinkle the reserved ¼ cup of candy corn over the top, pressing them in lightly.
- Refrigerate for at least 1 hour, or until completely firm (2 hours for best results). For a quicker set, freeze for 30 minutes, but watch closely.
- Once firm, lift the fudge out of the pan using the parchment paper handles. Place on a cutting board and cut into 1-inch squares using a sharp knife, wiping the blade clean between cuts.
Notes
Use room temperature ingredients to prevent white chocolate from seizing. Microwave at 50% power to avoid scorching. For cleaner cuts, chill fudge for at least 2 hours and use a hot knife. Fudge can be stored in an airtight container in the refrigerator for up to 2 weeks or frozen for up to 3 months.
Nutrition
- Serving Size: 1 square (1-inch)
- Calories: 85
- Sugar: 11
- Sodium: 20
- Fat: 3.5
- Saturated Fat: 2
- Carbohydrates: 13
- Protein: 1
Keywords: candy corn fudge, Halloween fudge, 3-ingredient fudge, easy fudge, white chocolate fudge, no-bake fudge, Halloween dessert, quick fudge


