I want deviled eggs for the Halloween party, obviously. But I want them to look like they belong on a platter next to fake cobwebs and a fog machine, not just sitting there being polite little appetizers. The problem is I have all the ingredients—eggs, mayo, mustard, paprika—and zero ideas that don’t feel… boring. Then it hits me, mid-crack of an egg against the counter. Black olives. Cut just right, they look exactly like spider bodies. And if I slice the other ones into thin little legs? I’m not making deviled eggs anymore. I’m making Spooky Halloween Spider Deviled Eggs, and honestly, I can’t believe I didn’t think of this sooner.
There’s something deeply satisfying about taking a classic party staple and turning it into something that makes people do a double-take. Not because it’s complicated—this is still just deviled eggs with a fancy hat on—but because it’s clever. It’s the kind of appetizer that makes kids giggle and adults lean in for a closer look. And the best part? It takes maybe ten extra minutes of prep time. That’s it. You’re already boiling eggs and mixing filling. You’re already slicing things. Why not slice them into something that looks like it crawled out of a haunted house?
I first made these for a Halloween potluck a few years ago, and they vanished before the punch bowl got touched. Someone actually asked me if the spiders were real. That’s the moment you know you’ve won Halloween. These aren’t just deviled eggs—they’re a conversation starter, a photo op, and a genuinely delicious snack all rolled into one creepy little package. If you’re looking for something that delivers on both flavor and fright factor without stressing you out, you’re in the right place.
Why You’ll Love This Recipe
Let me be honest with you—I’ve tested a lot of Halloween appetizers over the years. Some look amazing but taste like cardboard. Others taste great but look like a sad afterthought. These Spooky Halloween Spider Deviled Eggs hit both marks without breaking a sweat. Here’s why they work so well:
- Quick & Easy : From start to finish, you’re looking at about 35 minutes. Most of that is hands-off boiling and chilling time. The actual assembly flies by.
- Simple Ingredients : Eggs, mayo, mustard, vinegar, paprika, salt, pepper, and black olives. That’s it. You probably have everything except the olives right now.
- Perfect for Halloween Parties : Whether you’re hosting a costume party, a classroom celebration, or just a spooky movie night, these fit right in. They’re also fantastic alongside easy mummy sausage bites for a full savory spread.
- Crowd-Pleaser : Kids love the creepy factor. Adults love the classic deviled egg flavor they already know. Everyone wins.
- Unbelievably Delicious : The filling is creamy, tangy, and perfectly seasoned. The olive spiders add a briny pop that complements the richness of the yolk mixture beautifully.
What sets this recipe apart from other Halloween deviled eggs you might see online is the technique. I spent a few batches figuring out exactly how to slice the olives so the legs don’t fall off and the spider bodies sit flush against the filling. It’s a small detail, but it makes the difference between “oh, cute” and “whoa, that’s actually creepy.” Plus, the filling itself is dialed in—not too wet, not too dry, with just enough mustard to give it a little kick. This isn’t just another version of deviled eggs. It’s the version you’ll come back to every October.
And honestly? There’s something about watching people’s faces when they realize the spider is made of olive. That little moment of delight—it never gets old. These eggs make people happy. That’s reason enough to make them.
What Ingredients You Will Need
This recipe keeps things refreshingly simple. No weird specialty ingredients, no trips to three different stores. Everything you need is probably in your kitchen already, except maybe the olives. Here’s what you’ll need and why each ingredient matters:
- 6 large eggs – The foundation of everything. Use large eggs, not extra-large or jumbo, because they’re the most consistent size for even cooking. Room temperature eggs are ideal, but cold ones work too—just add a minute to the boil time.
- 3 tablespoons mayonnaise – This gives the filling its creamy, luscious texture. I prefer Hellmann’s or Duke’s for flavor, but any full-fat mayo works. Avoid Miracle Whip unless you want a tangier, sweeter result.
- 1 teaspoon yellow mustard – Adds that classic deviled egg tang without overwhelming the other flavors. You can use Dijon if you want a sharper kick, but yellow mustard keeps it nostalgic.
- 1 teaspoon white vinegar – A tiny splash brightens everything up. Don’t skip it. It’s the secret to that “what is that flavor?” depth.
- 1/4 teaspoon salt – Use fine sea salt for even distribution. Table salt works too, just go a little lighter since it’s more concentrated.
- 1/8 teaspoon black pepper – Freshly ground is better, but pre-ground is fine. Just don’t skip it—pepper cuts through the richness.
- 1/4 teaspoon paprika (plus more for garnish) – Paprika adds color and a subtle smoky sweetness. Smoked paprika works beautifully here if you want a deeper flavor.
- 1 can (6 ounces) large black olives – This is your spider material. Look for whole, pitted black olives that are on the larger side. Smaller olives make fiddly spiders. You’ll need about 12 olives total for 6 spiders, plus a few extra in case you mess up a leg slice.
Ingredient Selection Tips: For the best texture, use eggs that are at least a week old—they peel much easier than fresh ones. If you’re not sure how old your eggs are, do the float test: fresh eggs sink, older eggs stand on end or float. For the olives, I’ve found that store-brand whole black olives work just fine. You don’t need fancy ones here since they’re getting sliced and rearranged anyway.
Substitution Guidance: If you’re avoiding dairy, check your mayonnaise—some brands are dairy-free. For a lighter version, swap half the mayo with plain Greek yogurt. It changes the flavor slightly but keeps the creaminess. If you can’t find large black olives, you can use jumbo pitted olives, just adjust the slice sizes accordingly. And if you’re feeding a crowd that doesn’t do eggs? Honestly, this isn’t the recipe for that. But the spiders themselves? You could totally put them on top of a loaded charcuterie board for a fun Halloween touch.
Equipment Needed
You don’t need much to make these spiders come to life. Here’s what you’ll want on hand:
- Medium saucepan – For boiling the eggs. Any size works, but you want enough room for the eggs to sit in a single layer without crowding.
- Mixing bowl – For the filling. A medium bowl gives you enough room to mash and stir without flinging yolk everywhere.
- Fork or potato masher – For mashing the yolks. A fork works perfectly fine. A potato masher is faster if you’re making a double batch.
- Sharp paring knife – This is crucial. You need a sharp, small knife for slicing the olives into those thin leg pieces. A dull knife will squish the olives and make you want to throw them across the room. Trust me on this.
- Cutting board – Preferably a small one so you’re not chasing olives around a giant board.
- Piping bag or zip-top bag – For piping the filling into the egg whites. A zip-top bag with the corner snipped off works beautifully and costs nothing. If you have a piping bag with a star tip, go for it—it gives a prettier finish.
- Small spoon – For scooping out the yolks and for placing the olive spiders on top.
- Platter or serving dish – Something that shows off the spiders. A dark plate makes the white eggs and black olives pop.
Budget-Friendly Tip: Don’t have a piping bag? Seriously, just use a sandwich bag. Snip a tiny corner off, and you’re in business. I’ve been doing it for years and it works every time. Also, if you don’t have a potato masher, use a fork. It takes an extra 30 seconds. No big deal.
Preparation Method
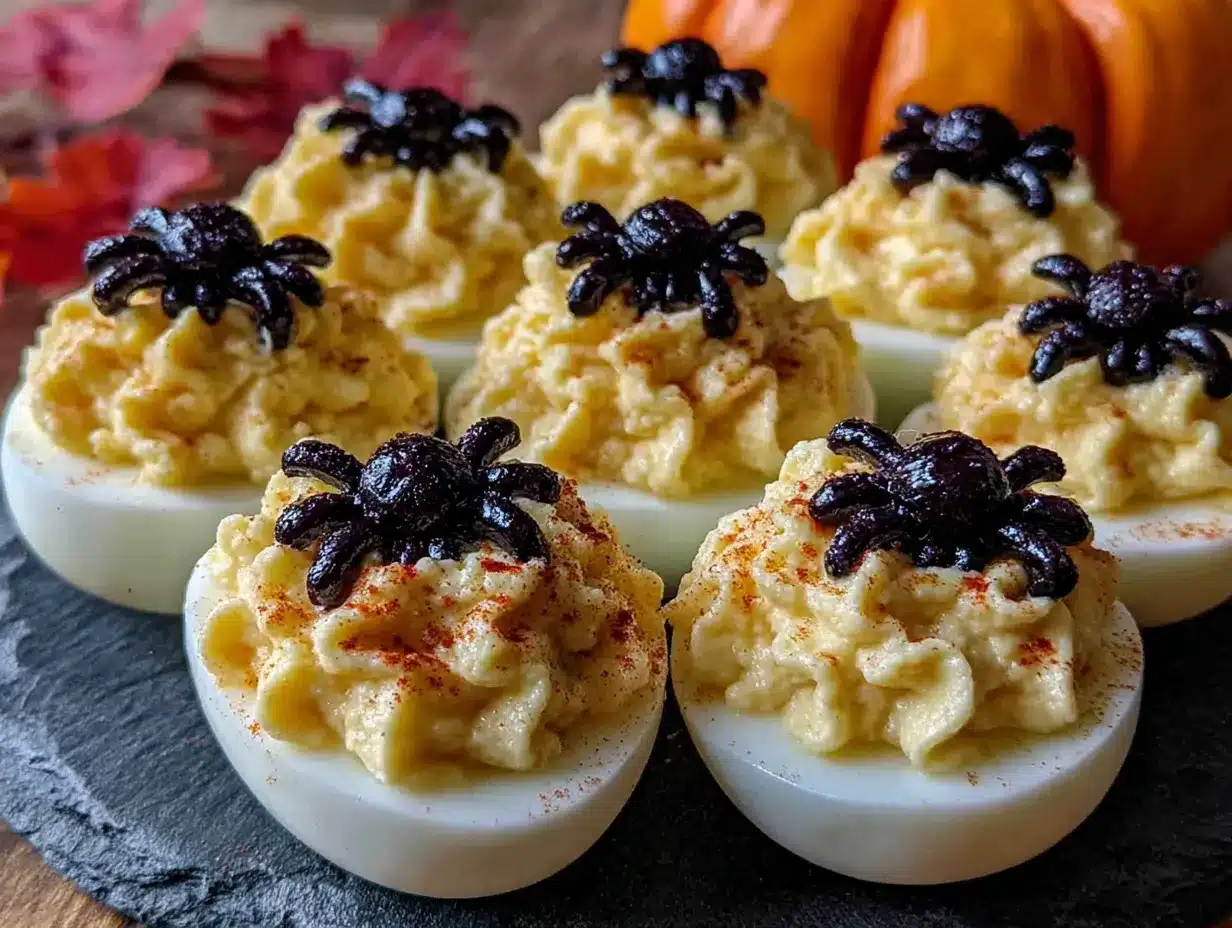
Alright, let’s make some spiders. Take your time with the olive slicing—it’s the only fiddly part, and once you get the hang of it, the rest flies by.
- Boil the eggs. Place your 6 large eggs in a single layer in a medium saucepan. Cover them with cold water by about an inch. Bring the water to a rolling boil over high heat. Once it’s boiling hard, cover the pot, turn off the heat, and let it sit for exactly 12 minutes. Set a timer—don’t guess. While the eggs are sitting, prepare a bowl of ice water.
- Ice bath the eggs. After 12 minutes, transfer the eggs to the ice water bath using a slotted spoon. Let them sit for at least 5 minutes, but 10 is better. This stops the cooking immediately and makes peeling way easier. I’ve skipped this step before out of impatience, and I regretted it every single time.
- Peel the eggs. Gently tap each egg on the counter to crack the shell all over, then roll it between your palms to loosen the shell. Start peeling from the wider end where the air pocket is—it’s easier to get under the membrane there. Rinse the peeled eggs under cool water to remove any tiny shell bits.
- Slice the eggs in half lengthwise. Use a sharp knife and wipe it clean between cuts for the neatest edges. You should have 12 egg white halves. Place them on your serving platter, cut side up.
- Scoop out the yolks. Gently pop the yolks into a medium mixing bowl. Be careful not to tear the egg whites—if you do, it’s fine, just put that half on the platter with the torn side facing down. No one will know.
- Mash the yolks. Use a fork or potato masher to break the yolks into a fine crumb. You want no large chunks. This takes about a minute of consistent mashing.
- Add the wet ingredients. To the mashed yolks, add 3 tablespoons mayonnaise, 1 teaspoon yellow mustard, and 1 teaspoon white vinegar. Stir until completely smooth and creamy. It should look like a thick, spreadable paste. If it seems too stiff, add another teaspoon of mayo. If it’s too loose, you added too much—next time measure carefully.
- Season the filling. Add 1/4 teaspoon salt, 1/8 teaspoon black pepper, and 1/4 teaspoon paprika. Stir well. Taste it. Does it need more salt? More mustard? Adjust to your preference. This is your filling—make it taste like you want it to.
- Fill the egg whites. Spoon the filling into a piping bag or a zip-top bag with a tiny corner snipped off. Pipe the filling into each egg white half, mounding it slightly. You want a nice rounded top, not flat. If you don’t have a bag, use a small spoon to carefully fill each half. It won’t look as polished, but it’ll taste the same.
- Prepare the olive spiders. This is the fun part. Drain your can of large black olives. For each spider, you’ll need 2 olives: one for the body and one for the legs. Take one olive and slice it in half crosswise (not lengthwise). Each half becomes a spider body. Set those aside. Take the second olive and slice it lengthwise into thin strips—you want 6 to 8 thin slices per olive. These are the legs. You’ll end up with more legs than you need, which is fine. Pick the best ones.
- Assemble the spiders. Place one olive half (cut side down) on top of the filling on each deviled egg. The rounded side faces up. Now take 6 of the thin olive strips and arrange them around the body like spider legs—3 on each side, slightly angled. Press them gently into the filling so they stay put. Repeat for all 12 eggs.
- Garnish and serve. Sprinkle a light dusting of paprika over the entire platter. It adds color and makes the spiders look even more dramatic. Serve immediately or refrigerate until ready to serve.
Cooking Tips & Techniques
I’ve made these spiders more times than I can count, and I’ve learned a few things the hard way. Let me save you some trouble.
The biggest mistake people make is overboiling the eggs. If you boil them for 15 minutes instead of 12, you’ll get that weird green ring around the yolk. It’s not harmful, but it looks unappetizing, especially when you’re trying to make something pretty. Stick to the 12-minute covered rest method. It works every time.
Olive slicing is the only hard part, and it’s not actually hard—it just requires patience. Use a sharp knife. A dull knife will crush the olives and turn your spider legs into sad little mush strips. If your knife isn’t sharp enough, run it through a sharpener first. Also, pat the olives dry with a paper towel before slicing. Wet olives are slippery olives, and slippery olives are dangerous olives.
Here’s a trick I figured out after a few batches: Slice the legs first, then slice the bodies. If you slice the bodies first, you have fewer whole olives left to work with for legs, and you might run short. Do the legs first, then use the remaining olives for bodies. Also, keep a few extra olives on hand. You will inevitably squish one or two. It’s fine. Just eat the evidence.
Timing strategy: You can boil and peel the eggs up to 2 days ahead. Store them unpeeled in the fridge, then peel them the day you’re serving. You can also make the filling a day ahead and store it in a piping bag in the fridge. Just pipe it into the eggs right before serving. The olive spiders should be assembled no more than a few hours before serving, or the olives can dry out and curl at the edges.
For consistent results, use a kitchen scale to measure your mayonnaise. I know that sounds extra, but mayo measurements by volume can vary a lot depending on how you scoop. 3 tablespoons by weight is about 42 grams. If you’re not weighing, level your tablespoons with a knife for accuracy.
Variations & Adaptations
One of the best things about this recipe is how easy it is to tweak. Here are some variations I’ve tried and loved:
Spicy Spider Eggs: Add 1/4 teaspoon cayenne pepper or a few dashes of hot sauce to the filling. The heat pairs beautifully with the cool, creamy yolk and the briny olive. I made these for a friend who loves spicy food, and she ate four before anyone else got one.
Smoky Bacon Spiders: Crumble a strip of cooked bacon over each deviled egg before placing the olive spider on top. The smoky, salty crunch adds another layer of texture and flavor. Just make sure the bacon is cool so it doesn’t make the filling warm.
Dairy-Free Version: Use a vegan mayonnaise and skip the butter. Most vegan mayo brands work well—Just Mayo is my go-to. The filling will be slightly tangier but still delicious. The olives are naturally dairy-free, so the whole recipe becomes vegan-friendly with that one swap.
Colorful Spider Eyes: For an extra creepy touch, add a tiny dot of sriracha or red pepper paste to the top of each olive body to look like red spider eyes. It sounds weird, but it looks genuinely unsettling in the best way. My kids thought this was hilarious.
Mini Spider Bites: Use quail eggs instead of chicken eggs for bite-sized spiders. You’ll need about 12 quail eggs. Boil them for 4 minutes instead of 12, and use the same filling recipe—you’ll have extra filling, but that’s never a problem. These are perfect for cocktail parties where people want to graze.
If you’re serving these alongside other Halloween treats, they pair beautifully with spooky black velvet cupcakes for a sweet-and-savory combo that covers all your bases.
Serving & Storage Suggestions
These spiders are best served chilled, straight from the fridge. The cold filling holds its shape better, and the olive legs stay firm. Arrange them on a dark platter or a black serving board for maximum spooky effect. I like to scatter a few fake plastic spiders around the platter for extra drama—just warn people which ones are real and which ones are fake.
What to serve with them: These deviled eggs are perfect alongside easy sheet pan nachos for a Halloween party spread that covers both savory cravings. They also go great with a crisp green salad or a bowl of soup for a lighter meal. For drinks, a cold beer or a dry white wine cuts through the richness of the filling beautifully.
Storage instructions: Store any leftover deviled eggs in an airtight container in the refrigerator for up to 2 days. Do not freeze them—the texture of the filling will break down and become watery when thawed. If you’re making them ahead, store the boiled eggs (unpeeled) in the fridge, the filling in a piping bag, and the sliced olives in a separate container. Assemble everything no more than 4 hours before serving.
Reheating? Don’t. Deviled eggs are served cold. If you want warm deviled eggs, you’re making a different recipe entirely. Just take them out of the fridge 15 minutes before serving to take the chill off, but keep them cool enough that the filling stays firm.
How flavors develop: The filling actually gets better after a few hours in the fridge as the flavors meld together. If you can, make the filling a day ahead and let it sit overnight. The mustard and vinegar mellow out and the paprika deepens. It’s a small thing, but it makes a noticeable difference.
Nutritional Information & Benefits
Here’s the nutritional breakdown for one spider deviled egg (based on 12 servings, using full-fat mayonnaise):
- Calories: 85
- Protein: 6g
- Fat: 6g
- Carbohydrates: 1g
- Fiber: 0g
- Sugar: 0g
- Sodium: 180mg
Health benefits: Eggs are a fantastic source of high-quality protein and contain all nine essential amino acids. They’re also rich in choline, which supports brain health, and lutein, which is good for your eyes. Olives provide healthy monounsaturated fats and a decent amount of vitamin E. This isn’t health food, but it’s not junk food either—it’s a balanced, protein-rich snack that happens to look like something from a horror movie.
Dietary considerations: This recipe is naturally gluten-free, low-carb, and keto-friendly. It’s also nut-free and soy-free (check your mayo label). If you’re watching your sodium, use reduced-sodium olives or rinse the olives before slicing. The main allergens are eggs and, depending on your mayo, eggs and oil. If you need it to be completely egg-free, this recipe isn’t for you—but you can use the olive spider technique on other appetizers!
Conclusion
Look, I know deviled eggs aren’t exactly groundbreaking. People have been making them for generations. But there’s something special about taking a classic and giving it a little personality—especially when that personality is eight-legged and slightly terrifying. These Spooky Halloween Spider Deviled Eggs are proof that you don’t need fancy ingredients or complicated techniques to make something memorable. You just need a little creativity and a can of olives.
I love this recipe because it makes people smile. Every single time I serve them, someone takes a photo. Someone says “wait, those are olives?” Someone eats three before realizing they were supposed to save room for dinner. That’s the kind of recipe worth keeping in your back pocket, especially this time of year.
So go ahead—boil those eggs, slice those olives, and make the creepiest, cutest, most delicious appetizer your Halloween party has ever seen. And when someone asks how you did it? Tell them you have a secret. Just don’t tell them it only took ten extra minutes. Let them wonder.
If you make these, I’d love to hear about it. Drop a comment below and let me know how your spiders turned out. Did you add any wild variations? Did anyone actually think they were real spiders? Share your stories—I read every single one.
Frequently Asked Questions
Can I make these spider deviled eggs a day ahead?
You can prepare the components a day ahead—boil and peel the eggs, make the filling, and slice the olives—but assemble them no more than 4 hours before serving. The olive legs can dry out and curl if left too long, and the filling might weep slightly. Assemble fresh for the best presentation.
What if I can’t find large black olives?
You can use jumbo pitted black olives or even Kalamata olives for a different flavor. Kalamata olives are saltier and have a more intense taste, so the spiders will be bolder. Just make sure they’re pitted and large enough to slice into recognizable legs and bodies.
How do I keep the olive legs from falling off?
Press the legs gently but firmly into the filling. The filling acts like glue. If your filling is too stiff, it won’t hold the legs well—make sure it’s creamy enough to create a slight indent when you press the legs in. You can also use a tiny dab of cream cheese on the bottom of each leg if you’re really struggling.
Can I use this olive spider technique on other foods?
Absolutely! The olive spiders work great on top of cream cheese spread on crackers, on top of mini quiches, or even on top of a cheese ball. You can also use them as a garnish for a Halloween charcuterie board. Just make sure the surface underneath is sticky enough to hold the legs in place.
My deviled eggs always have that green ring around the yolk. How do I fix it?
The green ring is caused by overcooking. Use the 12-minute covered rest method I described above—bring the water to a boil, cover, turn off the heat, and let them sit for exactly 12 minutes. Then immediately transfer to an ice bath. This stops the cooking process and prevents that green discoloration. It also makes peeling easier, so it’s a win-win.
Pin This Recipe!
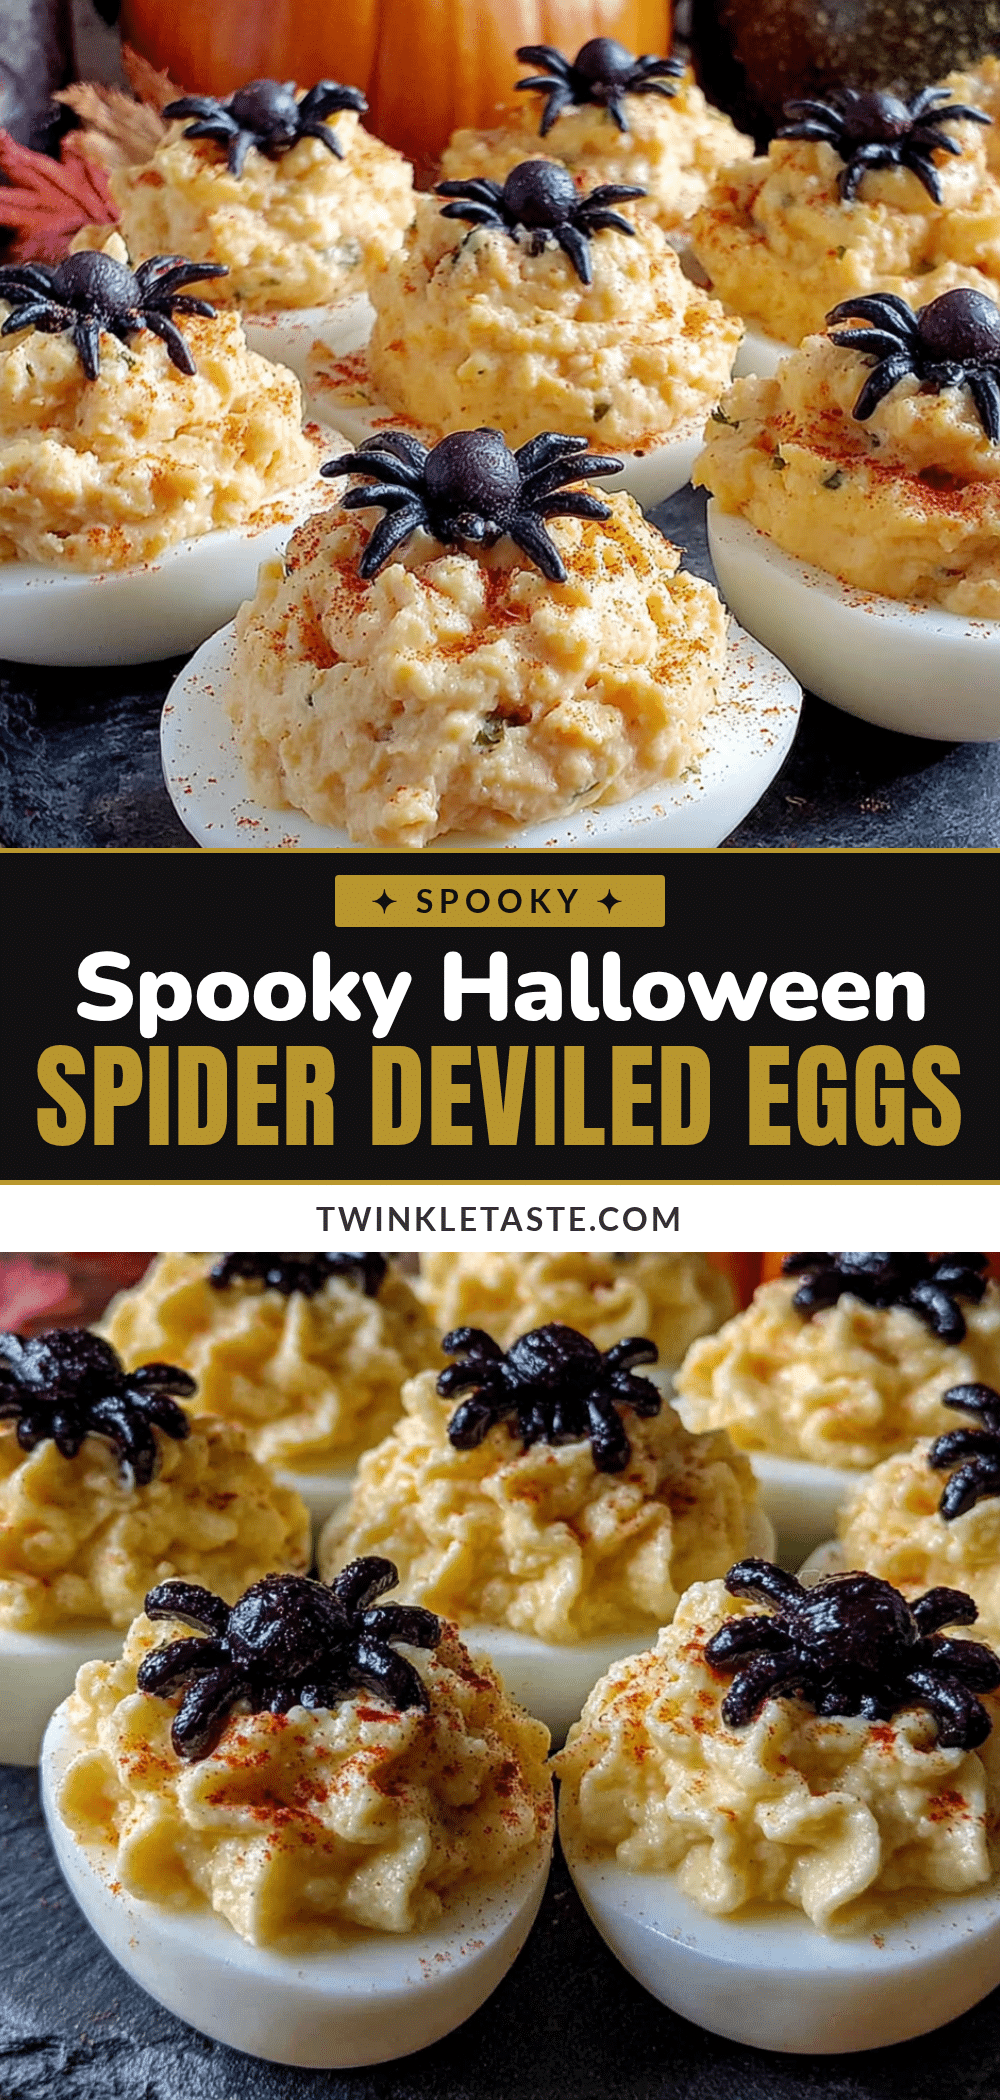
Spooky Halloween Spider Deviled Eggs: Easy & Creepy Appetizer
Turn classic deviled eggs into a creepy Halloween appetizer with black olive spiders. Quick, easy, and guaranteed to be a conversation starter at any spooky gathering.
- Prep Time: 15 minutes
- Cook Time: 12 minutes
- Total Time: 35 minutes
- Yield: 12 servings 1x
- Category: Appetizer
- Cuisine: American
Ingredients
- 6 large eggs
- 3 tablespoons mayonnaise
- 1 teaspoon yellow mustard
- 1 teaspoon white vinegar
- 1/4 teaspoon salt
- 1/8 teaspoon black pepper
- 1/4 teaspoon paprika (plus more for garnish)
- 1 can (6 ounces) large black olives
Instructions
- Boil the eggs. Place 6 large eggs in a single layer in a medium saucepan. Cover with cold water by about an inch. Bring to a rolling boil over high heat. Once boiling, cover the pot, turn off the heat, and let sit for exactly 12 minutes. Prepare a bowl of ice water.
- Ice bath the eggs. After 12 minutes, transfer eggs to the ice water bath using a slotted spoon. Let sit for at least 5 minutes, preferably 10.
- Peel the eggs. Gently tap each egg on the counter to crack the shell all over, then roll between palms to loosen. Start peeling from the wider end. Rinse under cool water.
- Slice the eggs in half lengthwise. Use a sharp knife and wipe clean between cuts. Place 12 egg white halves on a serving platter, cut side up.
- Scoop out the yolks. Gently pop yolks into a medium mixing bowl, being careful not to tear the egg whites.
- Mash the yolks. Use a fork or potato masher to break yolks into a fine crumb, about 1 minute.
- Add the wet ingredients. To the mashed yolks, add 3 tablespoons mayonnaise, 1 teaspoon yellow mustard, and 1 teaspoon white vinegar. Stir until completely smooth and creamy.
- Season the filling. Add 1/4 teaspoon salt, 1/8 teaspoon black pepper, and 1/4 teaspoon paprika. Stir well. Taste and adjust seasoning as desired.
- Fill the egg whites. Spoon filling into a piping bag or zip-top bag with a tiny corner snipped off. Pipe filling into each egg white half, mounding slightly.
- Prepare the olive spiders. Drain the can of large black olives. For each spider, use 2 olives: one for the body and one for the legs. Slice one olive in half crosswise to make two spider bodies. Slice the second olive lengthwise into thin strips (6-8 per olive) for legs.
- Assemble the spiders. Place one olive half (cut side down) on top of the filling on each deviled egg. Arrange 6 thin olive strips around the body like spider legs (3 on each side), pressing gently into the filling. Repeat for all 12 eggs.
- Garnish and serve. Sprinkle a light dusting of paprika over the entire platter. Serve immediately or refrigerate until ready to serve.
Notes
Boil eggs for exactly 12 minutes using the covered rest method to avoid green rings. Slice olive legs first, then bodies. Assemble spiders no more than 4 hours before serving to prevent olive legs from drying out. Use a sharp knife for clean olive slices.
Nutrition
- Serving Size: 1 deviled egg
- Calories: 85
- Sodium: 180
- Fat: 6
- Saturated Fat: 1.5
- Carbohydrates: 1
- Protein: 6
Keywords: Halloween deviled eggs, spider deviled eggs, spooky appetizer, Halloween party food, deviled eggs with olives


