Let’s be real for a second. I spent three Halloweens trying to make a party punch that wasn’t a total disaster before I landed on this one. The first year, I made something that looked like swamp water. The second year, it was so sweet my kids bounced off the walls for hours. The third year? I finally figured out the trick. This Kid-Friendly Candy Corn Punch is the one I wish I’d started with.
- Quick & Easy : Comes together in under 10 minutes with zero cooking required. Perfect for when the doorbell starts ringing and you realize you forgot the drinks.
- Simple Ingredients : No fancy syrups or hard-to-find mixers. Everything is from the regular grocery store.
- Perfect for Halloween Parties : The layered colors look exactly like candy corn. Kids lose their minds over it, and adults secretly love it too.
- Crowd-Pleaser : I’ve served this at three different Halloween parties now, and the bowl is always empty within an hour.
- Unbelievably Delicious : It’s fruity and creamy at the same time, with that nostalgic candy corn vibe but way better than the actual candy.
What makes this recipe different? It’s the layering technique. Most punch recipes just dump everything together and hope for the best. This one actually looks like candy corn in a cup. The kids at my son’s Halloween party last year literally gasped when I poured it. Not exaggerating. One kid said it was “magic juice,” and honestly? That’s the best compliment I’ve ever gotten.
This isn’t just another Halloween punch. It’s the one that makes you feel like you actually pulled off something special without breaking a sweat. Perfect for class parties, trunk-or-treat events, or just a fun Friday night before Halloween.
What Ingredients You Will Need
This recipe uses simple, store-bought ingredients to create something that looks way more complicated than it actually is. Most of these are probably already in your fridge or pantry.
- Orange Juice (3 cups, chilled) – Go for the pulp-free kind if you can. The pulp floats and messes up the clean layers. I like Simply Orange or Tropicana for consistent flavor.
- Pineapple Juice (2 cups, chilled) – This gives the middle layer that perfect golden-yellow color. Dole works great. Don’t use fresh pineapple juice unless you want it to foam up weird.
- Vanilla Ice Cream (4 cups, softened slightly) – The cheap store brand actually works better here. Premium ice cream has too much butterfat and doesn’t melt into that creamy texture you want. Let it sit out for 5-10 minutes before using.
- Lemon-Lime Soda (3 cups, chilled) – Sprite or 7UP. Don’t use diet versions unless you want a weird aftertaste. The bubbles are essential for the texture.
- Orange Sherbet (2 cups) – This is the secret ingredient that makes the top layer bright orange and gives it that creamy-fizzy thing. You can find it next to the ice cream.
- Whipped Cream (for topping) – Reddi-Whip is fine, or make your own if you’re feeling fancy. The canned stuff holds up better at parties though.
- Yellow and Orange Food Coloring (optional) – If your juices aren’t bright enough, a tiny drop helps intensify the candy corn look. Gel food coloring works best.
- Candy Corn Candies (for garnish) – A handful for the rim of the punch bowl or floating on top. Brach’s is the classic choice.
One thing I learned the hard way – chill everything overnight. Warm ingredients ruin the layering effect and make the whole thing look murky. Trust me on this one. I learned that lesson at my daughter’s preschool Halloween party, and let’s just say the punch looked more like muddy water than candy corn that day.
Equipment Needed
You don’t need anything fancy for this recipe. Here’s what you’ll need:
- Large Punch Bowl (at least 4-quart capacity) – Glass is ideal so people can see the layers. I got mine at Target for like $15. A clear plastic one works too for kids’ parties.
- Measuring Cups – For getting the proportions right. Trust the measurements; they matter for the layering.
- Large Spoon or Ladle – For stirring and serving. A slotted spoon is nice for scooping out the sherbet chunks.
- Ice Cream Scoop – For scooping the sherbet into uniform balls. Makes it look prettier.
- Small Bowls – For holding garnishes and extra candy corn.
- Pitcher – For mixing the juices beforehand if you’re prepping ahead.
If you don’t have a punch bowl, a large glass salad bowl works fine. I used one for years before I finally bought an actual punch bowl. Nobody cared what it was served in, they just drank it all anyway.
Preparation Method
Alright, let’s make this happen. The key to this punch is the order of operations – you can’t just dump everything in and hope for the best. Trust the process.
- Chill everything overnight. Put your orange juice, pineapple juice, lemon-lime soda, and punch bowl in the fridge for at least 8 hours. The sherbet and ice cream should go in the freezer, obviously. Cold ingredients are non-negotiable here. Warm soda makes everything flat and sad.
- Set out your ice cream. About 10 minutes before you start, take the vanilla ice cream out of the freezer. You want it soft enough to scoop but not melted. If it’s too hard, you’ll have chunks floating around instead of that creamy texture.
- Mix the juice base. In your pitcher, combine 3 cups chilled orange juice and 2 cups chilled pineapple juice. Stir gently. If your juices look pale, add one tiny drop of yellow food coloring and one tiny drop of orange. I mean tiny – you can always add more but you can’t take it out.
- Layer the punch bowl. Pour the juice mixture into your chilled punch bowl. It should come about halfway up the sides. This is the bottom orange layer.
- Add the ice cream. Scoop in the softened vanilla ice cream in dollops. Don’t stir yet! Let it float on top of the juice. The ice cream will start to melt and create that creamy white middle layer. Let it sit for 2-3 minutes.
- Pour in the soda. Slowly pour the chilled lemon-lime soda down the side of the bowl. Pouring it directly into the center will disturb the layers. Go slow and steady. The bubbles will start to lift the ice cream, creating that beautiful gradient effect.
- Top with sherbet. Use your ice cream scoop to add small scoops of orange sherbet on top. Don’t stir them in – let them float. They’ll create bright orange spots on the surface that look amazing.
- Garnish and serve. Add a dollop of whipped cream on top of each serving if you want. Float a few candy corn pieces on top of the punch bowl. Serve immediately in clear cups so everyone can see the layers.
Here’s a pro tip I figured out after ruining two batches – don’t stir the punch at all until you’re ready to serve the second round. The layers are the whole point. When you stir it, it turns into a weird beige color that looks nothing like candy corn. If you want to keep the effect going, just add more ice cream and sherbet to the remaining juice.
Cooking Tips & Techniques
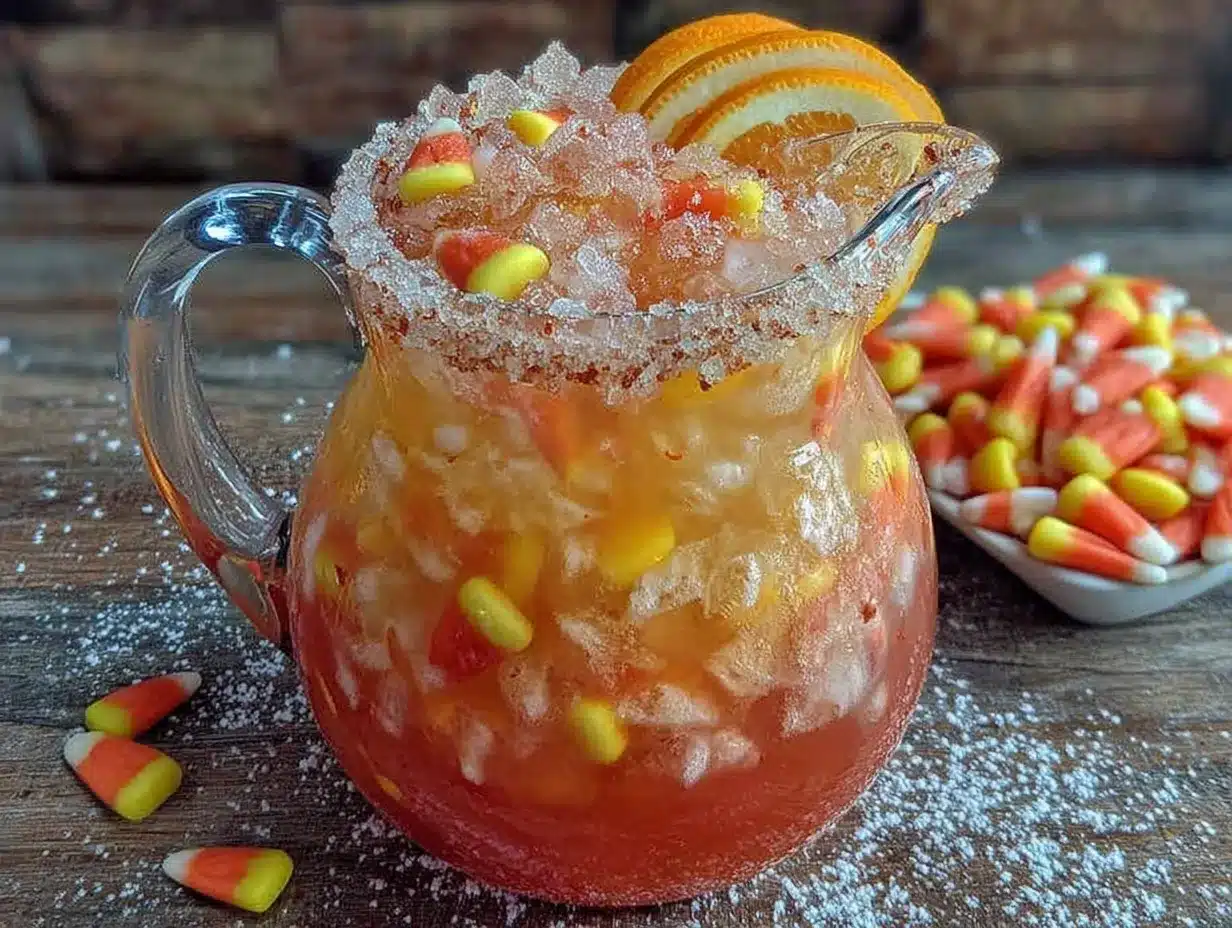
I’ve made this punch at least a dozen times now, and I’ve messed it up in pretty much every way possible. Here’s what I’ve learned so you don’t have to make the same mistakes.
The temperature thing is real. The first time I made this, I used room temperature juice because I forgot to chill it. The ice cream melted instantly, the soda went flat, and the whole thing looked like something you’d find in a swamp. Cold ingredients are not optional – they’re the whole trick.
Don’t overmix the layers. I know it’s tempting to stir everything together to make sure the flavors combine, but resist the urge. The layers will naturally mix as people scoop it into their cups. That’s part of the fun – every cup looks slightly different.
Make extra ice cream mixture. If you’re serving more than 8-10 people, double the recipe. I learned this the hard way at my son’s class party. The first batch was gone in 15 minutes, and I had to scramble to make a second one while 20 kids stared at me expectantly.
Use clear cups. Red Solo cups are fine for beer, but for this punch you want people to see the candy corn colors. I use those clear plastic party cups from the grocery store. They cost like $3 for a pack of 50 and make the punch look way more impressive.
Prep everything before the party starts. Have your juices measured, your ice cream softened, and your garnishes ready. Once the doorbell starts ringing, you won’t have time to measure things. I keep a little station set up with everything measured out so I can assemble it in about 3 minutes flat.
Variations & Adaptations
This punch is super flexible. Here are some ways I’ve changed it up over the years:
- Dairy-Free Version : Swap the vanilla ice cream for coconut milk ice cream and use dairy-free whipped topping. The texture is slightly different but still delicious. I tried this for a friend who’s lactose intolerant and honestly? It was almost better.
- Sparkling Water Option : If you want to cut down on sugar, use sparkling water instead of lemon-lime soda. Add a tablespoon of honey or agave to the juice mixture to keep some sweetness. It’s less sweet but still really refreshing.
- Adult Version : For grown-up parties, add a cup of vodka or coconut rum to the juice mixture. Just don’t label it “kid-friendly” obviously. I’ve made this for Halloween parties with friends and it goes fast.
- Berry Twist : Add a handful of frozen raspberries or strawberries to the punch bowl. They sink to the bottom and look like little red gems against the orange layer. Plus they add a tart pop of flavor.
- Pumpkin Spice Version : Add a teaspoon of pumpkin pie spice to the vanilla ice cream before scooping. It gives it that fall flavor without being overwhelming. This pairs great with my homemade pumpkin spice syrup if you want to drizzle some on top.
My personal favorite variation is the one where I add a scoop of creamy strawberry cheesecake overnight oats on the side for a breakfast-for-dinner Halloween treat. Something about the combo just works.
Serving & Storage Suggestions
This punch is best served immediately, but here’s how to handle it if you’re making it ahead or dealing with leftovers.
Serve it cold. The punch should be served within 30 minutes of assembling. After that, the ice cream melts completely and the layers disappear. If you’re having a long party, just make a fresh batch every hour. It’s quick enough that this isn’t a big deal.
Presentation matters. I serve this in clear plastic cups with a piece of candy corn stuck to the rim. Sometimes I’ll rim the cups with orange sanding sugar for extra sparkle. Kids love it, and honestly? Adults do too.
What to serve with it. This punch pairs perfectly with salty snacks. I always put out a bowl of pretzels or popcorn nearby. The sweet-salty combo is unstoppable. For a full Halloween spread, try it alongside some spiderweb brown butter rice krispie treats for a dessert table that’ll blow everyone away.
Storage. If you have leftovers (unlikely, but possible), pour them into a pitcher and refrigerate. The next day, it’ll be flat and the layers will be gone, but it still tastes good. Just stir it up and serve over ice. I wouldn’t keep it longer than 24 hours though.
Reheating. Don’t. Just don’t. This is a cold drink. If you want a warm Halloween drink, make hot apple cider instead.
How flavors develop. Honestly, this punch tastes best fresh. The carbonation is part of the experience. If you let it sit too long, it goes flat and the texture gets weird. Make it fresh, serve it fast, and enjoy the chaos.
Nutritional Information & Benefits
Let’s be real – this is a treat, not a health food. But here’s the breakdown if you’re curious.
Per 8-ounce serving (approximate):
- Calories: 220
- Fat: 8g
- Carbohydrates: 35g
- Sugar: 28g
- Protein: 3g
- Calcium: 10% DV
- Vitamin C: 45% DV
The orange juice actually provides a decent amount of vitamin C, which is nice during cold and flu season. The dairy from the ice cream adds some calcium and protein, so it’s not completely empty calories. But let’s not pretend this is a smoothie. It’s a Halloween party drink, and it’s supposed to be fun.
If you’re watching sugar intake, you can cut the soda in half and add sparkling water instead. It’ll still taste good, just less sweet. I’ve done this for my own kids when I didn’t want them bouncing off the walls at 8 PM.
Potential allergens: dairy (from ice cream and whipped cream). If you’re serving a crowd with allergies, make the dairy-free version I mentioned above. Nobody will know the difference.
Conclusion
This Kid-Friendly Candy Corn Punch is honestly the easiest way to make your Halloween party feel special without spending hours in the kitchen. It looks impressive, tastes amazing, and kids absolutely love it. I’ve made it for class parties, neighborhood gatherings, and family Halloween nights, and it never fails to get compliments.
Don’t be afraid to make it your own. Add extra candy corn, swap the juices, or try the variations I mentioned. The best recipes are the ones you tweak to fit your family’s tastes. That’s what cooking is all about – making things work for you.
If you try this recipe, I’d love to hear about it. Drop a comment below and let me know how it turned out. Did your kids love it? Did you add your own twist? I read every comment and I honestly get so excited when people tell me their versions turned out great.
And hey, if you’re looking for more easy Halloween treats, check out my black sesame latte with caramel drip for a spooky adult drink option. Or try these crispy baked chicken nuggets for a savory option that pairs perfectly with the sweet punch. Happy Halloween, friends!
Frequently Asked Questions
Can I make this punch ahead of time?
Not really. The layers start to disappear after about 30 minutes, and the soda goes flat. Your best bet is to prep all the ingredients and assemble it right before serving. It only takes 5 minutes, I promise.
Can I use frozen juice concentrate instead of bottled?
You can, but it won’t taste as good. Frozen concentrate has a different flavor profile and usually needs water added. Stick with bottled juice for the best results. Trust me on this one.
How many servings does this recipe make?
This recipe makes about 8-10 servings if you’re using 8-ounce cups. If you’re serving a crowd, double or triple it. I usually make a double batch for parties of 15 or more people.
Can I use a different soda?
Sure! Ginger ale works great for a spicier flavor. Lemon-lime soda is the classic choice, but feel free to experiment. Just avoid cola – the color will ruin the candy corn effect and the flavor clashes with the fruit juices.
How do I keep the layers from mixing?
The secret is temperature. Everything needs to be really cold, and you need to pour the soda slowly down the side of the bowl. Don’t stir until you’re serving the last few cups. If you want to refresh the layers, just add more ice cream and sherbet.
Pin This Recipe!
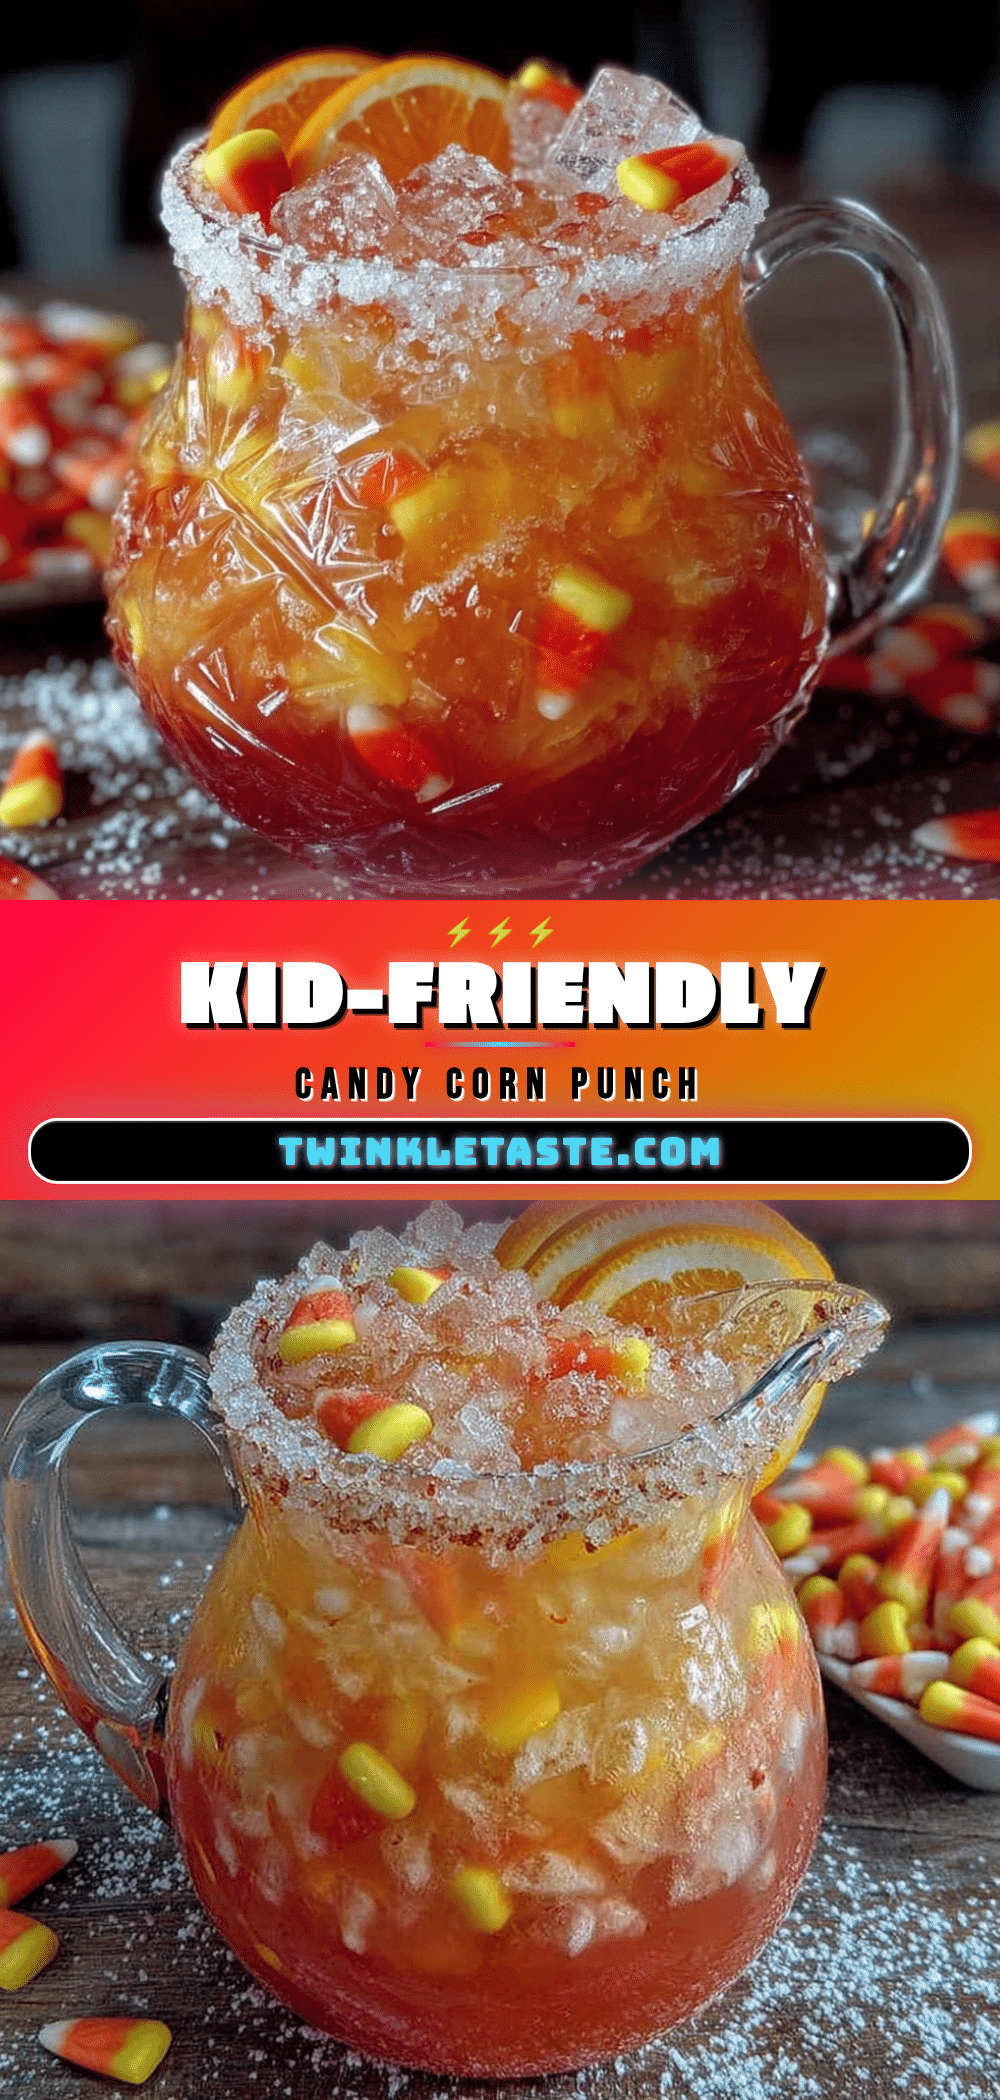
Kid-Friendly Candy Corn Punch: The Best Halloween Party Drink
This Kid-Friendly Candy Corn Punch is the easiest way to make your Halloween party feel special without spending hours in the kitchen. It looks impressive, tastes amazing, and kids absolutely love it.
- Prep Time: 10 minutes
- Cook Time: 0 minutes
- Total Time: 10 minutes
- Yield: 8-10 servings 1x
- Category: Drink
- Cuisine: American
Ingredients
- 3 cups orange juice, chilled (pulp-free recommended)
- 2 cups pineapple juice, chilled
- 4 cups vanilla ice cream, softened slightly
- 3 cups lemon-lime soda (Sprite or 7UP), chilled
- 2 cups orange sherbet
- Whipped cream (for topping)
- Yellow and orange food coloring (optional, gel preferred)
- Candy corn candies (for garnish)
Instructions
- Chill everything overnight: orange juice, pineapple juice, lemon-lime soda, and punch bowl in the fridge for at least 8 hours. Keep sherbet and ice cream in the freezer.
- About 10 minutes before starting, take the vanilla ice cream out of the freezer to soften slightly.
- In a pitcher, combine 3 cups chilled orange juice and 2 cups chilled pineapple juice. Stir gently. If juices look pale, add one tiny drop each of yellow and orange food coloring.
- Pour the juice mixture into the chilled punch bowl. It should come about halfway up the sides.
- Scoop in the softened vanilla ice cream in dollops. Do not stir. Let it float on top and sit for 2-3 minutes.
- Slowly pour the chilled lemon-lime soda down the side of the bowl to avoid disturbing the layers.
- Use an ice cream scoop to add small scoops of orange sherbet on top. Do not stir.
- Garnish with whipped cream and candy corn pieces. Serve immediately in clear cups.
Notes
Chill all ingredients overnight for best layering. Do not stir the punch until serving the last few cups to maintain the candy corn effect. For a dairy-free version, swap vanilla ice cream for coconut milk ice cream and use dairy-free whipped topping. For an adult version, add 1 cup of vodka or coconut rum to the juice mixture.
Nutrition
- Serving Size: 8 ounces
- Calories: 220
- Sugar: 28
- Sodium: 80
- Fat: 8
- Saturated Fat: 5
- Carbohydrates: 35
- Protein: 3
Keywords: Halloween punch, candy corn punch, kid-friendly punch, Halloween party drink, layered punch, non-alcoholic punch


