My friend Sarah showed up at my door with a bottle of wine and a look that said “I need carbs and comfort, stat.” I’d just gotten home from a long week myself, and my fridge was basically a science experiment at that point. But I did have two apples rolling around in the fruit bowl—slightly bruised, definitely not pretty, but still good. And I had oats, butter, brown sugar, and a desperate need for something warm and sweet.
I wasn’t about to make a whole pie (who has the energy?), and I didn’t want leftovers taunting me from the fridge for days. So I grabbed two little ramekins, chopped those sad apples, and threw together the easiest little crisps I’ve ever made. Fifteen minutes of prep, thirty minutes in the oven, and we had two perfect little cups of bubbling, golden-brown happiness.
That night, sitting on my couch with a fork in one hand and a warm ramekin in the other, I realized I’d stumbled onto something special. These individual apple crisp cups aren’t fussy, they don’t require a rolling pin or pastry skills, and they’re sized exactly for two people who just want a little something sweet. No more, no less.
Honestly, they’ve become my go-to for those nights when you want dessert but you don’t want to commit to a whole cake. They’re forgiving, they’re fast, and they taste like you spent way more effort than you actually did.
Why You’ll Love These Individual Apple Crisp Cups
I’ve tested this recipe more times than I care to admit—tweaking the oat-to-flour ratio, playing with spice levels, even trying different apple varieties to see what works best. So trust me when I say this version is the one. Here’s why it works so well.
- Made for Two : No leftovers, no waste, no temptation to eat an entire 9×13 pan by yourself. These are portioned perfectly for a cozy night in.
- Super Simple Ingredients : You probably have everything already. Oats, flour, butter, brown sugar, apples, cinnamon—that’s it. No grocery store trips required.
- Ready in Under an Hour : From apple-chopping to fork-in-mouth, you’re looking at about 45 minutes total. Most of that is hands-off oven time.
- Completely Customizable : Swap the apples for pears, add some nuts, throw in dried cranberries—this recipe is a template, not a rulebook.
- Foolproof for Beginners : There’s no tricky pastry to roll, no custard to curdle, no complicated techniques. If you can stir, you can make these.
- That Texture Though : The topping gets all golden and crunchy while the apples underneath turn soft and jammy. It’s the kind of contrast that makes you close your eyes after the first bite.
These little cups have saved me on quiet weeknights, last-minute dinner guests, and even one particularly sad Valentine’s Day when I was single and refused to buy a whole pie for myself. They’re comfort food that doesn’t require a crowd—just two people, two ramekins, and a shared sweet tooth.
What Ingredients You Will Need
This recipe keeps things refreshingly simple. You don’t need any exotic ingredients or specialty items—just good old-fashioned pantry staples that come together to make something genuinely delicious. Let’s break down each one so you know exactly what to look for.
For the Apple Filling
- 2 medium apples (about 300g total) — I prefer Honeycrisp or Granny Smith for their balance of sweetness and tartness. They hold their shape nicely without turning into complete mush. If you want something sweeter, Fuji or Gala work great too.
- 2 tablespoons brown sugar (25g) — Light or dark both work, but dark adds a deeper molasses flavor that I personally love with apples.
- 1 tablespoon granulated sugar (12g) — Just a little to help the apples soften and release their juices.
- 1 tablespoon all-purpose flour (8g) — This helps thicken the juices so you don’t end up with watery filling.
- 1/2 teaspoon ground cinnamon — The backbone of any good apple dessert. I use Vietnamese cinnamon when I can find it—it’s stronger and more aromatic.
- 1/4 teaspoon ground nutmeg — Freshly grated if you have it, but pre-ground is totally fine.
- 1 teaspoon lemon juice — Keeps the apples from browning and adds a little brightness to balance the sweetness.
- Pinch of salt — Don’t skip this! Salt makes everything taste more like itself.
For the Crisp Topping
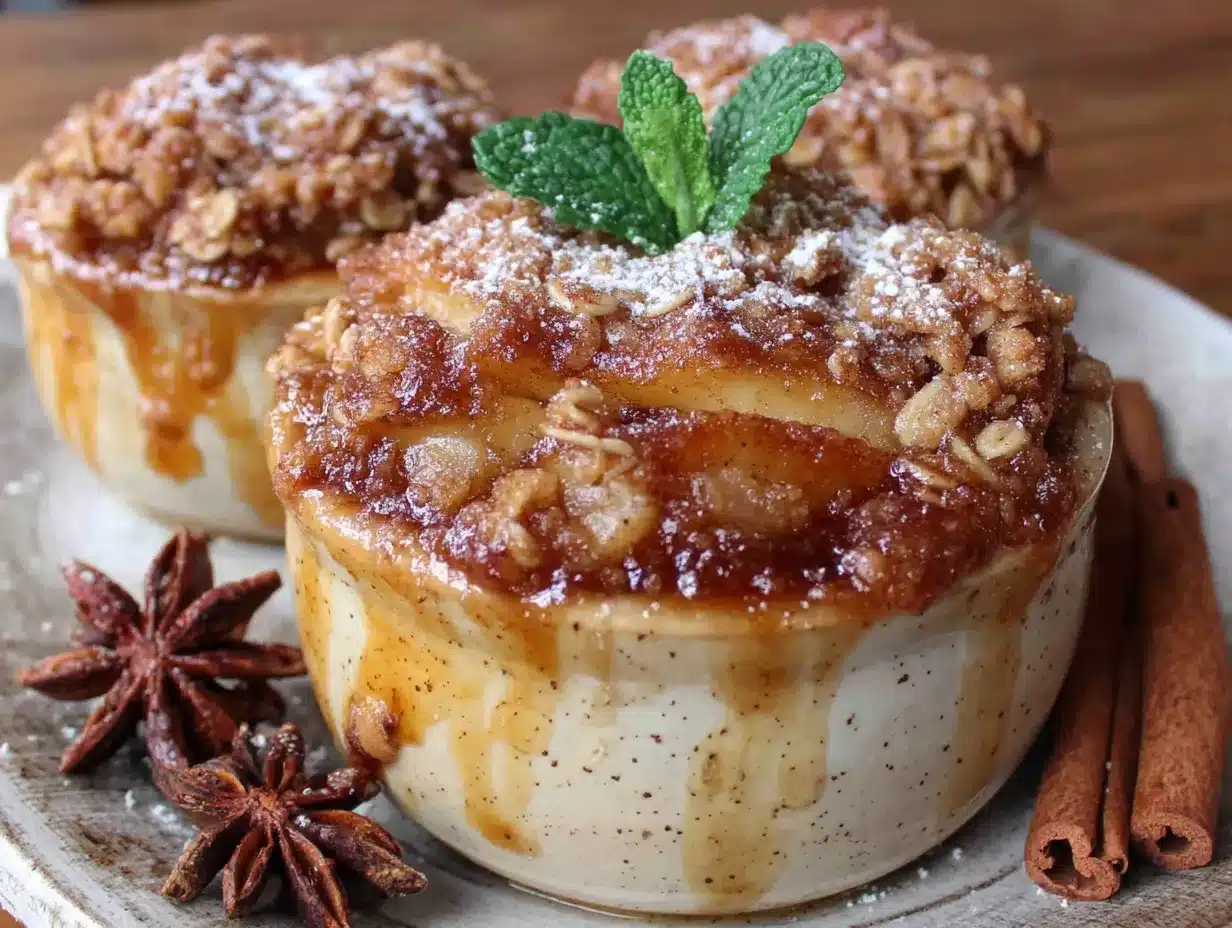
- 1/3 cup old-fashioned rolled oats (30g) — Please use old-fashioned oats, not quick oats. The texture is way better—you get those nice chewy bits that make a crisp a crisp.
- 1/3 cup all-purpose flour (40g) — Creates the crumbly structure.
- 1/4 cup brown sugar (50g), packed — This is what gives the topping that caramelized, crunchy edge.
- 1/4 cup unsalted butter (57g), cold and cut into small cubes — Cold butter is key here. It creates those little pockets of flaky goodness as it melts in the oven. I use Kerrygold when I can, but any good unsalted butter works.
- 1/4 teaspoon ground cinnamon — Because you can never have too much cinnamon.
- Pinch of salt — Balances the sweetness and brings out the oat flavor.
- Optional: 2 tablespoons chopped pecans or walnuts (15g) — Adds crunch and a little nutty depth. I add them about half the time, depending on my mood.
Equipment Needed
You don’t need a fancy kitchen for this recipe. Here’s what you’ll need:
- Two 8-ounce ramekins (or any small oven-safe dishes about 4 inches wide) — These are the star of the show. I got mine at a thrift store for a dollar each, and they’ve been used more than any other dish I own. If you don’t have ramekins, small oven-safe bowls or even a muffin tin will work.
- Mixing bowls — One medium for the filling, one small for the topping.
- Chef’s knife and cutting board — For chopping those apples.
- Measuring cups and spoons — Or a kitchen scale if you want to be precise. I use both, honestly—cups for convenience, scale for accuracy.
- Pastry cutter or fork — For cutting butter into the topping. Two forks work in a pinch, or you can use your fingertips if your hands are cold.
- Baking sheet — Place your ramekins on a baking sheet to catch any bubbly overflow. Trust me on this one.
- Vegetable peeler — Optional, depending on whether you peel your apples. I usually do, but some people love the texture of the skin.
If you don’t have ramekins, you can also make this in a small 6-inch cast iron skillet or even a single larger dish and just portion it out after baking. The beauty of this recipe is its flexibility.
Preparation Method
Alright, let’s get cooking. This is straightforward, but I’ll walk you through each step with the little details that make a difference.
- Preheat your oven to 350°F (175°C) and place a baking sheet on the middle rack. Getting the oven hot first means it’s ready when you are.
- Peel and chop your apples. Peel them if you want (I usually do for a smoother texture), then cut them into roughly 1/2-inch cubes. You want them small enough to cook through quickly but big enough to hold some shape. Aim for about 2 cups of chopped apples total. Toss them in a bowl with the lemon juice right away so they don’t turn brown while you’re working.
- Make the filling. To the apples, add the brown sugar, granulated sugar, flour, cinnamon, nutmeg, and salt. Stir everything together until the apples are evenly coated. You’ll see the flour and sugar start to create a little syrupy coating—that’s exactly what you want. Set this aside while you make the topping.
- Make the crisp topping. In a separate bowl, combine the oats, flour, brown sugar, cinnamon, and salt. Add the cold butter cubes. Now, use a pastry cutter, two forks, or your fingertips to cut the butter into the dry ingredients. You’re looking for a crumbly mixture with pea-sized butter pieces throughout. Some butter will be fully incorporated, some will be in little chunks—that’s perfect. If you’re adding nuts, stir them in now.
- Assemble the cups. Divide the apple mixture evenly between your two ramekins. The apples should come almost to the top—they’ll shrink a bit as they cook. Now sprinkle the topping over each one, pressing down gently so it sticks to the apples. Don’t pack it too tight though; you want those craggy bits to get crispy.
- Bake. Place the ramekins on your preheated baking sheet and bake for 30-35 minutes. You’ll know they’re done when the topping is golden brown and you can see the apple juices bubbling up around the edges. Your kitchen will smell like a fall candle commercial at this point.
- Cool slightly before serving. Let them sit for at least 5-10 minutes. The filling will be molten-hot straight out of the oven (ask me how I know), and giving them a few minutes lets the juices thicken up a bit. Plus, you won’t burn your mouth.
One thing I learned the hard way—don’t skip the baking sheet underneath. The first time I made these, I had apple syrup dripping all over my oven floor. The baking sheet catches any overflow and saves you a messy cleanup.
Cooking Tips & Techniques
After making these more times than I can count, I’ve picked up a few tricks that make a real difference. Here are the ones I wish I’d known from the start.
Use cold butter for the topping. I cannot stress this enough. Warm butter gets absorbed into the flour and oats, and you end up with a dense, pasty topping instead of those beautiful golden crumbles. If your kitchen is warm, pop the butter in the freezer for 10 minutes before cutting it in.
Don’t overwork the topping. When you’re cutting in the butter, stop while there are still visible butter bits. Those little pockets of butter melt in the oven and create steam pockets, which gives you that light, crispy texture. Overmixing makes it tough.
Let the apples macerate. If you have an extra 10-15 minutes, let the chopped apples sit with the sugar and spices before assembling. This draws out some of their natural juices and creates a richer, more syrupy filling. I do this while I’m making the topping.
Watch your oven. Ovens run hot or cold, so start checking at the 25-minute mark. You want deep golden brown on top, not burnt. If the topping is browning too fast but the apples aren’t bubbling yet, tent loosely with foil for the last 5 minutes.
Size matters with apples. Too big and they won’t soften enough; too small and they turn into applesauce. Aim for that 1/2-inch cube size—it’s the sweet spot for texture.
I once forgot to add the flour to the filling, and ended up with apple soup. Learn from my mistakes—that tablespoon of flour is doing important thickening work.
Variations & Adaptations
This recipe is incredibly forgiving, so feel free to play around. Here are some variations I’ve tried and loved.
Gluten-Free Version : Swap the all-purpose flour in both the filling and topping with a good gluten-free 1:1 baking flour. I’ve used Bob’s Red Mill and King Arthur with great results. Make sure your oats are certified gluten-free too.
Vegan Adaptation : Use cold coconut oil or vegan butter instead of regular butter. I’ve tried both, and coconut oil gives a slightly different texture—crispier, almost shortbread-like—which is honestly delicious in its own way.
Spice It Up : Add 1/4 teaspoon cardamom or ginger to the filling for a more complex flavor profile. I sometimes add a pinch of cloves too, but go easy—it’s potent stuff.
Mix Up the Fruit : Pears work beautifully here, or a mix of apples and pears. In summer, try peaches or nectarines with a little almond extract in the topping. In winter, add some dried cranberries or chopped dried figs to the apple mixture.
Boozy Option : Add 1 tablespoon of bourbon, dark rum, or calvados to the apple filling. It adds a warmth that’s perfect for cold nights. Cook off the alcohol in the oven, so you’re just left with the flavor.
Single Serving : Halve the recipe easily for one ramekin. Or make the full batch and save one for later (see storage tips below).
My personal favorite variation? Adding a handful of fresh or frozen raspberries to the apple mixture. The tartness cuts through the sweetness perfectly, and the color is gorgeous.
Serving & Storage Suggestions
These little crisps are best served warm, straight from the oven. That’s when the topping is at its crispiest and the apples are at their most tender and saucy.
How to Serve : A scoop of vanilla ice cream is the classic pairing, and for good reason—the cold creaminess against the warm, spiced apples is pure magic. If you don’t have ice cream, a dollop of whipped cream or a drizzle of heavy cream works beautifully. For a less indulgent option, try Greek yogurt or a spoonful of crème fraîche.
What to Pair It With : These cups are wonderful on their own, but they also pair nicely with a cup of hot coffee or a mug of spiced tea. If you’re feeling extra cozy, serve them alongside a warm cozy 5-ingredient dorm ramen upgrade bowl for a sweet-and-savory dinner combo that hits all the right notes. For a fall-themed dessert spread, try them with some brown sugar pumpkin coffee cake for a double dose of warm, spiced comfort.
Storing Leftovers : If you somehow have leftovers (unlikely, but possible), cover each ramekin with foil or plastic wrap and store in the refrigerator for up to 3 days. The topping will lose some of its crunch, but the flavor will still be great.
Reheating : Pop them back in a 350°F oven for 10-12 minutes to re-crisp the topping. The microwave works in a pinch (about 45 seconds), but the topping will be soft rather than crunchy. I usually go with the oven—it’s worth the extra few minutes.
Freezing : You can freeze the unbaked, assembled cups. Wrap them tightly in plastic wrap and then foil, and freeze for up to 3 months. Bake from frozen, adding about 10 minutes to the baking time. I’ve done this for last-minute dessert emergencies, and it works like a charm.
The flavors actually deepen a bit overnight, so day-old apple crisp is still pretty fantastic—especially with a fresh scoop of ice cream to wake it up.
Nutritional Information & Benefits
These individual apple crisp cups are a treat, but they also have some redeeming qualities. Here’s a rough estimate per serving (without ice cream or toppings).
| Nutrient | Per Serving |
|---|---|
| Calories | ~380 |
| Total Fat | 14g |
| Saturated Fat | 8g |
| Carbohydrates | 62g |
| Fiber | 5g |
| Sugar | 38g |
| Protein | 4g |
Apples are a good source of fiber and vitamin C, and oats provide soluble fiber that’s great for heart health. The cinnamon in this recipe isn’t just for flavor—it has anti-inflammatory properties and can help regulate blood sugar. Not bad for a dessert, right?
That said, this is definitely a dessert, not a health food. But compared to a slice of apple pie (which can easily top 500 calories with a buttery crust), these individual cups feel a little more reasonable. The portion control helps too—one ramekin is satisfying without being overwhelming.
If you’re watching your sugar intake, you can reduce the brown sugar by a tablespoon or two without sacrificing too much flavor. The natural sweetness of the apples does a lot of the heavy lifting here.
Conclusion
These easy individual apple crisp cups have become a staple in my kitchen for a reason. They’re simple enough for a Tuesday night but special enough for a dinner party. They don’t require any special skills or equipment, and they deliver that warm, cozy, apple-pie feeling without the fuss of rolling out dough.
What I love most about this recipe is how adaptable it is. You can make it your own—swap the fruit, adjust the spices, add nuts or leave them out. It’s a forgiving recipe that rewards experimentation, which is exactly the kind of cooking I love.
So next time you have two apples and a craving for something sweet, give these a try. Grab a friend, scoop some ice cream on top, and enjoy a little moment of warmth and sweetness. And if you come up with a variation I haven’t tried, I’d love to hear about it. Drop a comment below and share your version—I’m always looking for new ideas.
Happy baking, friends. Your ramekins are waiting.
Frequently Asked Questions
Can I use quick oats instead of old-fashioned oats?
You can, but the texture won’t be the same. Quick oats break down more and create a softer, less crunchy topping. Old-fashioned oats give you those nice chewy bits that make a crisp so satisfying. If quick oats are all you have, it’ll still taste good—just don’t expect the same crunch.
Do I have to peel the apples?
Not at all. Some people love the texture and color the skin adds. If you leave the skin on, just make sure to wash the apples well and chop them into small pieces. The skin will soften during baking, though it won’t disappear completely. I usually peel mine, but it’s totally a personal preference thing.
Can I double this recipe for a crowd?
Absolutely. This recipe scales beautifully. For a larger group, you can make it in an 8×8 baking dish or a 9-inch pie plate. Just increase the baking time by 5-10 minutes since you’ll have a deeper layer of filling. Keep an eye on the topping and tent with foil if it browns too quickly.
Why is my topping not crunchy?
Most likely, your butter was too warm when you mixed it in, or you overworked the topping. Cold butter is key—it creates steam pockets as it melts, which gives you that light, crispy texture. Also, make sure your oven is fully preheated before baking. A hot oven helps the topping set quickly rather than slowly melting into the apples.
Can I make these ahead of time?
Yes! You can assemble the cups completely (filling and topping) up to 24 hours in advance. Cover and refrigerate until ready to bake. You may need to add 5 extra minutes to the baking time since you’re starting from cold. You can also freeze them unbaked for up to 3 months—just bake from frozen and add about 10 minutes to the time.
Pin This Recipe!
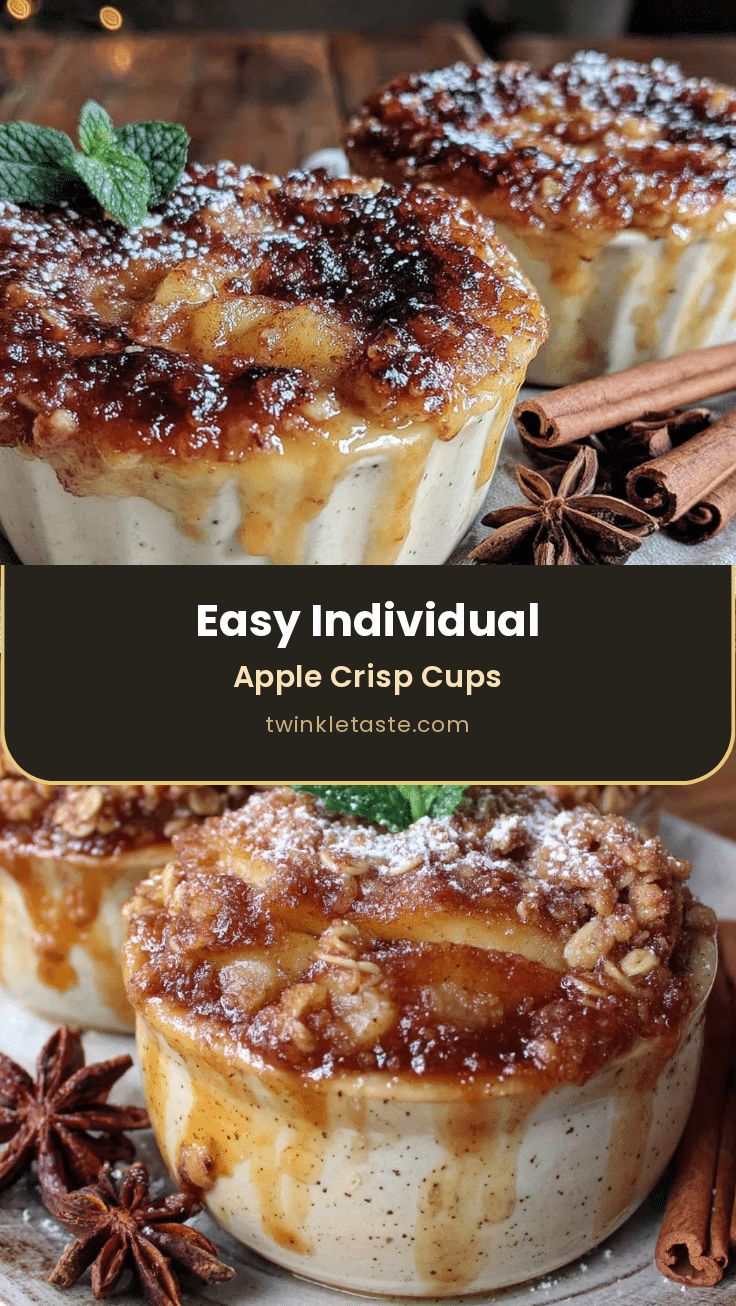
Easy Individual Apple Crisp Cups: Perfect Dessert for Two

These individual apple crisp cups are the perfect dessert for two, featuring a warm, spiced apple filling and a golden, crunchy oat topping. Ready in under an hour with simple pantry ingredients, they’re a cozy, foolproof treat for any occasion.
- Prep Time: 15 minutes
- Cook Time: 30 minutes
- Total Time: 45 minutes
- Yield: 2 servings 1x
- Category: Dessert
- Cuisine: American
Ingredients
- 2 medium apples (about 300g total), peeled and chopped into 1/2-inch cubes
- 2 tablespoons brown sugar (25g)
- 1 tablespoon granulated sugar (12g)
- 1 tablespoon all-purpose flour (8g)
- 1/2 teaspoon ground cinnamon
- 1/4 teaspoon ground nutmeg
- 1 teaspoon lemon juice
- Pinch of salt
- 1/3 cup old-fashioned rolled oats (30g)
- 1/3 cup all-purpose flour (40g)
- 1/4 cup brown sugar (50g), packed
- 1/4 cup unsalted butter (57g), cold and cut into small cubes
- 1/4 teaspoon ground cinnamon
- Pinch of salt
- Optional: 2 tablespoons chopped pecans or walnuts (15g)
Instructions
- Preheat your oven to 350°F (175°C) and place a baking sheet on the middle rack.
- Peel and chop your apples into roughly 1/2-inch cubes. Toss them in a bowl with the lemon juice right away.
- To the apples, add the brown sugar, granulated sugar, flour, cinnamon, nutmeg, and salt. Stir everything together until the apples are evenly coated. Set aside.
- In a separate bowl, combine the oats, flour, brown sugar, cinnamon, and salt. Add the cold butter cubes. Use a pastry cutter, two forks, or your fingertips to cut the butter into the dry ingredients until the mixture is crumbly with pea-sized butter pieces. If adding nuts, stir them in now.
- Divide the apple mixture evenly between two 8-ounce ramekins. Sprinkle the topping over each one, pressing down gently.
- Place the ramekins on the preheated baking sheet and bake for 30-35 minutes, until the topping is golden brown and the apple juices are bubbling around the edges.
- Let them cool for at least 5-10 minutes before serving.
Notes
Use cold butter for the topping to ensure a crunchy texture. Don’t overwork the topping; leave visible butter bits. Let the apples macerate with sugar and spices for 10-15 minutes if time allows. Place ramekins on a baking sheet to catch any overflow. For gluten-free, use a 1:1 gluten-free flour blend and certified gluten-free oats. For vegan, use cold coconut oil or vegan butter.
Nutrition
- Serving Size: 1 ramekin
- Calories: 380
- Sugar: 38
- Fat: 14
- Saturated Fat: 8
- Carbohydrates: 62
- Fiber: 5
- Protein: 4
Keywords: apple crisp, individual dessert, dessert for two, easy apple crisp, apple crisp cups, fall dessert, comfort food


