My sister showed up at my door at 5:47 PM on a Tuesday. She had that look—the one that says “I forgot to grocery shop again and I’m starving.” I opened the fridge and found chicken thighs, a sad head of garlic, and butter. That was it. No fancy marinades, no complicated sauces, just the basics staring back at me.
I’ll be honest, I almost panicked. But then I remembered the best meals I’ve ever made came from moments like this—when you have to work with what you’ve got and trust yourself a little. So I grabbed that cast iron skillet, tossed in some butter, and started smashing garlic cloves like I meant it.
Twenty-eight minutes later, we were sitting at my tiny kitchen table with plates of the juiciest, most ridiculous garlic butter chicken thighs I’d ever tasted. The skin was crackly and golden, the meat was so tender it practically fell apart, and that garlic butter sauce? We sopped it up with bread until there was nothing left but greasy fingerprints on the plates. My sister said it was better than any restaurant chicken she’d had in months. I didn’t argue.
That night, I scribbled the method on a sticky note and stuck it to my fridge. And now, every time I make these Easy Garlic Butter Chicken Thighs in 30 Minutes, I remember how the best recipes don’t come from planning—they come from showing up with whatever you have and making it work. You can trust that.
Why You’ll Love This Recipe
Look, I’ve tested a lot of chicken thigh recipes over the years. Some are too fussy, some take forever, and some just don’t deliver on flavor. These garlic butter chicken thighs are different. They’re the kind of recipe you’ll come back to again and again, and here’s why:
- Ready in 30 Minutes Flat: From fridge to table in under half an hour. Perfect for those nights when you’re hangry and need dinner now.
- Simple Pantry Ingredients: Chicken thighs, butter, garlic, salt, pepper—that’s it. No weird specialty items or expensive sauces.
- One Pan, Minimal Mess: Everything happens in a single skillet. Less dishes, more eating.
- Crispy Skin, Juicy Meat: The secret is starting skin-side down in a cold pan. Trust me on this one.
- Garlic Butter Sauce to Die For: That golden, garlicky pan sauce is the real star here. You’ll want to put it on everything.
- Family Approved: My picky nephew ate three thighs last time I made these. Three. That’s a win.
- Budget Friendly: Chicken thighs are way cheaper than breasts, and they taste better too.
What makes this version different from all the others? It’s the technique. Most recipes tell you to sear the chicken and then add the garlic. But I’ve found that smashing whole garlic cloves and letting them sizzle in the butter while the chicken cooks creates this deep, nutty, almost sweet garlic flavor that minced garlic just can’t match. Plus, starting with a cold pan means the fat renders slowly, giving you the crispiest skin without drying out the meat. It’s not complicated, but it makes all the difference.
This is the kind of dinner that makes you close your eyes after the first bite. It’s comfort food at its best—simple, satisfying, and soul-soothing. Whether you’re cooking for a crowd or just yourself on a Tuesday night, these chicken thighs deliver every single time.
What Ingredients You Will Need
This recipe uses simple, wholesome ingredients that you probably already have in your kitchen. No fancy grocery trips required. Here’s what you’ll need and why each ingredient matters:
- 6 bone-in, skin-on chicken thighs (about 2.5 pounds total) — This is the star of the show. Bone-in thighs stay juicier during cooking, and the skin gets beautifully crispy. If you can find pasture-raised chicken, the flavor is noticeably better, but regular grocery store thighs work perfectly too.
- 4 tablespoons unsalted butter — Butter is the soul of this dish. I prefer unsalted so I can control the salt level myself. Kerrygold is my go-to brand for its rich, creamy flavor, but any good quality butter works. If you’re dairy-free, you can substitute with a high-quality vegan butter, though the flavor will be slightly different.
- 8-10 cloves garlic, smashed — Smashing the cloves instead of mincing them is the key here. It releases their oils without making them burn, and you get these lovely soft, caramelized garlic pieces that melt in your mouth. Use fresh garlic, not the pre-minced stuff in a jar—it makes a huge difference.
- 1 teaspoon kosher salt — Salt brings out the natural flavor of the chicken and helps the skin crisp up. Diamond Crystal is my preferred brand because it’s less salty by volume, so it’s harder to over-season.
- ½ teaspoon freshly ground black pepper — Freshly ground pepper has so much more flavor than pre-ground. It adds a gentle warmth that complements the garlic beautifully.
- 2 tablespoons olive oil — A little oil mixed with the butter helps raise the smoke point, so you can get that gorgeous golden crust without the butter burning. Extra virgin is fine, but regular olive oil works too.
- Optional: fresh thyme or rosemary sprigs — If you have herbs on hand, toss a few sprigs into the pan while the chicken cooks. They infuse the butter with an earthy, aromatic flavor that takes everything up a notch.
- Optional: ¼ cup chicken broth — For a thinner pan sauce to drizzle over rice or mashed potatoes. Deglaze the pan with it after the chicken is done.
- Optional: fresh parsley for garnish — A sprinkle of bright green parsley makes the dish look gorgeous and adds a fresh, clean note to cut through the richness.
Ingredient Selection Tips: When buying chicken thighs, look for ones that are roughly the same size so they cook evenly. The skin should be intact and not torn. For the garlic, choose firm, plump cloves without any green sprouts in the center—those can be bitter. And please, please use real butter. Margarine or spreads won’t give you the same rich flavor or beautiful golden color.
Substitution Guidance: If you only have boneless, skinless thighs, you can use them, but reduce the cooking time to about 12-15 minutes total. The skinless version won’t get crispy, so you’ll miss that texture, but the garlic butter flavor will still be amazing. For a dairy-free option, use a good vegan butter or ghee if you can tolerate clarified butter. And if you’re out of fresh garlic (though I honestly can’t imagine that), you can use 1 teaspoon of garlic powder, but it won’t be the same—just a heads up.
Equipment Needed
You don’t need a fancy kitchen to make these chicken thighs. Here’s what you’ll want to have on hand:
- Large cast iron skillet (12-inch) — This is my absolute favorite pan for this recipe. It holds heat beautifully, gives you an incredible sear, and goes from stovetop to table if you’re feeling fancy. If you don’t have cast iron, a heavy-bottomed stainless steel skillet works great too. Just avoid non-stick if you can—it won’t give you the same crust.
- Tongs — You need a good pair of tongs to flip the chicken without piercing the skin. The last thing you want is all those juices escaping into the pan.
- Chef’s knife and cutting board — For smashing and prepping the garlic. I use the flat side of my knife to smash each clove—it’s oddly satisfying.
- Meat thermometer — This is non-negotiable for perfectly cooked chicken. You’re looking for 165°F in the thickest part, but I pull mine at 160°F and let carryover cooking do the rest. An instant-read thermometer is my best friend in the kitchen.
- Paper towels — For patting the chicken dry. This step is crucial for crispy skin, so don’t skip it.
- Small bowl — For seasoning the chicken before it hits the pan.
Budget-Friendly Options: If you don’t own a cast iron skillet, a stainless steel pan is your next best bet. Lodge makes affordable cast iron skillets that last forever—I’ve had mine for over a decade and it’s still going strong. And honestly, if all you have is a non-stick pan, it’ll still work. You just won’t get quite as much crust on the skin. No worries—the flavor will still be there.
Preparation Method
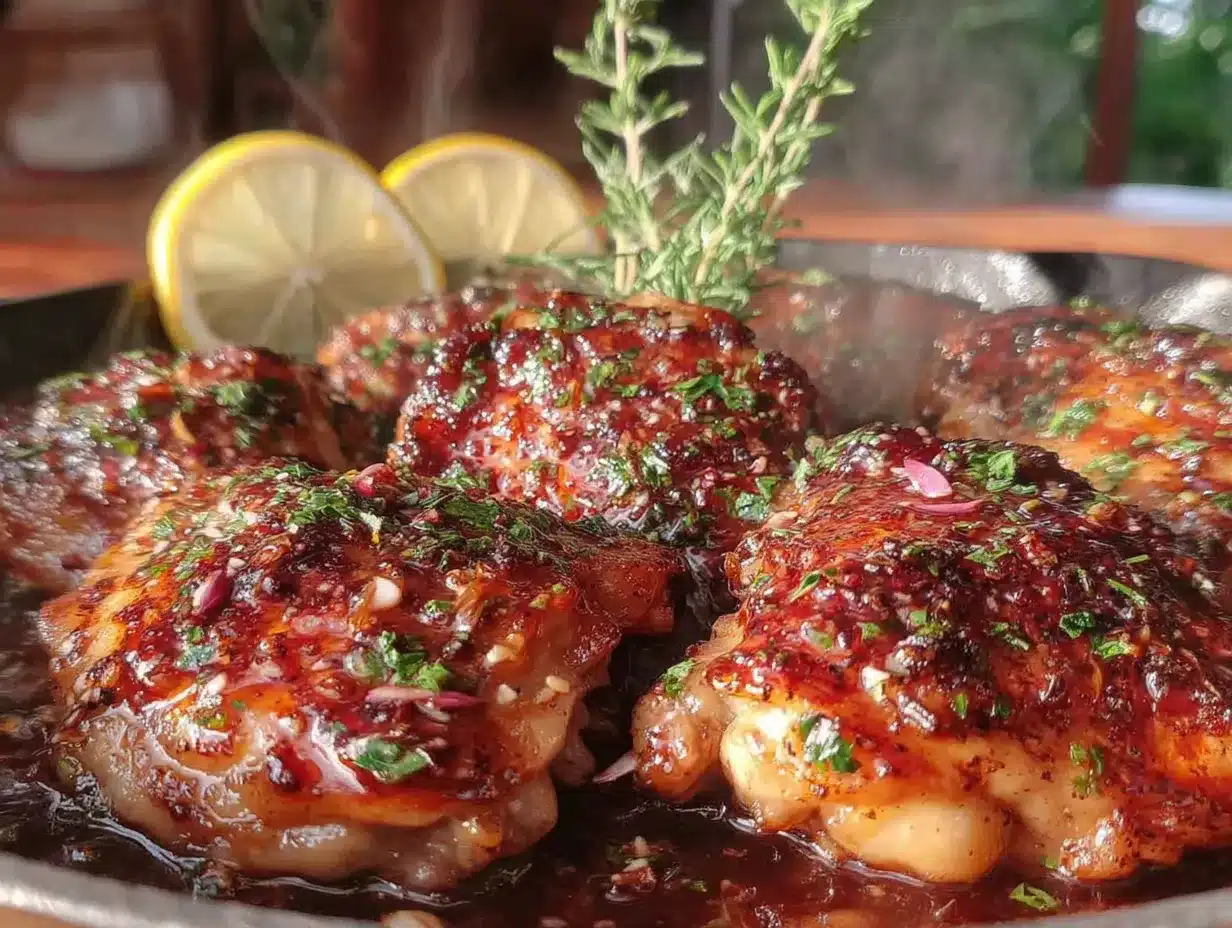
Alright, let’s get cooking. This whole thing comes together in about 30 minutes, so here’s the game plan:
- Pat the chicken dry (2 minutes) — Take your chicken thighs out of the fridge and pat them completely dry with paper towels. This is the most important step for crispy skin. I cannot stress this enough. Wet skin = soggy skin. Get every bit of moisture off there.
- Season generously (1 minute) — Sprinkle both sides of the chicken with the kosher salt and freshly ground black pepper. Don’t be shy with the salt—it’s your main seasoning here. Let the chicken sit at room temperature while you prep the garlic.
- Smash the garlic (2 minutes) — Take your garlic cloves and place them on the cutting board. Lay the flat side of your chef’s knife on top of each clove and give it a firm smack with the heel of your hand. The clove should split open slightly. Peel off the papery skin and set the smashed cloves aside. Some will stay whole, some will break apart—that’s perfect.
- Heat the pan (2 minutes) — Place your cast iron skillet over medium heat and add the olive oil. Let it heat up until it shimmers—about 2 minutes. Then add the butter and let it melt, swirling the pan to combine.
- Add the garlic (30 seconds) — Toss the smashed garlic cloves into the foaming butter. Let them sizzle for about 30 seconds, just until they start to smell amazing. Don’t let them brown—we want them soft and golden, not burnt.
- Place the chicken skin-side down (12-14 minutes) — Carefully lay the chicken thighs in the pan, skin-side down, making sure not to overcrowd. If your pan is too small, cook in batches. Listen for that beautiful sizzle. Let them cook undisturbed for 12-14 minutes. I know it’s tempting to peek, but don’t. Let the skin get deep golden brown and crispy. If you try to flip too early, the skin will stick.
- Flip and finish cooking (8-10 minutes) — Using your tongs, flip each thigh over. The skin should be a gorgeous golden brown. Add the herb sprigs now if you’re using them. Cook for another 8-10 minutes, or until the internal temperature reaches 165°F in the thickest part. The juices should run clear when you pierce the meat.
- Rest the chicken (5 minutes) — Remove the chicken from the pan and let it rest on a cutting board or plate for 5 minutes. This lets the juices redistribute so every bite is tender and moist. Don’t skip this—I learned the hard way.
- Make the pan sauce (optional) (2 minutes) — If you want a little extra sauce, pour off most of the fat from the pan (save it for roasting potatoes!), add the chicken broth, and scrape up all those browned bits from the bottom. Let it simmer for a minute, then pour it over the chicken.
- Serve and enjoy — Arrange the chicken on a platter, spoon the garlic butter and pan juices over the top, and garnish with fresh parsley if you have it. Watch everyone fight over the garlic cloves—they’re the best part.
Sensory Cues: When the chicken is ready to flip, the skin should look like a perfect golden-brown crust—think the color of a well-toasted croissant. The garlic should be soft enough to smash with a fork. The pan should smell nutty and rich, like browned butter and roasted garlic. If it smells burnt, your heat was too high. If it smells raw, give it more time.
Cooking Tips & Techniques
I’ve made this recipe more times than I can count, and I’ve definitely made my share of mistakes along the way. Here’s what I’ve learned so you don’t have to repeat my errors:
Start with a cold pan for the crispiest skin. I know this sounds counterintuitive, but hear me out. When you place the chicken skin-side down in a cold pan and then turn on the heat, the fat renders slowly and evenly. This gives you that incredibly crispy, crackly skin that shatters when you bite into it. If you start with a hot pan, the outside burns before the fat has a chance to render. Trust me on this one—it’s a game changer.
Don’t move the chicken. Once it’s in the pan, leave it alone. I know you want to check it, wiggle it, see if it’s sticking. Resist the urge. The chicken will release naturally from the pan once the skin is properly seared. If you try to flip it too early, you’ll tear the skin and lose all those beautiful crispy bits.
Use a meat thermometer. I cannot tell you how many times I’ve overcooked chicken because I was guessing. An instant-read thermometer takes all the guesswork out. For the juiciest results, pull the chicken at 160°F and let carryover cooking bring it to 165°F while it rests. Your chicken will be perfectly cooked every single time.
Watch the garlic closely. Garlic burns fast, and burnt garlic is bitter and ruins the whole dish. If you see your garlic getting too dark before the chicken is done, just scoop the cloves out and set them aside. You can add them back in at the end. Better safe than sorry.
Season in layers. I season the chicken directly, but I also season the butter in the pan with a pinch of salt. This ensures every component is flavorful, not just the meat. It’s a small thing that makes a big difference.
My biggest failure: The first time I made this, I used pre-minced garlic from a jar. It burned immediately, the sauce turned bitter, and my whole kitchen smelled like regret. Fresh garlic only, folks. It’s worth the extra 30 seconds of effort.
Multitasking tip: While the chicken is cooking, you can prep your sides. I like to toss some green beans with olive oil and salt and roast them in the oven at 400°F for about 15 minutes. Or make a quick pan of rice. Everything finishes around the same time, and dinner is on the table in 30 minutes flat.
Variations & Adaptations
One of the best things about this recipe is how adaptable it is. Here are some of my favorite variations:
Lemon Herb Version: Add the juice of half a lemon and a few lemon slices to the pan after flipping the chicken. The acidity cuts through the richness of the butter beautifully. Throw in some fresh rosemary or thyme sprigs for an herby twist. This version is my go-to when I want something a little brighter.
Spicy Sriracha Honey Glaze: Mix 2 tablespoons of honey with 1 tablespoon of sriracha and a splash of soy sauce. Brush this onto the chicken during the last 5 minutes of cooking. The sweet-spicy glaze caramelizes on the skin and is absolutely addictive. My husband requests this version constantly.
Dairy-Free Adaptation: Swap the butter for a good quality vegan butter or use ghee if you can tolerate clarified dairy. The flavor will be slightly different, but still delicious. Coconut oil also works in a pinch, though it will add a subtle coconut flavor that’s actually pretty nice with the garlic.
Oven-Roasted Method: If you don’t want to stand over the stove, you can finish the chicken in the oven. Sear the chicken skin-side down in an oven-safe skillet for 5 minutes, then flip and transfer the pan to a 400°F oven for 15-20 minutes, until the internal temperature reaches 165°F. This is great when you’re cooking for a crowd.
Air Fryer Version: Season the chicken as directed, then place it skin-side down in the air fryer basket. Cook at 375°F for 12 minutes, flip, and cook for another 8-10 minutes. While it cooks, melt the butter with the smashed garlic in a small saucepan. Drizzle the garlic butter over the finished chicken. It’s not quite as rich as the skillet version, but it’s faster and uses less fat.
Personal Variation: I once added a splash of white wine to the pan after flipping the chicken, let it reduce for a minute, then added the butter. The wine added this incredible depth of flavor that I still think about. If you have an open bottle, give it a try.
Serving & Storage Suggestions
These garlic butter chicken thighs are incredibly versatile when it comes to serving. Here’s how I like to enjoy them:
Serving Temperature: Serve the chicken hot, straight from the pan. The garlic butter sauce should be warm and glossy. If it’s cooled down too much, just reheat it gently on the stove with a splash of broth.
What to Serve With: These thighs pair beautifully with so many sides. I love them over creamy roasted tomato basil soup with crusty bread for dipping, or alongside a simple green salad. Mashed potatoes are a classic choice—the garlic butter sauce is basically made for potatoes. Roasted vegetables like asparagus, broccoli, or green beans also work wonderfully. For a lighter option, try them with a fresh mango avocado black bean buddha bowl for a burst of freshness. And if you’re feeling indulgent, serve them over buttery egg noodles or rice to soak up every drop of that sauce.
Complementary Drinks: A crisp white wine like Sauvignon Blanc or a light Pinot Noir pairs beautifully with the garlic and butter. For a non-alcoholic option, try sparkling water with a squeeze of lemon.
Storage Instructions: Store leftover chicken in an airtight container in the refrigerator for up to 4 days. The garlic butter will solidify, but that’s totally fine. To reheat, place the chicken in a skillet over medium-low heat with a splash of broth or water. Cover and heat for 5-7 minutes, until warmed through. The microwave works in a pinch, but the skin won’t be crispy. For best results, reheat in a 350°F oven for about 10 minutes.
Freezer Instructions: These chicken thighs freeze beautifully. Let them cool completely, then place them in a freezer-safe container or bag. They’ll keep for up to 3 months. To thaw, transfer to the refrigerator overnight. Reheat as directed above. The garlic butter sauce might separate slightly, but it’ll come back together when you reheat it.
How Flavors Develop: Honestly, these chicken thighs taste even better the next day. The garlic and butter have time to meld together, and the flavors become deeper and more complex. I often make a double batch just so I have leftovers for lunch. Cold garlic butter chicken straight from the fridge? Don’t knock it till you try it.
Nutritional Information & Benefits
While I’m not a nutritionist, I do care about what I put in my body. Here’s a rough estimate of what you’re getting with each serving (based on 6 servings, using bone-in skin-on chicken thighs):
| Nutrient | Per Serving |
|---|---|
| Calories | ~380-420 kcal |
| Protein | 28-32g |
| Fat | 28-32g |
| Carbohydrates | 2-4g |
| Fiber | 0g |
| Sugar | 0g |
| Sodium | 450-550mg |
Health Benefits: Chicken thighs are an excellent source of high-quality protein, which is essential for muscle repair and overall health. They’re also rich in B vitamins, particularly B6 and B12, which support energy metabolism and brain function. The butter provides fat-soluble vitamins A, D, E, and K, while garlic is known for its immune-boosting properties—it’s packed with allicin, a compound that may help reduce inflammation and support heart health.
Dietary Considerations: This recipe is naturally low-carb and keto-friendly (about 2-4g net carbs per serving). It’s also gluten-free, grain-free, and sugar-free. If you’re watching your sodium, you can reduce the salt to ½ teaspoon, but you’ll lose some flavor. For a lower-fat option, you can use boneless, skinless thighs and reduce the butter to 2 tablespoons, though you’ll miss out on the crispy skin.
Potential Allergens: This recipe contains dairy (butter). If you’re lactose intolerant, you can try using ghee, which has very low lactose content, or a dairy-free butter substitute. Always check your ingredient labels if you have specific allergies.
My Personal Wellness Perspective: I believe in balance. This recipe is indulgent, yes, but it’s made with real, whole ingredients. It’s the kind of meal that nourishes your body and your soul. I’d rather eat a moderate portion of this than a giant plate of something processed that leaves me feeling blah. Plus, the protein keeps me full for hours, so I’m not reaching for snacks an hour later.
Conclusion
These Easy Garlic Butter Chicken Thighs in 30 Minutes are the kind of recipe that saves dinner on a busy night and impresses guests on a special one. They’re simple enough for a beginner cook but flavorful enough to make you feel like a pro. The crispy skin, the tender meat, that glorious garlic butter sauce—it’s comfort food at its finest, and it comes together in the time it takes to watch a single episode of your favorite show.
I love this recipe because it reminds me that you don’t need a long list of ingredients or complicated techniques to make something truly delicious. Sometimes the best meals come from the simplest combinations—chicken, butter, garlic, and a little bit of patience. It’s honest food that feeds both body and soul.
Now I want to hear from you. Have you tried these garlic butter chicken thighs? Did you add your own twist? Maybe a splash of lemon or a sprinkle of chili flakes? Drop a comment below and let me know how it turned out. And if you loved them as much as I do, share this recipe with a friend who needs a reliable weeknight dinner in their back pocket. Happy cooking, friends!
Frequently Asked Questions
Can I use boneless, skinless chicken thighs instead?
Absolutely. Boneless, skinless thighs will cook faster—about 5-6 minutes per side. They won’t get crispy skin, obviously, but the garlic butter flavor will still be amazing. Just keep an eye on the internal temperature so you don’t overcook them.
How do I prevent the garlic from burning?
Keep your heat at medium, not high. Smashed garlic cloves are thicker than minced garlic, so they’re less likely to burn. If you see them getting too dark, just scoop them out of the pan and add them back in at the end. You can also add a splash of chicken broth to cool things down.
Can I make this recipe dairy-free?
Yes! Use a good quality vegan butter or ghee if you can tolerate clarified dairy. Coconut oil also works, though it adds a subtle coconut flavor. The texture and richness will be slightly different, but it’s still delicious.
What’s the best way to reheat leftover chicken thighs?
For the crispiest skin, reheat them in a skillet over medium-low heat with a splash of broth or water. Cover and heat for 5-7 minutes. The oven at 350°F for 10 minutes also works well. The microwave is fast but will make the skin soggy.
Can I use chicken breasts instead of thighs?
You can, but I don’t recommend it. Chicken breasts are leaner and dry out more easily. If you must use breasts, pound them to an even thickness and reduce the cooking time to about 5-6 minutes per side. Use a meat thermometer to avoid overcooking.
Pin This Recipe!

Easy Garlic Butter Chicken Thighs in 30 Minutes

Juicy, crispy-skinned chicken thighs cooked in a rich garlic butter sauce, ready in just 30 minutes. A simple, one-pan dinner that’s perfect for busy weeknights.
- Prep Time: 5 minutes
- Cook Time: 25 minutes
- Total Time: 30 minutes
- Yield: 6 servings 1x
- Category: Main Course
- Cuisine: American
Ingredients
- 6 bone-in, skin-on chicken thighs (about 2.5 pounds total)
- 4 tablespoons unsalted butter
- 8–10 cloves garlic, smashed
- 1 teaspoon kosher salt
- ½ teaspoon freshly ground black pepper
- 2 tablespoons olive oil
- Optional: fresh thyme or rosemary sprigs
- Optional: ¼ cup chicken broth
- Optional: fresh parsley for garnish
Instructions
- Pat the chicken thighs dry with paper towels. This is crucial for crispy skin.
- Season both sides of the chicken with kosher salt and black pepper. Let sit at room temperature while prepping garlic.
- Smash the garlic cloves with the flat side of a chef’s knife. Peel and set aside.
- Heat olive oil in a large cast iron skillet over medium heat until shimmering. Add butter and let it melt, swirling to combine.
- Add the smashed garlic cloves to the foaming butter and sizzle for about 30 seconds, until fragrant. Do not let them brown.
- Place the chicken thighs skin-side down in the pan, ensuring not to overcrowd. Cook undisturbed for 12-14 minutes, until the skin is deep golden brown and crispy.
- Flip the chicken using tongs. Add herb sprigs if using. Cook for another 8-10 minutes, until the internal temperature reaches 165°F in the thickest part.
- Remove the chicken from the pan and let rest for 5 minutes.
- Optional: For a pan sauce, pour off most of the fat, add chicken broth, and scrape up browned bits. Simmer for 1 minute.
- Serve the chicken with garlic butter and pan juices spooned over the top. Garnish with fresh parsley if desired.
Notes
Start with a cold pan for the crispiest skin. Do not move the chicken once it’s in the pan until it’s time to flip. Use a meat thermometer for perfect doneness. Watch the garlic closely to prevent burning. Season in layers for maximum flavor.
Nutrition
- Serving Size: 1 chicken thigh
- Calories: 400
- Sodium: 500
- Fat: 30
- Saturated Fat: 12
- Carbohydrates: 3
- Protein: 30
Keywords: garlic butter chicken thighs, easy chicken recipe, 30 minute dinner, one pan chicken, crispy chicken thighs


