The morning school bus rumbled away and I just stood there, holding a lunchbox that was completely empty. Not empty like “I’ll pack it later” empty. I mean empty like I had forgotten to buy bread, the cold cuts were questionable, and my kid was about to trade snacks for actual food. The fridge offered me a block of cheddar, some flour tortillas from who-knows-when, and a jar of salsa that was dangerously close to its expiration date. That’s it. No fancy ingredients, no plan, just the clock ticking and a hungry child waiting.
I grabbed the tortillas and started grating cheese—honestly, I was just buying time. But then I thought, what if I made something that actually felt special? A little crispy, a little melty, something you could dip. So I folded those tortillas with cheese, pressed them in a hot pan, and sliced them into wedges. Tossed in a tiny container of salsa, crossed my fingers, and hoped for the best. When my kid came home that afternoon, the lunchbox was empty and the report was glowing: “Best lunch ever, Mom. Can you make the cheese triangles again?”
That’s how these Easy Cheese Quesadilla Lunchbox Wedges with Salsa Dip were born—not from a recipe book or a Pinterest board, but from a desperate Tuesday morning and a fridge that had nothing left to give. And honestly? That’s exactly why they work. They’re simple, they’re fast, and they taste like you actually tried. I’ve made them at least a dozen times since, and every single time, that lunchbox comes back clean.
Why You’ll Love This Recipe
These aren’t just any quesadillas. They’re the kind of lunchbox solution that makes you feel like a hero without actually breaking a sweat. Here’s why this recipe has become my go-to for busy mornings and packed lunches alike:
- Ready in Under 15 Minutes: From fridge to lunchbox in the time it takes to pour your coffee. No joke.
- Simple Pantry Ingredients: You probably have everything right now—tortillas, cheese, and salsa. That’s it.
- Perfect for Packed Lunches: They hold up beautifully at room temperature, so no need to worry about reheating or soggy sandwiches.
- Crowd-Pleaser for All Ages: Kids love the dippable wedges, and adults secretly steal them from the lunchbox too.
- Unbelievably Satisfying: The crispy exterior, the gooey cheese, the tangy salsa dip—it’s comfort food that fits in a lunchbox.
What makes these different from every other quesadilla recipe? It’s the technique. I press the tortillas just right so they get those golden-brown spots without burning, and I slice them into wedges while they’re still warm so the cheese stays stretchy. Plus, the salsa dip isn’t an afterthought—it’s the whole reason these wedges disappear. You get that perfect crunch, then that cool, tangy finish. It’s a lunchbox win.
This recipe is for the days when you need something reliable. It’s for the mom who forgot to meal prep, the dad who’s packing lunch for the first time, or the college student who just wants a good lunch without the hassle. It’s simple, it’s fast, and it honestly makes you look like you have your life together.
What Ingredients You Will Need
This recipe uses just a handful of simple ingredients, but each one plays an important role in creating those perfect lunchbox wedges. Here’s what you’ll need and why they matter:
- Flour Tortillas (8-inch): Go for the soft, pliable kind—not the crispy taco shells. I prefer Mission or Guerrero brand for their flexibility and size. They fold without cracking and toast up beautifully.
- Shredded Cheddar Cheese (1 cup / 120g): Sharp cheddar gives you that bold, tangy flavor that stands up to the salsa. Pre-shredded works in a pinch, but freshly shredded melts so much better—trust me on this one.
- Monterey Jack Cheese (½ cup / 60g): This is my secret for extra gooeyness. It melts like a dream and balances the sharpness of the cheddar. You can use all cheddar if that’s what you have, but the blend is where the magic happens.
- Butter or Oil (1 tablespoon): A little fat in the pan gives you that golden, crispy exterior. I use unsalted butter for flavor, but avocado oil works great if you’re dairy-free.
- Salsa (½ cup / 120ml): This is your dip, so make it count. I love a chunky restaurant-style salsa for texture, but a smooth one works too. My go-to is Pace or a fresh salsa from the refrigerated section—just avoid anything too watery.
Ingredient Tips: For the best texture, let your cheese come to room temperature for about 10 minutes before assembling. Cold cheese takes longer to melt and can make the tortilla soggy before it browns. Also, if you’re using corn tortillas, warm them slightly first so they don’t crack when you fold them.
Substitution Options: Swap the cheddar for pepper jack if you want a little heat, or use a dairy-free cheese blend if needed. For a gluten-free version, corn tortillas work beautifully—just adjust the cooking time slightly since they crisp up faster.
Equipment Needed
You don’t need a fancy kitchen to make these wedges. Here’s what I use and a few alternatives if you’re working with limited tools:
- Non-Stick Skillet (10-inch): This is my go-to for even browning. If you don’t have non-stick, a well-seasoned cast iron skillet works beautifully—just add a little extra butter to prevent sticking.
- Spatula: A thin, flexible spatula makes flipping the quesadilla a breeze. I’ve used a pancake turner in a pinch, and it worked fine.
- Cheese Grater: If you’re shredding your own cheese (which I highly recommend), a box grater or a food processor with a grating disc does the job in seconds.
- Sharp Knife or Pizza Cutter: For slicing those perfect wedges. A pizza cutter is honestly the easiest tool here—one clean roll and you’re done.
- Small Container for Salsa: A 4-ounce (120ml) container with a tight lid works perfectly for packing the dip. I’ve repurposed old jam jars for this.
- Lunchbox or Bentgo-Style Container: A compartmentalized container keeps the wedges separate from the salsa so nothing gets soggy. I love my Bentgo for this—it’s leakproof and dishwasher safe.
Budget-Friendly Tip: If you don’t have a non-stick skillet, use a regular pan and a little more butter. Just keep an eye on the heat so the tortilla doesn’t stick. Also, skip the pizza cutter—a sharp chef’s knife works just as well for slicing wedges.
Preparation Method

Let’s make these wedges step by step. I’ll walk you through each stage so you get perfect results every time.
- Prep Your Ingredients (5 minutes): Grate your cheddar and Monterey Jack cheese if you’re using blocks. Aim for about 1½ cups total (180g). Let the cheese sit out while you get the pan ready—room temperature cheese melts faster and more evenly. Open your salsa and spoon it into a small serving container.
- Heat the Pan (2 minutes): Place your non-stick skillet over medium heat. Add ½ tablespoon of butter and let it melt completely, swirling the pan to coat the bottom. The butter should sizzle gently when you add the tortilla—if it’s smoking, your heat is too high.
- Assemble the Quesadilla (2 minutes): Lay one tortilla flat on a cutting board. Sprinkle about ¾ cup of the shredded cheese mixture evenly over half of the tortilla, leaving a ½-inch border around the edge. Fold the empty half over the cheese to create a half-moon shape. Press down gently to seal.
- Cook the First Side (3-4 minutes): Carefully place the quesadilla in the hot skillet. Cook without moving it for 3-4 minutes, or until the bottom is golden brown with dark spots. You’ll see the cheese starting to melt around the edges. Sensory cue: You should hear a gentle sizzle, and the kitchen will smell like toasted tortillas and warm cheese.
- Flip and Cook the Second Side (2-3 minutes): Use your spatula to carefully flip the quesadilla. Cook for another 2-3 minutes until the second side is golden brown and the cheese is fully melted. If the pan looks dry, add the remaining ½ tablespoon of butter before flipping. Troubleshooting: If the cheese isn’t melting but the tortilla is browning too fast, reduce the heat to medium-low and cover the pan for 30 seconds.
- Rest and Slice (2 minutes): Transfer the cooked quesadilla to a cutting board and let it rest for 1 minute. This lets the cheese set slightly so it doesn’t all ooze out when you cut. Use a pizza cutter or sharp knife to slice into 4 or 6 wedges. I prefer 6 wedges for lunchboxes—they’re easier for little hands to hold.
- Pack It Up (2 minutes): Let the wedges cool completely before packing—about 5 minutes on a wire rack. Place them in your lunchbox container with the salsa dip in a separate compartment or small container. If you’re packing for later, store the salsa separately to keep the wedges crispy.
Time-Saving Tip: Make a batch of 4 quesadillas ahead of time and store them in the fridge. In the morning, just reheat in a dry skillet for 1 minute per side, then slice and pack. They taste just as good as fresh!
Cooking Tips & Techniques
After making these wedges more times than I can count, I’ve learned a few things the hard way. Here are my best tips for getting that perfect crispy, melty result every single time.
- Don’t Overstuff: I know it’s tempting to pile on the cheese, but too much filling makes the quesadilla hard to flip and the cheese can leak out. Stick to about ¾ cup total cheese per quesadilla.
- Low and Slow Wins: Medium heat is your friend here. High heat browns the tortilla before the cheese melts, leaving you with a burnt outside and a cold inside. If you’re impatient like me, trust the process—it’s worth the extra minute.
- Use a Lid for Even Melting: If your cheese isn’t melting fast enough, cover the pan with a lid for 30 seconds. The trapped steam helps melt the cheese without burning the tortilla. Just remove the lid before the tortilla gets soggy.
- Let It Rest: This is the step I used to skip, and my wedges always fell apart. That 1-minute rest on the cutting board lets the cheese set just enough so it stays inside the wedges when you slice. Patience pays off.
- Double Batch Strategy: If you’re making multiple quesadillas, keep the cooked ones warm in a 200°F (95°C) oven on a baking sheet. They’ll stay crispy for up to 20 minutes while you finish the rest.
My Biggest Failure: The first time I made these, I used pre-shredded cheese straight from the bag and cooked on high heat. The tortilla burned, the cheese was still solid, and my kid refused to eat it. That’s when I learned that freshly shredded cheese and medium heat aren’t optional—they’re essential.
Variations & Adaptations
Once you’ve mastered the basic recipe, the possibilities are endless. Here are some of my favorite variations that I’ve tested in my own kitchen.
- Protein-Packed Wedges: Add ¼ cup of shredded rotisserie chicken or crumbled cooked chorizo to the cheese mixture before folding. It turns lunch into a heartier meal without extra effort.
- Veggie Lover’s Version: Sauté some bell peppers and onions until soft, then layer them with the cheese. I also love adding a handful of fresh spinach—it wilts down beautifully inside the quesadilla.
- Spicy Southwest Style: Use pepper jack cheese instead of cheddar and add a tablespoon of chopped pickled jalapeños. The heat pairs perfectly with a cool sour cream dip if salsa isn’t your thing.
- Breakfast Quesadilla Wedges: Add a scrambled egg and some cooked bacon to the cheese mixture. These are perfect for a breakfast-for-lunch treat and my kid’s absolute favorite.
- Air Fryer Method: If you don’t want to use the stovetop, air fry at 375°F (190°C) for 5-6 minutes, flipping halfway. They come out extra crispy with less oil—perfect for meal prep.
Dietary Adaptations: For a dairy-free version, use vegan cheddar shreds and skip the butter—avocado oil works great. For gluten-free, corn tortillas are your best bet. Just warm them slightly before folding to prevent cracking.
Serving & Storage Suggestions
These wedges are incredibly versatile when it comes to serving and storing. Here’s how to make the most of them.
Serving Temperature: These are best served warm, right after cooking, when the cheese is still stretchy and the tortilla is perfectly crisp. But they’re also delicious at room temperature—perfect for lunchboxes or picnics. If you’re packing them for later, let them cool completely first to avoid condensation making them soggy.
What to Serve With Them: Besides the salsa dip, try serving with a side of guacamole, sour cream, or a simple creamy smashed cucumber salad for a refreshing contrast. They also pair beautifully with a fresh mango avocado black bean buddha bowl for a complete lunch.
Storage Instructions: Store leftover wedges in an airtight container in the refrigerator for up to 3 days. Keep the salsa separate to prevent sogginess. To reheat, pop them in a dry skillet over medium heat for 1-2 minutes per side, or in the air fryer at 350°F (175°C) for 3 minutes. The microwave works in a pinch, but the tortilla won’t be as crisp.
Freezer Tips: These wedges freeze beautifully. Place them in a single layer on a baking sheet and freeze for 1 hour, then transfer to a freezer bag. They’ll keep for up to 2 months. Reheat directly from frozen in a skillet for 3-4 minutes per side.
Flavor Development: Honestly, these wedges taste best fresh. The cheese gets a little firmer after refrigeration, but the flavor is still great. If you’re meal prepping, I recommend cooking them the night before and reheating in the morning—they’ll taste almost as good as fresh.
Nutritional Information & Benefits
While these wedges are definitely a comfort food, they also offer some surprising nutritional benefits. Here’s a breakdown based on one serving (3 wedges with 2 tablespoons of salsa).
- Calories: Approximately 320 per serving
- Protein: 14g (from the cheese, which supports muscle repair and keeps you full)
- Carbohydrates: 28g (mostly from the tortilla, providing quick energy)
- Fat: 18g (from cheese and butter, with calcium and vitamin D benefits)
- Fiber: 2g (from the tortilla and salsa)
- Calcium: 35% of the daily value (cheese is an excellent source)
Health Benefits: Cheese is rich in calcium, which supports bone health, and protein, which helps keep kids (and adults!) full and focused throughout the day. The salsa adds a serving of vegetables and is low in calories. If you’re watching your sodium, opt for low-sodium salsa and reduce the added salt.
Dietary Considerations: This recipe can be made gluten-free with corn tortillas, dairy-free with vegan cheese, and lower in fat by using reduced-fat cheese and skipping the butter. It’s naturally vegetarian and can be made vegan with simple swaps.
Personal Perspective: I love that these wedges feel indulgent but aren’t loaded with processed ingredients. They’re a lunch I feel good about packing—satisfying, balanced, and made with real food.
Conclusion
These Easy Cheese Quesadilla Lunchbox Wedges with Salsa Dip have saved me more times than I can count. They’re the recipe I turn to when I’m out of ideas, out of time, or just out of energy. And every single time, they deliver—crispy, cheesy, dippable, and absolutely kid-approved.
What I love most about this recipe is how forgiving it is. You can use whatever cheese you have, swap the salsa for a different dip, or add leftovers from last night’s dinner. It’s a template for creativity, not a rigid formula. So don’t be afraid to make it your own—add some roasted hatch chiles for heat, or serve them alongside a bowl of creamy chicken soup for a complete meal.
I’d love to hear how your wedges turn out! Drop a comment below and tell me what variations you tried, or tag me in your lunchbox photos. And if you’re looking for more lunch ideas, check out my healthy Greek yogurt chicken salad lettuce wraps for another lunchbox win. Happy cooking, friends—you’ve got this!
Frequently Asked Questions
Can I use corn tortillas instead of flour?
Absolutely! Corn tortillas work great and add a slightly different flavor. Just warm them slightly before folding to prevent cracking, and reduce the cooking time by about 1 minute since they crisp up faster.
How do I keep the wedges from getting soggy in the lunchbox?
The key is to let the wedges cool completely before packing them. Also, always store the salsa in a separate compartment or container—never mix them until you’re ready to eat. A compartmentalized lunchbox like a Bentgo is perfect for this.
Can I make these ahead of time for the week?
Yes! Cook the wedges, let them cool completely, and store them in an airtight container in the fridge for up to 3 days. In the morning, reheat them in a dry skillet for 1-2 minutes per side, then pack them. They taste almost as good as fresh.
What’s the best cheese for melting?
A blend of cheddar and Monterey Jack is my go-to. Cheddar gives you flavor, and Monterey Jack gives you that stretchy, gooey texture. Other great options include mozzarella, pepper jack, or even a mild gouda.
Can I freeze these quesadilla wedges?
Definitely! Freeze them in a single layer on a baking sheet for 1 hour, then transfer to a freezer bag. They’ll keep for up to 2 months. Reheat directly from frozen in a skillet for 3-4 minutes per side, or in the air fryer at 350°F for 4-5 minutes.
Pin This Recipe!
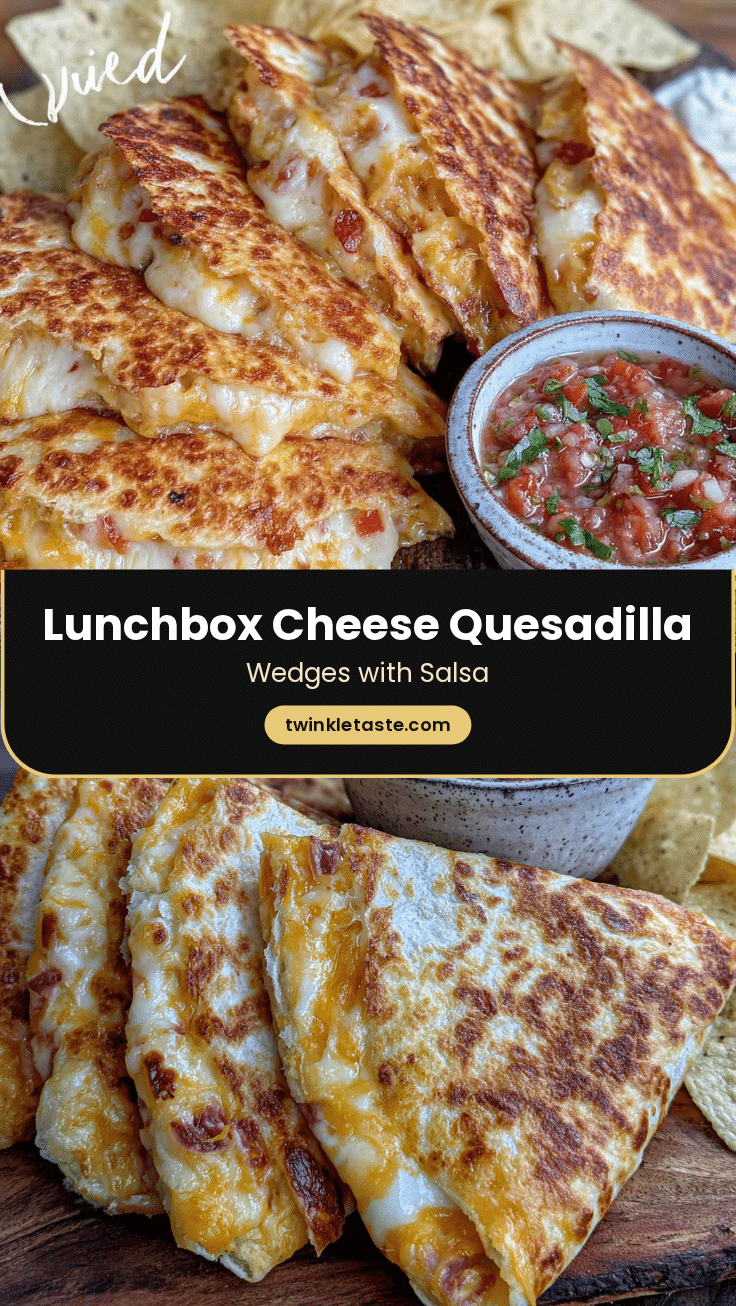
Easy Cheese Quesadilla Lunchbox Wedges with Best Salsa Dip

Crispy, cheesy quesadilla wedges perfect for lunchboxes, served with a tangy salsa dip. Ready in under 15 minutes with simple pantry ingredients.
- Prep Time: 5 minutes
- Cook Time: 8 minutes
- Total Time: 13 minutes
- Yield: 4 servings 1x
- Category: Lunch
- Cuisine: Mexican
Ingredients
- 4 (8-inch) flour tortillas
- 1 cup (120g) shredded cheddar cheese
- ½ cup (60g) shredded Monterey Jack cheese
- 1 tablespoon unsalted butter or avocado oil
- ½ cup (120ml) salsa (for dipping)
Instructions
- Grate cheddar and Monterey Jack cheese if using blocks. Let cheese sit at room temperature while preparing the pan.
- Place a non-stick skillet over medium heat. Add ½ tablespoon butter and let it melt completely, swirling to coat the bottom.
- Lay one tortilla flat on a cutting board. Sprinkle about ¾ cup of the shredded cheese mixture evenly over half of the tortilla, leaving a ½-inch border. Fold the empty half over the cheese to create a half-moon shape. Press down gently to seal.
- Carefully place the quesadilla in the hot skillet. Cook without moving for 3-4 minutes, until the bottom is golden brown with dark spots.
- Flip the quesadilla with a spatula. Cook for another 2-3 minutes until the second side is golden brown and the cheese is fully melted. If the pan looks dry, add the remaining ½ tablespoon butter before flipping.
- Transfer the cooked quesadilla to a cutting board and let it rest for 1 minute. Use a pizza cutter or sharp knife to slice into 4 or 6 wedges.
- Let the wedges cool completely before packing. Place in a lunchbox container with salsa in a separate compartment or small container.
Notes
For best results, use freshly shredded cheese and medium heat. Let wedges cool completely before packing to avoid sogginess. Store salsa separately. Can be made ahead and reheated in a dry skillet.
Nutrition
- Serving Size: 3 wedges with 2 tabl
- Calories: 320
- Sugar: 3
- Sodium: 620
- Fat: 18
- Saturated Fat: 10
- Carbohydrates: 28
- Fiber: 2
- Protein: 14
Keywords: quesadilla, lunchbox, cheese, salsa, easy, kid-friendly, quick


