My friend crashed at my place late one evening, completely unannounced. The fridge? Pretty much empty except for a lonely jar of pickling cucumbers sitting in the back, a few cloves of garlic, and some random herbs I’d grabbed on a whim last weekend. No time for fancy prep or long wait times—just whatever I could whip up before the night ended. Somehow, from that chaotic little fridge moment came these crispy garlic dill refrigerator pickles, ready fast and bursting with punch. Honestly, I didn’t expect them to turn out this good, but there’s something about the snap of fresh cucumbers soaked in garlicky, tangy brine that just hit the spot.
The crunch stays real, even after a few days, which is weirdly satisfying when you’re used to soggy jarred pickles. Plus, the dill and garlic combo makes every bite zingy with a little herbal warmth that keeps you reaching for more. It wasn’t planned perfection—more like a lucky accident born from a nearly empty fridge and a hungry guest—and that’s why this recipe stuck with me. When life throws you last-minute guests or you need a quick snack that doesn’t scream “I just threw this together,” these pickles have your back with their bright, crisp flavor and that fast turnaround.
There’s a quiet joy in knowing you can make something so tasty with just a handful of simple ingredients and zero fuss. That’s exactly what this crispy garlic dill refrigerator pickles recipe offers—snappy, fresh, and ready in no time. It’s the kind of thing that makes you want to keep a jar handy, just in case.
Why You’ll Love This Recipe
After many trials (and a few sad soggy failures), this recipe became my go-to for quick refrigerator pickles. It’s been tested through busy weeknights, last-minute snacks, and even a handful of impromptu dinner parties where it stole the show quietly from the background. Here’s why it’s a keeper:
- Quick & Easy: Ready to eat in as little as 24 hours, making it perfect for those moments when you need a crunchy snack fast.
- Simple Ingredients: No specialty stores needed—you probably already have garlic, dill, cucumbers, and basics like vinegar and salt in your kitchen.
- Perfect for Every Occasion: Whether it’s a casual BBQ, a potluck, or a quick side for your sandwich, these pickles fit right in.
- Crowd-Pleaser: Both kids and adults love the crispness and garlicky punch; they disappear fast at gatherings.
- Unbelievably Delicious: The balance of tart vinegar, fresh dill, and robust garlic creates a flavor combo that feels homemade and fresh—not like store-bought pickles at all.
What sets this recipe apart is the careful balance of flavors and texture. I use a pinch of pickling salt instead of regular table salt to keep the brine clear and the cucumbers crunchy. The dill isn’t just an afterthought either—I like to add a mix of fresh dill fronds and seeds for that herby complexity. Plus, the garlic gets a little mellowed but still bold after sitting in the fridge, so you get that perfect garlicky hint without overpowering the cucumbers. Honestly, this isn’t just another pickle recipe—it’s my little crunchy secret for fast, fresh homemade pickles that never disappoint.
What Ingredients You Will Need
This recipe uses simple, wholesome ingredients to deliver bold flavor and satisfying texture without the fuss. Most are pantry staples, and a few fresh touches make all the difference.
- Pickling Cucumbers: About 4-5 medium cucumbers (roughly 1.5 pounds or 700 grams). Look for firm, bright green cucumbers with minimal blemishes. Kirby cucumbers work wonderfully for their firmness.
- Fresh Garlic Cloves: 4-5 cloves, peeled and lightly smashed (adds robust garlic flavor).
- Fresh Dill: 3-4 sprigs of dill fronds plus 1 teaspoon dill seeds (fresh dill is best for that authentic herbal aroma).
- White Vinegar: 1 cup (240 ml) – the acidity is key for that classic tang and preservation.
- Water: 1 cup (240 ml) – balances the vinegar so it’s not too sharp.
- Pickling Salt or Kosher Salt: 2 tablespoons (avoid iodized salt to keep brine clear).
- Granulated Sugar: 1 tablespoon (optional, but helps balance acidity).
- Black Peppercorns: 1 teaspoon (adds a subtle spicy warmth).
- Red Pepper Flakes: 1/2 teaspoon (optional, for a little kick).
If you want to swap ingredients, almond flour doesn’t apply here, but feel free to try using apple cider vinegar instead of white vinegar for a slightly fruitier tang. And if fresh dill isn’t available, dried dill weed can work in a pinch, though the flavor won’t be as vibrant. For a dairy-free and vegan recipe, everything here fits perfectly. I usually recommend brands like Heinz for vinegar and Diamond Crystal for kosher salt because they deliver consistent results.
Equipment Needed
- Large Mason Jar or Glass Container: At least 1-quart (1-liter) capacity with a tight-fitting lid. Glass is best to avoid any weird flavors.
- Measuring Cups and Spoons: For precise vinegar, water, salt, and sugar measurements.
- Mixing Bowl: To combine the brine ingredients before pouring into the jar.
- Knife and Cutting Board: For slicing cucumbers and prepping garlic.
- Vegetable Peeler (Optional): If you want to peel stripes on cucumbers for aesthetics.
If you don’t have a mason jar, any clean glass container with a lid will do. Plastic containers tend to hold onto smells and don’t keep pickles quite as fresh. For making larger batches, a ceramic crock or pickling pot can be fun, but honestly, the jar works fine for daily fridge pickles. I keep a small funnel handy sometimes to avoid dribbles when pouring brine. And a sharp knife makes slicing cucumbers easier—dull knives tend to bruise and ruin that crisp texture.
Preparation Method
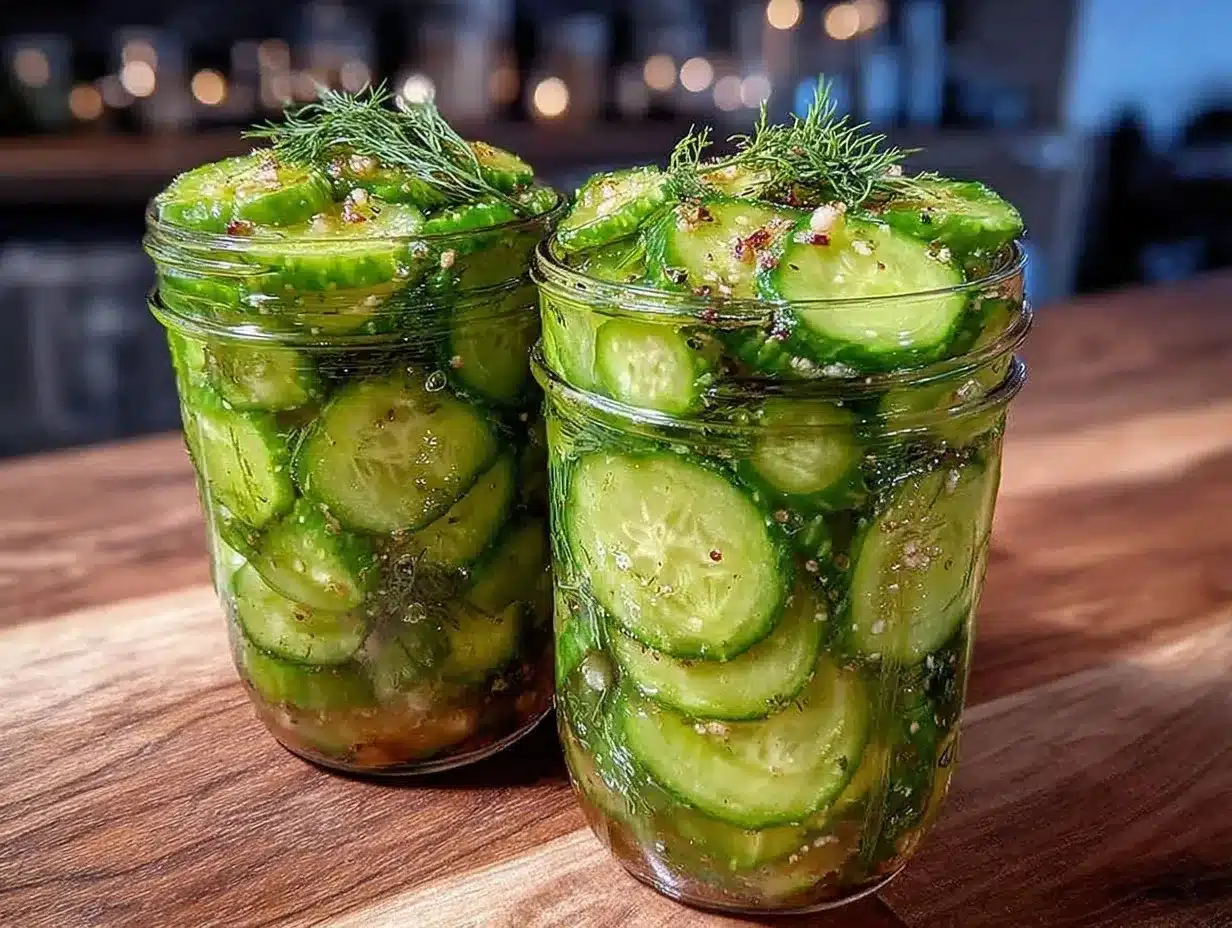
- Wash and Slice the Cucumbers: Rinse the cucumbers under cold water. Slice them into 1/4-inch (6 mm) thick rounds or spears (about 4 inches/10 cm long). The thickness affects how fast they pickle—thinner slices soak up flavor quicker but can lose crunch sooner.
- Prepare the Brine: In a mixing bowl, combine 1 cup (240 ml) white vinegar, 1 cup (240 ml) water, 2 tablespoons pickling salt, and 1 tablespoon sugar. Stir until salt and sugar dissolve completely. This usually takes about 2-3 minutes.
- Pack the Jar: Add the smashed garlic cloves, fresh dill sprigs, dill seeds, black peppercorns, and red pepper flakes (if using) into the bottom of your jar. Then tightly pack the cucumber slices or spears on top. Press down gently to fit as many as you can without crushing them.
- Pour the Brine: Pour the brine over the cucumbers, making sure they’re fully submerged. Leave about 1/2 inch (1.25 cm) of space at the top to allow for expansion.
- Seal and Shake: Screw on the lid tightly and give the jar a gentle shake to mix the spices around. Wipe the rim clean to avoid sticky residue.
- Refrigerate: Place the jar in the fridge. These pickles start tasting good after 24 hours, but for best flavor, wait 48 hours. They’ll keep for up to 2 weeks refrigerated.
- Enjoy: When ready, grab a crisp pickle and enjoy the garlicky, dill-infused crunch. The aroma should be fresh and inviting, not overpowering.
Quick tip: If your cucumbers end up floating, press them down with a clean weight or a small, sanitized jar lid to keep them submerged. Also, don’t skip the pickling salt—it’s what keeps the brine clear and crisp, unlike table salt which can make it cloudy.
Cooking Tips & Techniques
One thing I learned the hard way is that the type of cucumber you choose makes or breaks your crispy garlic dill refrigerator pickles. Pickling cucumbers or Kirby cucumbers are your best bet because of their firm texture and small seeds. Regular slicing cucumbers can get mushy pretty fast, so avoid those if you want crunch.
Don’t rush the pickling process. While these are “quick” refrigerator pickles, flavor improves significantly after 48 hours. But if you’re impatient like me, 24 hours still gives a decent tang and bite. Just remember, patience is part of the magic here.
Always fully submerge cucumbers in the brine to avoid mold and uneven pickling. I use a sanitized glass weight or a smaller jar lid pressed gently on top. Also, start with fresh, cold cucumbers straight from the fridge to preserve snap.
Garlic intensity mellows over time, so if you prefer a strong garlic punch, crush the cloves just before eating or add an extra clove. And if you want a little heat, toss in some red pepper flakes or even a sliced jalapeño for a spicy twist.
Having a clean jar and tools is crucial because any leftover residue or bacteria can spoil your pickles quickly. I learned that after a failed batch that turned cloudy and smelled off—never again!
Variations & Adaptations
There’s plenty of room to play with this crispy garlic dill refrigerator pickles recipe. Here are a few personal favorites and ideas to try out:
- Spicy Kick: Add sliced jalapeños or increase red pepper flakes for a bold, spicy pickle perfect for topping burgers or sandwiches.
- Sweet & Tangy: Increase sugar to 2 tablespoons and add a cinnamon stick to the jar for a sweet-savory twist that pairs well with grilled chicken.
- Herbal Mix-Up: Swap dill for fresh thyme or tarragon for a different herbal profile. Thyme adds earthiness, while tarragon brings a slight anise flavor.
- Quick Pickled Onions: Use thinly sliced red onions instead of cucumbers, following the same brine for a zesty onion pickle that’s great on tacos.
- Vegan & Allergy-Friendly: This recipe is naturally vegan and gluten-free. For low-sodium needs, reduce salt by half but expect less crispness.
Once, I tried adding a splash of apple cider vinegar instead of white vinegar and it gave a softer, fruitier tang I really liked for summer salads. And if you want to see a tangy, crunchy snack served alongside, these pickles go surprisingly well with crispy loaded potato skins with bacon and cheese, which is a nice savory companion.
Serving & Storage Suggestions
Serve these pickles chilled for maximum crispness and tang. They’re a perfect crunchy side for sandwiches, burgers, or even as a zingy snack straight from the jar. Try adding them to a batch of crispy mozzarella sticks with marinara sauce for a snack plate with contrasting textures and flavors.
Store pickles in the refrigerator in a sealed glass jar. They’ll keep fresh and crunchy for up to 2 weeks, though mine rarely last that long! Over time, the pickles get a little softer and the flavors meld deeper, which some folks prefer for cooking or topping pizzas.
If you want to re-crisp older pickles, soak them in ice-cold salted water for about 30 minutes before serving. And for travel or picnics, pack them in a tight jar to avoid leaks and keep them cold.
Nutritional Information & Benefits
These crispy garlic dill refrigerator pickles are low in calories (about 10-15 calories per serving) and fat-free. The vinegar provides a probiotic-friendly environment, which some studies link to gut health benefits. Garlic adds antioxidants and supports the immune system, while dill offers vitamins A and C along with minerals like calcium.
This recipe is naturally gluten-free, vegan, and suitable for keto or paleo diets. Just watch the sugar if you’re counting carbs closely. I appreciate how these pickles add a flavorful crunch without any unnecessary additives or preservatives found in store-bought varieties.
Conclusion
For a quick, flavorful, and satisfying snack, these crispy garlic dill refrigerator pickles check every box. They came from a moment of improvisation but turned into a staple in my kitchen for whenever I need a fresh crunch fast. The balance of garlic, dill, and vinegar is just right—not too sharp, not too mild—and the texture stays crisp in the fridge for days.
Adjust the spice, sweetness, or herbs to your liking, and you’ll have a homemade pickle that beats store brands easily. I love how simple ingredients and a little patience can turn into such an addictive treat, especially when paired with dishes like crispy loaded potato skins or even a fresh summer salad.
Give this recipe a shot next time you want a crunchy, garlicky pickled snack fast. Let me know how your batch turns out or if you tried any fun variations—I’m all ears!
FAQs About Crispy Garlic Dill Refrigerator Pickles
How long do refrigerator pickles take to be ready?
They start tasting good after 24 hours but are best after 48 hours in the fridge for full flavor and crunch.
Can I use regular cucumbers for this recipe?
Pickling or Kirby cucumbers are best for crispness. Regular slicing cucumbers can get mushy quickly.
Do I need special pickling salt?
Pickling salt or kosher salt is recommended to keep the brine clear and the cucumbers crunchy. Avoid iodized table salt.
How long will these pickles keep in the fridge?
They stay good and crunchy for up to 2 weeks when stored in a sealed glass jar.
Can I make these pickles spicy?
Absolutely! Add red pepper flakes or sliced jalapeños to the jar before refrigerating for some heat.
Pin This Recipe!

Crispy Garlic Dill Refrigerator Pickles Recipe Ready Fast and Easy

A quick and easy recipe for crispy garlic dill refrigerator pickles that are ready in as little as 24 hours, featuring fresh cucumbers soaked in a tangy, garlicky brine with dill and spices.
- Prep Time: 15 minutes
- Cook Time: 0 minutes
- Total Time: 24 hours (minimum for pickling)
- Yield: 4-5 servings 1x
- Category: Snack, Side Dish
- Cuisine: American
Ingredients
- 4–5 medium pickling cucumbers (about 1.5 pounds or 700 grams)
- 4–5 fresh garlic cloves, peeled and lightly smashed
- 3–4 sprigs fresh dill fronds
- 1 teaspoon dill seeds
- 1 cup (240 ml) white vinegar
- 1 cup (240 ml) water
- 2 tablespoons pickling salt or kosher salt
- 1 tablespoon granulated sugar (optional)
- 1 teaspoon black peppercorns
- 1/2 teaspoon red pepper flakes (optional)
Instructions
- Wash and slice the cucumbers into 1/4-inch (6 mm) thick rounds or spears about 4 inches (10 cm) long.
- In a mixing bowl, combine 1 cup white vinegar, 1 cup water, 2 tablespoons pickling salt, and 1 tablespoon sugar. Stir until salt and sugar dissolve completely.
- Add smashed garlic cloves, fresh dill sprigs, dill seeds, black peppercorns, and red pepper flakes (if using) to the bottom of a large mason jar or glass container.
- Tightly pack the cucumber slices or spears on top of the spices in the jar, pressing down gently to fit as many as possible without crushing.
- Pour the brine over the cucumbers, ensuring they are fully submerged, leaving about 1/2 inch (1.25 cm) space at the top.
- Seal the jar tightly and gently shake to mix the spices around. Wipe the rim clean.
- Refrigerate the jar. Pickles start tasting good after 24 hours but are best after 48 hours. Keep refrigerated for up to 2 weeks.
- When ready, enjoy the garlicky, dill-infused crunchy pickles.
Notes
Use pickling or Kirby cucumbers for best crunch. Avoid iodized salt to keep brine clear. Fully submerge cucumbers to prevent mold. For stronger garlic flavor, crush cloves just before eating or add extra cloves. Red pepper flakes or jalapeños can be added for spice. Store in sealed glass jar refrigerated up to 2 weeks. To re-crisp older pickles, soak in ice-cold salted water for 30 minutes before serving.
Nutrition
- Serving Size: About 1/2 cup of pic
- Calories: 1015
- Sugar: 1
- Sodium: 800
- Carbohydrates: 2
- Fiber: 0.5
- Protein: 0.3
Keywords: refrigerator pickles, garlic dill pickles, quick pickles, easy pickles, crispy pickles, homemade pickles, dill pickles, refrigerator pickles recipe


