This was supposed to be a fancy layered tiramisu. I had the mascarpone, the espresso, the ladyfingers—the whole nine yards. It was the night before my annual Halloween party, and I was feeling ambitious. But somewhere between the third batch of caramel popcorn and the ghost-shaped cheese platter, my brain short-circuited. I grabbed the instant chocolate pudding instead of the espresso. I used crushed Oreos instead of ladyfingers. And I was already ten minutes behind schedule with guests arriving in an hour. What came out was nothing like the plan—and better.
I stood there, staring at these little plastic cups filled with chocolate pudding and cookie crumbs, thinking I’d just created a dessert disaster. Honestly, I almost threw the whole thing in the trash. But my neighbor, Carol, who had wandered in early to help, grabbed one and took a bite. She didn’t say anything for a solid five seconds. Then she just pointed at the bowl of remaining pudding and said, “Make more.”
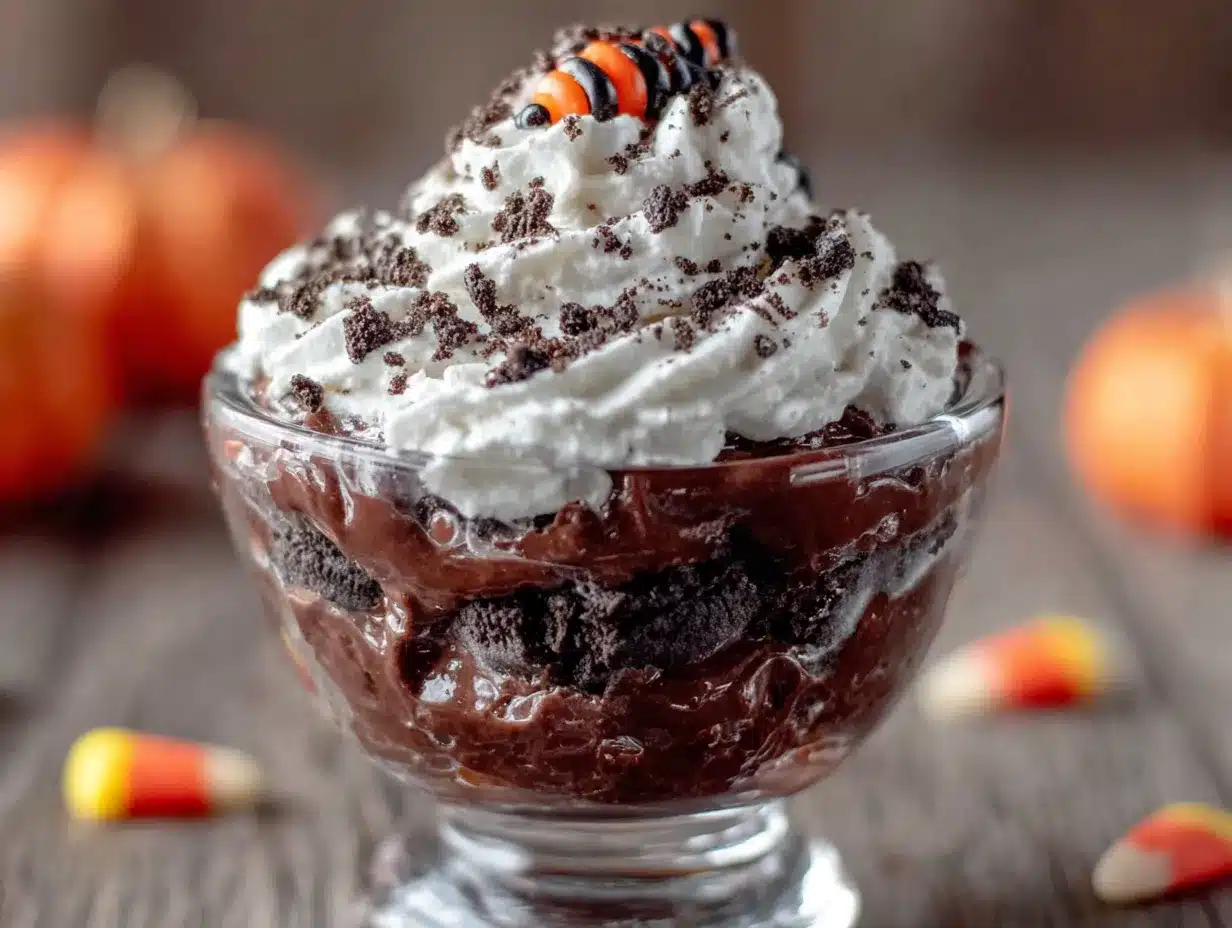
That’s the thing about this Halloween Oreo dirt cup pudding recipe—it started as a complete accident, but it ended up being the most requested dessert I’ve ever made. Every year since, someone asks me, “You’re bringing those dirt cups, right?” And every year, I pretend I planned it that way. The gummy worms peeking out of the “dirt,” the creamy chocolate layers, the crunch of the crushed Oreos—it’s like a little garden of spooky deliciousness. Maybe you’ve been there, standing in your kitchen with a mess of ingredients that weren’t supposed to go together, wondering if you should just order pizza. Trust me, sometimes the happy accidents are the ones worth repeating.
Why You’ll Love This Recipe
Let me tell you why this Halloween Oreo dirt cup pudding recipe has become my go-to for every spooky gathering. I’ve tested this about six different ways—different pudding brands, different chilling times, different ratios of cookie to cream—and this version is the one that gets the biggest reactions every single time.
- Quick & Easy: Comes together in under 20 minutes of active prep time. No baking, no complicated steps, no stress when you’re already juggling a dozen other party tasks.
- Simple Ingredients: You probably have most of these in your pantry right now. Instant pudding mix, milk, Oreos, cream cheese, and whipped topping—that’s it. No fancy grocery runs required.
- Perfect for Halloween Parties: These little cups are made for gatherings. They’re individual servings, so guests can grab one and mingle without needing plates or forks. Plus, they look adorable on a dessert table.
- Crowd-Pleaser: I’ve served these to kids, adults, and even my aunt who “doesn’t do sweets.” She had two. The combination of creamy pudding and crunchy cookies is basically irresistible.
- Make-Ahead Magic: You can prep these a full day in advance. The flavors actually get better as they sit, and it means one less thing to worry about when guests are walking through the door.
What makes this version different from every other dirt cup recipe out there? It’s the cream cheese layer. Most recipes just layer pudding and crushed cookies, but adding that tangy cream cheese mixture in the middle gives it a richness that makes people stop and ask, “What’s in this?” It’s not just another dessert—it’s the one that disappears first.
There’s something deeply satisfying about watching guests’ faces light up when they see these cups. The gummy worms peeking out, the “dirt” on top, the little plastic cup that feels like a treasure. It’s comfort food with a spooky twist, and honestly, it makes hosting feel effortless.
What Ingredients You Will Need
This Halloween Oreo dirt cup pudding recipe uses simple, pantry-friendly ingredients to create something that tastes way more complicated than it actually is. Here’s what you’ll need and why each one matters.
For the Pudding Layer
- 2 boxes (3.9 oz each) instant chocolate pudding mix — I prefer Jell-O brand for its consistent texture, but any brand works. Make sure it’s instant, not cook-and-serve, or the timing gets tricky.
- 3 cups cold whole milk — Whole milk gives the richest, creamiest pudding. You can use 2% in a pinch, but avoid skim—the pudding won’t set up as nicely and can turn watery.
For the Cream Cheese Layer
- 8 oz cream cheese, softened — This is the secret ingredient that elevates the whole dessert. Let it sit on the counter for about 30 minutes before mixing so it blends smoothly without lumps.
- 1/2 cup granulated sugar — Just enough to sweeten the cream cheese without making it cloying.
- 1 teaspoon vanilla extract — Pure vanilla adds warmth and depth. Imitation works fine, but pure is noticeably better.
- 1 cup whipped topping (like Cool Whip), thawed — This lightens the cream cheese mixture and makes it fluffy. You can also whip 1 cup of heavy cream with 2 tablespoons of powdered sugar if you want to go fully homemade.
For the “Dirt”
- 1 family-size package (about 36 cookies) Oreo cookies — Regular Oreos work best. Double Stuf is fine too, but the extra cream filling can make the “dirt” clump a bit. You’ll need the whole package.
For Decoration
- Gummy worms — About 2-3 per cup. Get the sour kind for an extra tangy surprise against the sweet pudding.
- Optional: Halloween sprinkles, candy eyeballs, or small plastic spiders — These take the presentation from cute to showstopping.
Ingredient Selection Tips: When choosing your Oreos, look for packages that aren’t too crushed already. You want whole cookies that you can crush yourself for the perfect texture—some fine crumbs, some small chunks. For the gummy worms, I like the Trolli brand because they hold their shape and don’t get sticky too fast.
Substitution Guidance: Need a dairy-free version? Use almond milk or oat milk with a dairy-free instant pudding mix (check the label—some brands are accidentally vegan). Swap the cream cheese for a plant-based version and use coconut whipped topping. The texture will be slightly different but still delicious. For a gluten-free option, use gluten-free chocolate sandwich cookies—they work exactly the same way.
Equipment Needed
You don’t need fancy tools for this Halloween Oreo dirt cup pudding recipe, which is part of why I love it. Here’s what you’ll need:
- Large mixing bowls — Two medium-to-large bowls, one for the pudding and one for the cream cheese mixture. I use glass bowls because they’re easy to see through and clean up well.
- Electric hand mixer or stand mixer — You can mix the cream cheese by hand if your arm is up for it, but a hand mixer makes it silky smooth in about 90 seconds. I’ve done it both ways, and the mixer is worth the minimal cleanup.
- Whisk — For the pudding. A whisk gets out lumps better than a spoon.
- Ziploc bags or a food processor — For crushing the Oreos. A food processor gives you the most consistent texture, but a Ziploc bag and a rolling pin (or even a heavy skillet) work perfectly. There’s something satisfying about smashing cookies when you’re stressed about hosting.
- Small plastic cups or clear dessert cups — I use 7-ounce plastic cups from the party supply store. Clear cups show off the layers, which is half the fun. You can also use small mason jars or even wine glasses for a fancier look.
- Spatula — For scraping every last bit of cream cheese mixture into the cups. Waste not, want not.
- Measuring cups and spoons — Standard set for accuracy.
Budget-Friendly Tip: Don’t buy special “dessert cups” if you don’t want to. Solo cups work in a pinch, or even small bowls. The presentation won’t be as layered, but the taste is exactly the same.
Preparation Method
Here’s how to make these Halloween Oreo dirt cup pudding cups step by step. I’ve made this recipe so many times I could do it in my sleep, but I’ll share all the little tricks I’ve learned along the way.
- Crush the Oreos (5 minutes)
Place all the Oreos in a large Ziploc bag and seal it tight. Use a rolling pin or the bottom of a heavy skillet to crush them into fine crumbs with some small chunks remaining. You want a mix of textures—some powdery “dirt” and some little cookie bits. If you’re using a food processor, pulse about 10-12 times, checking after each pulse. Set aside about 1/2 cup of the crumbs for topping later.
- Make the pudding (5 minutes)
In a large bowl, whisk together the instant pudding mix and cold milk. Whisk vigorously for about 2 minutes until the mixture thickens. It should look glossy and start to hold soft peaks when you lift the whisk. Let it sit for 5 minutes to fully set while you work on the next step. Don’t rush this—the pudding needs that time to firm up properly.
- Make the cream cheese layer (5 minutes)
In a separate bowl, beat the softened cream cheese with the sugar and vanilla extract using an electric mixer on medium speed. Beat for about 2-3 minutes until the mixture is completely smooth with no lumps. Scrape down the sides of the bowl with a spatula halfway through. Fold in the thawed whipped topping gently with a spatula until fully combined. The mixture should be light, fluffy, and pale.
- Layer the cups (10 minutes)
Now for the fun part. Take your clear cups and start building layers. First, add a generous tablespoon of crushed Oreos to the bottom of each cup—about 1/2 inch deep. Next, spoon a layer of the cream cheese mixture over the cookies, about 1/4 cup per cup. Then add a layer of chocolate pudding on top of the cream cheese, another 1/4 cup or so. Repeat with another thin layer of crushed Oreos, then another layer of pudding. End with a final layer of crushed Oreos on top. The “dirt” should cover the surface completely.
- Chill (at least 2 hours, ideally overnight)
Cover each cup with plastic wrap or a lid and refrigerate for at least 2 hours. Overnight is better—the layers settle, the flavors meld, and the cookies soften slightly into the pudding. It’s like the dessert version of marinating. I’ve made these 24 hours ahead of time and they were perfect.
- Decorate just before serving (5 minutes)
Right before you bring them out, stick 2-3 gummy worms into the “dirt” of each cup so they look like they’re crawling out. Add any extra decorations like candy eyeballs or sprinkles. The worms will start to soften if they sit too long, so wait until the last minute.
Sensory Cues: When the pudding is ready, it should feel thick and silky when you stir it, not runny. The cream cheese mixture should be smooth enough to spread easily but firm enough to hold its shape when spooned. When you bite into a finished cup, you should get the crunch of the cookies, the creaminess of the pudding, and the tangy richness of the cream cheese all at once.
Prep Note: If you’re making these for a party, crush the Oreos and make the pudding the night before. Then just assemble the cups in the morning. It breaks up the work and makes the day-of hosting much more relaxed.
Cooking Tips & Techniques
After making this Halloween Oreo dirt cup pudding recipe more times than I can count, I’ve picked up a few tricks that make the process smoother and the results better. Let me share what I’ve learned the hard way.
Don’t over-crush the Oreos. I made this mistake the first time—I pulverized them into dust, thinking I wanted a fine, soil-like texture. The problem was that the “dirt” turned into mud when it mixed with the pudding. You want some larger chunks, about the size of small pebbles, to give it that realistic dirt look and a satisfying crunch.
Let the cream cheese really soften. I’ve been impatient and tried to mix cold cream cheese. It ends up lumpy and no amount of beating makes it completely smooth. Set it out 30-45 minutes before you start. If you forget, microwave it in 10-second bursts, checking between each one, until it’s soft but not melted.
Use a piping bag or Ziploc for the layers. If you want perfectly even layers, snip a corner off a Ziploc bag and pipe the pudding and cream cheese mixture into the cups. It takes an extra minute but makes the presentation look professional. I learned this after a particularly messy attempt where the layers looked like a Jackson Pollock painting.
Timing is everything with the gummy worms. I once put the worms in the cups the night before a party. By morning, they had absorbed moisture from the pudding and turned into sad, bloated blobs. Always add them right before serving. Your guests will thank you.
Make extra “dirt”. I always crush a few extra Oreos beyond what the recipe calls for. Someone will inevitably knock over a cup, or you’ll want a thicker topping on a few servings, or you’ll just want to snack on the crumbs while you work. Trust me on this.
The biggest lesson I learned: Don’t stress about perfection. The beauty of these cups is that they’re supposed to look messy—it’s dirt, after all. If a layer smooshes together or a worm is crooked, it just adds to the rustic, spooky charm.
Variations & Adaptations
One of the best things about this Halloween Oreo dirt cup pudding recipe is how easy it is to adapt. Here are some variations I’ve tried and loved.
Peanut Butter Dirt Cups: Add 1/2 cup of creamy peanut butter to the cream cheese mixture when you’re beating it. The peanut butter adds a salty, nutty depth that pairs beautifully with the chocolate. My husband says this version is better than the original—though I’m not sure I agree.
Mint Chocolate Dirt Cups: Use mint-flavored Oreos instead of regular ones, and add 1/2 teaspoon of peppermint extract to the pudding. The cool mint with the dark chocolate is like a Thin Mint in dessert cup form. Perfect for a Christmas-themed party too.
Vegan Dirt Cups: Use dairy-free cream cheese, coconut whipped topping, almond milk with a vegan instant pudding mix, and gluten-free chocolate sandwich cookies. I made this version for a friend with dietary restrictions, and honestly, it was almost indistinguishable from the original. The coconut whipped topping adds a subtle tropical note that’s lovely.
Pumpkin Spice Dirt Cups: For a fall twist, add 1/2 cup of pumpkin puree and 1 teaspoon of pumpkin pie spice to the cream cheese mixture. Top with crushed ginger snaps instead of Oreos. It’s a Thanksgiving-worthy dessert that looks like a tiny pumpkin patch.
Layered Parfait Style: Instead of cups, make a large trifle dish with multiple layers. It’s great for feeding a crowd and looks stunning on a buffet table. Just triple the recipe and layer everything in a glass bowl. The visual impact is incredible.
Spicy Chocolate Dirt Cups: Add 1/4 teaspoon of cayenne pepper and 1/2 teaspoon of cinnamon to the pudding mix. The heat sneaks up on you and makes the chocolate taste deeper and more complex. I tried this on a whim and it’s become my secret weapon for adult parties.
Serving & Storage Suggestions
These Halloween Oreo dirt cup pudding cups are best served cold, straight from the refrigerator. The contrast between the chilled, creamy pudding and the crunchy cookie “dirt” is what makes them so addictive.
Presentation Tips: Arrange the cups on a large platter or tray lined with black or orange fabric. Scatter a few extra gummy worms and candy eyeballs around the base for a spooky effect. If you’re using small plastic cups, you can write guests’ names on them with a Sharpie for place settings. I’ve also used small terracotta pots (lined with plastic wrap) for a gardening theme—just stick a fake flower in the top.
What to Serve Alongside: These cups are rich, so pair them with something lighter. I like serving them with a fruit platter, some caramel apples, or popcorn balls. For drinks, apple cider, hot chocolate, or a pumpkin spice latte are perfect complements. If you’re hosting an adult party, a dark stout beer or a coffee cocktail works beautifully with the chocolate.
Storage Instructions: Keep the cups covered in the refrigerator for up to 3 days. The texture changes over time—the cookies soften and the layers meld together—but it’s still delicious. I actually prefer them on day two when everything has settled. Do not freeze them; the pudding gets icy and the texture becomes grainy when thawed.
Reheating: Don’t. These are meant to be served cold. If you want a warm dessert, this isn’t the recipe for you.
How Flavors Develop: The first day, the layers are distinct—crunchy cookies, creamy pudding, tangy cream cheese. By day two, the cookies have softened and the flavors have blended into something more cohesive. Both versions are good, just different. I usually make them a day ahead on purpose because I prefer the melded version.
Nutritional Information & Benefits
Let’s be honest—this is a treat, not a health food. But here’s the nutritional breakdown for one serving (based on 12 servings per recipe).
Estimated per serving: 320 calories, 18g fat, 38g carbohydrates, 5g protein, 28g sugar, 2g fiber. These numbers will vary based on your specific ingredients and portion sizes.
Health Benefits of Key Ingredients: The cream cheese provides calcium and protein, and the milk adds vitamin D and more calcium. The cocoa in the pudding mix contains antioxidants called flavonoids, which can support heart health. The Oreos… well, they make you happy, and that counts for something.
Dietary Considerations: This recipe contains dairy, gluten, and soy (from the Oreos). It can be adapted to be vegan, dairy-free, and gluten-free with the substitutions I mentioned earlier. It’s not low-carb or keto-friendly unless you use a sugar-free pudding mix and keto-friendly cookies.
Potential Allergens: Milk, wheat, soy. Check your specific brands if you’re serving someone with allergies, as formulations can vary.
My Personal Perspective: I’m a firm believer in balance. These dirt cups are a celebration dessert, not an everyday snack. They’re meant to be enjoyed with friends and family on a special occasion. So go ahead, have one—or two. Life’s too short to skip dessert.
Conclusion
This Halloween Oreo dirt cup pudding recipe is the kind of dessert that makes people smile. It’s fun, it’s nostalgic, and it’s genuinely delicious—not just a gimmick. Whether you’re hosting a Halloween party, a fall gathering, or just want to surprise your family with something special, these cups deliver every single time.
I love this recipe because it reminds me that sometimes the best things come from mistakes. That night I grabbed the wrong ingredients and ended up with something better than I’d planned? It taught me to relax in the kitchen. Not everything has to be perfect. Sometimes the messy, imperfect, last-minute creation is the one everyone remembers.
So go ahead and make these. Customize them, play with the layers, stick a few extra worms in there. Make them your own. And when your guests ask for the recipe, tell them it was an accident. They won’t believe you, but that’s part of the fun.
I’d love to hear how yours turn out! Drop a comment below with your twists on the recipe, or tag me in your photos if you share them online. Happy Halloween, and happy eating!
Frequently Asked Questions
Can I use homemade pudding instead of instant?
Yes, you can use homemade chocolate pudding, but it needs to be completely cooled and thickened before layering. Instant pudding is faster and has a more consistent texture for this recipe, but homemade works if you have the time.
How far in advance can I make these?
You can make them up to 3 days in advance. The texture will soften over time, but many people prefer them on day two when the flavors have melded. Just add the gummy worms right before serving.
Can I use a different type of cookie?
Absolutely! Chocolate wafer cookies, gluten-free sandwich cookies, or even crushed graham crackers work well. Each gives a slightly different texture and flavor, so feel free to experiment.
How do I keep the gummy worms from getting soggy?
Add the gummy worms right before serving, not during the chilling process. The moisture from the pudding will soften them over time, so waiting until the last minute keeps them chewy and fun.
Can I make these in a large dish instead of individual cups?
Yes! Use a 9×13-inch baking dish or a large trifle bowl. Layer the ingredients as directed, then scoop into bowls when serving. The presentation is different but just as delicious. You may need to double the recipe for a larger dish.
Pin This Recipe!
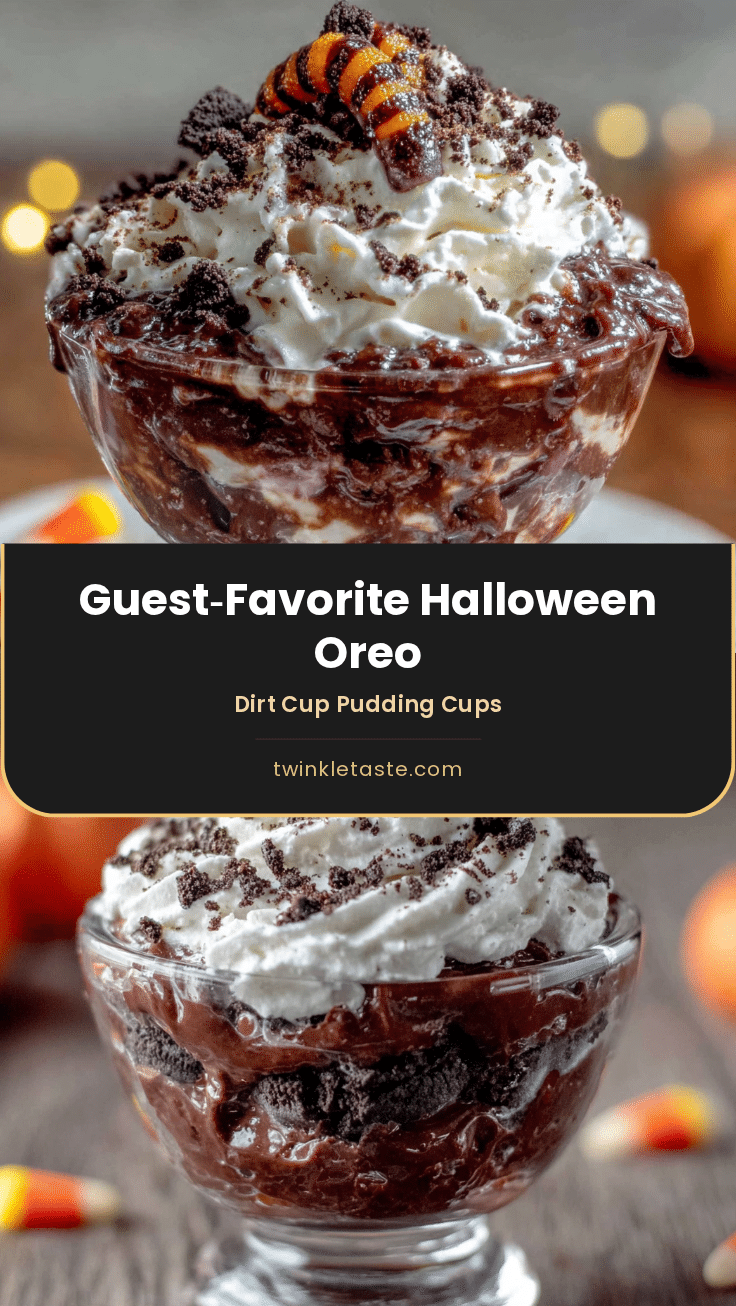
The Best Halloween Oreo Dirt Cup Pudding Recipe
This Halloween Oreo dirt cup pudding recipe is a quick, no-bake dessert that layers creamy chocolate pudding, a tangy cream cheese mixture, and crushed Oreo ‘dirt’ in individual cups. Perfect for parties, it’s a crowd-pleasing treat that comes together in under 20 minutes of active prep.
- Prep Time: 20 minutes
- Cook Time: 0 minutes
- Total Time: 2 hours 20 minutes (includes chilling)
- Yield: 12 servings 1x
- Category: Dessert
- Cuisine: American
Ingredients
- 2 boxes (3.9 oz each) instant chocolate pudding mix
- 3 cups cold whole milk
- 8 oz cream cheese, softened
- 1/2 cup granulated sugar
- 1 teaspoon vanilla extract
- 1 cup whipped topping (like Cool Whip), thawed
- 1 family-size package (about 36 cookies) Oreo cookies
- Gummy worms (about 2-3 per cup)
- Optional: Halloween sprinkles, candy eyeballs, or small plastic spiders
Instructions
- Crush the Oreos: Place all Oreos in a large Ziploc bag and crush with a rolling pin or heavy skillet into fine crumbs with some small chunks. Set aside about 1/2 cup for topping.
- Make the pudding: In a large bowl, whisk together instant pudding mix and cold milk for about 2 minutes until thickened. Let sit for 5 minutes to fully set.
- Make the cream cheese layer: In a separate bowl, beat softened cream cheese with sugar and vanilla extract using an electric mixer on medium speed for 2-3 minutes until smooth. Fold in thawed whipped topping gently until combined.
- Layer the cups: In clear cups, add a generous tablespoon of crushed Oreos (about 1/2 inch deep). Spoon about 1/4 cup cream cheese mixture over cookies. Add about 1/4 cup chocolate pudding. Repeat with another thin layer of crushed Oreos, then another layer of pudding. End with a final layer of crushed Oreos on top.
- Chill: Cover each cup with plastic wrap and refrigerate for at least 2 hours, ideally overnight.
- Decorate just before serving: Stick 2-3 gummy worms into the ‘dirt’ of each cup. Add any extra decorations like candy eyeballs or sprinkles.
Notes
For best results, let cream cheese soften at room temperature for 30-45 minutes before mixing. Add gummy worms just before serving to prevent sogginess. Make extra crushed Oreos for snacking or thicker topping. The dessert can be made up to 3 days in advance; flavors meld and improve over time.
Nutrition
- Serving Size: 1 cup
- Calories: 320
- Sugar: 28
- Sodium: 320
- Fat: 18
- Saturated Fat: 10
- Carbohydrates: 38
- Fiber: 2
- Protein: 5
Keywords: Halloween dessert, dirt cups, Oreo pudding, no-bake dessert, chocolate pudding, cream cheese, gummy worms, party dessert


