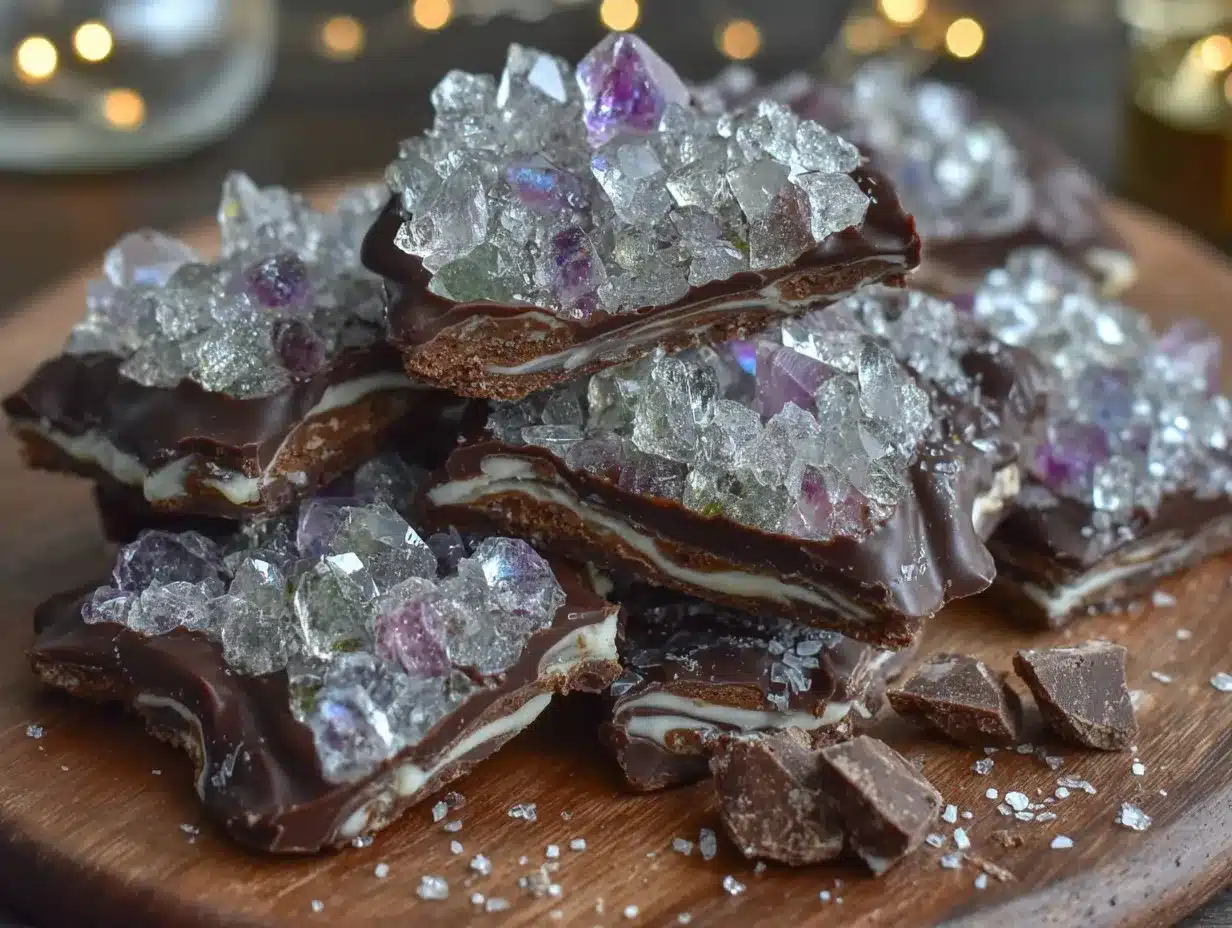
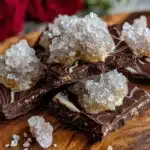
“Are you sure this is edible?” my friend asked, eyeing the dazzling shards of the geode chocolate bark I’d just pulled from the fridge. Honestly, I had my doubts too when I first stumbled on the idea of making chocolate bark that looks like a sparkling geode. It all started on a lazy Sunday afternoon, the kind where I wanted to create something impressive but without spending hours in the kitchen. I had some leftover chocolate and a bag of rock candy crystals that had been sitting untouched in my pantry. Curiosity nudged me to try layering the chocolate and placing those crystals in a way that mimicked the natural beauty of geodes. The result was stunning — and yes, totally edible.
The thrill of cracking off a piece of this breakable geode chocolate bark, watching the crystals shimmer and crunch under your teeth, is unlike any other dessert experience. It has this magical mix of crunch, sweetness, and elegance that caught me off guard. I never thought chocolate could look so much like a glittering mineral formation, yet be so simple to make at home. That first batch led to several more that week — each one a bit different, playing with colors and crystal placements. This recipe stuck because it brings that wow factor without the fuss, turning a plain chocolate snack into a conversation starter. Plus, it’s perfect when you want to treat yourself or surprise guests with something unique.
There’s something quietly satisfying about breaking off a shard of this bark, the crystals catching the light just right, and knowing you made it yourself. It’s less about perfect precision and more about the joy of creating edible art that tastes as good as it looks. Let’s face it, making this stunning breakable geode chocolate bark with edible rock candy crystals is a delicious kind of fun that anyone can enjoy — whether you’re a seasoned baker or just someone who loves a little sparkle in their sweets.
Why You’ll Love This Recipe
Having tested this geode chocolate bark recipe multiple times, I’ve picked up a few tricks that make it stand apart from other chocolate bark variations. Here’s why you’ll find it hard not to make it again and again:
- Quick & Easy: The whole process takes about 30 minutes from start to finish, including setting time — perfect for last-minute gifts or spontaneous dessert moments.
- Simple Ingredients: You don’t need fancy chocolates or rare crystals. Basic high-quality chocolate and edible rock candy crystals (which you can find online or at specialty stores) do the job beautifully.
- Perfect for Special Occasions: Whether it’s a birthday, holiday party, or just a weekend treat, this geode bark adds an unexpected elegance that impresses every time.
- Crowd-Pleaser: Kids love the shiny crystals, and adults appreciate the artful look combined with the rich chocolate flavor and satisfying crunch.
- Unbelievably Delicious: The texture contrast between smooth chocolate and crunchy crystals makes for a delightful bite that’s both fun and indulgent.
This isn’t just another chocolate bark. What makes it different is the method of layering color and placing edible crystals to mimic natural geodes. You get that mesmerizing depth and sparkle that feels almost too pretty to eat (but you’ll want to, trust me). The recipe also encourages some creative freedom — you can swap dark, milk, or white chocolate, and arrange crystal colors however you like. It’s the kind of treat that makes you pause and savor every bite, closing your eyes as the flavors and textures unfold.
Whether you’re looking for a unique dessert idea or a stunning edible gift, this geode chocolate bark recipe brings a little sparkle to the everyday without requiring professional skills or hours of time. It’s fun, forgiving, and always a crowd-pleaser.
What Ingredients You Will Need
This recipe uses straightforward, pantry-friendly ingredients to create that stunning geode look and delicious flavor. Most of these you might already have on hand or can find easily at your local grocery or specialty shop.
- Chocolate: 12 ounces (340 grams) of high-quality melting chocolate. You can choose dark (60-70% cacao for rich flavor), milk chocolate for creaminess, or white chocolate for vibrant color layering. I personally like Callebaut or Ghirardelli for smooth melting and flavor.
- Edible Rock Candy Crystals: About 1 cup (200 grams). These are the star “geode” crystals that mimic natural mineral formations. Choose clear or colored crystals depending on your color scheme. You can find these online or in baking specialty shops.
- Food Coloring (Oil-Based or Powdered): Optional but highly recommended for coloring white chocolate layers to create depth and contrast. Use vibrant jewel tones like electric blue, amethyst purple, or emerald green to replicate geode hues.
- Edible Gold or Silver Dust: Optional for adding metallic shimmer to the chocolate edges or crystals, giving that luxe mineral flash.
- Coconut Oil or Clear Vegetable Oil: 1-2 tablespoons (15-30 ml) to thin the chocolate slightly for easier spreading and smoother finish.
- Sea Salt Flakes: A pinch to sprinkle on top, balancing sweetness and adding a hint of crunch.
If you’re aiming for a gluten-free or vegan version, choose chocolates that meet those requirements and pick vegan rock candy crystals. For a dairy-free twist, swap milk chocolate with dairy-free dark chocolate varieties. The edible crystal colors can be swapped seasonally too — for instance, warm amber and ruby reds for fall or icy blues and frosted whites for winter themes.
Pro tip: When selecting rock candy crystals, go for smaller chunks or crush larger pieces gently so they look more like natural geode crystals. Firm, small crystals create the best texture contrast without overwhelming the chocolate.
Equipment Needed
The gear for making stunning breakable geode chocolate bark is minimal but having the right tools makes the process smoother and more enjoyable.
- Microwave-Safe Bowls or Double Boiler: For melting chocolate gently without scorching. I prefer using a double boiler for better control, but the microwave works well if you melt in short bursts.
- Baking Sheet or Large Tray: To spread out the chocolate bark. A rimmed baking sheet lined with parchment paper or silicone baking mats works best for easy release.
- Offset Spatula or Silicone Spreader: For smoothing melted chocolate layers evenly.
- Small Paintbrush: Useful if you want to apply edible gold or silver dust precisely on the crystals or edges.
- Measuring Spoons and Cups: For precise ingredient measurements.
- Knife or Chocolate Chopper: To break the bark into shards once set.
If you don’t have an offset spatula, a butter knife or the back of a spoon can substitute but may not give as smooth a finish. Silicone baking mats are a worthwhile investment for chocolate work since they prevent sticking and make cleanup easier. For edible dust, a small cosmetic brush (clean and unused) works just fine if you don’t want to buy a specialty brush.
Preparation Method
- Prepare your workspace: Line a rimmed baking sheet (about 9×13 inches / 23×33 cm) with parchment paper or a silicone mat. This will be your canvas for the geode bark. Set aside.
- Melt your base chocolate: Chop 8 ounces (227 grams) of chocolate into small pieces for even melting. Using a double boiler or microwave, melt chocolate gently until smooth. Add 1 tablespoon (15 ml) coconut oil to thin it slightly, stirring well.
- Pour and spread base layer: Pour the melted chocolate onto the lined baking sheet and spread evenly with an offset spatula to about 1/4-inch (6 mm) thickness. Try to smooth the edges to resemble rough rock shapes but don’t stress over perfection. Chill in the fridge for 10-15 minutes until firm but not fully set.
- Color and melt the second chocolate layer: If using white chocolate for color layers, melt 4 ounces (113 grams) and mix in your chosen oil-based food coloring. Thin with a teaspoon of coconut oil if needed for easier spreading. This layer adds the geode’s vibrant, crystal-like hues.
- Apply the colored chocolate: Using the spatula, drop dollops of colored chocolate onto the chilled base layer in clusters, swirling gently with a toothpick or skewer to mimic natural crystal formations. Don’t cover the whole surface; leave some base chocolate showing for depth. Return to fridge for 5-10 minutes to firm up slightly.
- Place rock candy crystals: Carefully press edible rock candy crystals into the colored chocolate clusters, building “geode pockets.” Use varying crystal sizes for a natural look. Sprinkle a pinch of sea salt flakes around the crystals for texture contrast and flavor balance.
- Add shimmer (optional): Lightly brush edible gold or silver dust on the edges of the crystals and chocolate to replicate mineral shimmer. This step is subtle but makes a big visual difference.
- Chill until fully set: Place the entire sheet in the fridge for at least 30 minutes until the chocolate is completely firm and breakable.
- Break into shards: Once set, remove from fridge and lift the parchment paper. Using a sharp knife or your hands, gently break the bark into irregular shards — some large, some small — just like natural geode pieces.
- Serve or store: Enjoy immediately or store in an airtight container in a cool place. The bark keeps well for up to two weeks.
Pro tip: If your chocolate seems too soft when spreading, chill briefly between layers to avoid mixing colors too much. Also, working quickly but gently when placing crystals helps maintain their sparkle and shape.
Cooking Tips & Techniques
Making geode chocolate bark feels fancy but it’s really about layering and timing. Here are a few tips I’ve learned through trial and error:
- Chocolate Tempering: You don’t need full tempering for this recipe, but melting chocolate gently and avoiding overheating is key to smooth, shiny bark. If chocolate looks grainy or thick, add a teaspoon of oil and stir until smooth.
- Choosing Food Coloring: Use oil-based or powdered food colors designed for chocolate to avoid seizing. Water-based colors can ruin the texture.
- Crystal Placement: Press crystals lightly so they don’t sink too deep but are secure enough not to fall off. Vary sizes for natural effect.
- Layer Chilling: Chill between each layer to keep colors distinct. Rushing this step leads to muddy colors and less defined “geode” pockets.
- Breaking the Bark: Don’t aim for perfect pieces. Irregular shards are what gives it that authentic geode vibe. Use your hands for a rustic look or a sharp knife for cleaner edges.
- Multitasking: While one chocolate layer chills, prep your crystals or clean up tools. It keeps the process smooth and stress-free.
I once tried skipping the chill between layers and ended up with a blurry mess of color rather than distinct geode effects. Trust me, patience pays off here. Also, a quick tip is to keep your hands dry when handling chocolate to avoid fingerprints and melting.
Variations & Adaptations
This geode chocolate bark is a great canvas for your creativity! Here are some ideas I’ve tried or recommend:
- Flavor Swaps: Add a teaspoon of instant espresso powder to dark chocolate for a mocha twist or sprinkle crushed freeze-dried raspberries on white chocolate for a fruity pop.
- Seasonal Colors: Use pastel colors and pink crystals for spring, fiery reds and oranges for fall, or icy blues and whites for winter-themed bark.
- Dietary Adaptations: Use vegan chocolate and vegan rock candy crystals for a plant-based treat. Swap coconut oil with a neutral vegetable oil if preferred.
- Cooking Method: Instead of spreading on a baking sheet, pour chocolate into silicone molds for shaped geode chocolates — perfect for gifting.
- Mix-Ins: Add chopped nuts, edible flowers, or crushed candy canes around the crystals for extra texture and flavor contrast.
One personal favorite variation was adding a hint of lavender extract to the white chocolate layer paired with purple crystals, which gave a subtle floral aroma that surprised and delighted guests. If you’re looking for savory-sweet contrast, try a pinch of smoked sea salt instead of regular salt to add depth.
Serving & Storage Suggestions
The best way to enjoy this chocolate bark is at room temperature, where the chocolate is firm but not hard. This lets the crystals crunch satisfyingly without being too brittle. Serve it on a pretty platter or in small clear bags tied with a ribbon for gifting.
This bark pairs nicely with a cup of rich coffee, a glass of red wine, or even alongside a simple cheese board for an elegant touch. For festive occasions, add some fresh berries or candied citrus slices on the side.
To store, keep the bark in an airtight container in a cool, dry place away from sunlight. Refrigeration is fine but can cause slight condensation when brought back to room temperature, which might dull the chocolate’s shine. For longer storage, freeze the bark in a sealed bag for up to 2 months — just thaw gently before serving.
Flavors tend to mellow and deepen after a day or two, so making the bark a day ahead can actually improve the tasting experience. Just be mindful of humidity, which can affect the rock candy crystals’ crunch.
Nutritional Information & Benefits
This stunning breakable geode chocolate bark is an indulgent treat, but it can fit into balanced eating when enjoyed in moderation. Here’s a rough estimate per serving (about 1 oz / 28 grams):
| Calories | 150 |
|---|---|
| Fat | 10g |
| Saturated Fat | 6g |
| Sugar | 14g |
| Protein | 1g |
Dark chocolate offers antioxidants and minerals like magnesium and iron, while the rock candy crystals provide pure sweetness without additives. Choosing dark or bittersweet chocolate can reduce sugar content compared to milk or white varieties.
Those with allergies to dairy or soy should check chocolate labels carefully, and gluten-free versions are easy by selecting gluten-free certified ingredients. For a healthier twist, try limiting portion sizes or pairing the bark with fresh fruit to balance sweetness.
Conclusion
This stunning breakable geode chocolate bark with edible rock candy crystals is a playful way to make chocolate feel special and unique. It’s one of those recipes that looks far more complex than it actually is, giving you that proud “wow” moment without hours of fuss. I love how it invites creativity — from color choices to crystal placement — and makes for a fun kitchen project that anyone can enjoy.
Whether you keep it simple or add your own personal twist, this bark is guaranteed to bring smiles and spark conversations. Plus, it’s a beautiful gift idea or party treat that stands out in a sea of ordinary sweets. I hope you give this recipe a try and find your own favorite way to break off a piece of edible sparkle.
Feel free to share your creations or tweaks — I always love hearing how others make this recipe their own. After all, cooking is about joy and discovery, one delicious shard at a time.
Frequently Asked Questions
What type of chocolate is best for geode chocolate bark?
High-quality melting chocolate works best. Dark chocolate offers rich flavor and contrast, milk chocolate adds creaminess, and white chocolate is perfect for coloring. Use brands like Ghirardelli or Callebaut for smooth melting.
Can I use regular sugar crystals instead of rock candy crystals?
Regular sugar crystals are usually too small and may dissolve in the chocolate. Edible rock candy crystals have the right size and hardness to mimic natural geodes and hold their shape.
How do I prevent the chocolate from seizing when adding food coloring?
Use oil-based or powdered food coloring designed for chocolate. Water-based colors can cause chocolate to seize and become grainy.
How long does the geode bark keep fresh?
Stored in an airtight container in a cool, dry place, it stays fresh for up to 2 weeks. Freezing can extend the shelf life up to 2 months.
Can I make this recipe without a fridge?
Chilling helps the layers set properly, but if your environment is cool enough (under 70°F / 21°C), you can let the bark set at room temperature. It might take longer and be less shiny.
For a savory-sweet balance on your dessert table, you might enjoy pairing this geode chocolate bark with a rich, comforting dish like the creamy tomato pasta e fagioli or serving it after a flavorful meal such as the spicy dakgalbi stir-fried chicken. Both offer satisfying contrasts to the sweet sparkle of this unique chocolate treat.
Pin This Recipe!
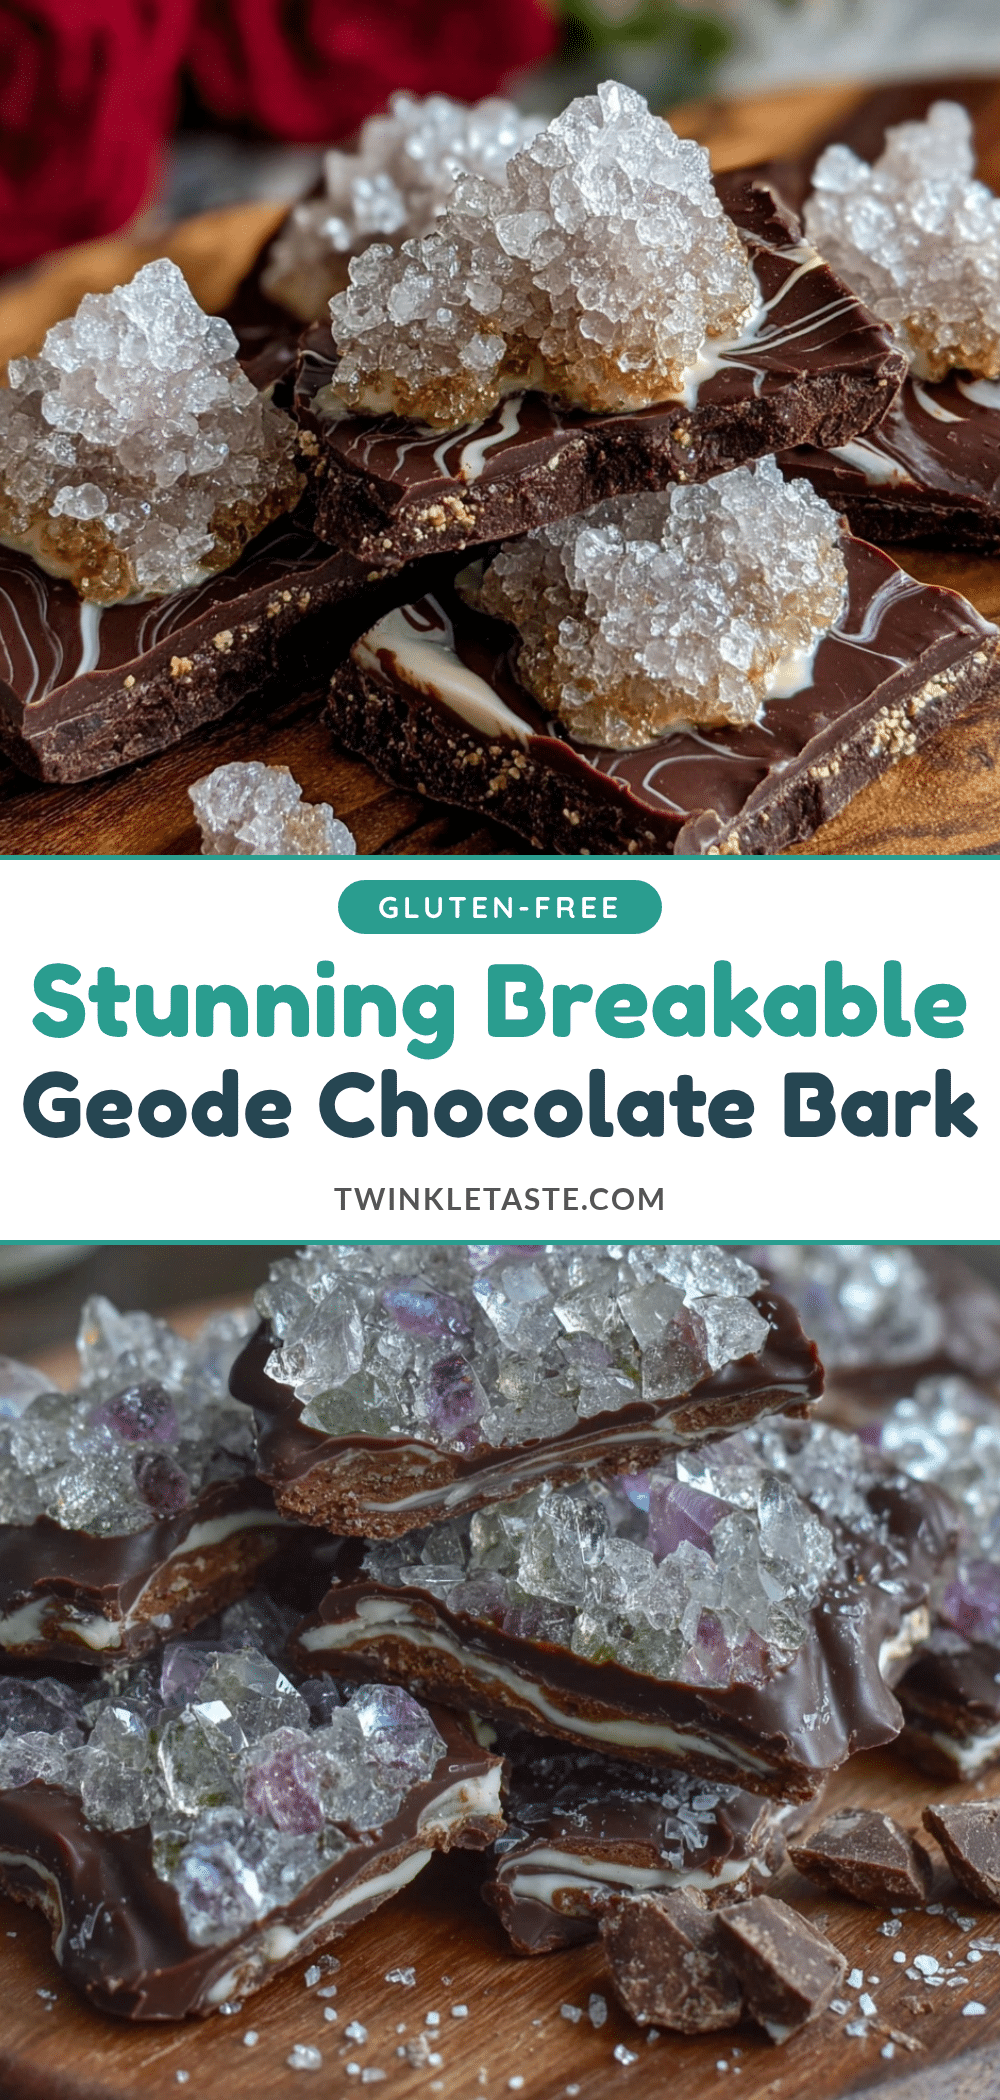
Stunning Breakable Geode Chocolate Bark Recipe with Edible Rock Candy Crystals
A dazzling and easy-to-make chocolate bark that mimics the natural beauty of geodes using edible rock candy crystals. This recipe offers a magical mix of crunch, sweetness, and elegance perfect for treats or gifts.
- Prep Time: 10 minutes
- Cook Time: 20 minutes
- Total Time: 30 minutes
- Yield: About 12 servings 1x
- Category: Dessert
- Cuisine: American
Ingredients
- 12 ounces (340 grams) high-quality melting chocolate (dark, milk, or white)
- 1 cup (200 grams) edible rock candy crystals (clear or colored)
- Oil-based or powdered food coloring (optional, for coloring white chocolate layers)
- Edible gold or silver dust (optional, for shimmer)
- 1–2 tablespoons (15–30 ml) coconut oil or clear vegetable oil
- Pinch of sea salt flakes
Instructions
- Line a rimmed baking sheet (about 9×13 inches / 23×33 cm) with parchment paper or a silicone mat.
- Chop 8 ounces (227 grams) of chocolate into small pieces and melt gently using a double boiler or microwave. Stir in 1 tablespoon (15 ml) coconut oil to thin.
- Pour melted chocolate onto the lined baking sheet and spread evenly to about 1/4-inch (6 mm) thickness. Chill in fridge for 10-15 minutes until firm but not fully set.
- Melt 4 ounces (113 grams) of white chocolate and mix in chosen oil-based food coloring. Thin with a teaspoon of coconut oil if needed.
- Drop dollops of colored chocolate onto the chilled base layer in clusters and swirl gently with a toothpick to mimic crystal formations. Chill for 5-10 minutes.
- Press edible rock candy crystals into the colored chocolate clusters, varying sizes for a natural look. Sprinkle sea salt flakes around crystals.
- Optionally, brush edible gold or silver dust on edges of crystals and chocolate for shimmer.
- Chill the entire sheet in the fridge for at least 30 minutes until fully set and firm.
- Remove from fridge and break the bark into irregular shards using a sharp knife or hands.
- Serve immediately or store in an airtight container in a cool place for up to two weeks.
Notes
Use oil-based or powdered food coloring to avoid chocolate seizing. Chill between layers to keep colors distinct. Press crystals lightly to maintain sparkle. Store in airtight container away from sunlight. Freeze for longer storage up to 2 months.
Nutrition
- Serving Size: 1 ounce (28 grams)
- Calories: 150
- Sugar: 14
- Sodium: 10
- Fat: 10
- Saturated Fat: 6
- Carbohydrates: 15
- Fiber: 1
- Protein: 1
Keywords: geode chocolate bark, edible rock candy, chocolate bark recipe, easy chocolate dessert, edible crystals, chocolate treat, holiday dessert, gift idea