I burned the first three batches of potato skins I ever made for a Super Bowl party. Not a little singed around the edges either—I mean charcoal-black, smoke-alarm-wailing, had-to-order-pizza-level disasters. It was humiliating, especially since I’d shown up talking big about my “famous loaded potato skins.” Nobody said anything, but they didn’t have to. The smell said it all.
That failure stuck with me. Not because I’m dramatic (okay, maybe a little), but because I knew potato skins could be incredible. I’d had them at bars where they came out golden, crispy, piled with cheese and bacon, and I wanted that. So I kept tinkering. I tried different oven temps, different potato varieties, different pre-cooking methods. I ruined more potatoes than I care to count. But somewhere around attempt number seven, it clicked. The secret wasn’t just the cooking time or the temperature—it was the prep. And honestly, once I figured that out, these game day loaded potato skins became the thing people ask me to bring to every party.
This isn’t one of those recipes you pin and forget. It’s the one you make when you want to walk into a room full of hungry football fans and watch them go quiet for a second before they grab a second (and third) skin. They’re salty, cheesy, smoky, and exactly what a cold Sunday in front of the TV calls for.
Why You’ll Love This Recipe
I’ve tested this recipe more times than I’d like to admit, and every single batch has taught me something. The version I’m sharing today is the result of all those burnt edges and soggy bottoms. It’s the one I’d serve to my pickiest friends without a second thought.
- Quick & Easy: These come together in about an hour, and most of that is hands-off oven time. Perfect for when the pre-game show is already on.
- Simple Ingredients: Potatoes, cheese, bacon, sour cream, green onions. You probably have half of this in your kitchen right now.
- Perfect for Game Day: They hold up well on a buffet table, they’re easy to eat standing up, and they pair perfectly with cold beer.
- Crowd-Pleaser: I’ve seen people who “don’t like potatoes” eat three of these. It’s the bacon-cheese combo—it never fails.
- Unbelievably Delicious: The contrast between the crispy skin and the creamy filling is next-level. It’s comfort food that actually delivers.
What makes this recipe different from the rest is the double-baking method. Most recipes either bake the potatoes once and call it done, or they fry the skins, which gets messy. My approach gives you that shatteringly crisp shell without the grease. It’s the texture that keeps people coming back, and it took me way too many burnt potatoes to figure it out.
What Ingredients You Will Need
This recipe uses straightforward ingredients, but the quality of each one matters. Since there aren’t a ton of components, every single one pulls its weight. Here’s what you’ll need and why I chose each one.
For the Potato Skins
- Russet potatoes (6 medium): These are non-negotiable. Russets have thick skins that get super crispy, and the insides are fluffy, not waxy. Look for ones that are similar in size so they cook evenly.
- Olive oil (2 tablespoons): You need a high-smoke-point oil here. Olive oil works great, but avocado oil would also be fine. Don’t use butter for the first bake—it burns too easily.
- Coarse salt (1 teaspoon): I use kosher salt for the outside of the potatoes. It sticks better than fine salt and gives that satisfying crunch.
- Black pepper (½ teaspoon): Freshly ground, please. It makes a difference.
For the Filling
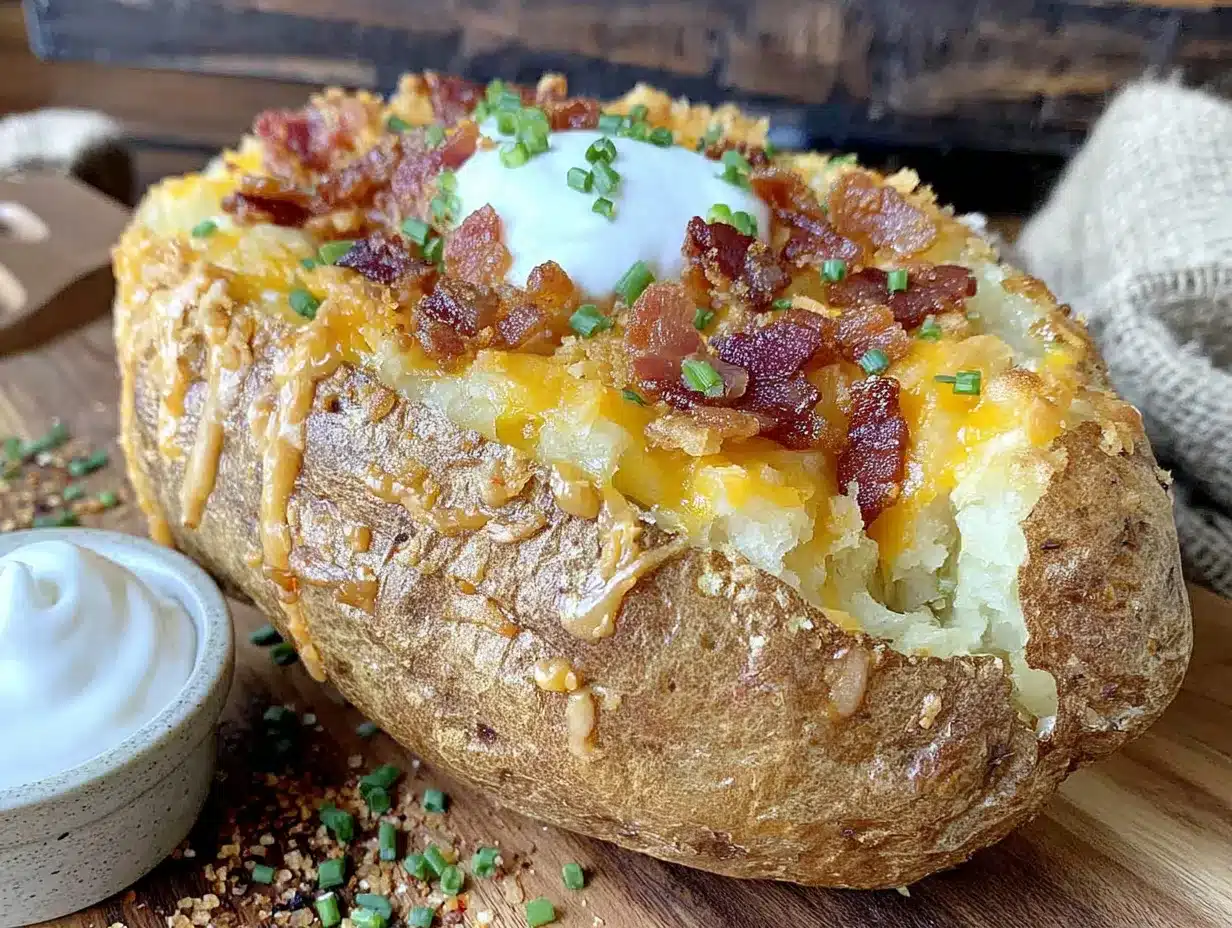
- Shredded cheddar cheese (1½ cups): Sharp cheddar gives you the most flavor. I’ve used mild in a pinch, and it’s fine, but sharp is better. Shred it yourself if you can—pre-shredded has anti-caking agents that mess with the melt.
- Cooked bacon (8 strips, crumbled): Thick-cut bacon is worth the extra money here. It stays meaty and doesn’t disappear into the cheese. I like to cook mine until it’s extra crispy so it holds up after baking.
- Sour cream (½ cup): Full-fat is best. The tang cuts through all that richness. If you’re dairy-free, there are good plant-based options, but the texture won’t be quite the same.
- Green onions (4, sliced): These go on top at the end for freshness and color. Don’t skip them—they balance the heaviness.
Optional Add-Ins
- Jalapeño slices: Pickled or fresh, depending on how much heat you want.
- Hot sauce: A drizzle of Frank’s or Cholula before serving is never a bad idea.
- Garlic powder (½ teaspoon): I sometimes mix this into the scooped potato pulp for extra flavor.
Equipment Needed
You don’t need a fancy kitchen to make these, but a few specific tools will make your life easier.
- Baking sheet (large, rimmed): A half-sheet pan works perfectly. The rim is important—it catches any cheese that drips off.
- Wire rack: This sits inside the baking sheet and lets air circulate around the potato skins. It’s the secret to crispy bottoms. If you don’t have one, you can flip the skins halfway through, but the rack is better.
- Melon baller or small spoon: For scooping out the potato insides. A melon baller gives you more control and leaves a nice even shell.
- Chef’s knife and cutting board: For halving the potatoes and chopping toppings.
- Fork: To prick the potatoes before baking. Don’t skip this—potatoes explode if you do.
I’ve made these with just a baking sheet and a spoon before, and it worked. But the wire rack? That’s the upgrade that took my skins from good to great. Worth the ten bucks.
Preparation Method
This method looks like a lot of steps, but I promise it’s straightforward. I’ve broken it down so you can follow along without second-guessing yourself.
- Preheat your oven to 400°F (200°C). Give it a full 15 minutes to come to temperature. A cold oven throws off the timing.
- Scrub the potatoes clean. Russets hold onto dirt, so give them a good rinse under cold water and dry them with a towel. You want the skins dry so they crisp up.
- Prick each potato 4-5 times with a fork. This lets steam escape while they bake. I forgot to do this once and heard a pop from the oven—cleaning exploded potato off the oven walls is not fun.
- Rub the potatoes with olive oil. Use your hands to coat them evenly. Then sprinkle with coarse salt and pepper. Don’t be shy with the salt—most of it stays on the skin and doesn’t end up in the filling.
- Place the potatoes directly on the oven rack. Put a baking sheet on the rack below to catch any drips. Bake for 50-60 minutes, until the skins are crispy and a knife slides through easily. The exact time depends on potato size.
- Let the potatoes cool for 10 minutes. They’ll be screaming hot. Use a towel to handle them if you’re impatient like me.
- Cut each potato in half lengthwise. A sharp chef’s knife makes this easy. Let them cool another 5 minutes so you don’t burn your fingers during the next step.
- Scoop out the insides. Use a melon baller or small spoon, leaving about ¼ inch of potato attached to the skin. You want a sturdy shell that won’t collapse. Save the scooped potato for another use—I like to mash it with butter and garlic for a quick side dish.
- Place the potato skins on a wire rack set inside a baking sheet. This is the step that makes them crispy all over. If you skip the rack, the bottoms will steam and get soft.
- Brush the inside of each skin with a little olive oil. This helps them crisp up during the second bake. Sprinkle with a pinch of salt.
- Bake the empty skins for 10 minutes at 400°F (200°C). You’ll see them start to turn golden and the edges will get crunchy.
- Flip each skin over and bake another 5 minutes. This crisps the outside too. Yes, it’s an extra step, but it’s worth it.
- Flip them back to skin-side down. Fill each one with shredded cheese and crumbled bacon. Don’t overfill—about 2 tablespoons of cheese per skin is plenty.
- Bake for 8-10 minutes, until the cheese is melted and bubbly. Keep an eye on them. Ovens vary, and you want melted cheese, not burnt cheese.
- Remove from the oven and let rest 2 minutes. Top with a dollop of sour cream and a sprinkle of green onions. Serve immediately.
Cooking Tips & Techniques
I learned most of these the hard way, so you don’t have to. Here are the things I wish someone had told me before my first attempt.
Don’t skip the double bake. I know it seems like extra work, but the first bake cooks the potatoes through, and the second bake crisps the skins. If you try to do it in one go, you’ll end up with either burnt skins or undercooked potatoes. There’s no shortcut here.
Use a wire rack for the second bake. I cannot stress this enough. The first few times I made these, I put the skins directly on the baking sheet. The bottoms came out soggy and sad. The wire rack lets hot air circulate underneath, and that’s what gives you that shatteringly crisp texture on all sides.
Save the scooped potato for something else. I usually mash it with butter, salt, and a little milk, then serve it as a side the next night. Or I mix it into soup to thicken it up. Don’t throw it away—it’s perfectly good potato.
Shred your own cheese. Pre-shredded cheese has cellulose (wood pulp, basically) to keep it from clumping. That same coating stops it from melting smoothly. Spend the two extra minutes shredding a block of cheddar. Your potato skins will thank you.
Cook the bacon until it’s very crispy. It’s going to go back in the oven with the cheese, so if it’s only halfway done when you start, it’ll end up chewy instead of crunchy. I like to cook my bacon on a sheet pan in the oven at 400°F while the potatoes are baking—it’s hands-off and doesn’t splatter.
Variations & Adaptations
Once you’ve got the basic method down, the possibilities are endless. Here are a few ways I’ve changed it up depending on the occasion or who’s coming over.
Buffalo Chicken Potato Skins
Mix shredded rotisserie chicken with buffalo sauce and a little cream cheese, then pile it into the skins before adding the cheddar. Bake as directed, then drizzle with ranch or blue cheese dressing. This version disappears fastest at my house.
Vegetarian Loaded Potato Skins
Skip the bacon and use sautéed mushrooms, black beans, or roasted corn instead. I’ve also used crumbled Hatch chile cream cheese as a base layer, and it adds a smoky kick that even meat-eaters love.
BBQ Pulled Pork Skins
Leftover pulled pork works beautifully here. Toss it in your favorite BBQ sauce, pile it on, and top with a mix of cheddar and Monterey Jack. A little pickled jalapeño on top cuts through the sweetness.
For a lower-carb option: Use smaller potatoes and scoop out more of the insides. You’ll still get the crispy skin experience with fewer carbs. Or swap the sour cream for Greek yogurt—it’s tangy and adds protein.
For a spicy version: Mix diced jalapeños into the cheese before baking, and drizzle with hot sauce right before serving. I’ve also added a pinch of cayenne to the olive oil I brush on the skins.
Serving & Storage Suggestions
These are best served hot, straight from the oven. The cheese should be molten, the skins should crack when you bite into them, and the sour cream should be cool and tangy against all that warmth.
I like to arrange them on a platter with extra sour cream on the side, a bowl of hot sauce, and maybe some cowboy caviar for contrast. They pair perfectly with cold beer, but a spicy margarita works too if you’re feeling fancy.
To store leftovers: Let the skins cool completely, then place them in an airtight container in the fridge. They’ll keep for up to 3 days. The texture won’t be as crispy as fresh, but they’re still good.
To reheat: The oven is your best bet. Preheat to 375°F (190°C) and bake the skins on a wire rack for 8-10 minutes. The microwave works in a pinch, but the skins will be soft, not crispy. Don’t add the sour cream until after reheating.
To freeze: Assemble the skins (with cheese and bacon) but don’t bake them. Freeze them on a baking sheet until solid, then transfer to a freezer bag. They’ll keep for up to 2 months. Bake from frozen at 400°F for 15-18 minutes, adding a few extra minutes if needed.
Nutritional Information & Benefits
Let’s be real—these are not health food. But they’re made with real ingredients, and that counts for something. Each skin (based on 12 servings) contains approximately:
| Nutrient | Amount per skin |
|---|---|
| Calories | 185 |
| Fat | 11g |
| Carbohydrates | 16g |
| Protein | 8g |
| Fiber | 2g |
Potato skins are actually a decent source of fiber and potassium, since most of those nutrients live in the skin. The cheese and bacon add protein and calcium, but also saturated fat and sodium. If you’re watching your salt intake, use low-sodium bacon and go easy on the added salt.
For a lighter version, swap the sour cream for Greek yogurt and use turkey bacon instead of regular. It won’t be the same, but it’ll scratch the itch. If you’re gluten-free, you’re in luck—this recipe is naturally gluten-free as written.
Conclusion
These game day loaded potato skins are the recipe I wish I’d had back when I was burning potatoes and ordering pizza in shame. They’re crispy, cheesy, smoky, and exactly what a football Sunday calls for. I’ve made them for Super Bowl parties, playoff games, and random Tuesday nights when I just needed something indulgent.
Don’t be afraid to make them your own. Swap the bacon for pulled pork, add jalapeños if you like heat, or pile on extra cheese because why not. The method is solid, and the toppings are flexible. That’s the beauty of a good base recipe.
I’d love to hear how yours turn out. Drop a comment below and let me know what toppings you used, or tag me in your photos. And if you’re looking for another game day hit, try these sun-dried tomato pesto pinwheels—they’re the perfect companion to these skins. Happy cooking, and enjoy the game!
Frequently Asked Questions
Can I make these potato skins ahead of time?
Yes! You can bake the potatoes, scoop them, and store the empty skins in the fridge for up to 2 days. When you’re ready to serve, just brush them with oil, do the second bake, add toppings, and finish them off. It saves a ton of time on game day.
What’s the best potato for loaded potato skins?
Russet potatoes are the best choice. They have thick, sturdy skins that crisp up beautifully, and the insides are fluffy, not waxy. Yukon Golds work in a pinch, but the skins are thinner and won’t get as crispy.
Why are my potato skins soggy?
Two likely culprits: you didn’t use a wire rack for the second bake, or you didn’t bake the empty skins long enough before adding the toppings. The rack lets air circulate underneath, and the pre-bake dries out any moisture. Both steps are crucial for crispy skins.
Can I air fry these instead of baking?
Absolutely. Cook the potatoes in the air fryer at 400°F for 35-40 minutes, then proceed with scooping and filling. For the final bake, air fry at 375°F for 5-6 minutes. The air fryer actually gives you an even crispier result, but you’ll need to work in batches.
How do I keep the skins from falling apart?
Leave about ¼ inch of potato attached to the skin when you scoop. If you go too deep, the shell will be fragile. Also, let the potatoes cool enough before scooping—hot potatoes are soft and more likely to tear. Patience pays off here.
Pin This Recipe!

Best Game Day Loaded Potato Skins Recipe for Crowds

Crispy, cheesy, and smoky loaded potato skins perfect for game day. This double-baked method ensures shatteringly crisp shells with a creamy, indulgent filling that will disappear fast at any party.
- Prep Time: 20 minutes
- Cook Time: 75 minutes
- Total Time: 95 minutes
- Yield: 12 servings 1x
- Category: Appetizer
- Cuisine: American
Ingredients
- 6 medium Russet potatoes
- 2 tablespoons olive oil
- 1 teaspoon coarse salt (kosher)
- ½ teaspoon freshly ground black pepper
- 1½ cups shredded sharp cheddar cheese
- 8 strips thick-cut bacon, cooked and crumbled
- ½ cup full-fat sour cream
- 4 green onions, sliced
- Optional: jalapeño slices, hot sauce (e.g., Frank’s or Cholula), ½ teaspoon garlic powder
Instructions
- Preheat oven to 400°F (200°C). Allow 15 minutes for full preheat.
- Scrub potatoes clean, rinse under cold water, and dry thoroughly.
- Prick each potato 4-5 times with a fork to allow steam to escape.
- Rub potatoes evenly with olive oil, then sprinkle with coarse salt and pepper.
- Place potatoes directly on oven rack with a baking sheet on the rack below to catch drips. Bake 50-60 minutes until skins are crispy and a knife slides through easily.
- Let potatoes cool for 10 minutes. Handle with a towel if needed.
- Cut each potato in half lengthwise. Let cool another 5 minutes.
- Using a melon baller or small spoon, scoop out insides, leaving about ¼ inch of potato attached to the skin. Save scooped potato for another use.
- Place potato skins on a wire rack set inside a rimmed baking sheet.
- Brush inside of each skin with a little olive oil and sprinkle with a pinch of salt.
- Bake empty skins for 10 minutes at 400°F (200°C) until golden and edges are crunchy.
- Flip each skin over and bake another 5 minutes to crisp the outside.
- Flip skins back to skin-side down. Fill each with shredded cheese and crumbled bacon (about 2 tablespoons cheese per skin).
- Bake 8-10 minutes until cheese is melted and bubbly.
- Remove from oven, let rest 2 minutes. Top with a dollop of sour cream and sprinkle of green onions. Serve immediately.
Notes
Don’t skip the double bake or wire rack for crispiest results. Shred cheese from a block for best melting. Cook bacon until very crispy before adding. Save scooped potato for mashed potatoes or soup. For make-ahead: bake and scoop potatoes up to 2 days ahead, store empty skins in fridge, then do second bake and toppings when ready. To reheat leftovers: oven at 375°F for 8-10 minutes on wire rack. To freeze: assemble unbaked skins, freeze solid, then bake from frozen at 400°F for 15-18 minutes.
Nutrition
- Serving Size: 1 potato skin
- Calories: 185
- Sugar: 1
- Sodium: 380
- Fat: 11
- Saturated Fat: 5
- Carbohydrates: 16
- Fiber: 2
- Protein: 8
Keywords: loaded potato skins, game day appetizer, crispy potato skins, bacon cheese potato skins, Super Bowl snack, party appetizer, double-baked potato skins


