Last October, I was standing at the checkout counter at our local grocery store, and the woman behind me—a retired art teacher named Gloria—watched me wrestling with a bag of Halloween candy that had already ripped open. She didn’t say anything at first. Then she just shook her head and laughed. “You know,” she said, “those meringue cookies I make every year are way easier than dealing with that mess.” She told me about them while we stood in line, like it was no big deal. Just a simple recipe her grandkids went crazy for every Halloween.
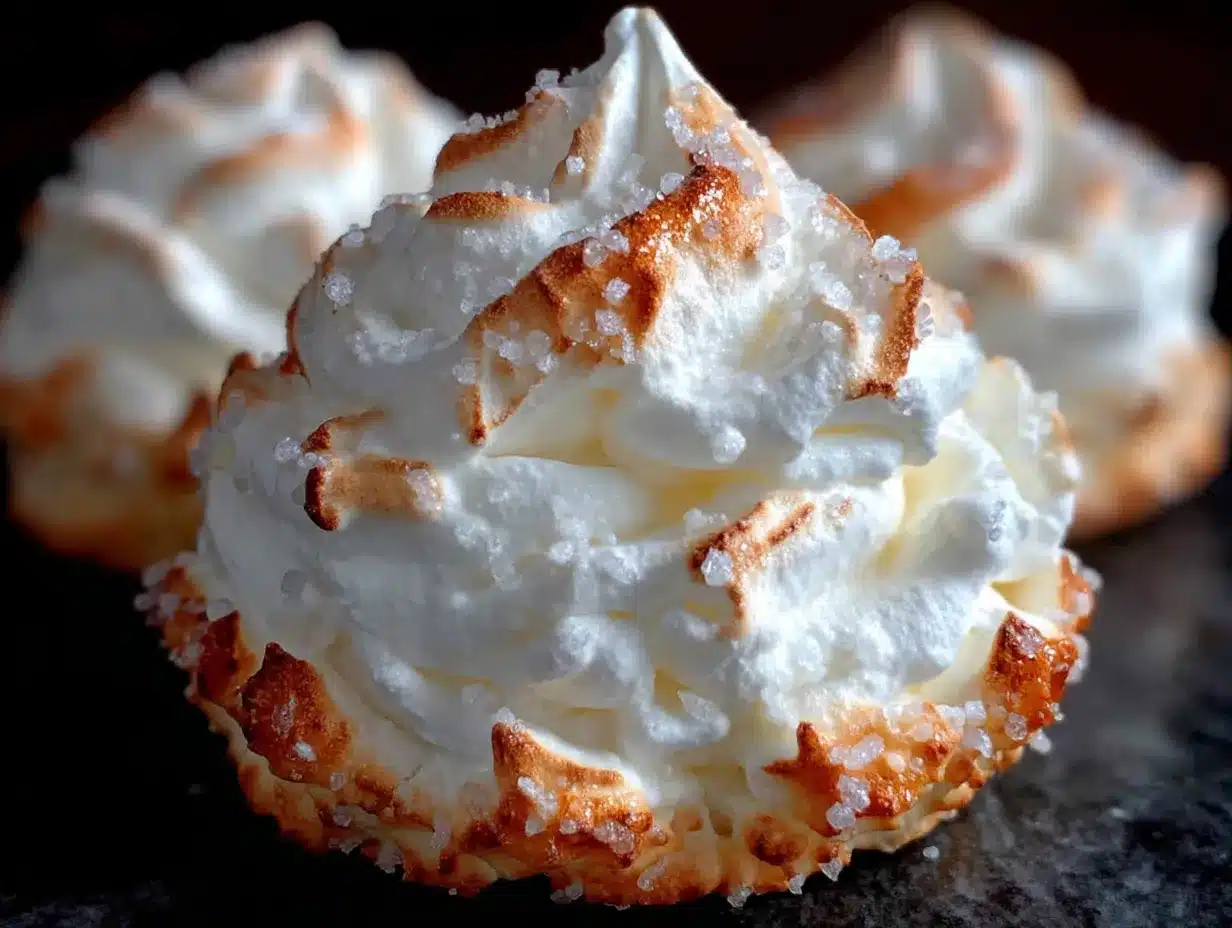
I honestly forgot about the conversation until a few days later, when I was staring at a carton of eggs in my fridge and remembered her saying, “The trick is getting the sugar right.” I had never made meringue before. Let me tell you, my first batch looked less like ghosts and more like sad little blobs. But Gloria’s words stuck with me, and after a few tries (and a lot of powdered sugar), I finally got it. These Spooky Ghost Meringue Cookies for Halloween are now my go-to treat for the season. They are light, crunchy, and melt in your mouth—plus, they look absolutely adorable on a dessert table.
Maybe you’ve been there—wanting something festive but not wanting to deal with complicated baking or a kitchen disaster. That’s exactly why these cookies work. They are simple, forgiving, and they make everyone smile. I mean, who can resist a little ghost with chocolate chip eyes staring up at you? This recipe has become a tradition in my house, and I think it will become one in yours too.
Why You’ll Love This Recipe
Let me tell you why these cookies are a winner. I’ve tested this recipe about six times now, tweaking the sugar ratio and the baking temperature until I got that perfect crisp exterior with a soft, marshmallowy center. My neighbor’s kids—who are brutally honest about snacks—gave them two thumbs up. So trust me, this is the version you want.
- Quick & Easy: These come together in under 15 minutes of active prep time. The oven does the rest of the work.
- Simple Ingredients: You probably have everything in your kitchen right now. Eggs, sugar, vanilla, and chocolate chips. That’s it.
- Perfect for Halloween: These little ghosts are the star of any Halloween party, school bake sale, or spooky movie night.
- Crowd-Pleaser: Kids love them, adults love them, and they are naturally gluten-free, so everyone can enjoy them.
- Unbelievably Delicious: The texture is light as air, and the vanilla flavor is just right. They dissolve on your tongue like a sweet cloud.
What makes this recipe different from the rest? It’s the technique. Most meringue recipes tell you to beat the egg whites until stiff peaks form, but I add a tiny pinch of cream of tartar to stabilize them. That little trick makes a huge difference. You get ghosts that hold their shape and don’t deflate halfway through baking. Plus, I bake them low and slow—at 200°F—so they dry out perfectly without browning. This isn’t just another meringue cookie; it’s the best version I’ve ever made.
These cookies are the kind that make you close your eyes after the first bite. Seriously. They are comfort food reimagined—healthier, lighter, but with the same soul-soothing satisfaction. Perfect for impressing guests without stress, or turning a simple Halloween snack into something memorable.
What Ingredients You Will Need
This recipe uses simple, wholesome ingredients to deliver a light, airy cookie that tastes like a vanilla cloud. The ingredients are pantry staples, so you likely already have them on hand.
For the Meringue Ghosts
- 4 large egg whites, at room temperature (this is crucial—cold eggs won’t whip up as well)
- 1 cup (200g) granulated sugar (I prefer C&H brand for its fine texture)
- 1/2 teaspoon cream of tartar (stabilizes the meringue and prevents it from collapsing)
- 1 teaspoon vanilla extract (pure vanilla extract gives the best flavor, but imitation works fine)
- Pinch of salt (balances the sweetness)
For the Decorations
- 1/4 cup (45g) mini chocolate chips (for the eyes and mouth—use dairy-free chips if needed)
- Optional: Orange or black gel food coloring (if you want to pipe little pumpkins or bats alongside your ghosts)
Ingredient Selection Tips: Use the freshest eggs you can find. Older egg whites whip up better because they have a higher pH, but fresh ones work fine if you let them come to room temperature. I recommend Land O’Lakes or Eggland’s Best for consistent results. For the sugar, avoid super coarse sugar—it takes too long to dissolve. Fine granulated sugar is your best bet.
Substitution Guidance: You can swap the granulated sugar with superfine sugar if you have it. It dissolves even faster. For a vegan option, try aquafaba (the liquid from a can of chickpeas) instead of egg whites—use 3 tablespoons per egg white. The texture will be slightly different, but it works! And if you don’t have cream of tartar, substitute with 1 teaspoon of lemon juice or white vinegar.
Equipment Needed
You don’t need fancy tools for this recipe, but a few key items make the process smoother.
- Stand mixer or electric hand mixer: Whipping egg whites by hand is possible, but it takes forever. A mixer saves your arm.
- Large mixing bowl: Make sure it’s completely clean and dry. Any grease will ruin your meringue.
- Piping bag with a large round tip: I use a Wilton 1A tip for ghost shapes. You can also use a zip-top bag with the corner snipped off.
- Baking sheets: Line them with parchment paper or a silicone baking mat.
- Offset spatula: Great for smoothing the meringue into the piping bag.
- Small cookie scoop: Optional, but helpful for portioning if you don’t want to pipe.
If you don’t have a piping bag, honestly, just use a spoon. Drop spoonfuls of meringue onto the baking sheet, then shape them into ghost-like blobs with the back of the spoon. They won’t be perfect, but they’ll still taste amazing. I’ve done this when my piping bag burst (yes, that happened), and the cookies were still a hit.
Budget-Friendly Tip: Skip the fancy piping tips and just use a plastic bag. It’s cheaper and works just as well. Also, silicone baking mats are reusable and save you money on parchment paper over time.
Preparation Method
Let’s get into the fun part. Follow these steps carefully, and you’ll have a tray full of adorable ghost meringues in no time.
- Preheat your oven to 200°F (93°C). Line two baking sheets with parchment paper. This low temperature dries the meringues without browning them, keeping them ghostly white.
- Separate your eggs while they are cold—it’s easier. Crack each egg and let the white fall into a small bowl, then transfer it to your mixer bowl. This way, if a yolk breaks, it won’t ruin the whole batch. Let the egg whites sit at room temperature for 20 minutes. Room temperature whites whip up fluffier.
- Add the cream of tartar and salt to the egg whites. Beat on medium speed with your stand mixer (or hand mixer) until soft peaks form. This takes about 2-3 minutes. The mixture should look foamy and start to hold its shape, but the peaks will droop when you lift the whisk.
- Gradually add the sugar, one tablespoon at a time, with the mixer running on medium-high speed. This is important—if you dump all the sugar in at once, the meringue can deflate. After all the sugar is in, increase the speed to high and beat for about 5-7 minutes, until stiff, glossy peaks form. You know it’s ready when you rub a tiny bit between your fingers and it feels smooth, not gritty.
- Add the vanilla extract and beat for another 30 seconds until combined. The mixture should look thick, shiny, and hold its shape completely.
- Prepare your piping bag. Fit it with a large round tip (or just snip the corner of a zip-top bag). Spoon the meringue into the bag, twisting the top to close it. Work quickly so the meringue doesn’t start to deflate.
- Pipe the ghosts. Hold the bag straight up, about 1 inch above the baking sheet. Squeeze out a base, then lift the bag slightly and squeeze out a smaller top for the head (like a snowman shape). Release pressure and pull straight up to create a little peak on top. Leave about 2 inches between each ghost—they don’t spread much, but you want room to pipe.
- Add the faces. Gently press mini chocolate chips into the wet meringue for eyes and a mouth. Do this right after piping, before the meringue starts to dry. You can make them look happy, spooky, or silly—it’s up to you!
- Bake for 60-75 minutes. The meringues are done when they are dry to the touch and easily lift off the parchment paper. They should not be browned at all. If they start to color, your oven is too hot—try lowering the temperature.
- Turn off the oven and let the meringues cool inside for at least 1 hour. This prevents cracking from sudden temperature changes. After that, transfer them to a wire rack to cool completely.
Warning: Do not open the oven door during the first 45 minutes of baking. The rush of cold air can cause the meringues to crack or collapse. I learned this the hard way when I peeked at my second batch and ended up with ghost craters.
Cooking Tips & Techniques
Here are some things I’ve learned from my meringue mishaps. Trust me, I’ve made plenty of mistakes so you don’t have to.
Use a clean bowl. Any trace of grease or yolk will prevent your egg whites from whipping up. Wipe your bowl and whisk with a little lemon juice or vinegar before starting to be safe. I once used a bowl that had a tiny smear of butter, and my meringue never got past the foamy stage. Total waste of eggs.
Don’t overbeat. Once you have stiff peaks, stop. If you keep beating, the meringue will become grainy and start to separate. You’ll see little beads of liquid forming—that’s a sign you’ve gone too far. If that happens, unfortunately, you have to start over.
Low and slow is the way to go. I know 200°F seems ridiculously low, but that’s the secret. Meringues need to dry out, not bake. If your oven runs hot, drop the temperature to 190°F or even 180°F. The baking time will be longer, but they’ll stay white and crack-free.
Humidity is your enemy. Meringues are hygroscopic, meaning they absorb moisture from the air. Don’t make these on a rainy or humid day—they’ll end up sticky and chewy instead of crisp. Save this recipe for a dry, sunny day.
Multitasking tip: While the meringues are baking, you can clean up your kitchen or prep other Halloween treats. The long baking time is actually nice—it gives you a break.
Variations & Adaptations
Once you master the basic ghost, you can get creative. Here are some variations I’ve tried and loved.
- Chocolate Ghosts: Replace 2 tablespoons of the granulated sugar with unsweetened cocoa powder. Sift it into the egg whites with the sugar. The ghosts will be a pale brown, but they taste like chocolate meringue. Add white chocolate chips for eyes instead of dark ones.
- Pumpkin Spice Ghosts: Add 1/2 teaspoon of pumpkin pie spice and a drop of orange gel food coloring to the meringue before piping. Pipe them into ghost shapes, and they’ll look like little pumpkin ghosts. Perfect for fall.
- Vegan Ghosts: Use aquafaba (liquid from a can of chickpeas) instead of egg whites. Use 3 tablespoons of aquafaba per egg white. Add 1/4 teaspoon of cream of tartar. The texture is a bit softer, but they still taste amazing.
- Spooky Swirls: Before piping, dip a toothpick into black gel food coloring and swirl it through the meringue in the piping bag. When you pipe, you’ll get marbled ghosts with a spooky, ghostly effect.
- Mini Ghosts: Pipe smaller ghosts (about 1 inch tall) and bake for only 45-50 minutes. These are perfect for topping cupcakes or hot cocoa.
My personal favorite variation is the pumpkin spice version. I made them last Halloween for a party, and they disappeared within minutes. The combination of vanilla and warm spices just works.
Serving & Storage Suggestions
These ghost meringues are best served at room temperature, straight off the baking sheet. They are light and airy, perfect for snacking on while watching a scary movie.
Presentation Ideas: Arrange the ghosts on a platter with some fake spiderwebs and plastic spiders for a spooky effect. You can also stick them into a bowl of popcorn or pile them on a cake stand. For a Halloween party, place them next to a bowl of creepy crawly dirt cups for a themed dessert table.
Complementary Dishes: These cookies pair beautifully with hot apple cider, pumpkin spice lattes, or a warm mug of hot chocolate. They also go well with pumpkin bread with cream cheese frosting for a full fall spread.
Storage Instructions: Store the meringues in an airtight container at room temperature for up to 2 weeks. Do not refrigerate—they will absorb moisture and become sticky. If you live in a humid climate, add a silica gel packet to the container to keep them crisp.
Freezing: You can freeze baked meringues for up to 3 months. Place them in a single layer in a freezer-safe container with parchment paper between layers. Thaw at room temperature for 15 minutes before serving. They won’t be quite as crisp as fresh, but they’re still delicious.
Flavor Development: These cookies actually taste better the next day. The flavors meld together, and the texture becomes even more delicate. So don’t worry about making them a day ahead—they’ll be perfect.
Nutritional Information & Benefits
Here’s a rough estimate for one ghost meringue (based on the recipe making about 24 cookies):
| Nutrient | Amount |
|---|---|
| Calories | 45 |
| Total Fat | 0g |
| Saturated Fat | 0g |
| Cholesterol | 0mg |
| Sodium | 15mg |
| Total Carbohydrates | 11g |
| Sugars | 10g |
| Protein | 1g |
These cookies are naturally gluten-free, low in fat, and contain no dairy. The main ingredient is egg whites, which are a great source of protein and contain all the essential amino acids. Egg whites are also low in calories and cholesterol-free. The sugar provides quick energy, making these a nice treat before a night of trick-or-treating.
Dietary Considerations: This recipe is naturally gluten-free and nut-free. For a vegan version, use aquafaba. For a lower-sugar version, you can try using a sugar substitute like Swerve, but the texture will be slightly different. Always check your chocolate chips for dairy if you need to avoid it.
Conclusion
These Spooky Ghost Meringue Cookies for Halloween are honestly one of my favorite recipes to make this time of year. They are simple, fun, and absolutely delicious. I love that they bring a little bit of magic to the kitchen—watching those plain egg whites transform into fluffy, glossy ghosts never gets old.
I hope you give them a try and make them your own. Maybe you’ll add extra chocolate chips, or pipe them into different shapes, or even make them for a Christmas ghost party (hey, no judgment here). The beauty of this recipe is that it’s forgiving and flexible.
I’d love to hear how yours turn out! Drop a comment below and let me know if your ghosts were spooky or silly. Share a photo on Pinterest and tag me—I always love seeing your creations. And if you have any questions, just ask. Happy Halloween, and happy baking!
Frequently Asked Questions
Can I make these ghost meringues without a piping bag?
Absolutely! Use a zip-top bag with the corner snipped off, or simply drop spoonfuls of meringue onto the baking sheet and shape them into ghost-like blobs with the back of a spoon. They won’t be perfectly shaped, but they’ll taste just as good.
Why are my meringues sticky and chewy instead of crisp?
This usually happens because of humidity. Meringues absorb moisture from the air, so avoid making them on rainy or humid days. Also, make sure they are fully dried out in the oven—bake them for the full 75 minutes if needed.
Can I use liquid egg whites from a carton?
You can, but they don’t whip up as well as fresh egg whites because they are pasteurized at a higher temperature. If you use carton egg whites, add an extra tablespoon per egg white and beat them a little longer. The texture won’t be as stiff, but it will still work.
How do I store leftover ghost meringues?
Store them in an airtight container at room temperature for up to 2 weeks. Do not refrigerate—they will become sticky. If you live in a humid area, add a silica gel packet to the container to keep them crisp.
Can I make these meringues ahead of time for a Halloween party?
Yes! You can make them up to 2 weeks in advance. Store them in an airtight container at room temperature. They actually taste better the next day, so making them a day or two ahead is perfect.
Pin This Recipe!
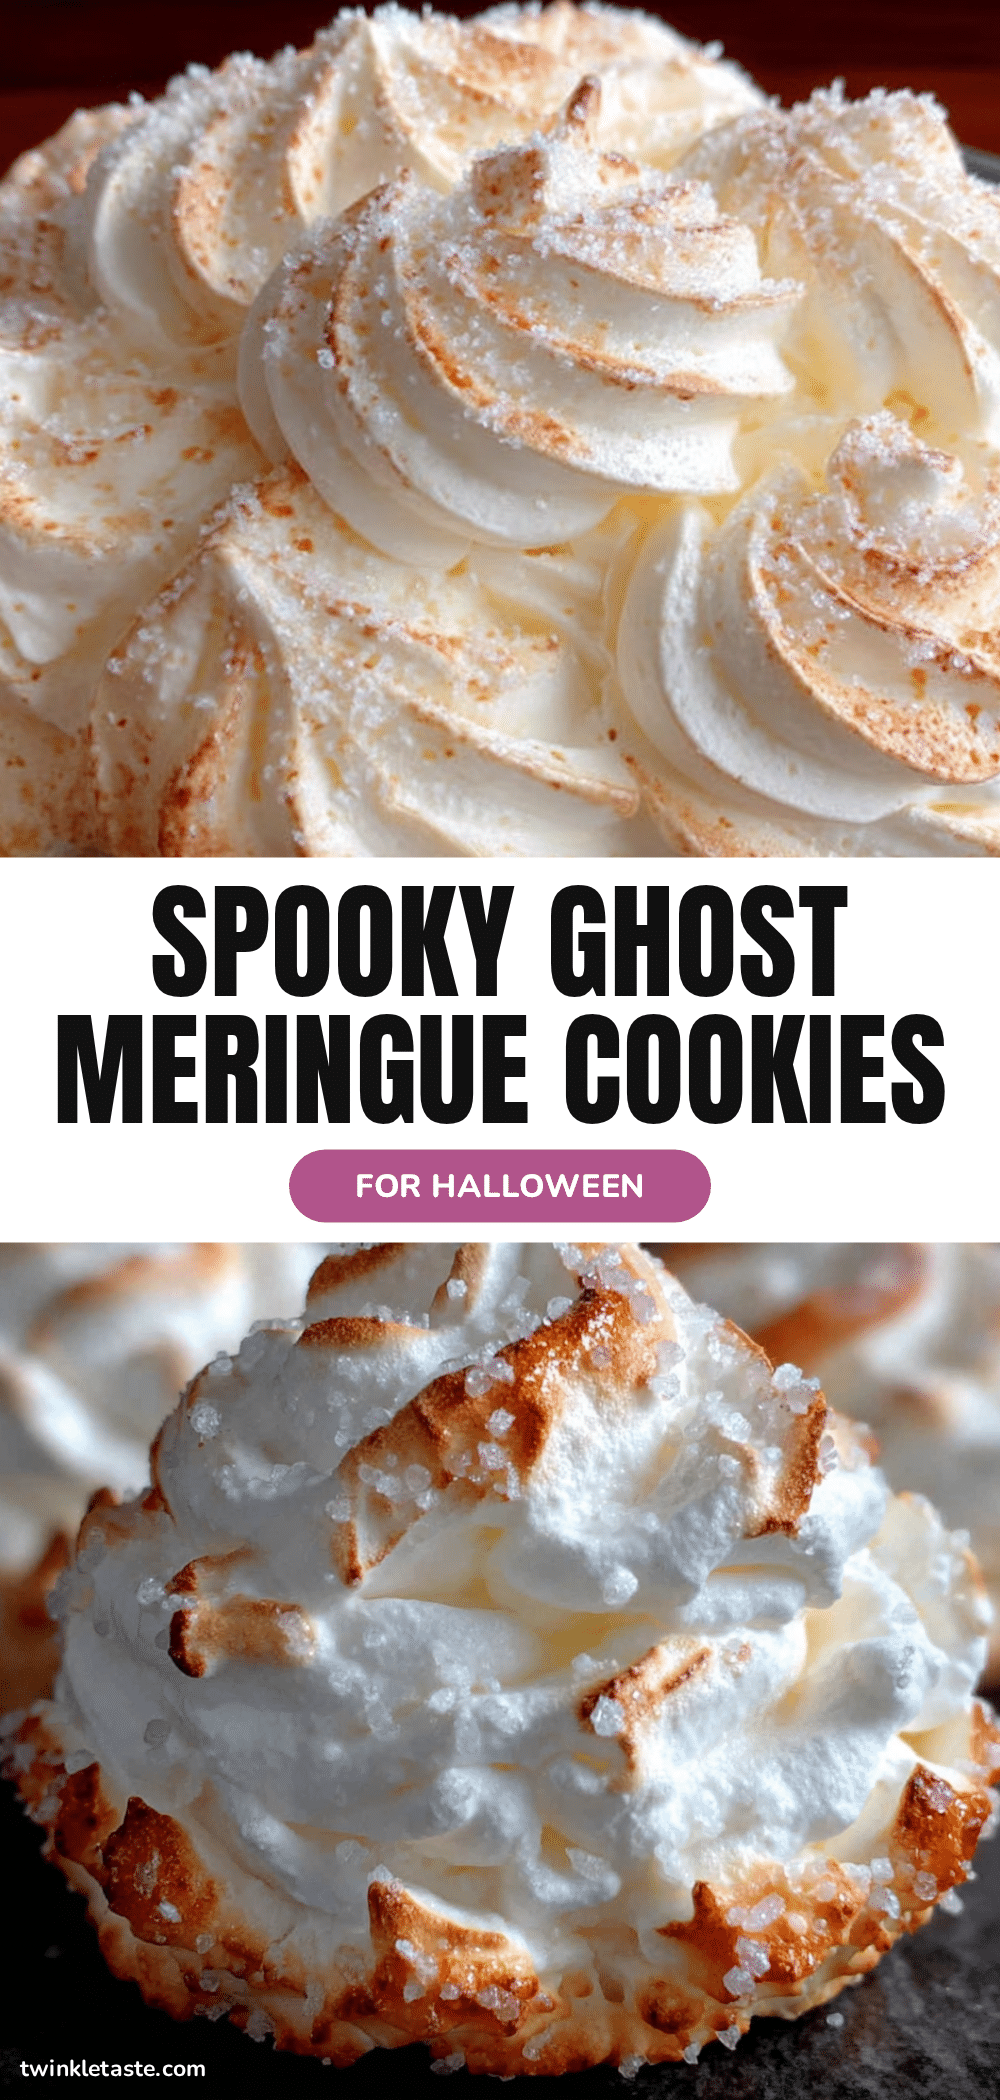
Spooky Ghost Meringue Cookies: Easy Halloween Treat
These light, crunchy, and melt-in-your-mouth ghost meringue cookies are the perfect Halloween treat. Simple to make with just a few ingredients, they are naturally gluten-free and always a crowd-pleaser.
- Prep Time: 15 minutes
- Cook Time: 60-75 minutes
- Total Time: 1 hour 30 minutes to 1 hour 45 minutes
- Yield: 24 servings 1x
- Category: Dessert
- Cuisine: American
Ingredients
- 4 large egg whites, at room temperature
- 1 cup (200g) granulated sugar
- 1/2 teaspoon cream of tartar
- 1 teaspoon vanilla extract
- Pinch of salt
- 1/4 cup (45g) mini chocolate chips
- Optional: Orange or black gel food coloring
Instructions
- Preheat your oven to 200°F (93°C). Line two baking sheets with parchment paper.
- Separate your eggs while they are cold. Let the egg whites sit at room temperature for 20 minutes.
- Add the cream of tartar and salt to the egg whites. Beat on medium speed until soft peaks form, about 2-3 minutes.
- Gradually add the sugar, one tablespoon at a time, with the mixer running on medium-high speed. After all the sugar is in, increase speed to high and beat for 5-7 minutes until stiff, glossy peaks form.
- Add the vanilla extract and beat for another 30 seconds until combined.
- Prepare your piping bag with a large round tip. Spoon the meringue into the bag.
- Pipe the ghosts onto the prepared baking sheets: squeeze out a base, then lift and squeeze out a smaller top for the head. Leave about 2 inches between each ghost.
- Gently press mini chocolate chips into the wet meringue for eyes and a mouth.
- Bake for 60-75 minutes, until dry to the touch and easily lift off the parchment paper.
- Turn off the oven and let the meringues cool inside for at least 1 hour. Then transfer to a wire rack to cool completely.
Notes
Do not open the oven door during the first 45 minutes of baking. Meringues are best made on a dry, sunny day. Store in an airtight container at room temperature for up to 2 weeks.
Nutrition
- Serving Size: 1 ghost meringue
- Calories: 45
- Sugar: 10
- Sodium: 15
- Carbohydrates: 11
- Protein: 1
Keywords: ghost meringue cookies, Halloween cookies, meringue cookies, gluten-free cookies, easy Halloween treat


