I was standing at the register of a tiny hardware store—the kind that smells like fertilizer and dust and sells seeds in little paper packets—when the woman behind the counter started talking about squash. Not the kind you plant, but the kind you roast. She was maybe seventy, with hands that looked like they’d been busy for decades, and she was ringing up my purchase of a single lightbulb and a bag of birdseed. “You ever had honeynut?” she asked, not looking up from the keypad. I admitted I hadn’t. She gave a little nod, like she’d expected that answer, and then she told me exactly how to cook it. No measurements, no fuss—just butter, sage, and heat. I scribbled it on the back of my receipt before I forgot. Honestly, I almost didn’t try it. But that Tuesday night, with a fridge full of nothing much and a craving for something warm, I remembered her words. And let me tell you—that little squash changed everything.
The thing about honeynut squash is it looks like a butternut that forgot to grow up. It’s smaller, sweeter, and the skin is thin enough that you don’t have to peel it—which, if you’ve ever wrestled a butternut with a vegetable peeler, you know is a genuine kitchen victory. The woman from the hardware store said to slice them in half, scoop the seeds, and let the butter do the heavy lifting. She was right. The brown butter brings this nutty, almost caramel flavor that makes the squash taste like dessert, and the sage? It crisps up in the pan and adds this earthy, peppery bite that cuts through the sweetness. It’s one of those recipes that sounds fancy but is honestly just a few smart moves in a hot pan. And in under twenty minutes, you have a side dish that steals the whole show.
I keep coming back to this recipe because it’s the kind of thing you can make on a random Wednesday when you’re tired and hungry and don’t want to think too hard. The squash roasts quickly—no long oven waits—and the brown butter sauce comes together in the same pan while the squash rests. It’s efficient, it’s forgiving, and it makes you look like you know what you’re doing even if you’re just following the instructions a nice lady gave you while buying birdseed. Maybe you’ve been there—standing in an unexpected place, getting cooking advice from someone you’d never expect. That’s how the best recipes find you, honestly. This one stuck because it actually works.
Why You’ll Love This Recipe
Let’s be real—weeknight cooking can feel like a chore. You’re tired, the kitchen is messy, and the last thing you want is a recipe with a laundry list of ingredients and complicated steps. This quick brown butter honeynut squash with sage is the opposite of that. It’s fast, it’s forgiving, and it delivers flavor that tastes like you spent way more effort than you actually did. I’ve tested this one at least a dozen times—sometimes with different pans, different squash sizes, even different butter brands—and it works every single time.
- Quick & Easy : From fridge to table in 20 minutes flat. That’s faster than ordering takeout in some neighborhoods.
- Simple Ingredients : You need honeynut squash, butter, fresh sage, salt, and pepper. That’s it. No trips to a specialty store required.
- Perfect for Weeknights : This side pairs with almost anything—roasted chicken, seared fish, a simple steak, or even a bowl of grains for a vegetarian meal.
- Crowd-Pleaser : I’ve served this to picky eaters, vegetable skeptics, and full-on squash lovers. Everyone goes back for seconds.
- Unbelievably Delicious : The brown butter adds a nutty, toasty depth that makes the squash taste almost like candy. The sage brings a savory counterpoint that keeps it from being too sweet.
What makes this recipe different from the dozens of other squash recipes out there? It’s the technique. Instead of roasting the squash for forty minutes and then making a separate sauce, you cook everything in one skillet. The squash gets caramelized on the cut side, then finishes cooking with a lid on to steam through. Meanwhile, you brown the butter in the same pan—no extra dishes—and the sage leaves crisp up right in the foam. It’s a smart, efficient method that maximizes flavor while minimizing cleanup. And honestly, the texture is next-level: tender squash with crispy, browned edges, all coated in that nutty, fragrant butter.
This isn’t just a good side dish—it’s the kind that makes you close your eyes after the first bite. It’s comfort food that feels a little bit special but comes together with almost no stress. Perfect for those nights when you want something warm and satisfying but don’t have the energy for a production.
What Ingredients You Will Need
This recipe uses a short list of simple, everyday ingredients that come together to create something surprisingly elegant. The key is choosing good-quality butter and fresh sage—those two ingredients do most of the heavy lifting here.
- Honeynut squash (2 medium, about 1 pound each) — Look for squash that feels heavy for its size and has a deep orange color. The skin should be smooth and free of soft spots. Unlike butternut squash, honeynut skin is thin and edible, so no peeling required. Just give them a good scrub before cooking.
- Unsalted butter (3 tablespoons) — I use unsalted so I can control the salt level. If you only have salted butter, just reduce the added salt by a pinch. I prefer Kerrygold or Plugrà for their rich flavor and higher fat content, which helps with browning.
- Fresh sage leaves (10-12 leaves) — Fresh is non-negotiable here. Dried sage won’t crisp up the same way and has a more muted, dusty flavor. Look for leaves that are bright green and fragrant, without any wilting or browning.
- Kosher salt (1/2 teaspoon, plus more to taste) — I use Diamond Crystal kosher salt. If you’re using table salt or fine sea salt, start with 1/4 teaspoon and adjust from there.
- Black pepper (1/4 teaspoon, freshly ground) — Freshly ground pepper makes a difference here. The floral, slightly spicy notes complement the sweetness of the squash and the nuttiness of the brown butter.
- Optional: Maple syrup (1 teaspoon) — If your squash isn’t as sweet as you’d like, a tiny drizzle of maple syrup at the end can boost the caramel notes. I usually skip this, but it’s nice to have on hand if you’re serving this to kids or anyone with a sweet tooth.
- Optional: Flaky sea salt (for finishing) — A sprinkle of Maldon or another flaky salt right before serving adds a lovely crunch and a burst of saltiness that contrasts with the sweet, buttery squash.
That’s the whole list. No cream, no cheese, no complicated spice blends. The beauty of this recipe is how the ingredients work together—the butter browns and becomes nutty, the sage crisps and turns aromatic, and the squash caramelizes and softens. It’s a perfect little symphony of flavor and texture, all from five ingredients.
Equipment Needed
You don’t need much for this recipe, which is part of its charm. Here’s what you’ll want to have handy:
- Large skillet (10-12 inches) — A heavy-bottomed skillet works best for even browning. Cast iron is ideal because it holds heat well and gives the squash a beautiful sear. A stainless steel or nonstick pan will also work, just make sure it’s large enough to hold the squash halves in a single layer without crowding.
- Sharp chef’s knife — Honeynut squash is smaller than butternut, but it’s still dense. A sharp knife makes cutting them in half much safer and easier. I use a 8-inch chef’s knife for this.
- Cutting board — A sturdy board that won’t slip around. I like to put a damp paper towel under mine for extra grip.
- Metal spoon or small scoop — For scraping out the seeds and stringy bits from the center of the squash. A grapefruit spoon with a serrated edge works great, but a regular spoon is fine.
- Lid or piece of foil — To cover the skillet while the squash finishes cooking. If your skillet doesn’t have a lid, a sheet of aluminum foil crimped around the edges works perfectly.
- Spatula or tongs — For flipping the squash and moving the sage leaves around. Tongs give you more control, but a spatula works too.
- Small bowl (optional) — For holding the browned butter and sage while the squash rests. I often just leave everything in the pan, but if you’re serving it on a platter, a small bowl is handy.
That’s it. No food processor, no mandoline, no special gadgets. This is a recipe that respects your time and your dishwasher.
Preparation Method
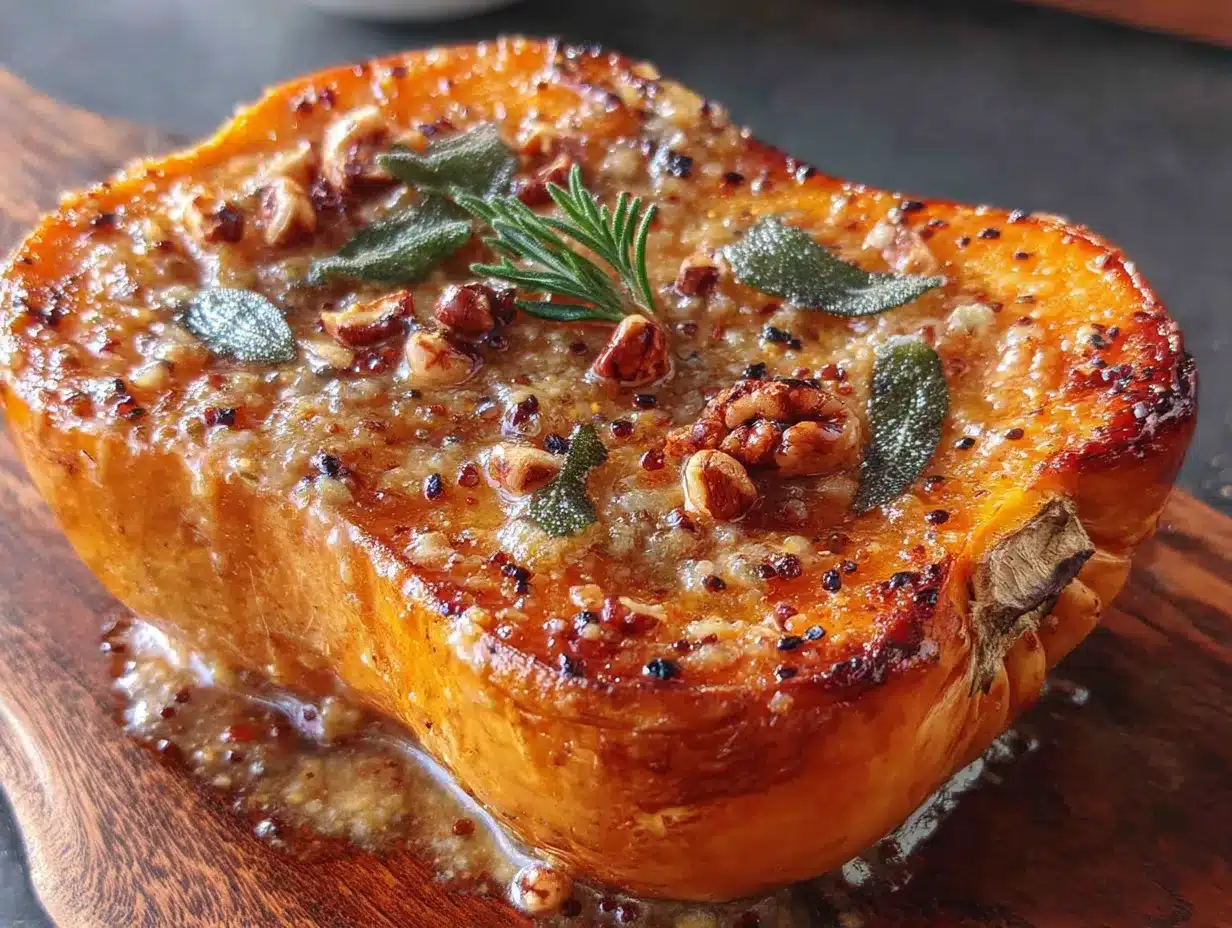
Let’s get cooking. This whole process takes about 20 minutes from start to finish, and most of that time is hands-off while the squash cooks.
- Prep the squash (2 minutes) — Rinse the honeynut squash under cool water and pat dry. Using a sharp chef’s knife, carefully cut each squash in half lengthwise, from stem to tip. Scoop out the seeds and stringy fibers with a spoon and discard. Don’t worry about getting every last fiber—just remove the bulk of it. The cut side should be relatively smooth and flat so it sits evenly in the pan.
- Season the squash (1 minute) — Sprinkle the cut sides of the squash halves with kosher salt and freshly ground black pepper. Don’t be shy with the salt—it helps draw out moisture and encourages browning. If you want, you can also rub a tiny bit of olive oil on the cut sides, but it’s not necessary since the butter will provide plenty of fat.
- Heat the skillet (1 minute) — Place your skillet over medium-high heat and let it get hot for about a minute. You want it hot enough that a drop of water sizzles and evaporates immediately when it hits the pan.
- Brown the butter (2-3 minutes) — Add the butter to the hot skillet. It should melt quickly and start to foam. Swirl the pan occasionally. After about 2 minutes, the foam will subside and you’ll see little brown specks forming at the bottom of the pan. The butter will smell nutty and toasty. This is the sweet spot—don’t walk away, because brown butter can go from perfect to burnt in seconds.
- Add the sage (30 seconds) — As soon as the butter is browned, drop in the fresh sage leaves. They’ll sizzle and crisp up almost immediately. Swirl the pan to coat them in the butter, then use tongs to transfer the sage leaves to a small plate. They should be dark green and crispy, not limp. Set them aside for garnish.
- Sear the squash (4-5 minutes) — Carefully place the squash halves cut-side down in the browned butter. They should sizzle when they hit the pan. Let them cook undisturbed for 4-5 minutes, until the cut sides are deeply golden brown and caramelized. You can peek by lifting one gently with a spatula—if it’s not brown yet, give it another minute.
- Flip and steam (6-8 minutes) — Using tongs or a spatula, carefully flip the squash halves over so they’re cut-side up. The browned butter should still be in the pan. Reduce the heat to medium-low and cover the skillet with a lid or foil. Let the squash cook for 6-8 minutes, until it’s tender all the way through. You should be able to pierce the flesh easily with a fork or the tip of a knife. The skin will have softened and may be slightly wrinkled.
- Rest and baste (1 minute) — Remove the lid and turn off the heat. Use a spoon to drizzle any remaining browned butter from the pan over the cut sides of the squash. This little step adds extra flavor and keeps the squash moist.
- Serve (1 minute) — Transfer the squash halves to a serving platter, cut-side up. Crumble the crispy sage leaves over the top. If you’re using flaky sea salt or a drizzle of maple syrup, add it now. Serve hot, warm, or at room temperature—it’s delicious at any temperature.
One thing I learned the hard way: don’t overcrowd the pan. If your skillet is too small to hold all four squash halves in a single layer without touching, cook them in two batches. Crowding traps steam and prevents that beautiful caramelization. Also, if your squash halves are different sizes, the smaller ones will cook faster. Check them at the 6-minute mark and remove any that are tender, letting the larger ones cook a bit longer.
Cooking Tips & Techniques
After making this recipe more times than I can count, I’ve picked up a few tricks that make a real difference. Here’s what I wish someone had told me the first time:
Don’t skip the browning step. I know it’s tempting to just melt the butter and throw the squash in, but taking those extra two minutes to brown the butter changes everything. The nutty, toasty flavor is what makes this dish feel special. Watch for the moment when the foam subsides and the milk solids turn amber—that’s your cue. And if you get distracted and the butter turns dark brown and smells burnt? Start over. Burnt butter is bitter and will ruin the dish.
Pat the squash dry. After you wash the squash, make sure it’s completely dry before it hits the pan. Any moisture on the cut surface will steam instead of sear, and you’ll end up with pale, soggy squash instead of deeply caramelized, golden-brown pieces. I use a clean kitchen towel or paper towels to blot the cut sides thoroughly.
Use medium-high heat, not high. I used to crank the heat to high thinking it would brown faster, but it just burnt the butter and left the squash raw in the middle. Medium-high heat gives you a good sear without scorching the butter. If you hear aggressive popping or see smoke, turn it down a notch.
Let the squash rest. After you flip the squash and cover the pan, resist the urge to peek. The steam trapped under the lid is what cooks the squash through. Every time you lift the lid, you release steam and add cooking time. Trust the process—6-8 minutes covered is usually perfect for medium-sized honeynut squash.
Save the crispy sage. The sage leaves are fragile when they come out of the hot butter. I’ve crushed more than a few by being too rough. Use tongs and handle them gently. If some break, that’s fine—just scatter the pieces over the squash. They’ll still taste amazing.
Double the butter if you want extra sauce. This recipe makes just enough browned butter to coat the squash. If you’re serving a crowd or want extra to drizzle over rice or roasted vegetables on the side, use 5 tablespoons of butter instead of 3. The proportions still work perfectly.
Variations & Adaptations
One of the best things about this recipe is how easy it is to adapt. Here are a few ways I’ve changed it up depending on what I have on hand or who I’m cooking for:
Maple-Balsamic Version: After browning the butter and searing the squash, add 1 tablespoon of balsamic vinegar and 1 tablespoon of maple syrup to the pan before covering. The vinegar cuts through the richness, and the maple syrup adds a deeper caramelization. This version is amazing alongside roast pork or grilled sausages.
Spicy Brown Butter: Add a pinch of red pepper flakes or a small dried chili to the butter as it browns. The heat balances the sweetness of the squash beautifully. I do this when I’m serving the squash with something mild like roasted chicken or white fish. The little kick wakes everything up.
Herb Swap: If you don’t have sage—or you just want to try something different—swap in fresh thyme sprigs or rosemary needles. Thyme gives a more delicate, floral note, while rosemary is bolder and piney. Both crisp up nicely in the brown butter. Just remove the woody stems before serving.
Vegan Option: Substitute the butter with a high-quality vegan butter (I like Miyoko’s or Earth Balance) and use a neutral oil like avocado oil for the initial sear. The flavor won’t be quite as nutty, but it’s still delicious. You can also use coconut oil, which adds its own subtle sweetness.
Roasted Whole: If you don’t feel like halving the squash, you can roast them whole. Prick the skin with a fork, rub with oil, and roast at 400°F for 30-40 minutes until tender. Then halve them, scoop out the seeds, and drizzle with brown butter and crispy sage. This method takes longer but gives you a more steamed, custardy texture.
Grain Bowl Addition: Leftover squash (if you have any) is incredible chopped up and tossed into a warm grain bowl with farro, arugula, toasted walnuts, and a lemon vinaigrette. The brown butter flavor carries through and makes the whole bowl feel special.
Serving & Storage Suggestions
This squash is incredibly versatile when it comes to serving. Here’s how I like to present it and what to do with leftovers:
Serving Temperature: Serve the squash hot or warm for the best texture. The crispy edges are most pronounced when it’s fresh from the pan. That said, it’s also surprisingly good at room temperature—the flavors meld and deepen as it cools. I’ve even eaten it cold straight from the fridge, and it was still delicious.
Presentation: Arrange the squash halves cut-side up on a platter, drizzle any remaining browned butter from the pan over the top, and scatter the crispy sage leaves artfully over each piece. A sprinkle of flaky sea salt adds visual appeal and a satisfying crunch. If you’re feeling fancy, add a few pomegranate arils or toasted pumpkin seeds for color and texture.
What to Serve With It: This squash pairs beautifully with roast chicken, pan-seared pork chops, grilled steak, or baked salmon. It’s also wonderful alongside a simple green salad with a tangy vinaigrette—the acidity cuts through the richness. For a vegetarian meal, serve it over a bed of lentils or quinoa with a dollop of yogurt or labneh.
Storage: Store leftover squash in an airtight container in the refrigerator for up to 4 days. The texture will soften as it sits, but the flavor only gets better. I actually like leftovers more than the fresh version sometimes—the brown butter soaks into the squash overnight and makes it even more flavorful.
Reheating: The best way to reheat is in a skillet over medium heat. Add a tiny splash of water or broth, cover, and heat for 2-3 minutes until warmed through. You can also reheat in a 350°F oven for 5-7 minutes. Avoid the microwave if you can—it makes the squash mushy and the sage leaves soggy. If you must use the microwave, do it in 20-second bursts and expect the texture to be softer.
Freezing: You can freeze cooked honeynut squash for up to 3 months. Let it cool completely, then transfer to a freezer-safe container or bag. Thaw overnight in the refrigerator and reheat in a skillet. The texture will be softer after freezing, so it’s best used in soups, purees, or grain bowls rather than served as a standalone side.
Nutritional Information & Benefits
This quick brown butter honeynut squash with sage isn’t just delicious—it’s also packed with nutrients. Here’s a rough breakdown per serving (one squash half):
- Calories: ~180
- Fat: 9g (mostly from butter, which is fine in moderation)
- Carbohydrates: 24g
- Fiber: 4g
- Sugar: 8g (natural sugars from the squash)
- Protein: 3g
- Vitamin A: 200% of the Daily Value (honeynut squash is loaded with beta-carotene)
- Vitamin C: 25% of the Daily Value
- Potassium: 500mg
Honeynut squash is a nutritional powerhouse. It’s rich in antioxidants, particularly beta-carotene, which your body converts into vitamin A for healthy vision and immune function. The fiber content supports digestion and helps keep you full. And the butter? Well, butter contains fat-soluble vitamins A, D, E, and K, which help your body absorb the nutrients from the squash. It’s a win-win.
This recipe is naturally gluten-free and can be made dairy-free with a vegan butter substitute. It’s also low in added sugars—the sweetness comes entirely from the squash itself. If you’re watching your sodium, you can reduce the salt or use a salt-free seasoning blend.
Conclusion
This quick brown butter honeynut squash with sage is one of those recipes that proves you don’t need a long ingredient list or complicated techniques to make something memorable. It’s fast enough for a Tuesday night, fancy enough for a holiday table, and simple enough that you’ll memorize it after making it once. The brown butter brings a nutty richness that transforms humble squash into something almost luxurious, and the crispy sage adds a savory, aromatic finish that keeps every bite interesting.
I love this recipe because it respects your time without sacrificing flavor. It’s the kind of side dish that makes the rest of your meal look good—and it pairs with just about anything. Whether you’re serving it alongside a weeknight roast chicken or building a vegetarian grain bowl, it delivers every single time.
I’d love to hear how it turns out for you. Did you try any variations? Serve it with something unexpected? Drop a comment below and let me know—I read every single one. And if you snap a photo, tag me on social media so I can see your beautiful squash. Happy cooking, friends!
Frequently Asked Questions
Can I use butternut squash instead of honeynut?
Yes, but you’ll need to peel it first since butternut skin is tough and not pleasant to eat. Cut the peeled butternut into 1-inch cubes and cook them cut-side down in the brown butter. The cooking time will be similar—about 8-10 minutes covered. The flavor won’t be quite as sweet as honeynut, so you might want to add a tiny drizzle of maple syrup at the end.
How do I know when the butter is properly browned?
Watch for the foam to subside and the milk solids at the bottom of the pan to turn a warm amber color—think the color of a hazelnut. The butter will also smell nutty and toasty. This usually takes 2-3 minutes over medium-high heat. If you see dark brown or black specks, you’ve gone too far and the butter will taste bitter. Better to pull it off the heat a little early than a little late.
Can I make this recipe ahead of time?
You can cook the squash up to 2 days ahead and store it in the refrigerator. Reheat it in a skillet with a splash of water or broth, covered, over medium heat for about 3-4 minutes. The crispy sage is best added fresh, so I recommend making that right before serving. The brown butter flavor actually deepens as the squash sits, so leftovers are delicious.
What if I can’t find honeynut squash?
Look for them at farmers’ markets or specialty grocery stores in the fall and winter. If you can’t find them, use small butternut squash (peeled and cubed) or delicata squash (which also has edible skin). Acorn squash works too—just cut it into wedges instead of halves. The cooking time may vary slightly depending on the size and density of the squash you choose.
Is this recipe suitable for meal prep?
Absolutely. Make a batch on Sunday and use it throughout the week in grain bowls, salads, or as a quick side with protein. Store the cooked squash in an airtight container in the fridge. I like to add the crispy sage fresh each time—it only takes 30 seconds to crisp up a few leaves in a pan. The squash itself reheats beautifully and the flavor only gets better.
Pin This Recipe!
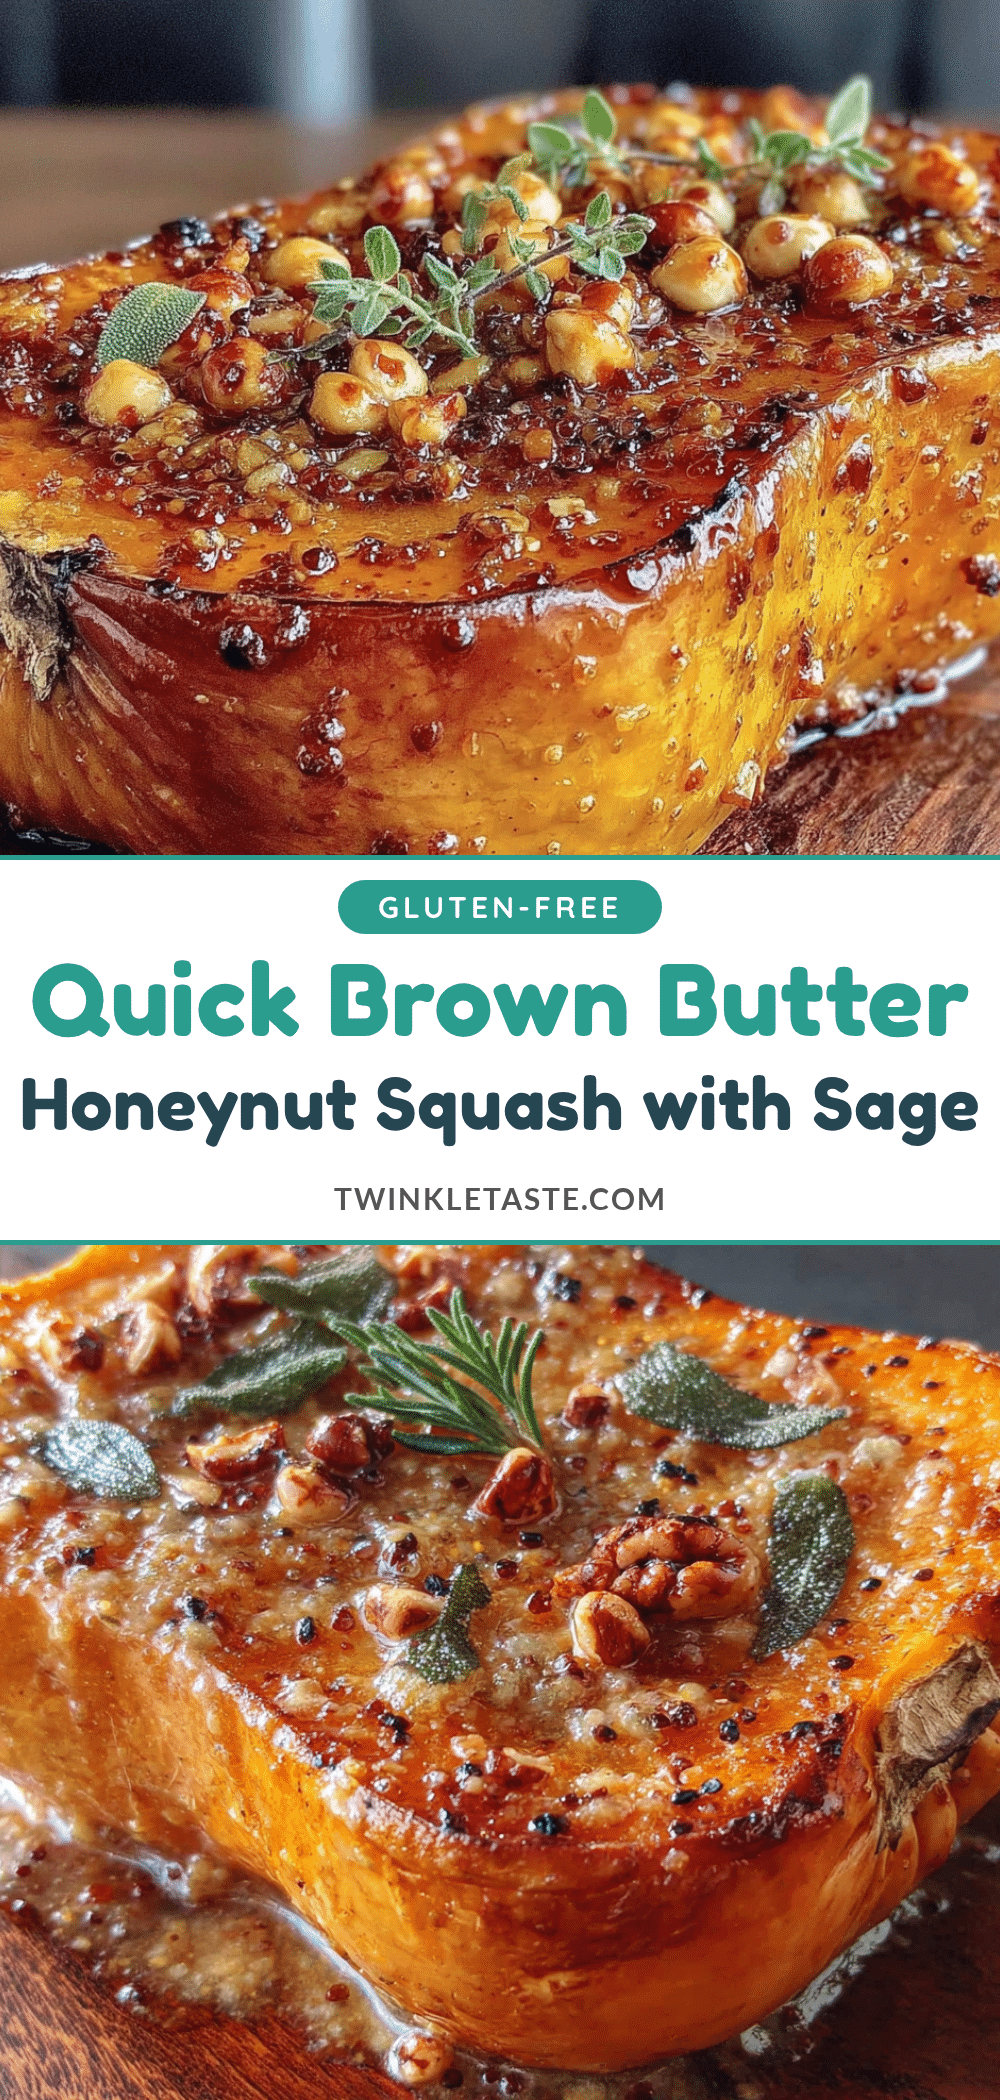
Quick Brown Butter Honeynut Squash with Sage (Easy 20-Minute Side)

A fast and flavorful side dish featuring caramelized honeynut squash in nutty brown butter with crispy sage. Ready in just 20 minutes, it’s perfect for weeknights yet elegant enough for special occasions.
- Prep Time: 5 minutes
- Cook Time: 15 minutes
- Total Time: 20 minutes
- Yield: 4 servings 1x
- Category: Side Dish
- Cuisine: American
Ingredients
- 2 medium honeynut squash (about 1 pound each)
- 3 tablespoons unsalted butter
- 10–12 fresh sage leaves
- 1/2 teaspoon kosher salt, plus more to taste
- 1/4 teaspoon freshly ground black pepper
- 1 teaspoon maple syrup (optional)
- Flaky sea salt for finishing (optional)
Instructions
- Rinse the honeynut squash under cool water and pat dry. Using a sharp chef’s knife, carefully cut each squash in half lengthwise. Scoop out the seeds and stringy fibers with a spoon and discard.
- Sprinkle the cut sides of the squash halves with kosher salt and freshly ground black pepper.
- Place a large skillet over medium-high heat and let it get hot for about 1 minute.
- Add the butter to the hot skillet. Swirl the pan occasionally until the butter melts, foams, and then the foam subsides, and you see little brown specks forming at the bottom. The butter will smell nutty and toasty, about 2-3 minutes.
- Drop in the fresh sage leaves; they will sizzle and crisp up almost immediately. Swirl the pan to coat them in the butter, then use tongs to transfer the sage leaves to a small plate. Set aside for garnish.
- Carefully place the squash halves cut-side down in the browned butter. Cook undisturbed for 4-5 minutes, until the cut sides are deeply golden brown and caramelized.
- Flip the squash halves over so they are cut-side up. Reduce the heat to medium-low and cover the skillet with a lid or foil. Cook for 6-8 minutes, until the squash is tender all the way through (easily pierced with a fork).
- Remove the lid and turn off the heat. Drizzle any remaining browned butter from the pan over the cut sides of the squash.
- Transfer the squash halves to a serving platter, cut-side up. Crumble the crispy sage leaves over the top. If using, add flaky sea salt or a drizzle of maple syrup. Serve hot, warm, or at room temperature.
Notes
Don’t overcrowd the pan; cook in batches if needed. Pat the squash dry before searing to ensure good caramelization. Watch the brown butter carefully—it can go from perfect to burnt in seconds. The crispy sage is fragile; handle gently.
Nutrition
- Serving Size: 1 squash half
- Calories: 180
- Sugar: 8
- Sodium: 300
- Fat: 9
- Saturated Fat: 5
- Carbohydrates: 24
- Fiber: 4
- Protein: 3
Keywords: honeynut squash, brown butter, sage, quick side dish, fall recipe, weeknight dinner, easy side, gluten-free


