I was standing in the checkout line at the hardware store—of all places—when the woman behind me, who had a smear of potting soil on her cheek, started talking about muffins. Not about garden hoses or fertilizer, but about the exact problem I’d been wrestling with all week. “My kids want pumpkin muffins,” she said, more to herself than to me, “but I’m not baking two dozen. I don’t have that kind of energy on a Tuesday.”
And honestly, I felt that in my bones. You know that feeling when you want something homemade and cozy, but the idea of pulling out every mixing bowl you own just feels like too much? I nodded at her, and she just kept talking—told me about this recipe she’d scribbled on the back of a receipt, designed for exactly six muffins. No more, no less. I mean, I’d never met this woman before, but there we were, two strangers in a hardware store, bonding over the struggle of feeding a family without going overboard.
I didn’t get her name, but I got her idea. And let me tell you, these kid-approved small-batch pumpkin muffins have saved my sanity more times than I can count. They’re the kind of recipe that makes you wonder why you ever made a full batch in the first place. No leftover muffins going stale on the counter, no fighting over who gets the last one. Just six perfect, golden muffins that disappear before you’ve even finished your coffee.
So here’s the thing—I’ve tweaked that hardware store conversation into something that actually works for real families. These muffins are soft, spiced just right, and sweet enough to feel like a treat without being a sugar bomb. And the best part? You can have them on the table in under 30 minutes. That’s not a brag—that’s just what happens when you’re baking for six instead of twelve.
Why You’ll Love This Recipe
Let’s be real for a second. Most pumpkin muffin recipes make a dozen or more, which is great if you’re feeding a crowd or have a freezer stocked for emergencies. But for the rest of us—the ones with a half-empty can of pumpkin in the fridge and a toddler tugging at our sleeve—a small batch just makes sense.
- Just 6 Muffins — No more, no less. Perfect for a quick breakfast, after-school snack, or weekend treat without leftovers going to waste.
- 30 Minutes Start to Finish — From the moment you pull out the bowl to the moment you’re pulling muffins out of the oven, you’re looking at half an hour. That’s faster than a drive-through run.
- Pantry-Friendly Ingredients — You probably already have everything you need. No fancy flours, no obscure spices, no trips to three different stores.
- Kid-Approved and Picky-Eater Tested — My own kids have given these the official seal of approval, and I’ve made them for playdates where they vanished before the juice boxes were opened.
- Budget-Friendly — With simple ingredients and no waste, these muffins cost pennies to make. That’s real value when you’re feeding a family.
- Freezer-Friendly — If by some miracle you have leftovers, they freeze beautifully. Pop one in a lunchbox and it’ll be thawed by snack time.
What makes these different from every other pumpkin muffin recipe out there? It’s the technique. I use a slightly higher ratio of pumpkin to flour, which gives these muffins an incredibly moist, almost pudding-like texture without being gummy. And I skip the mixer entirely—everything comes together in one bowl with a wooden spoon. Less dishes, less fuss, more time with your people.
Honestly, this is the kind of recipe that makes you feel like a kitchen rockstar without actually having to work for it. It’s comfort food that actually fits your life, not the other way around.
What Ingredients You Will Need
This recipe keeps things simple, using ingredients you probably already have in your pantry. The beauty of a small batch is that you don’t need to buy a whole new set of supplies—just grab what you’ve got and get baking.
- 1 cup all-purpose flour — Regular white flour works perfectly here. If you want to experiment, whole wheat pastry flour also works, but the muffins will be slightly denser. I’ve used Gold Medal and King Arthur with equal success.
- 1/2 cup granulated sugar — Just enough sweetness to make these feel like a treat. You can reduce it to 1/3 cup if your kids prefer less sweet muffins, but I wouldn’t go lower than that.
- 1 teaspoon baking powder — This is what gives the muffins their rise. Make sure it’s fresh—if you’re not sure, test a little in hot water. If it fizzes, you’re good.
- 1/2 teaspoon baking soda — Works with the buttermilk to create that tender crumb. No buttermilk? No problem—see the substitution note below.
- 1 teaspoon pumpkin pie spice — You can use store-bought or make your own with 1/2 teaspoon cinnamon, 1/4 teaspoon ginger, 1/8 teaspoon nutmeg, and a pinch of cloves. I actually prefer making my own because I can adjust the cinnamon up a bit—my kids love that warmth.
- 1/4 teaspoon salt — Don’t skip this! Salt enhances all the other flavors and keeps the muffins from tasting flat.
- 1/2 cup pumpkin puree — Not pumpkin pie filling! Make sure you’re getting 100% pure pumpkin. I’ve used Libby’s and store brands, and they all work fine. This is the perfect amount to use up half a standard 15-ounce can.
- 1/4 cup vegetable oil — Canola or any neutral oil works. Melted coconut oil also works if you’re into that. I’ve even used melted butter in a pinch—just let it cool slightly before mixing.
- 1/4 cup buttermilk — Here’s the trick: if you don’t have buttermilk, add 1 teaspoon of lemon juice or white vinegar to regular milk and let it sit for 5 minutes. It works perfectly and you probably already have both ingredients.
- 1 large egg — Room temperature is best, but if you forget to take it out of the fridge, just put it in a bowl of warm water for 5 minutes.
- 1 teaspoon vanilla extract — Pure vanilla is nice, but imitation works just fine in baked goods. Don’t stress about this one.
Optional add-ins: A handful of chocolate chips, chopped pecans, or even a streusel topping if you’re feeling fancy. But honestly, these muffins are perfect as-is.
Equipment Needed
The beauty of this recipe is that you don’t need much. Here’s what you’ll need to have on hand:
- One medium mixing bowl — Any bowl you’ve got will work. I use a ceramic one that I’ve had for years, but glass or metal is fine too.
- One 6-cup muffin tin — This is key for a small batch. If you only have a 12-cup tin, just fill the empty cups halfway with water to prevent warping. I actually found my 6-cup tin at a thrift store for two dollars—best investment ever.
- Muffin liners — Paper liners make cleanup a breeze, but you can also grease the tin well with butter or non-stick spray. I’ve done both, and honestly, the liners are worth the extra few cents.
- Measuring cups and spoons — Standard set will do. For the pumpkin, I use a 1/2 cup measure and pack it firmly.
- Wooden spoon or spatula — No mixer needed. A simple spoon is all you need to bring everything together.
- Cooling rack — Not strictly necessary, but it helps the muffins cool evenly. If you don’t have one, just let them cool in the pan for a few minutes, then transfer to a plate.
- Small whisk or fork — For whisking the dry ingredients together. A fork works in a pinch.
That’s it. No stand mixer, no sifter, no fancy gadgets. Just basic kitchen tools and a little bit of time.
Preparation Method
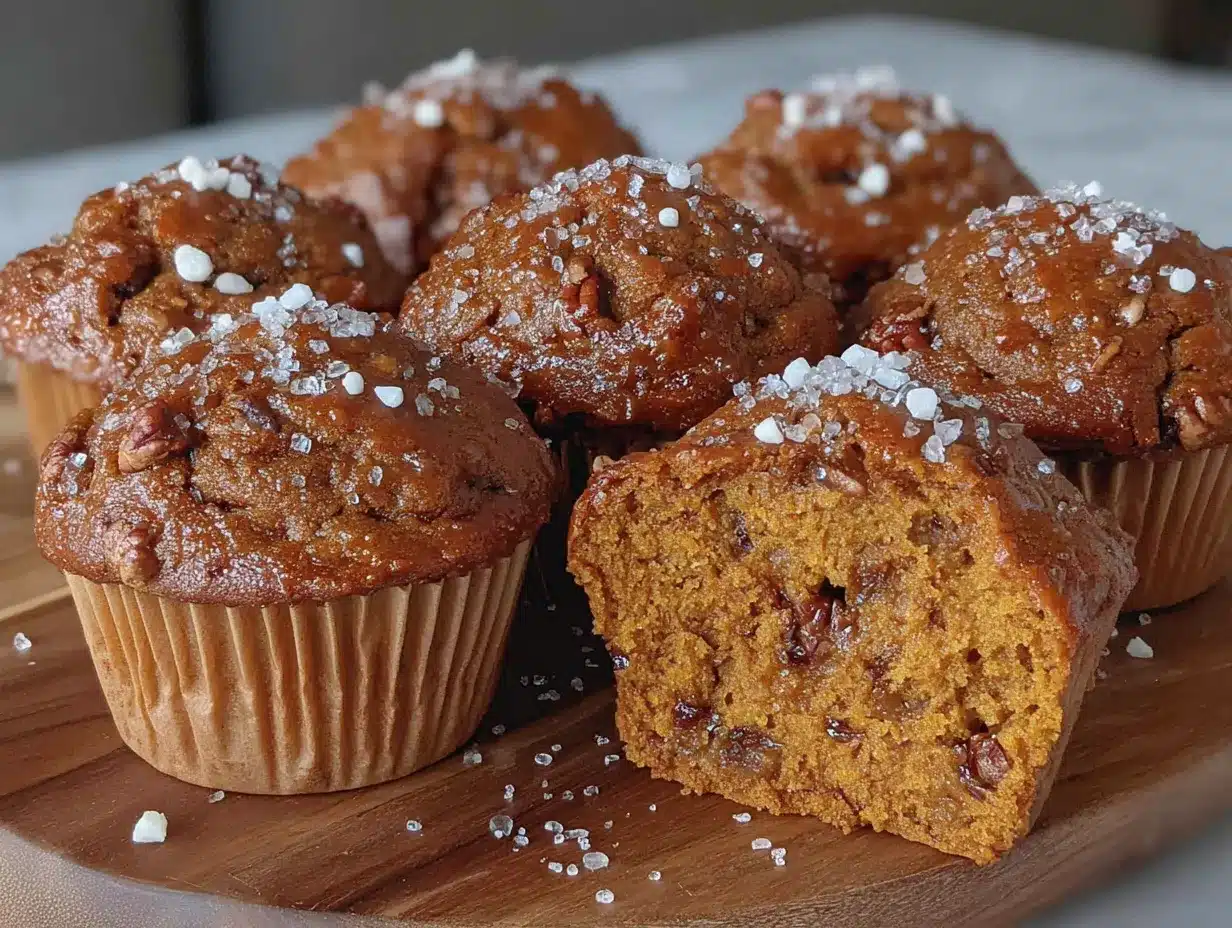
Alright, let’s get baking. This comes together so fast that you’ll barely have time to preheat the oven before you’re ready to go.
- Preheat your oven to 350°F (175°C). Line your 6-cup muffin tin with paper liners or grease it well. I like to do this first so the oven is ready when I am.
- In your medium mixing bowl, whisk together the dry ingredients. Add the flour, sugar, baking powder, baking soda, pumpkin pie spice, and salt. Give it a good whisk—about 10 seconds—to make sure everything is evenly distributed. This is where you’d add any dry add-ins like chopped nuts or spices.
- Make a well in the center of the dry ingredients. This sounds fancy, but really you’re just pushing the flour mixture to the sides of the bowl to create a little crater. This helps the wet ingredients incorporate more evenly.
- Add the wet ingredients to the well. Pour in the pumpkin puree, vegetable oil, buttermilk, egg, and vanilla extract. Don’t mix yet—just let everything sit there for a second while you double-check you haven’t forgotten anything.
- Stir until just combined. Use your wooden spoon or spatula to gently fold everything together. Here’s the most important tip I can give you: stop mixing as soon as you don’t see any more streaks of flour. A few small lumps are totally fine—overmixing will make your muffins tough and dense. I speak from experience—I ruined my first batch by being too enthusiastic with the stirring.
- Let the batter rest for 2-3 minutes. This is optional, but I’ve found it helps the muffins rise more evenly. The baking powder and baking soda get a head start, and you end up with taller, fluffier muffins. Use this time to clear your counter or pour yourself a coffee.
- Divide the batter evenly among the 6 muffin cups. A 1/4 cup measure or an ice cream scoop works perfectly. Each cup should be about 2/3 to 3/4 full. Don’t worry if they look a little uneven—they’ll even out as they bake.
- Bake for 16-18 minutes. Start checking at 15 minutes if your oven runs hot. You’re looking for a golden-brown top that springs back when you gently press it. A toothpick inserted into the center should come out clean or with a few moist crumbs—not wet batter.
- Cool in the pan for 5 minutes. This is important! The muffins need this time to set properly. If you try to take them out too soon, they might fall apart. Use this time to admire your work and enjoy the amazing smell filling your kitchen.
- Transfer to a cooling rack. After 5 minutes, carefully lift the muffins out of the pan and place them on a wire rack. If you used liners, they’ll come out easily. If you greased the pan, run a knife around the edges first. Let them cool for at least 5 more minutes before serving—I know it’s hard to wait, but they really do taste better when they’re not molten hot.
And that’s it! From start to finish, you’re looking at about 25-30 minutes total. Not bad for homemade muffins, right?
Cooking Tips & Techniques
Over the years, I’ve made these muffins more times than I can count, and I’ve learned a few things the hard way. Here are my best tips for getting perfect results every time.
Don’t overmix the batter. I know I said this already, but it’s worth repeating. When you overmix, you develop the gluten in the flour, which leads to tough, rubbery muffins. You want them tender and soft, so mix just until the flour disappears. A few lumps are your friend—they’ll bake out in the oven.
Room temperature ingredients really do matter. When your egg and buttermilk are at room temperature, they blend more evenly into the batter. Cold ingredients can cause the batter to seize up, leading to uneven baking. I’ve been guilty of using cold eggs straight from the fridge, and the muffins were noticeably denser. Just take everything out 15 minutes before you start.
Check your pumpkin puree. Different brands have different moisture levels. If your batter looks too thick (like cookie dough), add a tablespoon of milk. If it looks too thin (like pancake batter), add a tablespoon of flour. Trust your eyes—the batter should be thick but scoopable.
Rotate the pan halfway through. Ovens have hot spots, and the back of the oven is usually hotter than the front. About 8 minutes in, quickly rotate the pan 180 degrees. This ensures all six muffins bake evenly. I forgot to do this once, and three muffins came out perfect while the other three were slightly overdone.
Use an ice cream scoop for even portions. This is my favorite trick for consistent muffins. A standard ice cream scoop holds about 1/4 cup, which is the perfect amount for each muffin. Plus, it’s less messy than using a spoon.
Let them cool completely before storing. If you put warm muffins in an airtight container, the steam will make them soggy on top. I learned this the hard way when I packed some for a road trip snack. Give them at least 30 minutes on the cooling rack before storing.
Variations & Adaptations
One of the best things about this recipe is how easy it is to customize. Here are some of my favorite variations that I’ve tried over the years.
Chocolate Chip Pumpkin Muffins. This is my kids’ absolute favorite version. Fold in 1/3 cup of chocolate chips (semi-sweet or milk chocolate, whichever your family prefers) right after you combine the wet and dry ingredients. The chocolate melts into little pockets of sweetness that pair perfectly with the warm pumpkin spices. I’ve also used white chocolate chips, which are amazing but a bit sweeter.
Whole Wheat Version. For a slightly healthier twist, swap half the all-purpose flour for whole wheat flour. The muffins will be a bit denser and nuttier in flavor, but still delicious. I wouldn’t recommend using 100% whole wheat—the texture gets too heavy, and kids notice. I tried that once and got some very honest feedback from my taste-testers.
Gluten-Free Adaptation. Use a 1:1 gluten-free baking flour blend (I like Bob’s Red Mill or King Arthur). No other adjustments needed—just swap it in cup for cup. The texture will be slightly more crumbly, but still very good. My gluten-sensitive friend loves these.
Less Sugar Option. If you’re watching sugar intake, you can reduce the sugar to 1/3 cup without affecting the texture too much. The muffins will be less sweet, but the pumpkin and spices still shine through. For a natural sweetener, try 1/4 cup maple syrup plus 2 tablespoons of sugar—just reduce the buttermilk by a tablespoon to compensate for the extra liquid.
Streusel Topping. Feeling fancy? Mix 2 tablespoons of flour, 2 tablespoons of brown sugar, 1 tablespoon of cold butter, and a pinch of cinnamon. Cut the butter in with your fingers until it forms coarse crumbs. Sprinkle this over the muffin batter before baking. The crunchy topping adds a lovely texture contrast. Fair warning: this makes the muffins even more irresistible.
Dairy-Free Version. Swap the buttermilk for a dairy-free milk (almond, oat, or soy) mixed with 1 teaspoon of lemon juice. Use a neutral oil instead of butter. The muffins turn out just as moist and tender—my dairy-sensitive nephew couldn’t tell the difference.
Serving & Storage Suggestions
These muffins are incredibly versatile when it comes to serving. Here’s how I like to enjoy them and how to keep them fresh.
Serving Temperature. These muffins are delicious warm, right out of the oven, when the edges are still slightly crisp and the center is soft and tender. But they’re also fantastic at room temperature—the flavors actually meld together more after they’ve cooled. For a special treat, warm one up in the microwave for 10-15 seconds and spread a little butter on top. Oh my goodness, it’s heavenly.
What to Serve With Them. For breakfast, pair a muffin with a side of scrambled eggs and some fruit for a balanced meal. For a snack, they’re perfect on their own with a glass of milk or a cup of coffee. I’ve also served them alongside a bowl of chili or soup for a cozy dinner—the sweet and savory combo is surprisingly good.
Storage Instructions. Store leftover muffins in an airtight container at room temperature for up to 3 days. If you live in a humid climate (like I do), they might get a bit sticky on top—just pop them in a paper bag for a few hours to dry out slightly. Don’t refrigerate them, as that actually speeds up staling.
Freezing Instructions. These muffins freeze beautifully. Let them cool completely, then wrap each one individually in plastic wrap and place them in a freezer-safe bag. They’ll keep for up to 3 months. To thaw, just leave one on the counter for an hour, or microwave for 20-30 seconds. I often make a double batch and freeze half for busy mornings.
How Flavors Develop. Here’s a secret: these muffins actually taste better the next day. The pumpkin and spice flavors have time to meld together, and the texture becomes even more moist. So don’t worry if you have leftovers—they’re still fantastic tomorrow.
Nutritional Information & Benefits
While these muffins are definitely a treat, they do have some redeeming nutritional qualities worth mentioning.
Estimated Per Muffin (based on 6 muffins):
- Calories: 210-230
- Fat: 9g
- Carbohydrates: 32g
- Fiber: 2g
- Sugar: 16g
- Protein: 4g
Health Benefits. Pumpkin is packed with vitamin A (great for eye health) and fiber (good for digestion). The cinnamon in the pumpkin pie spice has anti-inflammatory properties, and using oil instead of butter keeps the saturated fat content lower. Plus, making them at home means you control exactly what goes in—no preservatives, no artificial flavors, no weird ingredients you can’t pronounce.
Dietary Considerations. These muffins are vegetarian and can easily be made dairy-free or gluten-free (see variations above). They contain eggs and wheat, so they’re not suitable for vegan or celiac diets without modifications.
My Personal Take. I’m not going to pretend these are health food—they’re muffins, after all. But they’re a much better option than store-bought muffins, which are often loaded with excess sugar, unhealthy fats, and preservatives. Plus, the portion control of a small batch means you’re not tempted to eat a dozen. Everything in moderation, right?
Conclusion
These kid-approved small-batch pumpkin muffins have become a staple in my kitchen for good reason. They’re quick, easy, and made with ingredients I always have on hand. But more than that, they’ve become a little tradition—something I make on lazy Saturday mornings, rainy afternoons, or any time we need a little comfort without a lot of fuss.
I love that this recipe proves you don’t need a huge batch to get that homemade feeling. Sometimes six muffins are exactly enough—enough to share, enough to enjoy, enough to make the kitchen smell amazing without overwhelming your week.
So go ahead and give them a try. Customize them however you like—add chocolate chips, swap in whole wheat flour, or pile on a streusel topping. Make them your own. And when you do, I’d love to hear about it. Drop a comment below and tell me how they turned out, what variations you tried, or if your kids gave them the thumbs up.
Happy baking, friends. You’ve got this.
Frequently Asked Questions
Can I use fresh pumpkin instead of canned?
Absolutely! If you have fresh pumpkin puree, you can use it cup for cup. Just be aware that fresh pumpkin tends to have more moisture than canned, so you might need to reduce the buttermilk by a tablespoon to compensate. Roast your pumpkin, scoop out the flesh, and blend until smooth. The flavor is actually even more vibrant with fresh pumpkin.
Why did my muffins turn out dense and heavy?
This usually happens for one of two reasons: overmixing the batter or using too much flour. When you overmix, you develop gluten, which makes muffins tough. When you scoop flour with your measuring cup instead of spooning it in, you can pack in too much flour, which dries out the batter. Always spoon flour into your measuring cup and level it off with a knife.
Can I make these into mini muffins?
Yes! For mini muffins, reduce the baking time to 10-12 minutes. You’ll get about 12-14 mini muffins from this batch. They’re perfect for little hands or for packing in lunchboxes. Just keep an eye on them starting at 9 minutes—mini muffins bake fast and can go from perfect to overdone in a flash.
How do I know when the muffins are done baking?
The best test is the toothpick test. Insert a toothpick into the center of a muffin—if it comes out clean or with a few moist crumbs, they’re done. You can also gently press the top of a muffin; if it springs back, they’re ready. The edges should be slightly golden and pulling away from the sides of the pan.
Can I make the batter ahead of time?
I don’t recommend it. The leavening agents (baking powder and baking soda) start working as soon as they hit the wet ingredients, so the batter is best used immediately. If you need to prep ahead, mix the dry ingredients and wet ingredients separately, then combine them right before baking. You can store the dry mix in a ziplock bag for up to a week.
Pin This Recipe!
Perfect Small-Batch Pumpkin Muffins (Just 6!)
These kid-approved small-batch pumpkin muffins are soft, spiced just right, and ready in under 30 minutes. Perfect for a quick breakfast or snack without leftovers.
- Prep Time: 10 minutes
- Cook Time: 18 minutes
- Total Time: 28 minutes
- Yield: 6 muffins 1x
- Category: Breakfast
- Cuisine: American
Ingredients
- 1 cup all-purpose flour
- 1/2 cup granulated sugar
- 1 teaspoon baking powder
- 1/2 teaspoon baking soda
- 1 teaspoon pumpkin pie spice
- 1/4 teaspoon salt
- 1/2 cup pumpkin puree
- 1/4 cup vegetable oil
- 1/4 cup buttermilk
- 1 large egg
- 1 teaspoon vanilla extract
Instructions
- Preheat your oven to 350°F (175°C). Line your 6-cup muffin tin with paper liners or grease it well.
- In your medium mixing bowl, whisk together the dry ingredients: flour, sugar, baking powder, baking soda, pumpkin pie spice, and salt.
- Make a well in the center of the dry ingredients.
- Add the wet ingredients to the well: pumpkin puree, vegetable oil, buttermilk, egg, and vanilla extract.
- Stir until just combined. A few small lumps are fine; do not overmix.
- Let the batter rest for 2-3 minutes.
- Divide the batter evenly among the 6 muffin cups, filling each about 2/3 to 3/4 full.
- Bake for 16-18 minutes, until golden brown and a toothpick inserted into the center comes out clean or with a few moist crumbs.
- Cool in the pan for 5 minutes.
- Transfer to a cooling rack and let cool for at least 5 more minutes before serving.
Notes
For best results, use room temperature ingredients. Do not overmix the batter. For mini muffins, bake 10-12 minutes. Muffins can be frozen for up to 3 months.
Nutrition
- Serving Size: 1 muffin
- Calories: 220
- Sugar: 16
- Sodium: 250
- Fat: 9
- Saturated Fat: 1
- Carbohydrates: 32
- Fiber: 2
- Protein: 4
Keywords: pumpkin muffins, small batch, kid-friendly, easy, quick, fall baking


