Unexpected guests rang the doorbell just as I was staring down a near-empty pantry and a single box of cake mix tucked in the back corner. No fancy plans, no elaborate grocery runs. I had enough to throw together something festive for the 4th of July—just in time. That’s how this Perfect Red, White & Blue Layer Cake with Buttercream Stars was born: a last-minute scramble that turned into a centerpiece nobody could stop talking about.
The kitchen smelled of vanilla and fresh berries, with the sweet hum of the mixer battling the summer heat. I wasn’t aiming for perfection, just a quick, colorful cake to brighten the unexpected party. The layers came together with surprising ease, and the buttercream stars? Well, those were an improvisation inspired by a leftover piping bag and a bit of patriotic spirit.
Honestly, what started as a frantic dash to whip up something edible ended with a quiet moment of relief and pride. This cake isn’t just about the stars and stripes on a plate—it’s about pulling off a sweet escape when you’re least prepared. It’s stayed with me because it’s real, approachable, and somehow manages to look festive without a fuss. That’s the kind of recipe you want in your back pocket, trust me on this one.
Why You’ll Love This Recipe
After several trials and a few smudged frosting stars, I’ve nailed a version of this red, white, and blue layer cake that’s as fun to make as it is to eat. Here’s why it’s become a go-to for every summer celebration—planned or not:
- Quick & Easy: It all comes together in under 90 minutes, which is a lifesaver when you’re racing the clock.
- Simple Ingredients: No exotic stuff here—just pantry staples and fresh berries you can find everywhere.
- Perfect for Summer Parties: Whether it’s a barbecue, picnic, or just a spontaneous get-together, this cake fits right in.
- Crowd-Pleaser: Kids love the bright colors and stars, adults appreciate the classic buttery flavor and moist crumb.
- Unbelievably Delicious: The moist layers paired with fluffy buttercream stars make each bite a celebration.
What sets this cake apart is the way the buttercream stars add texture and charm without being finicky. I’ve tested everything from folding in cream cheese for tang to swapping out red food coloring for natural beet juice (which gave the cake a subtle earthiness). It’s comfort food with a patriotic twist, and honestly, it’s the kind of dessert that makes you pause and savor the moment.
Plus, if you want to keep the party going beyond the cake, you might enjoy pairing it with a refreshing red, white, and blue sangria or complementing it with an easy patriotic charcuterie board—both fantastic for rounding out your celebration.
What Ingredients You Will Need
This recipe uses straightforward ingredients that work together to deliver a moist, flavorful cake with vibrant colors and a creamy, dreamy buttercream topping. You likely have most of these on hand (or can grab them easily) without a special trip.
- For the Cake Layers:
- All-purpose flour (2 ½ cups / 315g) – for that tender crumb
- Granulated sugar (2 cups / 400g) – sweet but balanced
- Baking powder (2 ½ tsp) – to keep things light and fluffy
- Salt (½ tsp) – enhances flavor
- Unsalted butter (½ cup / 115g), softened – adds richness
- Eggs (4 large, room temperature) – helps bind and rise
- Whole milk (1 cup / 240ml), room temperature – keeps the batter moist
- Vanilla extract (2 tsp) – classic flavor boost
- Red food coloring (gel preferred for vibrant color) – about 1 tbsp for the red layer
- Blue food coloring (gel) – about 1 tbsp for the blue layer
- For the Buttercream Frosting:
- Unsalted butter (1 ½ cups / 340g), softened – the base of the frosting
- Powdered sugar (5 cups / 600g), sifted – for smooth sweetness
- Heavy cream or whole milk (3-4 tbsp / 45-60ml) – to adjust consistency
- Vanilla extract (1 tbsp) – for flavor
- Pinch of salt – balances sweetness
- Red and blue gel food coloring – for the star decorations
- Fresh Berries for Garnish:
- Strawberries, sliced (about 1 cup) – fresh and juicy
- Blueberries (1 cup) – plump and sweet
I recommend brands like King Arthur for flour and Wilton for gel food colors because they offer consistent quality. If you want a dairy-free option, substitute the butter and milk with coconut oil and almond milk, respectively. In summer, fresh berries are best, but frozen works in a pinch (just thaw and drain).
Equipment Needed
- Three 8-inch (20 cm) round cake pans – non-stick or well-greased to avoid sticky layers
- Electric mixer – handheld or stand mixer makes whipping buttercream a breeze
- Mixing bowls – at least two for batter and frosting
- Sifter or fine mesh sieve – for powdered sugar and dry ingredients to keep batter smooth
- Offset spatula – essential for spreading frosting evenly and piping stars
- Piping bags and star piping tips (Wilton #21 recommended) – to create those iconic buttercream stars
- Cooling racks – lets cakes cool evenly without sogginess
- Measuring cups and spoons – accurate measurements are key for baking success
If you don’t have cake pans, you can use a 9×13-inch pan for a single-layer cake, but you’ll lose the layered effect. No piping tips? No worries—use a plastic sandwich bag with a small corner snipped off to pipe stars with a bit of practice. Also, I’ve found that investing in a good offset spatula transforms the frosting game—it’s worth the small splurge.
Preparation Method
- Preheat and Prep: Preheat your oven to 350°F (175°C). Grease and flour three 8-inch cake pans or line them with parchment paper. This step saves you from cake disasters later.
- Mix Dry Ingredients: In a medium bowl, sift together 2 ½ cups (315g) flour, 2 cups (400g) sugar, 2 ½ teaspoons baking powder, and ½ teaspoon salt. Set aside.
- Cream Butter and Eggs: In a large bowl, beat ½ cup (115g) softened unsalted butter until creamy, about 2 minutes. Add eggs one at a time, beating well after each addition. Stir in 2 teaspoons vanilla extract.
- Add Dry Ingredients and Milk: Alternate adding the dry ingredients and 1 cup (240ml) milk to your butter-egg mixture, starting and ending with dry ingredients. Mix until just combined — overmixing makes cake tough.
- Divide and Color Batter: Divide batter evenly into three bowls. Stir red gel food coloring into one, blue into another, and leave the last plain for the white layer. Add color gradually—you want vibrant but not overpowering hues.
- Pour and Bake: Pour each colored batter into its prepared pan. Smooth tops gently with a spatula. Bake for 25-30 minutes or until a toothpick inserted in the center comes out clean. Cakes should spring back lightly when touched.
- Cool Completely: Let cakes cool in pans for 15 minutes, then invert onto cooling racks. You want them completely cool before frosting or the buttercream melts.
- Make the Buttercream: Beat 1 ½ cups (340g) softened butter on medium speed until creamy (about 3 minutes). Gradually add 5 cups (600g) sifted powdered sugar, mixing on low to prevent a sugar cloud. Add 3-4 tablespoons (45-60ml) heavy cream and 1 tablespoon vanilla extract, then beat on high for 3-4 minutes until fluffy. Add a pinch of salt to balance sweetness.
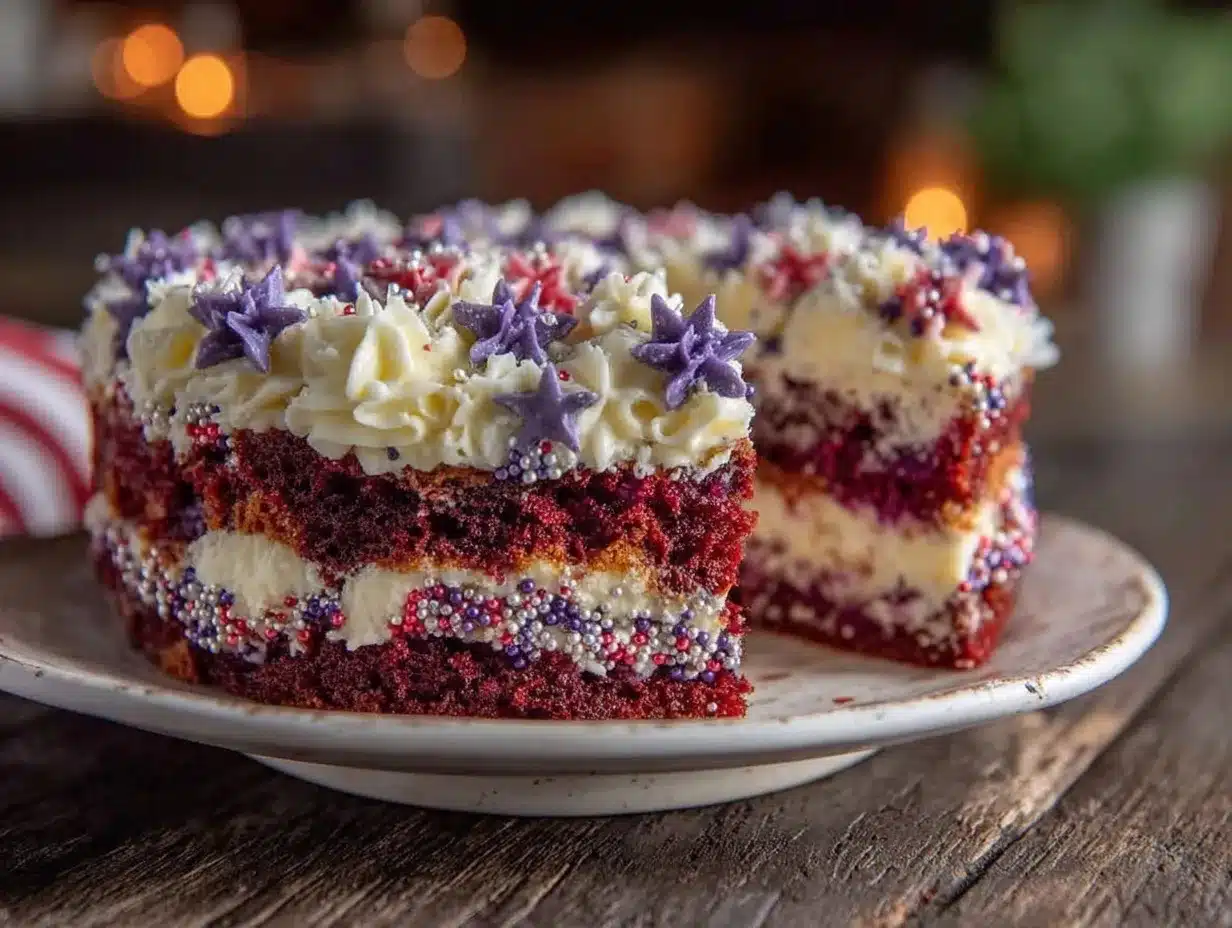
- Assemble the Cake: Place the blue layer on your cake board or plate (blue goes bottom for a nice base). Spread about ½ cup buttercream evenly. Add the white layer, then spread another ½ cup frosting. Finish with the red layer on top. Cover the entire cake with a thin crumb coat and chill for 15 minutes.
- Piping Buttercream Stars: Divide remaining buttercream into three bowls. Tint one with red, one with blue, and leave one white. Fill piping bags fitted with star tips. Pipe stars around the top edge and sides, alternating colors to mimic the flag’s festive vibe.
- Final Touches: Garnish the top with fresh sliced strawberries and blueberries. Chill for 30 minutes before serving to set the frosting.
Pro tip: When mixing the batter, scrape sides often to keep everything well combined. Also, don’t skip chilling the crumb coat—it keeps your layers neat and the stars crisp. If you want to speed things up, make the cake layers a day ahead and freeze them wrapped tightly; thaw completely before frosting.
Cooking Tips & Techniques
Making this red, white, and blue layer cake look flawless comes down to a few tricks I’ve picked up the hard way. Like, for example, don’t forget to bring your eggs and milk to room temperature. Cold ingredients create lumps and dense cake, and nobody wants that.
When coloring your batter, gel food coloring is a game-changer. It packs vibrant color without watering down the batter. I learned this after one attempt with liquid dyes that left the cake too wet and pale. Also, mix the food color well but gently—overmixing can activate gluten and toughen the crumb.
Buttercream stars are easier than they look—start with a good consistency: pipe a star and if it droops, add a bit more powdered sugar. If it cracks, add a splash more cream. Use steady pressure on the piping bag and pull away sharply to get that crisp star shape.
One common mistake is skipping the crumb coat; the crumbs will mix into your top layer of frosting and ruin that clean look. Another tip: chill your cake after crumb coating and between colors to keep the layers and stars defined.
Multitasking tip: While your cake layers bake, prep the buttercream and wash your piping tools. It saves time and keeps the kitchen organized. And if you want a moist cake every single time, I recommend swapping half the milk for sour cream or buttermilk occasionally—it makes a noticeable difference.
Variations & Adaptations
This recipe is as flexible as your baking mood. Here are a few ways to make it your own or tweak it based on dietary needs:
- Diet-Friendly: Use gluten-free flour blend instead of all-purpose flour to make it gluten-free. For a dairy-free version, swap butter and milk with coconut oil and your favorite plant milk.
- Flavor Twists: Add lemon zest to the batter for a subtle citrus pop or mix in a teaspoon of almond extract for a nutty aroma. For a patriotic surprise, fill the layers with a thin spread of homemade peach bourbon jam.
- Alternative Decorations: Instead of piping stars, you can create a smooth buttercream finish and decorate with fresh strawberries and blueberries arranged in flag patterns. Or use edible glitter for sparkle.
- Cooking Method: Prefer cupcakes? This batter works perfectly for red, white, and blue cupcakes with piped buttercream stars on each one, ideal for sharing at picnics.
One time, I swapped the red layer for a rich red velvet cake and it turned into a showstopper for a birthday barbecue. Trust me, the possibilities are deliciously endless.
Serving & Storage Suggestions
Serve this layered cake chilled or at room temperature for the best buttercream texture. The stars hold their shape longer when cool, but the cake tastes rich and moist once it warms a bit.
Pair your slice with a cold glass of lemonade or a light summer cocktail. It’s also a great finale after a meal featuring lighter fare like a dill cucumber tomato salad or a crispy grilled dish.
Store leftover cake in an airtight cake container in the fridge for up to 4 days. To keep the stars from wilting, avoid stacking anything on top. For longer storage, wrap cake layers tightly in plastic and freeze up to 2 months; thaw overnight in the fridge before frosting.
Reheat slices gently at room temperature for about 30 minutes before serving. Flavors meld over time, so leftovers often taste even better the next day.
Nutritional Information & Benefits
Each slice of this red, white, and blue layer cake is a treat with approximately 420 calories, 20g fat, 55g carbohydrates, and 4g protein, depending on portion size and frosting thickness.
Key ingredients like eggs provide protein and essential nutrients, while fresh berries contribute antioxidants and vitamins C and K. Using real butter and cream keeps the texture rich but also means it’s best enjoyed in moderation.
For those watching carbs or sugar, consider reducing powdered sugar in the frosting slightly or swapping in a sugar substitute labeled for baking. The recipe can be adapted for gluten-free or dairy-free diets as mentioned earlier, so it’s quite inclusive.
Personally, I appreciate this cake as a special occasion treat that brings people together—sometimes that kind of joy is just as nourishing as the ingredients.
Conclusion
This Perfect Red, White & Blue Layer Cake with Buttercream Stars isn’t just a dessert; it’s a slice of celebration and spontaneity that’s surprisingly manageable to pull off. From the simple ingredients to the approachable decorating technique, it’s designed to make you look like a baking rockstar without the stress.
Whether you’re commemorating a holiday, surprising an unexpected guest, or just craving something sweet and patriotic, this cake adapts to your kitchen and your mood. I love it because it’s a recipe that’s forgiving and festive, with a bit of personality baked right in.
Give it a try, and if you tweak it to suit your style or occasion, I’d love to hear how it turned out. Happy baking and star-spangled celebrations!
FAQs
How do I prevent the buttercream stars from melting?
Make sure your buttercream is chilled and piped onto a cool cake. Chilling the cake briefly after the crumb coat and before piping helps stars hold their shape longer.
Can I use natural food coloring instead of gels?
Yes, but natural colorings tend to be less vibrant and can affect the batter’s texture. Beet juice works for red, and blueberry powder can be used for blue, but expect softer hues.
What’s the best way to store leftover cake?
Store in an airtight container in the fridge for up to 4 days. For longer storage, freeze the layers tightly wrapped for up to 2 months, then thaw in the fridge before frosting.
Can I make this cake ahead of time?
Absolutely. Bake the layers a day or two in advance and keep them wrapped in the fridge or freezer. Frost and decorate just before serving for the freshest look.
Is there a way to make this recipe healthier?
You can reduce sugar slightly, swap butter for a healthier fat like coconut oil, or use a sugar substitute in the frosting. Adding fresh fruit layers also boosts nutrition and flavor.
Pin This Recipe!
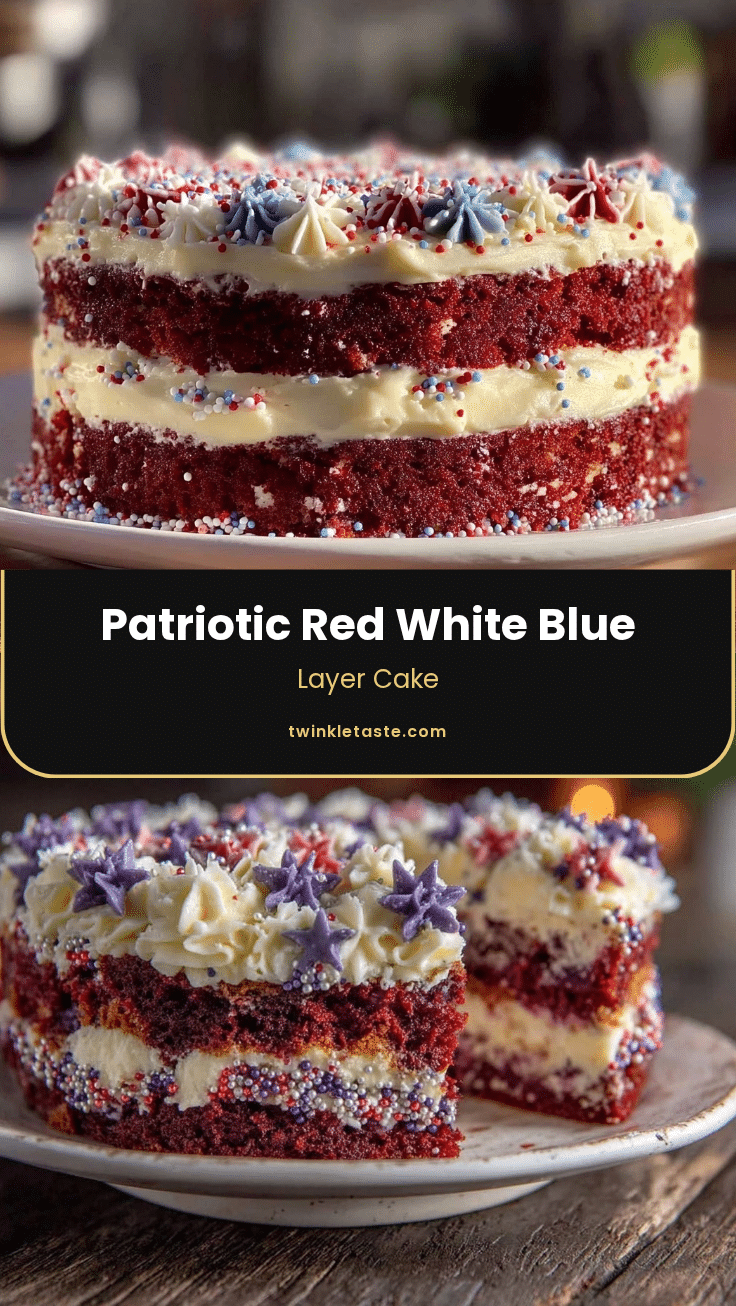
Perfect Red White Blue Layer Cake with Buttercream Stars
A quick and easy festive red, white, and blue layered cake with moist layers and fluffy buttercream stars, perfect for summer celebrations and patriotic occasions.
- Prep Time: 20 minutes
- Cook Time: 30 minutes
- Total Time: 90 minutes
- Yield: 12 servings 1x
- Category: Dessert
- Cuisine: American
Ingredients
- 2 ½ cups (315g) all-purpose flour
- 2 cups (400g) granulated sugar
- 2 ½ teaspoons baking powder
- ½ teaspoon salt
- ½ cup (115g) unsalted butter, softened
- 4 large eggs, room temperature
- 1 cup (240ml) whole milk, room temperature
- 2 teaspoons vanilla extract
- About 1 tablespoon red gel food coloring
- About 1 tablespoon blue gel food coloring
- 1 ½ cups (340g) unsalted butter, softened (for frosting)
- 5 cups (600g) powdered sugar, sifted
- 3–4 tablespoons (45-60ml) heavy cream or whole milk
- 1 tablespoon vanilla extract (for frosting)
- Pinch of salt (for frosting)
- Red and blue gel food coloring (for star decorations)
- 1 cup sliced strawberries (fresh berries for garnish)
- 1 cup blueberries (fresh berries for garnish)
Instructions
- Preheat oven to 350°F (175°C). Grease and flour three 8-inch cake pans or line with parchment paper.
- In a medium bowl, sift together flour, sugar, baking powder, and salt. Set aside.
- In a large bowl, beat ½ cup softened unsalted butter until creamy, about 2 minutes. Add eggs one at a time, beating well after each addition. Stir in 2 teaspoons vanilla extract.
- Alternate adding dry ingredients and milk to the butter-egg mixture, starting and ending with dry ingredients. Mix until just combined.
- Divide batter evenly into three bowls. Stir red gel food coloring into one, blue into another, and leave the last plain for the white layer.
- Pour each colored batter into prepared pans. Smooth tops gently with a spatula. Bake for 25-30 minutes or until a toothpick inserted in the center comes out clean.
- Let cakes cool in pans for 15 minutes, then invert onto cooling racks. Cool completely before frosting.
- For the buttercream, beat 1 ½ cups softened butter on medium speed until creamy (about 3 minutes). Gradually add powdered sugar, mixing on low to prevent sugar cloud.
- Add heavy cream and 1 tablespoon vanilla extract, then beat on high for 3-4 minutes until fluffy. Add a pinch of salt to balance sweetness.
- Place the blue layer on cake board or plate. Spread about ½ cup buttercream evenly. Add the white layer, spread another ½ cup frosting. Finish with the red layer on top.
- Cover entire cake with a thin crumb coat and chill for 15 minutes.
- Divide remaining buttercream into three bowls. Tint one with red, one with blue, and leave one white. Fill piping bags fitted with star tips.
- Pipe stars around the top edge and sides, alternating colors to mimic the flag’s festive vibe.
- Garnish the top with fresh sliced strawberries and blueberries.
- Chill for 30 minutes before serving to set the frosting.
Notes
Bring eggs and milk to room temperature to avoid lumps and dense cake. Use gel food coloring for vibrant colors without watering down batter. Chill crumb coat before piping stars to keep layers neat and stars crisp. You can make cake layers a day ahead and freeze them wrapped tightly; thaw completely before frosting. For dairy-free, substitute butter and milk with coconut oil and almond milk. For gluten-free, use gluten-free flour blend.
Nutrition
- Serving Size: 1 slice (1/12th of c
- Calories: 420
- Fat: 20
- Carbohydrates: 55
- Protein: 4
Keywords: red white blue cake, patriotic cake, buttercream stars, 4th of July cake, layered cake, easy cake recipe, summer dessert


