I was standing in the checkout line at the craft store last October, my cart overflowing with orange crepe paper and those fake spiderwebs that somehow end up everywhere, when I saw them. A bag of pretzel rods peeking out from under a skein of yarn in the woman’s cart ahead of me. And just like that—I was seven years old again, sitting at my Aunt Rita’s kitchen table, the smell of melted chocolate and salt filling her tiny apartment.
Aunt Rita wasn’t much for fancy baking. Honestly, she wasn’t much for baking at all. But every Halloween, without fail, she’d pull out a bag of pretzel rods, a block of white almond bark, and a jar of those neon sprinkles that looked like they glowed in the dark. She’d set me up with a wax paper-covered cookie sheet and let me go to town. I remember the way the white chocolate would drip down my fingers, the crunch of the pretzel, the way she’d laugh when I’d try to sneak extra sprinkles.
She passed a few years back, and I haven’t thought about those afternoons in ages. But standing there in the checkout line, I could almost feel the sticky wax paper under my hands. So I grabbed a bag of pretzel rods, a bag of white chocolate chips, and a jar of sliced almonds that I figured could pass for fingernails. Because let me tell you—sometimes the best recipes aren’t the ones you slave over. Sometimes they’re the ones that bring a person back to you for just a minute.
These Easy Witch Finger Pretzel Rods are exactly that kind of recipe. They’re silly, they’re simple, and honestly, they’re the best Halloween treat for anyone who wants something spooky without spending all day in the kitchen. Maybe you’ve been there—standing in a store aisle, hit with a memory you didn’t even know you were holding onto. That’s what this recipe is for me. And I hope it becomes that for you, too.
Why You’ll Love This Recipe
I’ve tested a lot of Halloween recipes over the years. Some are complicated, some are messy, and some just don’t taste as good as they look. These witch finger pretzel rods hit the sweet spot—they’re creepy, cute, and genuinely delicious. Here’s why I keep coming back to them year after year:
- Quick & Easy: From start to finish, you’re looking at about 20 minutes of active work. No baking, no complicated steps. Just dip, decorate, and chill.
- Simple Ingredients: You need pretzel rods, white chocolate or almond bark, sliced almonds for the fingernails, and a little green food coloring. That’s it. No weird specialty items.
- Perfect for Halloween Parties: These things disappear fast. Kids love them, adults sneak them, and they look way more impressive than the effort suggests.
- Crowd-Pleaser: The salty-sweet combo is basically foolproof. Plus, they’re portable—no plates needed, no forks required.
- Unbelievably Delicious: The crunch of the pretzel against the creamy white chocolate, with that little pop of salt—it’s next-level comfort food disguised as something spooky.
What makes these different from other Halloween treats? It’s the texture. The sliced almond fingernail gives you a little nutty crunch that plays perfectly off the smooth chocolate and salty pretzel. I’ve tried versions with candy melts and frosting, but nothing beats the simplicity of white chocolate and almonds. It’s comfort food reimagined—spooky, yes, but with the same soul-soothing satisfaction of a classic sweet-and-salty snack.
What Ingredients You Will Need
This recipe uses simple, pantry-friendly ingredients to deliver maximum Halloween fun with minimum fuss. Most of these are things you might already have on hand, which is exactly how I like my last-minute party recipes.
- Pretzel rods (1 bag, about 12-16 rods) – Look for thick, sturdy rods that won’t snap easily when you’re dipping them. I prefer the Snyder’s of Hanover brand for their consistent size and crunch. You want rods that are straight enough to look like fingers, not too curved.
- White chocolate chips or almond bark (12 ounces) – This is the coating. I’ve used both, and honestly, almond bark melts smoother and sets up harder, which makes for a cleaner finish. If you’re using white chocolate chips, add a teaspoon of coconut oil to help them melt smoothly. Ghirardelli white chocolate chips are my go-to for flavor.
- Sliced almonds (about ½ cup) – These become the fingernails. Look for raw, sliced almonds that are flat and wide. You want pieces that are roughly the size of a fingernail—not too small or crumbly. I’ve tried using whole almonds cut in half, but the sliced ones look more realistic.
- Green gel food coloring (a few drops) – This gives the white chocolate that witchy green hue. Gel coloring works better than liquid because it won’t thin out the chocolate. I use Americolor brand in “Leaf Green” for a nice, creepy shade.
- Red decorating gel or jam (optional, for “blood” effects) – If you want to go full horror movie, a little red gel at the base of the fingernail adds a gory touch. Totally optional, but kids go wild for it.
- Wax paper or parchment paper – For setting the dipped pretzels. Nothing fancy, just something non-stick.
Substitution guidance: If you’re dairy-free, use dairy-free white chocolate chips. Coconut oil helps them melt. For a nut-free version, skip the almonds and use a dab of green frosting for the fingernails instead. The texture changes, but the spooky factor stays strong.
Equipment Needed
You don’t need a fancy kitchen setup for these. Here’s what I use every time:
- Microwave-safe bowl – For melting the white chocolate. Glass or ceramic works best. Avoid plastic—it can hold onto odors and affect the taste.
- Baking sheet – Lined with wax paper or parchment paper. This is where the dipped pretzels will set.
- Spoon or offset spatula – For stirring the chocolate and helping coat the pretzels evenly. A regular dinner spoon works fine.
- Small piping bag or zip-top bag – For drizzling extra chocolate or adding details. Honestly, I just snip a tiny corner off a zip-top bag.
- Toothpicks – Handy for positioning the almond fingernails if your fingers get sticky (which they will).
- Parchment paper or wax paper – As mentioned, for the setting surface.
Budget-friendly tip: Don’t have a piping bag? A plastic sandwich bag with a tiny hole cut in the corner works just as well. I’ve done it a dozen times. Also, if you don’t have a microwave, you can melt the white chocolate in a heatproof bowl set over a pot of simmering water—just make sure the bowl doesn’t touch the water.
Preparation Method
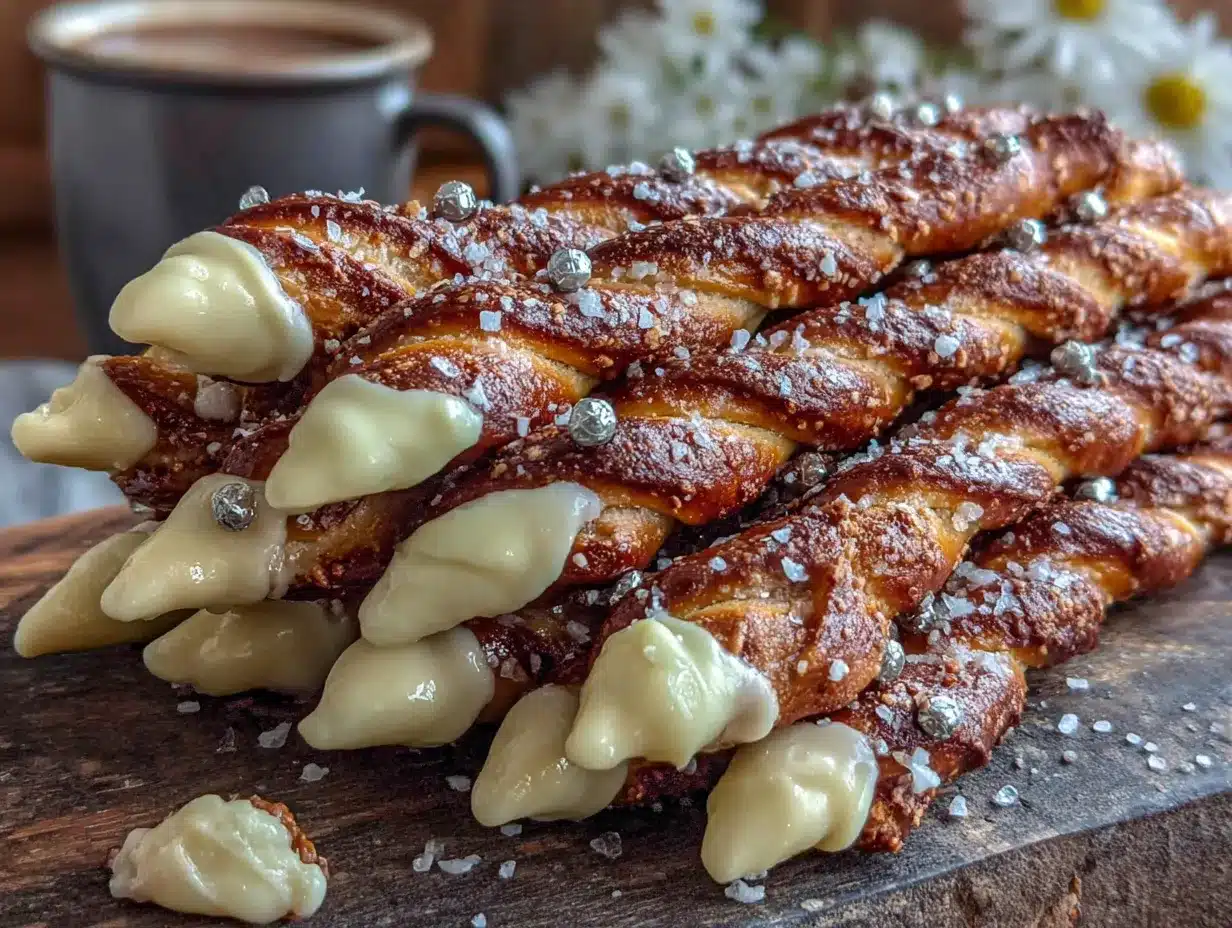
Alright, let’s get to the fun part. These witch finger pretzel rods come together fast, so read through the steps once before you start. Trust me, it’s easier than it looks.
- Prep your workspace. Line a baking sheet with wax paper or parchment paper. Lay out your pretzel rods, sliced almonds, and any decorations you’re using. Having everything within reach makes the dipping process smooth and stress-free.
- Melt the white chocolate. Place the white chocolate chips or chopped almond bark in a microwave-safe bowl. Microwave in 30-second intervals, stirring after each, until smooth. This usually takes about 1.5 to 2 minutes total. Be careful not to overheat—white chocolate burns easily and gets grainy. If it seizes up, you can try adding a teaspoon of coconut oil and stirring vigorously, but prevention is better than cure.
- Add the green color. Once the chocolate is melted and smooth, add 2-3 drops of green gel food coloring. Stir until the color is evenly distributed. Start with less—you can always add more, but you can’t take it out. Aim for a pale, sickly green. You want “witchy,” not “alien slime.”
- Dip the pretzels. Hold a pretzel rod by one end and dip it into the green white chocolate, twisting gently to coat about two-thirds of the rod. Let the excess drip off back into the bowl. You want a nice, even coating, but don’t let it pool too thickly at the bottom—it’ll drip off and create a puddle on your paper.
- Add the fingernail. Immediately after dipping, place the pretzel on the prepared baking sheet. While the chocolate is still wet, press a sliced almond onto the tip of the pretzel, pointy end outward, to look like a fingernail. Gently press so it sticks. Work quickly—the chocolate sets fast.
- Create the knuckle details. This is where the magic happens. Using a toothpick or the tip of a small knife, gently drag lines across the chocolate to create knuckle wrinkles. You want 2-3 horizontal lines about halfway down the coated portion. Don’t press too hard—you’re just marking the chocolate, not carving through it.
- Add red “blood” (optional). If you’re using red decorating gel, dab a tiny bit at the base of the almond fingernail. This gives the illusion of a freshly severed finger. It’s gross. It’s perfect.
- Let them set. Place the baking sheet in the refrigerator for 15-20 minutes, or until the chocolate is completely firm. Don’t skip this step—warm chocolate will smear and ruin your knuckle details.
- Serve and enjoy. Once set, carefully peel the pretzels off the wax paper. Arrange them on a platter like a hand reaching up from the grave. Or just pile them in a bowl. No judgment here.
Pro tip: If your chocolate starts to thicken while you’re working, pop it back in the microwave for 10 seconds and stir. It happens—especially if your kitchen is cool. Just don’t let it get too hot.
Cooking Tips & Techniques
I’ve made these witch finger pretzels more times than I’d like to admit, and I’ve learned a few things the hard way. Let me save you the trouble.
Temperature matters. White chocolate is finicky. If your kitchen is hot and humid, the chocolate might not set properly. Work in a cool room if you can. If it’s a warm day, pop the dipped pretzels in the fridge immediately after decorating.
Don’t over-dip. I know it’s tempting to coat the whole pretzel rod, but trust me—leave about an inch undipped at the bottom. This gives your “fingers” a clean base and prevents chocolate from getting all over your hands when you eat them. Plus, it looks more realistic.
Knuckle placement is key. The knuckle lines should be about halfway up the coated portion, not at the tip. Think about where your own knuckles are on your fingers. You want it to look like a real hand, not a cartoon.
Work in batches. Don’t try to dip all the pretzels at once. Do 3-4 at a time, adding the almond and knuckle details before moving on. The chocolate sets quickly, and you want everything to stick properly.
My biggest failure: The first time I made these, I used liquid food coloring. The chocolate seized up into a grainy, clumpy mess. I tried to salvage it with coconut oil, but it was too late. I ended up tossing the whole batch and starting over with gel coloring. Learn from my mistake—gel is non-negotiable.
Variations & Adaptations
Once you’ve mastered the basic witch finger, the possibilities are endless. Here are some variations I’ve tried and loved:
- Dark Chocolate Witches: Swap the white chocolate for dark or milk chocolate. Skip the green coloring and use dark chocolate with a drop of black gel coloring for a moodier look. The sliced almond fingernails stand out beautifully against dark chocolate.
- Vampire Fingers: Use red candy melts instead of green. Add a drop of black coloring for a deep crimson. Skip the almond fingernail and use a white candy melt or white chocolate disk instead. Give them fangs with tiny white sprinkles.
- Zombie Fingers: Use gray or purple candy melts. Add a drop of black and a tiny drop of red for a bruised, undead look. Skip the almond fingernail and use a broken pretzel piece instead—jagged edges look like torn flesh.
- Gluten-Free Option: Use gluten-free pretzel rods. Most major brands make them now. The rest of the ingredients are naturally gluten-free, so you’re good to go.
- Dairy-Free/Vegan: Use dairy-free white chocolate chips and a teaspoon of coconut oil for smooth melting. Check your pretzel rods—some brands use butter, so read labels carefully.
Personal favorite: I once made a batch with half dark chocolate and half white chocolate, alternating them on the same platter. It looked like a coven of witches had a fight. The dark ones were moody, the white ones were classic, and everyone grabbed both.
Serving & Storage Suggestions
These witch finger pretzel rods are best served chilled or at room temperature. I like to arrange them on a black platter with the tips pointing inward, like a hand reaching up from below. Throw some fake spiderwebs around the base for extra creep factor.
What to serve with them: They pair beautifully with a warm apple cider or a pumpkin spice latte. For a party, set them out alongside a bowl of popcorn balls or caramel apples. The salty-sweet combination plays well with other Halloween treats.
Storage: Store the finished pretzels in an airtight container in the refrigerator for up to 5 days. Layer them between sheets of wax paper so they don’t stick together. Don’t stack them too deep—the chocolate can crack under pressure.
Freezing: You can freeze these for up to 2 months. Place them in a single layer on a baking sheet and freeze until solid, then transfer to a freezer-safe container with wax paper between layers. Thaw in the refrigerator overnight before serving.
Flavor development: Honestly, these taste best within the first 48 hours. The pretzel stays crunchy, and the chocolate is fresh. After that, the pretzel can start to soften slightly from the moisture in the chocolate. Not a huge deal, but worth noting if you’re making them ahead for a party.
Nutritional Information & Benefits
Let’s be real—these are a treat, not a health food. But that doesn’t mean they’re devoid of any redeeming qualities. Here’s a rough estimate per serving (one pretzel rod):
- Calories: Approximately 180-220, depending on the size of your pretzel and how much chocolate you use.
- Fat: 10-12g (mostly from the white chocolate and almonds)
- Carbohydrates: 20-25g
- Protein: 3-4g
- Sugar: 14-18g
Health highlights: The almonds provide a small dose of vitamin E and healthy fats. Pretzels offer a little iron and B vitamins. Mostly, this is about enjoyment and nostalgia—and that counts for something, too.
Dietary considerations: These contain dairy, gluten (unless you use gluten-free pretzels), and tree nuts (almonds). Not suitable for vegan or dairy-free diets unless you make the substitutions listed above.
My perspective: Look, Halloween comes once a year. I’m not here to tell you to eat these every day. But if you’re going to indulge, make it count. These are worth every bite, and the memories you make while making them with your kids or friends? Priceless.
Conclusion
These Easy Witch Finger Pretzel Rods are the kind of recipe that reminds me why I love Halloween so much. They’re silly, they’re spooky, and they bring people together around the kitchen counter. Whether you’re making them for a party, a school treat, or just because you got hit by a random memory in a craft store checkout line, they deliver every time.
I love how customizable they are—you can go full horror movie with the red “blood,” or keep it cute and creepy with just the green chocolate and almond fingernails. However you make them, they’re guaranteed to get laughs, screams, and requests for the recipe. And honestly, that’s the best compliment a home cook can get.
So grab a bag of pretzel rods and some white chocolate. Make a mess. Laugh with your kids. Remember someone you loved. And when you’re done, come back and tell me how they turned out. I’d love to hear your twist on these witchy treats. Happy Halloween, friends!
Frequently Asked Questions
Can I make these witch finger pretzels ahead of time?
Absolutely. You can make them up to 3 days in advance. Store them in an airtight container in the refrigerator, with wax paper between layers so they don’t stick together.
Why did my white chocolate seize up?
White chocolate is sensitive to heat and moisture. If it gets too hot or if even a drop of water gets in, it can seize into a grainy mess. Use low heat, stir frequently, and make sure your bowl is completely dry. If it does seize, stir in a teaspoon of coconut oil or vegetable shortening to try to smooth it out.
Can I use almond bark instead of white chocolate chips?
Yes, and I actually prefer almond bark for this recipe. It melts smoother, sets harder, and doesn’t require tempering. White chocolate chips work fine, but they can be a little thicker and may need a teaspoon of coconut oil for a smoother consistency.
How do I get the knuckle details to show clearly?
Use a toothpick or the tip of a small knife to gently drag lines across the chocolate while it’s still wet. Don’t press too hard—you just want to create shallow indentations. If the chocolate starts to set before you finish, pop the pretzel in the fridge for a minute to firm up, then try again.
Can I use a different nut for the fingernails?
Sure. Sliced almonds work best because they’re flat and wide, but you can also use whole almonds cut in half lengthwise, or even sunflower seeds for a nut-free option. Just make sure whatever you use is flat enough to look like a fingernail and sticks well to the chocolate.
Pin This Recipe!

Easy Witch Finger Pretzel Rods: Best Halloween Treat

These Easy Witch Finger Pretzel Rods are a spooky, salty-sweet Halloween treat that comes together in just 20 minutes. Made with pretzel rods, white chocolate, and sliced almond fingernails, they’re creepy, cute, and guaranteed to be a crowd-pleaser at any Halloween party.
- Prep Time: 20 minutes
- Cook Time: 0 minutes
- Total Time: 40 minutes (including chilling time)
- Yield: 12-16 servings 1x
- Category: Dessert
- Cuisine: American
Ingredients
- 1 bag (12-16) pretzel rods (e.g., Snyder’s of Hanover)
- 12 ounces white chocolate chips or almond bark (e.g., Ghirardelli white chocolate chips)
- ½ cup sliced almonds (raw, flat and wide)
- 2–3 drops green gel food coloring (e.g., Americolor Leaf Green)
- Red decorating gel or jam (optional, for ‘blood’ effects)
- Wax paper or parchment paper (for setting)
Instructions
- Prep your workspace: Line a baking sheet with wax paper or parchment paper. Lay out pretzel rods, sliced almonds, and any decorations.
- Melt the white chocolate: Place white chocolate chips or chopped almond bark in a microwave-safe bowl. Microwave in 30-second intervals, stirring after each, until smooth (about 1.5 to 2 minutes total). Be careful not to overheat.
- Add the green color: Stir in 2-3 drops of green gel food coloring until evenly distributed. Aim for a pale, sickly green.
- Dip the pretzels: Hold a pretzel rod by one end and dip it into the green white chocolate, twisting gently to coat about two-thirds of the rod. Let excess drip off.
- Add the fingernail: Immediately place the dipped pretzel on the prepared baking sheet. While chocolate is still wet, press a sliced almond onto the tip, pointy end outward, to look like a fingernail.
- Create knuckle details: Using a toothpick or small knife, gently drag 2-3 horizontal lines across the chocolate about halfway down the coated portion to create knuckle wrinkles.
- Add red ‘blood’ (optional): Dab a tiny bit of red decorating gel at the base of the almond fingernail for a gory effect.
- Let them set: Place the baking sheet in the refrigerator for 15-20 minutes, or until chocolate is completely firm.
- Serve and enjoy: Carefully peel pretzels off wax paper and arrange on a platter.
Notes
Use gel food coloring, not liquid, to prevent white chocolate from seizing. Work in a cool room for best results. Leave about an inch undipped at the bottom of each pretzel for a clean base. If chocolate thickens while working, microwave for 10 seconds and stir.
Nutrition
- Serving Size: 1 pretzel rod
- Calories: 200
- Sugar: 16
- Sodium: 180
- Fat: 11
- Saturated Fat: 6
- Carbohydrates: 22
- Fiber: 1
- Protein: 3.5
Keywords: Halloween treats, witch finger pretzels, easy Halloween recipe, spooky snacks, pretzel rods, white chocolate, Halloween party food


