The first time I made this focaccia, I didn’t even plan to photograph it. It was a Tuesday, and I just had a sourdough discard that needed using up. I pulled the baking sheet out of the oven, and the whole kitchen smelled like a bakery in a tiny Italian village. My husband walked in, grabbed a piece straight from the pan, and didn’t say a word for a full minute. Then he asked, “Can you make this every week?” That quiet, buttery crust with those crispy, herby edges had done its job. This Rustic No-Knead Rosemary Sourdough Focaccia wasn’t just good—it was the kind of bread that makes you feel like you actually know what you’re doing in the kitchen.
Honestly, I was shocked at how simple it was. No kneading, no stand mixer, no fancy techniques. Just a bowl, a spoon, and time. That’s the magic of this recipe. It lets the sourdough starter do all the heavy lifting, developing that complex, tangy flavor and airy crumb while you go about your day. It’s the most forgiving bread I’ve ever made, and it’s become my go-to for everything from lazy Sunday afternoons to dinner parties where I want to look like a hero without breaking a sweat.
This isn’t just another bread recipe. It’s a lesson in patience paying off. The long, slow rise builds a flavor you just can’t rush. And that golden, olive-oil-crisped bottom? It’s the best part. If you’ve been intimidated by sourdough or just want a bread that feels special but requires almost no effort, this is your recipe. Trust me on this one.
Why You’ll Love This Recipe
Let me tell you why this focaccia has earned a permanent spot in my weekly rotation. I’ve tested it in every season, with different flours, and even when my starter was feeling a bit sluggish. It delivers every single time. This isn’t just bread; it’s a reliable, delicious win.
- No Kneading Required: Seriously, zero effort. You stir, you wait, you bake. That’s it. No arm workout needed.
- Uses Sourdough Discard: This is the perfect way to use up that unfed starter sitting in your fridge. No waste, just incredible flavor.
- Incredible Texture: The long fermentation creates a light, airy crumb with a crispy, golden-brown crust that shatters when you bite into it.
- Simple Pantry Ingredients: Flour, water, olive oil, salt, rosemary, and your sourdough starter. You probably have everything right now.
- Perfect for Beginners: If you’re new to sourdough or bread baking, this recipe is incredibly forgiving. It’s hard to mess up.
- Versatile & Crowd-Pleasing: Serve it with soup, use it for sandwiches, or just eat it warm with a drizzle of good olive oil. It disappears fast.
What makes this focaccia different from the rest? It’s the combination of that deep, tangy sourdough flavor with the classic olive oil and rosemary. It’s not just a flat bread; it’s a flavor experience. The texture is so good, you’ll close your eyes after the first bite. It’s comfort food that feels rustic and fancy all at once. Perfect for impressing guests without any stress, or turning a simple weeknight dinner into something memorable.
What Ingredients You Will Need
This recipe uses simple, wholesome ingredients to deliver that signature focaccia texture and flavor. Most of these are pantry staples, which is why I make this so often. Let’s break down what you need and why each ingredient matters.
For the Dough
- Bread Flour (4 cups / 500g): Bread flour has a higher protein content than all-purpose, which gives the focaccia its chewy, airy structure. I prefer King Arthur Flour for its consistent results, but any good bread flour works. If you only have all-purpose, you can use it, but the crumb will be slightly less open.
- Sourdough Starter (1 cup / 240g, unfed/discard): This is the star of the show. Use your unfed starter straight from the fridge. It provides the tangy flavor and helps with the rise. A mature, bubbly starter is ideal, but even a sleepy one will work with a longer fermentation.
- Warm Water (1 ½ cups / 360g): The water should be lukewarm (about 80-85°F) to help the yeast activity without killing it. Tap water is fine, but if yours is heavily chlorinated, let it sit out for an hour first.
- Olive Oil (¼ cup / 60ml, plus more for the pan and topping): Use a good quality extra virgin olive oil here. It’s not just for greasing the pan; it adds flavor to the dough and creates that incredibly crispy, golden bottom crust. Don’t skimp on this.
- Fine Sea Salt (2 teaspoons / 10g): Salt is crucial for flavor and controlling fermentation. I use fine sea salt because it dissolves easily. If you use kosher salt, you might need a bit more.
For the Topping
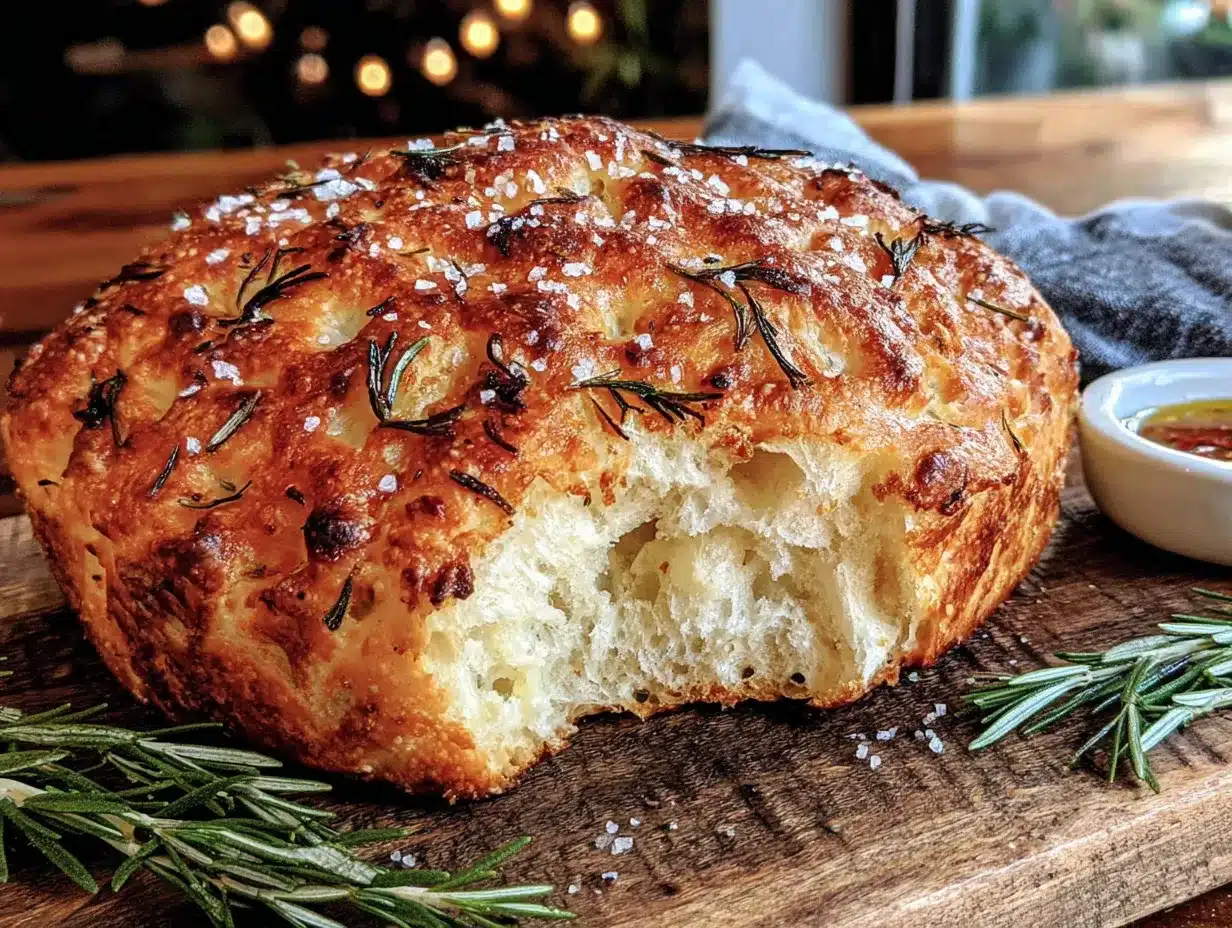
- Fresh Rosemary (2-3 sprigs, leaves removed and roughly chopped): Fresh rosemary is non-negotiable here. Dried rosemary just doesn’t have the same fragrant, piney punch. Gently bruise the leaves between your fingers before chopping to release the oils.
- Flaky Sea Salt (like Maldon): This is for sprinkling on top right before baking. It adds a wonderful crunch and burst of salty flavor that contrasts beautifully with the olive oil. Don’t skip this.
- Extra Virgin Olive Oil (for drizzling): A generous drizzle right before baking ensures the top gets beautifully golden and crispy.
Equipment Needed
You don’t need a lot of fancy gear for this recipe, which is part of its charm. Here’s what you’ll need:
- Large Mixing Bowl: Any bowl big enough to hold the dough as it rises.
- Wooden Spoon or Silicone Spatula: For mixing the sticky dough. A Danish dough whisk works wonders here too.
- Measuring Cups and Kitchen Scale: I highly recommend a kitchen scale for accuracy, especially with the flour. It makes a huge difference in the final texture.
- 9×13-inch Baking Pan or Sheet Pan: A standard metal baking pan is perfect. Glass or ceramic dishes work, but you won’t get as crispy of a bottom crust. I prefer a light-colored metal pan for even browning.
- Plastic Wrap or a Clean Kitchen Towel: To cover the dough while it rises.
- Cooling Rack: Essential for letting the focaccia cool so the bottom doesn’t get soggy.
I’ve made this in a cheap, old baking sheet and it turned out perfectly. Don’t feel like you need to buy anything special. The most important tool is your patience!
Preparation Method
This is where the magic happens. Follow these steps, and you’ll be rewarded with the most incredible focaccia of your life. The key is to trust the process and let the dough do its thing.
- Mix the Dough (5 minutes): In your large mixing bowl, combine the bread flour and fine sea salt. Whisk them together. Add the sourdough starter, warm water, and ¼ cup of olive oil. Stir with your wooden spoon or spatula until a shaggy, sticky dough forms. There should be no dry bits of flour left. It will look very wet and sticky—that’s exactly what you want. Don’t be tempted to add more flour.
- First Rise (Bulk Fermentation – 8-12 hours): Cover the bowl tightly with plastic wrap or a damp kitchen towel. Let it sit at room temperature (around 70-75°F) for 8 to 12 hours. The dough needs to double in size and be covered in bubbles. I usually mix it before bed and let it rise overnight. In a cooler kitchen, it might take the full 12 hours. You’re looking for a very bubbly, airy, and jiggly dough. If it smells pleasantly sour and yeasty, you’re on the right track.
- Prepare the Pan (5 minutes): Generously coat your 9×13-inch baking pan with olive oil. Don’t be shy here—use about 2-3 tablespoons. Pour the oil right into the pan and use your fingers to spread it all over the bottom and sides. This is what creates that iconic crispy crust.
- Stretch and Fold (5 minutes): With lightly oiled hands (to prevent sticking), gently scrape the dough out of the bowl and into the oiled pan. Don’t punch it down! You want to keep those air bubbles. Let the dough rest in the pan for 15-20 minutes. Then, using your fingertips, gently stretch the dough to the edges of the pan. It will resist and try to pull back. That’s okay. Let it rest for another 15 minutes, then stretch it again. Repeat this stretch-and-rest process 3-4 times until the dough fills the pan evenly.
- Second Rise (Proofing – 2-3 hours): Cover the pan with plastic wrap or a towel and let the dough rise again at room temperature until it’s puffy and has doubled in height. This usually takes 2 to 3 hours. The dough should look pillowy and full of air. You’ll know it’s ready when you poke it gently with a finger and the indentation stays.
- Dimple the Dough (5 minutes): About 30 minutes before the second rise is done, preheat your oven to 425°F (220°C). Once the dough is ready, drizzle another tablespoon of olive oil over the top. Now for the fun part—use your fingertips to press deep dimples all over the surface of the dough. Press all the way down to the bottom of the pan. This isn’t just for looks; it creates those signature focaccia pockets that hold the oil and salt.
- Add Toppings (5 minutes): Sprinkle the chopped fresh rosemary evenly over the dimpled dough. Finish with a generous sprinkle of flaky sea salt. Don’t be shy—the salt is crucial for flavor.
- Bake (20-25 minutes): Place the pan on the middle rack of your preheated oven. Bake for 20-25 minutes, or until the focaccia is deep golden brown on top and sounds hollow when you tap it on the bottom. The edges should be particularly dark and crispy. If it’s browning too quickly on top but not dark enough on the bottom, move it to a lower rack for the last 5 minutes.
- Cool (10-15 minutes): Let the focaccia cool in the pan for about 5 minutes. Then, use a spatula to carefully transfer it to a cooling rack. This is a critical step! If you let it cool in the pan, the steam will make the bottom soggy. Let it cool for at least 10 minutes before slicing. The wait is worth it for that perfect texture.
Cooking Tips & Techniques
I’ve made this focaccia more times than I can count, and I’ve learned a few things the hard way. Here are my best tips to guarantee success every time.
- Don’t Skip the Stretch and Folds: This is the only “work” you do, and it’s crucial for building structure. It helps align the gluten strands without kneading, giving you that beautiful, airy crumb. Be patient with it.
- Use a Hot Oven: A high oven temperature (425°F) is key for getting that immediate oven spring and a crispy crust. Make sure your oven is fully preheated before you put the bread in.
- Trust Your Senses, Not Just the Timer: Ovens vary. The focaccia is done when it’s a deep, rich golden brown and the bottom sounds hollow when you tap it. Don’t be afraid to bake it a little longer for a darker, crispier crust.
- The Oil is Your Friend: I cannot overstate this. Be generous with the olive oil in the pan and on top. It’s what makes the crust shatteringly crisp and the crumb tender. Skimping on oil leads to a dry, sad focaccia.
- My Biggest Failure: The first time I made this, I was impatient with the second rise. The dough hadn’t doubled, but I baked it anyway. The result was a dense, flat focaccia that was more like a cracker. Don’t rush the proofing phase! Give it the full 2-3 hours, or even longer if your kitchen is cool. A properly proofed dough is jiggly and pillowy.
Variations & Adaptations
This recipe is a wonderful blank canvas. Once you master the basic method, feel free to get creative. Here are a few of my favorite variations.
- Everything Bagel Focaccia: After dimpling the dough, sprinkle generously with everything bagel seasoning (sesame seeds, poppy seeds, dried garlic, dried onion, and salt). It’s incredible with cream cheese or as a side for soup.
- Roasted Garlic & Thyme: Before mixing the dough, roast a whole head of garlic until soft and jammy. Squeeze the cloves out and dot them over the dimpled dough along with fresh thyme leaves. The sweet, mellow garlic is a perfect match for the tangy sourdough.
- Sun-Dried Tomato & Feta: Roughly chop some oil-packed sun-dried tomatoes and sprinkle them over the dough along with crumbled feta cheese before baking. The salty, briny feta and sweet tomatoes are a total flavor bomb.
- Gluten-Free Adaptation: While I haven’t tested this specific recipe with gluten-free flour, a good 1-to-1 gluten-free baking blend can work. The dough will be much wetter and more like a batter. You’ll need to let it rise for a longer period. It won’t have the same open crumb, but it will still be delicious.
Serving & Storage Suggestions
This focaccia is best enjoyed the day it’s made, but it stores surprisingly well. Here’s how to make the most of it.
- Serving: Serve it warm or at room temperature. It’s perfect on its own, dipped in a good quality balsamic vinegar and olive oil. It also makes an incredible base for sandwiches. Try it with some creamy Marry Me Chicken for an unforgettable meal. For a lighter option, it pairs beautifully with a fresh house balsamic vinaigrette chopped salad.
- Storage: Store leftover focaccia in an airtight container or wrapped tightly in foil at room temperature for up to 2 days. Do not refrigerate it, as the fridge will dry it out and make it stale.
- Freezing: This focaccia freezes beautifully. Wrap the cooled, unsliced focaccia tightly in plastic wrap, then in a layer of aluminum foil. Freeze for up to 3 months. To reheat, place the frozen focaccia directly on the oven rack at 350°F for 10-15 minutes, or until warmed through and crispy.
- Reheating: The best way to revive day-old focaccia is to pop it in a 350°F oven for 5-7 minutes. It will crisp right back up. The microwave will make it soft and chewy, so I don’t recommend it unless you’re in a real hurry.
Nutritional Information & Benefits
While this is a treat, it’s made with wholesome ingredients that offer some benefits. Here’s a rough estimate per serving (1/9th of the recipe).
- Calories: Approximately 280-320
- Total Fat: 12-15g (mostly from heart-healthy olive oil)
- Carbohydrates: 35-40g
- Protein: 6-8g
- Fiber: 1-2g
Health Benefits: The sourdough fermentation process breaks down phytic acid, making the minerals in the flour more bioavailable. It also creates a lower glycemic index compared to bread made with commercial yeast. The olive oil is rich in monounsaturated fats and antioxidants. Fresh rosemary is packed with antioxidants and anti-inflammatory compounds. This focaccia is also vegetarian and can be made vegan by ensuring your starter is plant-based.
Dietary Considerations: This recipe contains gluten. For a dairy-free option, it’s already dairy-free! It is not low-carb or keto-friendly. If you’re looking for a lighter snack, consider serving it alongside a creamy tropical mango protein smoothie for a balanced meal.
Conclusion
This Rustic No-Knead Rosemary Sourdough Focaccia is more than just a recipe; it’s a little piece of baking magic that anyone can master. It proves that you don’t need a bakery or a thousand dollars worth of equipment to make bread that tastes this incredible. The deep, tangy flavor from the sourdough, the crispy, oil-soaked crust, and the fragrant rosemary come together in a way that feels both rustic and special.
I love this recipe because it’s the perfect example of how simple ingredients, treated with a little patience and care, can create something truly extraordinary. It’s become my signature bread, the one I’m always asked to bring to gatherings. I encourage you to make it your own—play with the toppings, adjust the salt, and find your perfect bake time.
Now I want to hear from you! Have you tried making focaccia before? What’s your favorite topping combination? Drop a comment below and let me know how this recipe turned out for you. And if you loved it, don’t forget to share it with a friend who needs a little more bread in their life. Happy baking!
Frequently Asked Questions (FAQs)
Can I use all-purpose flour instead of bread flour?
Yes, you can! The focaccia will still be delicious, but the crumb will be slightly less airy and chewy. Bread flour’s higher protein content creates more gluten, which gives that signature open, bubbly structure. If you only have all-purpose, it will still work wonderfully.
My dough is very sticky. Is that normal?
Absolutely! This is a high-hydration dough, meaning it has a lot of water compared to flour. It should be very sticky and almost batter-like. Resist the urge to add more flour. The high hydration is what creates those beautiful, large air pockets in the baked focaccia. Using wet or oiled hands will make it much easier to handle.
Can I make this gluten-free?
I haven’t tested this specific recipe with gluten-free flour, but a good quality 1-to-1 gluten-free baking blend can be used as a substitute. The dough will be much wetter and will require a longer rise time. The texture won’t be exactly the same, but it will still be a tasty, savory flatbread.
How do I know when my sourdough starter is ready to use?
For this recipe, you can use unfed discard straight from the fridge. It doesn’t need to be bubbly and active. The magic comes from the long, slow fermentation time. If you want to use a fed, active starter, you can, but you might need to reduce the bulk fermentation time slightly as it will rise faster.
Can I add other herbs or toppings?
Definitely! This recipe is incredibly versatile. Try adding sliced olives, caramelized onions, cherry tomato halves, or different herbs like thyme, oregano, or sage. You can also sprinkle on some grated Parmesan cheese in the last 5 minutes of baking for a cheesy crust. The possibilities are endless!
Pin This Recipe!
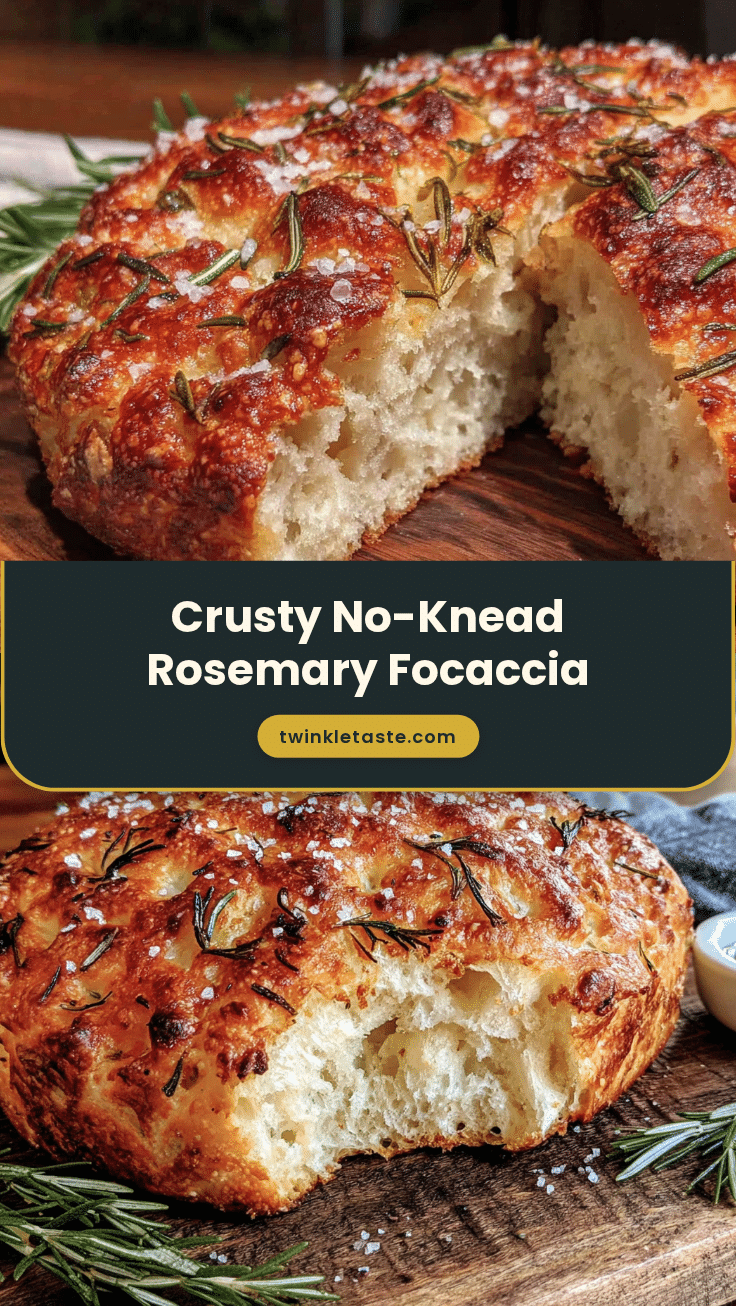
Easy Rustic No-Knead Rosemary Sourdough Focaccia: Best Recipe
This Rustic No-Knead Rosemary Sourdough Focaccia is a simple, forgiving bread that delivers a deep, tangy flavor and airy crumb with a crispy, golden-brown crust. Perfect for beginners, it uses sourdough discard and requires no kneading, just time and patience.
- Prep Time: 15 minutes
- Cook Time: 25 minutes
- Total Time: 10 hours 40 minutes (includes 8-12 hours bulk fermentation and 2-3 hours proofing)
- Yield: 9 servings 1x
- Category: Bread
- Cuisine: Italian
Ingredients
- 4 cups (500g) bread flour
- 1 cup (240g) sourdough starter (unfed/discard)
- 1 ½ cups (360g) warm water (80-85°F)
- ¼ cup (60ml) extra virgin olive oil, plus more for pan and topping
- 2 teaspoons (10g) fine sea salt
- 2–3 sprigs fresh rosemary, leaves removed and roughly chopped
- Flaky sea salt (like Maldon), for sprinkling
- Extra virgin olive oil, for drizzling
Instructions
- Mix the Dough: In a large mixing bowl, whisk together bread flour and fine sea salt. Add sourdough starter, warm water, and ¼ cup olive oil. Stir with a wooden spoon or spatula until a shaggy, sticky dough forms with no dry bits. It will be very wet and sticky.
- First Rise (Bulk Fermentation): Cover the bowl tightly with plastic wrap or a damp kitchen towel. Let it sit at room temperature (70-75°F) for 8 to 12 hours until doubled in size and covered in bubbles.
- Prepare the Pan: Generously coat a 9×13-inch baking pan with 2-3 tablespoons of olive oil, spreading it all over the bottom and sides.
- Stretch and Fold: With lightly oiled hands, gently scrape the dough into the oiled pan without punching it down. Let it rest for 15-20 minutes. Using your fingertips, gently stretch the dough to the edges of the pan. Let it rest for another 15 minutes, then stretch again. Repeat this stretch-and-rest process 3-4 times until the dough fills the pan evenly.
- Second Rise (Proofing): Cover the pan with plastic wrap or a towel and let the dough rise at room temperature for 2 to 3 hours until puffy and doubled in height. The dough should look pillowy and full of air.
- Dimple the Dough: About 30 minutes before the second rise is done, preheat your oven to 425°F (220°C). Once the dough is ready, drizzle another tablespoon of olive oil over the top. Use your fingertips to press deep dimples all over the surface, pressing all the way down to the bottom of the pan.
- Add Toppings: Sprinkle the chopped fresh rosemary evenly over the dimpled dough. Finish with a generous sprinkle of flaky sea salt.
- Bake: Place the pan on the middle rack of the preheated oven. Bake for 20-25 minutes until deep golden brown on top and sounds hollow when tapped on the bottom. If browning too quickly, move to a lower rack for the last 5 minutes.
- Cool: Let the focaccia cool in the pan for about 5 minutes. Then, use a spatula to carefully transfer it to a cooling rack. Let it cool for at least 10 minutes before slicing.
Notes
Don’t skip the stretch and folds; they build structure without kneading. Use a hot oven (425°F) for a crispy crust. Be generous with olive oil for a shatteringly crisp crust and tender crumb. Don’t rush the proofing phase; a properly proofed dough is jiggly and pillowy. For best results, use a kitchen scale for accuracy.
Nutrition
- Serving Size: 1/9 of recipe
- Calories: 300
- Sodium: 550
- Fat: 13.5
- Saturated Fat: 2
- Carbohydrates: 37.5
- Fiber: 1.5
- Protein: 7
Keywords: sourdough focaccia, no-knead bread, rosemary focaccia, sourdough discard recipe, easy bread recipe, rustic bread, Italian bread


