Sunday evening, the kitchen counter still littered with the aftermath of a weekend that got away from me—a half-empty bag of baby carrots, a single cucumber rolling near the knife block, and a container of hummus staring at me from the fridge shelf. I wasn’t in the mood for another sad desk salad come Monday. I wanted something that felt like a treat, not a chore. So I started chopping. Red bell pepper first, then orange, then yellow. The knife moved slow and steady, and somewhere between the crunch of the first cut and the smell of fresh cilantro, these Rainbow Veggie and Hummus Snack Boxes just sort of happened.
I wasn’t trying to be healthy, honestly. I was just tired of watching perfectly good vegetables rot in my crisper drawer. But as the colors lined up on my cutting board—red, orange, yellow, green, purple—I realized I was building something that actually made me excited about lunch. Not the kind of lunch you eat over your keyboard while answering emails. The kind you actually sit down for, even if it’s only for ten minutes. The kind that makes you feel like you did something nice for yourself.
These snack boxes aren’t complicated. That’s the whole point. They’re the opposite of those elaborate meal prep recipes that require seventeen ingredients and a weekend dedicated to organization. This is real-life meal prep for people who want to eat well but don’t want to spend their entire Sunday in the kitchen. And honestly? They’re the reason I started actually looking forward to Monday lunches.
Why You’ll Love This Recipe
Let’s be real for a second. How many times have you bought a bag of carrots with the best intentions, only to find them limp and sad a week later? These Rainbow Veggie and Hummus Snack Boxes solve that problem. They’re designed to use up whatever vegetables you have hanging around, and they actually taste better after a day or two in the fridge. The hummus keeps everything fresh, and the vegetables stay crunchy thanks to a little trick I figured out after one too many soggy lunches.
- Quick & Easy: These come together in about 20 minutes flat. No cooking required. Seriously—if you can chop a vegetable, you can make these.
- Simple Ingredients: Everything you need is probably already in your kitchen. Hummus, fresh vegetables, maybe some olives or cheese if you’re feeling fancy. No trips to specialty grocery stores.
- Perfect for Meal Prep: Make a batch on Sunday, and you’ve got grab-and-go lunches for the whole week. They hold up beautifully in the fridge for up to five days.
- Crowd-Pleaser: I’ve packed these for my kids, brought them to work potlucks, and served them at casual get-togethers. Everyone loves them. Even the picky eaters.
- Unbelievably Customizable: The rainbow theme is just a suggestion. Use whatever vegetables are in season, whatever hummus flavor you’re craving, whatever protein you want to add. There are no rules.
What makes these different from every other veggie snack box out there? It’s the little things. The way I prep the vegetables to keep them crisp. The balance of textures—crunchy, creamy, salty, fresh. The fact that you can make them look so beautiful in the container that you actually want to eat them. I’ve tested this method dozens of times, tweaking the vegetable sizes and layering techniques until I found what works best. This isn’t just thrown together. It’s thoughtfully built.
There’s something about opening a lunch container and seeing all those colors. It’s like eating a little piece of joy. And when you’re sitting at your desk at noon, staring at another sandwich, isn’t that exactly what you need?
What Ingredients You Will Need
This recipe uses simple, fresh ingredients that come together to create something that feels far more special than the sum of its parts. The key is using vegetables that are firm and fresh, and a hummus that you actually enjoy eating on its own.
- Hummus: 1 cup (about 240g) of your favorite hummus. I personally love a classic roasted red pepper hummus or a smooth garlic hummus. Store-bought is totally fine—I often use Sabra or Hope brands. If you’re feeling ambitious, homemade hummus takes this to another level. (Use a dairy-free version if needed.)
- Carrots: 2 large carrots, peeled and cut into sticks or rounds. Orange is obviously the classic, but rainbow carrots add even more color. Look for firm, bright carrots without any soft spots.
- Red Bell Pepper: 1 medium red bell pepper, seeded and sliced into strips. The sweetness of red bell pepper is unmatched. Yellow or orange work too, but red has the most flavor.
- Yellow Bell Pepper: 1 medium yellow bell pepper, seeded and sliced into strips. Adds that beautiful golden color to the rainbow.
- Cucumber: 1 large English cucumber, sliced into rounds or half-moons. English cucumbers have fewer seeds and a milder flavor. Regular cucumbers work too, but you might want to scoop out the seeds.
- Cherry Tomatoes: 1 cup (about 150g) of cherry or grape tomatoes, halved. They add a pop of red and a burst of juice. In summer, use the sweetest ones you can find.
- Purple Cabbage: 1 cup of thinly shredded purple cabbage. This adds that gorgeous purple element and a nice crunch. You can also use red radishes if you prefer.
- Snap Peas or Snow Peas: 1 cup of snap peas, trimmed. They add a bright green element and a satisfying snap. Sugar snap peas are my favorite for their sweetness.
- Kalamata Olives: ½ cup (about 80g) of pitted Kalamata olives. Optional, but I love the salty contrast they bring. You can also use Castelvetrano olives for a milder flavor.
- Feta Cheese: ½ cup (about 75g) of crumbled feta cheese. Also optional, but highly recommended. The saltiness pairs beautifully with the hummus. Use a plant-based feta if needed.
- Fresh Herbs: A small handful of fresh parsley or mint, roughly chopped. Adds a fresh finish. I’ve also used dill and cilantro with great results.
- Lemon Juice: 1 tablespoon of fresh lemon juice. A squeeze over the vegetables just before serving brightens everything up.
- Salt and Pepper: To taste. I use flaky sea salt for the best texture.
Equipment Needed
You don’t need much for this recipe. That’s part of the beauty. But having the right tools makes the process smoother and the results prettier.
- Cutting Board: A large, sturdy cutting board. I prefer wood, but plastic works fine. Just make sure it’s big enough to hold all your chopped vegetables without crowding.
- Chef’s Knife: An 8-inch chef’s knife is ideal. A sharp knife makes all the difference when slicing bell peppers and cabbage. I’ve been using the same Wüsthof for years, and it’s worth every penny.
- Vegetable Peeler: For the carrots. A standard Y-peeler is fast and easy to control.
- Meal Prep Containers: Glass or BPA-free plastic containers with tight-fitting lids. I use 3-cup (about 700ml) compartment containers, but any size works. The key is having a separate compartment for the hummus if possible.
- Small Bowls: For holding the hummus and any toppings. Ramekins or small silicone cups work perfectly.
- Measuring Cups and Spoons: For the hummus and lemon juice. Eyeballing is fine, but measuring ensures consistency.
If you don’t have compartment containers, you can use regular containers and just keep the hummus separate in a small bag or container. I’ve done that many times when traveling. It works perfectly fine.
Preparation Method
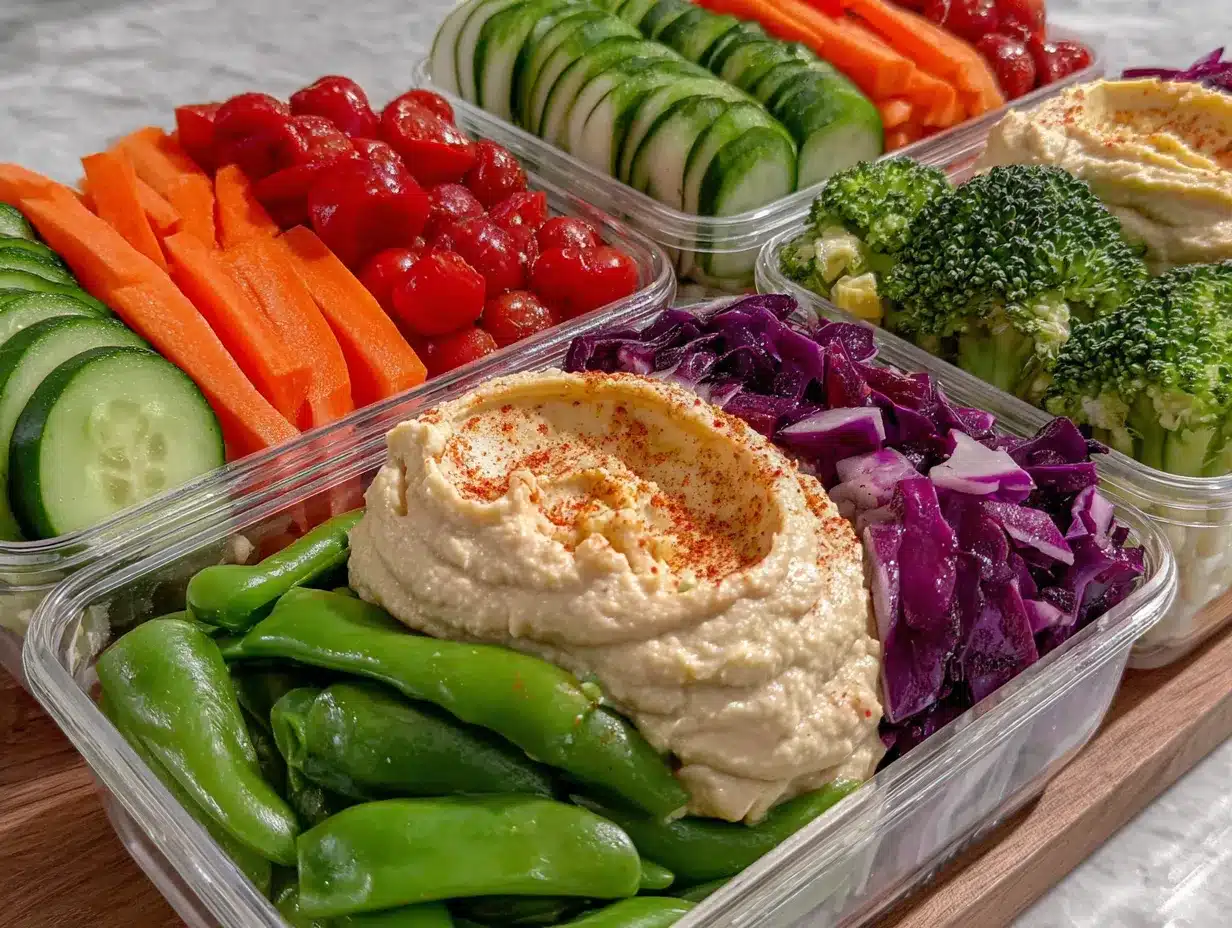
This is where the magic happens. The process is simple, but the order matters. You want to keep your vegetables as crisp as possible, and that means being strategic about when you cut what.
- Wash and dry all your vegetables thoroughly. This is crucial. Any moisture left on the vegetables will make them soggy faster. I pat everything dry with a clean kitchen towel or paper towels. Take your time here—it makes a real difference.
- Peel the carrots. Use your vegetable peeler to remove the outer skin. Then cut them into sticks about 3 inches long and ½ inch thick. If you’re using rainbow carrots, keep the colors separate for visual appeal. (About 5 minutes)
- Slice the bell peppers. Cut off the top and bottom of each pepper, then slice down one side to open it flat. Remove the seeds and white membranes. Slice into strips about ½ inch wide. Red and yellow peppers should be kept separate if you want the rainbow effect. (About 3 minutes)
- Slice the cucumber. Cut the cucumber into rounds about ¼ inch thick. If you’re using a regular cucumber, you might want to cut it in half lengthwise and scoop out the seeds first. English cucumbers don’t need this step. (About 2 minutes)
- Halve the cherry tomatoes. Cut each tomato in half from top to bottom. If they’re very large, you can quarter them. This helps them release their juice without making everything watery. (About 3 minutes)
- Shred the purple cabbage. Cut the cabbage wedge into thin ribbons using your chef’s knife. The thinner, the better—it’s easier to eat and looks prettier. (About 2 minutes)
- Trim the snap peas. Cut off the stem end of each snap pea. You can also remove the string along the seam if you want, but I usually skip this step. (About 2 minutes)
- Prepare the hummus. If you’re using store-bought hummus, give it a good stir. Sometimes the oil separates. If you’re making homemade, make sure it’s smooth and creamy. Divide the hummus evenly among your containers—about ¼ cup per container if you’re making four servings.
- Assemble the snack boxes. Start with the hummus in its compartment or in a small ramekin placed in the center of the container. Then arrange the vegetables around it in rainbow order: red (tomatoes), orange (carrots), yellow (bell pepper), green (cucumber and snap peas), purple (cabbage). This isn’t just for looks—it helps you see what you have and makes the box feel abundant.
- Add the toppings. Sprinkle the Kalamata olives, crumbled feta, and fresh herbs over the vegetables. Drizzle a little lemon juice over everything. Season with a pinch of salt and a few cracks of black pepper.
- Seal and refrigerate. Put the lids on tightly and store in the refrigerator. These will keep for up to five days, but they’re best within the first three. The vegetables stay crunchy, and the hummus stays creamy.
Pro tip: If you’re making these for the week, keep the lemon juice and herbs separate until just before eating. Fresh herbs can wilt, and lemon juice can make the vegetables a little soft over time. I add them fresh each morning.
Cooking Tips & Techniques
I’ve made these snack boxes more times than I can count, and I’ve learned a few things along the way. Some through success, some through spectacular failure.
The biggest mistake I made early on? Not drying the vegetables well enough. I was in a hurry one Sunday, and I just tossed the washed vegetables into the containers without patting them dry. By Wednesday, the cucumbers were limp and the hummus had gotten watery. It was a sad lunch. Now I’m obsessive about drying. I use a salad spinner for leafy things and paper towels for everything else. It takes an extra two minutes, and it’s worth every second.
Another thing I’ve learned: Cut your vegetables to the same size. It sounds fussy, but it matters. When everything is roughly the same size, you get a little bit of everything in each bite. Plus, it looks so much better. I aim for pieces that are about the size of my thumb—easy to pick up, easy to dip.
Timing hack: I chop the vegetables while I’m waiting for something else to cook. Sunday dinner is simmering on the stove? Perfect time to prep these. The hummus can be made or stirred while the pasta water boils. Multitasking makes this recipe feel effortless.
For consistency: Use the same containers every time. Once you figure out how many carrot sticks fit in your container, you can replicate it without thinking. I have a set of four glass containers that I use exclusively for these snack boxes. They’re my meal prep workhorses.
One more thing: If you’re packing these for work, consider keeping the hummus in a separate small container and adding it just before eating. This keeps the vegetables from getting moist and the hummus from getting crusty around the edges. I learned this after a few sad lunches where the hummus had dried out.
Variations & Adaptations
These Rainbow Veggie and Hummus Snack Boxes are endlessly adaptable. Here are some of my favorite variations:
- Protein-Packed Version: Add grilled chicken strips, hard-boiled eggs, or chickpeas. I love adding a handful of roasted chickpeas for extra crunch. If you’re looking for more meal prep ideas, these pair beautifully with our healthy Greek yogurt chicken salad lettuce wraps for a complete lunch spread.
- Low-Carb/Keto Version: Swap the carrots for more cucumber and bell peppers. Add avocado slices and extra olives. Skip the snap peas and use radishes instead.
- Seasonal Version: In summer, use fresh corn kernels, zucchini ribbons, and cherry tomatoes. In fall, add roasted butternut squash cubes and apple slices. In winter, use roasted beets and shaved Brussels sprouts.
- Different Hummus Flavors: Try roasted garlic hummus, beet hummus (for extra pink color), or spicy harissa hummus. Each flavor changes the whole character of the box.
- Dairy-Free Version: Skip the feta or use a plant-based alternative. The olives add enough saltiness that you won’t miss it.
I once made a version with roasted red pepper hummus, grilled halloumi, and a sprinkle of za’atar. It was incredible. Honestly, I think that version might be better than the original. Don’t be afraid to experiment.
Serving & Storage Suggestions
These snack boxes are designed to be eaten cold or at room temperature. I actually prefer them straight from the fridge—the crunch is unbeatable. But if you’re someone who likes things at room temp, let them sit out for about 15 minutes before eating.
For presentation: If you’re serving these for a gathering, arrange the vegetables on a large platter around a bowl of hummus. It makes a stunning centerpiece. I’ve done this for baby showers and casual dinner parties, and it always gets compliments.
Storage: These will keep in the refrigerator for up to five days. The key is keeping the hummus separate if possible. If you’ve already combined them, eat within three days. I don’t recommend freezing these—the vegetables will turn to mush.
Reheating: Don’t. These are meant to be enjoyed cold. If you want something warm, try our creamy slow cooker chicken tortilla soup instead.
Flavor development: Interestingly, these actually get better after a day or two. The vegetables absorb a little of the hummus flavor, and everything melds together. Day two is my favorite.
For a complete lunch, pair these with a handful of pita chips or whole-grain crackers. Or serve them alongside our fresh mango avocado black bean buddha bowl for a truly satisfying meal.
Nutritional Information & Benefits
Per serving (one snack box, approximately 1 cup of vegetables with ¼ cup hummus):
- Calories: 220-280 (depending on toppings)
- Protein: 8-10g
- Carbohydrates: 25-30g
- Fiber: 8-10g
- Fat: 12-15g
- Sugar: 8-10g (natural, from vegetables)
Health benefits: This recipe is packed with fiber from the vegetables and hummus, which keeps you full and supports digestive health. The variety of colors means you’re getting a wide range of antioxidants—lycopene from the tomatoes, beta-carotene from the carrots, anthocyanins from the purple cabbage. The hummus provides plant-based protein and healthy fats from the tahini and olive oil.
Dietary considerations: This recipe is naturally vegetarian and can easily be made vegan by omitting the feta. It’s gluten-free, dairy-free (without the feta), and nut-free. The only potential allergen is sesame (in the tahini in hummus), so if you have a sesame allergy, use a hummus made without tahini or try a white bean dip instead.
My personal take: I love that this recipe makes eating vegetables feel like a treat, not a punishment. It’s proof that healthy food can be beautiful, satisfying, and genuinely enjoyable.
Conclusion
These Rainbow Veggie and Hummus Snack Boxes have become a staple in my weekly meal prep rotation, and I have a feeling they’ll become one in yours too. They’re simple enough for a busy weeknight prep session, but beautiful enough to serve to guests. They solve the eternal problem of “what do I eat for lunch that isn’t a sad sandwich?” And they make eating your vegetables feel like a celebration instead of a chore.
I love that this recipe is a starting point, not a rigid set of rules. Use whatever vegetables are in your fridge. Swap the hummus for your favorite dip. Add cheese or olives or seeds or nothing at all. The rainbow is just a suggestion—the real magic is in the act of taking care of yourself, one colorful container at a time.
I’d love to hear how you make these your own. What vegetables do you use? What’s your favorite hummus flavor? Drop a comment below and let me know. And if you share a photo on Pinterest, tag me—I want to see your rainbow creations!
Here’s to lunches that actually make you smile.
Frequently Asked Questions
Can I use store-bought hummus for this recipe?
Absolutely. In fact, I use store-bought hummus more often than homemade. Just give it a good stir before adding it to your containers, as the oil sometimes separates. My go-to brands are Sabra and Hope, but any hummus you enjoy eating on its own will work perfectly.
How long do these snack boxes last in the fridge?
They’ll keep for up to five days in an airtight container. However, they’re best within the first three days. If you’ve added fresh herbs or lemon juice, the vegetables might soften slightly after day three. I recommend adding those elements fresh each morning if you’re prepping for the full week.
Can I add protein to these snack boxes?
Definitely. Grilled chicken, hard-boiled eggs, chickpeas, edamame, or even sliced turkey all work beautifully. If you’re adding cooked protein, make sure it’s completely cooled before adding it to the container to prevent condensation from making the vegetables soggy.
What if I don’t have compartment containers?
No problem at all. You can use regular containers and keep the hummus separate in a small bag or container. Or you can layer the vegetables with the hummus on the bottom—just be aware that the vegetables might get a little moist from the hummus. It’s still delicious, just slightly different texture.
Can I make these for a crowd?
Yes, and they’re perfect for entertaining. Instead of individual boxes, arrange all the vegetables on a large platter around a bowl of hummus. It makes a stunning presentation. You can also set up a DIY snack box station with different vegetables, hummus flavors, and toppings, letting guests build their own combinations.
Pin This Recipe!
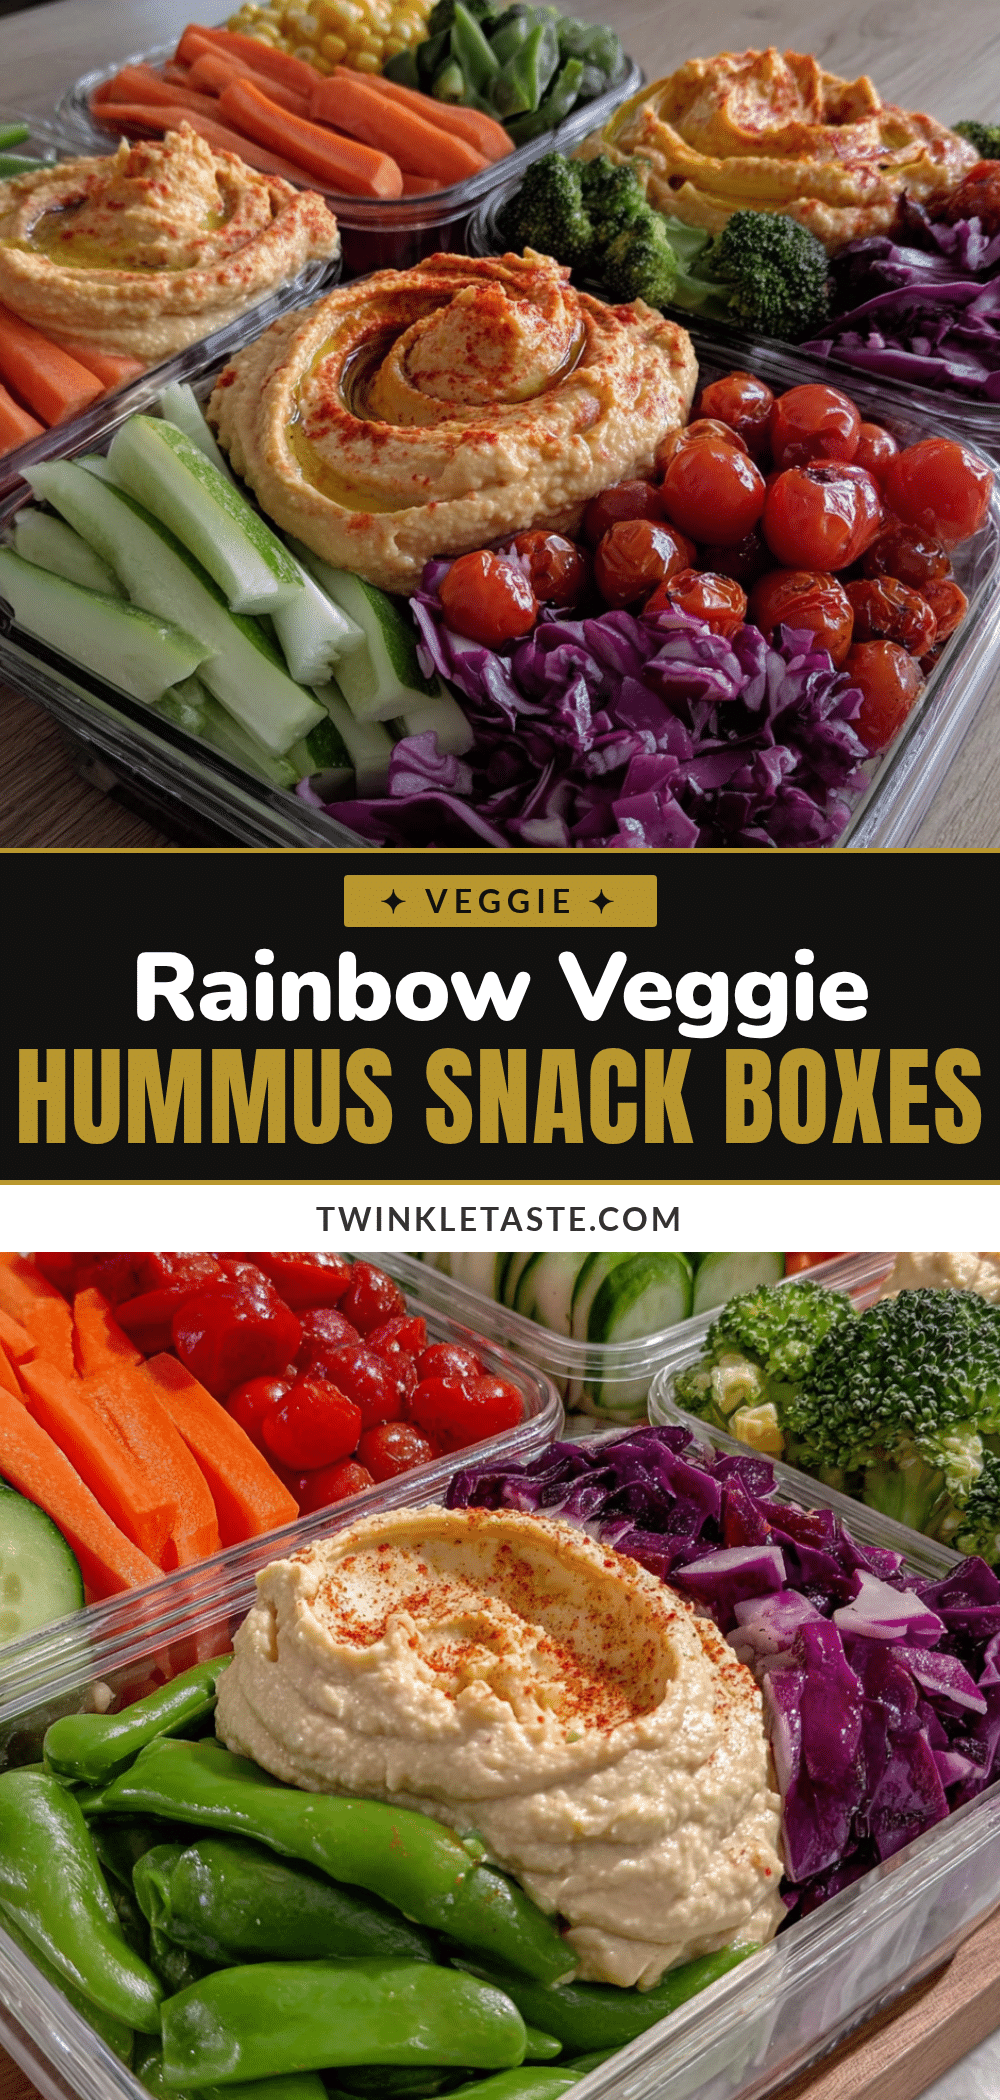
Easy Rainbow Veggie Hummus Snack Boxes (Best Lunch)
These Rainbow Veggie and Hummus Snack Boxes are the perfect grab-and-go lunch, featuring crisp, colorful vegetables paired with creamy hummus. They’re quick to assemble, endlessly customizable, and make eating your vegetables feel like a treat.
- Prep Time: 20 minutes
- Cook Time: 0 minutes
- Total Time: 20 minutes
- Yield: 4 servings 1x
- Category: Lunch
- Cuisine: American
Ingredients
- 1 cup (about 240g) hummus (e.g., roasted red pepper or garlic)
- 2 large carrots, peeled and cut into sticks
- 1 medium red bell pepper, seeded and sliced into strips
- 1 medium yellow bell pepper, seeded and sliced into strips
- 1 large English cucumber, sliced into rounds or half-moons
- 1 cup (about 150g) cherry or grape tomatoes, halved
- 1 cup thinly shredded purple cabbage
- 1 cup snap peas or snow peas, trimmed
- ½ cup (about 80g) pitted Kalamata olives (optional)
- ½ cup (about 75g) crumbled feta cheese (optional)
- Small handful fresh parsley or mint, roughly chopped
- 1 tablespoon fresh lemon juice
- Salt and pepper to taste
Instructions
- Wash and dry all vegetables thoroughly to prevent sogginess.
- Peel the carrots and cut into sticks about 3 inches long and ½ inch thick.
- Slice bell peppers: cut off tops and bottoms, open flat, remove seeds and membranes, then slice into ½-inch strips.
- Slice cucumber into rounds about ¼ inch thick (if using regular cucumber, halve lengthwise and scoop out seeds first).
- Halve cherry tomatoes from top to bottom (quarter if very large).
- Shred purple cabbage into thin ribbons using a chef’s knife.
- Trim stem ends of snap peas (optional: remove string along seam).
- Stir store-bought hummus (if using) until smooth; divide evenly among containers (about ¼ cup per serving for 4 servings).
- Assemble snack boxes: place hummus in a compartment or small ramekin, then arrange vegetables around it in rainbow order: red (tomatoes), orange (carrots), yellow (bell pepper), green (cucumber and snap peas), purple (cabbage).
- Sprinkle olives, feta, and fresh herbs over vegetables. Drizzle with lemon juice and season with salt and pepper.
- Seal containers tightly and refrigerate. Best within 3 days, but keeps up to 5 days.
Notes
For best results, dry vegetables thoroughly after washing to prevent sogginess. Keep lemon juice and fresh herbs separate until just before eating to maintain crunch. If packing for work, store hummus separately to avoid moisture. These snack boxes are best enjoyed cold or at room temperature; do not reheat.
Nutrition
- Serving Size: 1 snack box (approxi
- Calories: 250220280
- Sugar: 9810
- Sodium: 400
- Fat: 13.51215
- Saturated Fat: 3
- Carbohydrates: 27.5253
- Fiber: 9810
- Protein: 9810
Keywords: rainbow veggie hummus snack boxes, meal prep lunch, healthy lunch, vegetarian lunch, gluten-free lunch, easy lunch recipe


