There used to be a tiny diner on the corner of Maple and 3rd in my hometown—a place with cracked vinyl booths and a jukebox that only played 80s ballads—that made a peanut butter Oreo icebox cake I still dream about. When they closed down in 2017 to make way for a chain coffee shop, I honestly felt a little lost. I mean, that dessert was my go-to after a rough week, my celebration treat, my “I just need five minutes of peace” companion.
After twelve tries—twelve, let me tell you, including one disastrous batch where the layers slid right off the plate—I finally got it. This cozy no-bake peanut butter Oreo icebox cake is the exact replica of that diner magic. The first time I nailed it, I actually texted my sister a photo with the caption “We’re back.” She knew exactly what I meant.
Maybe you’ve been there too—chasing a dessert from a place that no longer exists, wondering if you’ll ever taste that specific combination of textures and flavors again. Let me save you the twelve attempts. This recipe is the one.
Why You’ll Love This Recipe
Let’s be real for a second. There are a million icebox cake recipes floating around, but this one? It’s different. I’ve tested this version on my neighbors, my book club, and even my picky brother-in-law who “doesn’t do dessert.” Every single person asked for the recipe. Here’s why this cozy no-bake peanut butter Oreo icebox cake stands out:
- No Oven Required: Summer heat or lazy Sundays—this dessert doesn’t care. You don’t even need to turn on the stove. Just mix, layer, and chill.
- Simple Ingredients: You probably have most of these in your kitchen right now. No fancy extracts, no specialty stores. Just honest, real ingredients.
- Perfect for Cozy Nights: Cold weather, a rough day, or just because—this cake feels like a hug on a plate. It’s the definition of comfort food.
- Crowd-Pleaser: Kids devour it. Adults sneak extra slices. I’ve watched people go back for thirds at parties.
- Unbelievably Delicious: The way the peanut butter mousse softens those Oreo layers overnight? Magic. Pure, honest magic.
What makes this version different from the rest is the technique. Instead of just layering whipped cream and cookies, I make a stabilized peanut butter mousse that holds its shape perfectly. No soggy layers, no sliding slices. This cozy no-bake peanut butter Oreo icebox cake is the kind of dessert that makes you close your eyes after the first bite. It’s comfort food at its finest—simple, soul-soothing, and absolutely unforgettable.
What Ingredients You Will Need
This recipe uses simple, honest ingredients that work together to create something truly special. Most of these are pantry staples, which makes this cozy no-bake peanut butter Oreo icebox cake perfect for those moments when you need dessert right now.
For the Peanut Butter Mousse Layer
- 2 cups heavy cream, cold (I prefer Organic Valley or Horizon for best whipping)
- 1 cup creamy peanut butter (use a no-stir variety like Jif or Skippy—natural peanut butter can separate)
- 8 ounces cream cheese, softened to room temperature (Philadelphia is my go-to)
- 1 cup powdered sugar
- 1 teaspoon vanilla extract
- Pinch of salt (enhances the peanut butter flavor)
For the Cookie Layers
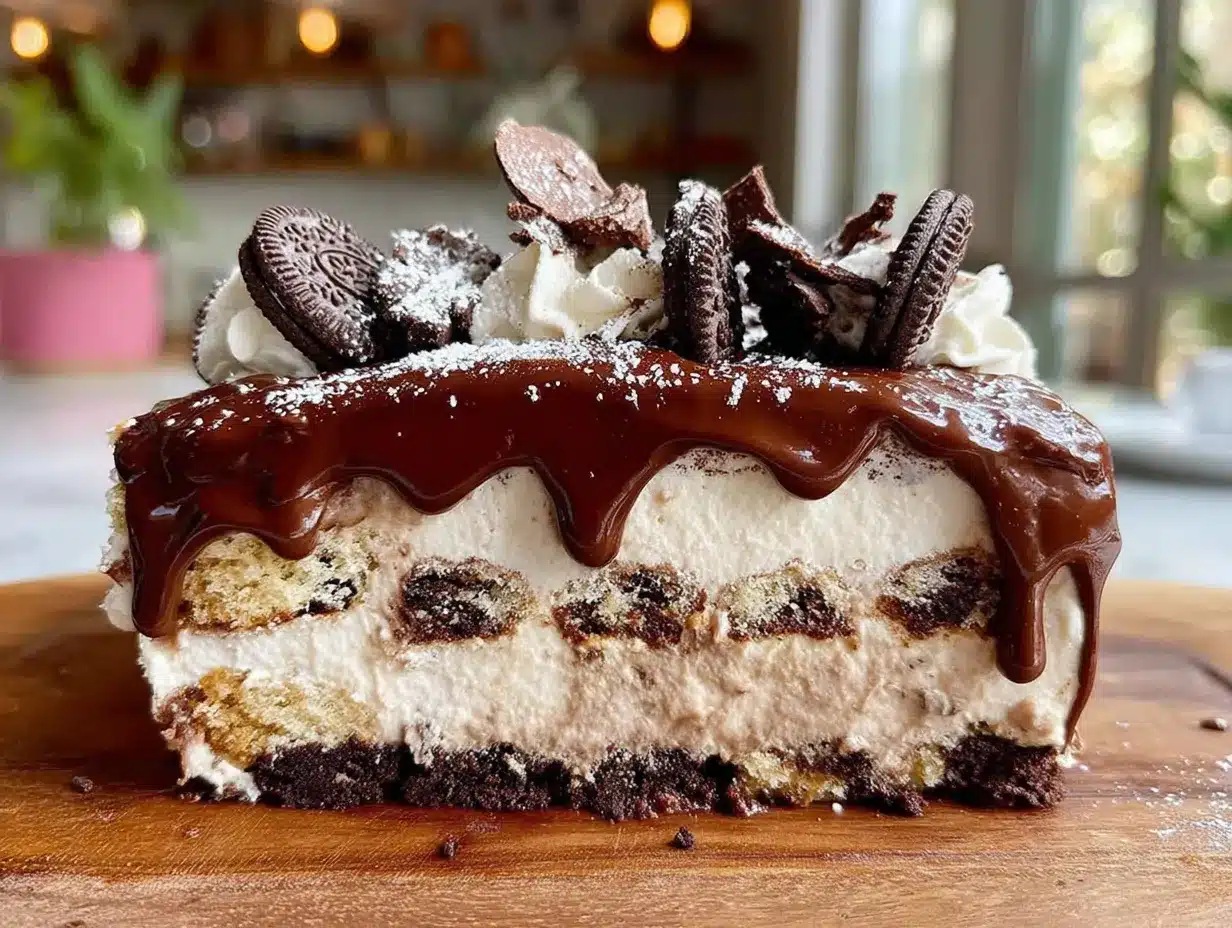
- 2 (14.3 ounce) packages Oreo cookies (about 72 cookies total—you’ll use almost all of them)
- 1/4 cup creamy peanut butter, melted (for drizzling on top)
For the Topping
- 1 cup heavy cream, cold
- 2 tablespoons powdered sugar
- 1/2 teaspoon vanilla extract
- Crushed Oreos for garnish (about 4 cookies)
- Peanut butter chips (optional, but highly recommended—I like Reese’s brand)
A few notes from my testing: Make sure your cream cheese is truly softened. I’ve made the mistake of using cold cream cheese, and the mousse turned out lumpy. Also, don’t skimp on the chilling time—this cozy no-bake peanut butter Oreo icebox cake needs at least 6 hours, but overnight is better. If you’re dairy-free, you can substitute full-fat coconut cream for the heavy cream, though the texture will be slightly different.
Equipment Needed
- 9×13 inch baking dish (glass or ceramic works best—metal can sometimes react with the peanut butter)
- Electric hand mixer or stand mixer (you’ll be whipping cream, so arm power alone won’t cut it)
- Large mixing bowls (at least two—one for the mousse, one for the topping)
- Spatula (a good rubber one for scraping every bit of mousse)
- Ziploc bag (for crushing Oreos—less mess than a rolling pin)
- Measuring cups and spoons
Honestly, you don’t need anything fancy. I’ve made this cozy no-bake peanut butter Oreo icebox cake using a hand mixer that cost me fifteen bucks. The only non-negotiable is the 9×13 dish—anything smaller and the layers get too thick, anything bigger and they’re too thin. Trust me on this one.
Preparation Method
Let’s walk through this step by step. I’ll include all the little details I learned through trial and error so you don’t have to make the same mistakes I did.
Step 1: Make the Peanut Butter Mousse
In a large mixing bowl, beat the softened cream cheese with an electric mixer until smooth and fluffy—about 2 minutes. Add the peanut butter and beat until fully combined. The mixture should be smooth with no streaks. Add the powdered sugar, vanilla extract, and pinch of salt. Beat until everything is incorporated, scraping down the sides of the bowl halfway through.
In a separate bowl (make sure it’s clean and dry), pour in the 2 cups of cold heavy cream. Beat on medium-high speed until stiff peaks form. This takes about 3-4 minutes with a hand mixer. You’ll know it’s ready when you lift the beaters and the cream holds its shape without drooping.
Here’s the important part: Gently fold the whipped cream into the peanut butter mixture. Don’t stir—fold. Use a spatula and cut through the center, then scrape along the bottom and bring it up over the top. Turn the bowl a quarter turn and repeat. Keep going until no white streaks remain. The mixture should be light, airy, and a beautiful pale brown.
Step 2: Crush the Oreos
Place about 60 Oreos in a large ziploc bag (save 12 for the topping and garnish). Seal the bag, push out the air, and use a rolling pin to crush them into small pieces. You want some texture—not dust, but not big chunks either. Think gravel-sized pieces. I actually got interrupted by a phone call during this step once and ended up with some bigger pieces, which honestly added nice texture. So don’t stress about perfection.
Step 3: Layer the Cake
Spread about one-third of the peanut butter mousse evenly in the bottom of your 9×13 dish. Use a spatula to smooth it out to the edges. Sprinkle half of the crushed Oreos evenly over the mousse. Press them down gently with the spatula so they stick.
Repeat with another third of the mousse, spreading carefully over the Oreo layer. Top with the remaining crushed Oreos. Finish with the final third of mousse, spreading it all the way to the edges. The top layer should be smooth and even.
Step 4: Make the Whipped Cream Topping
In a clean bowl, beat the remaining 1 cup of heavy cream with the powdered sugar and vanilla extract until soft peaks form. You want it thick but still spreadable—not as stiff as the mousse cream. Spread this evenly over the top of the cake.
Step 5: Garnish and Chill
Crush the remaining 4 Oreos into smaller pieces and sprinkle them over the whipped cream. Drizzle the melted peanut butter over the top in a zigzag pattern. Add peanut butter chips if you’re using them.
Cover the dish with plastic wrap and refrigerate for at least 6 hours—overnight is ideal. The longer it sits, the more the Oreos soften into a cake-like texture. I’ve left it for up to 48 hours and it only gets better.
Cooking Tips & Techniques
After making this cozy no-bake peanut butter Oreo icebox cake more times than I care to count, here are the things I wish someone had told me:
Don’t overwhip the cream. I ruined my first batch by getting distracted and beating the cream into butter. Watch for those stiff peaks—once they form, stop immediately.
Room temperature ingredients matter. Cold cream cheese creates lumps that never fully smooth out. Set it on the counter for 30 minutes before starting. I learned this the hard way during a holiday party prep disaster.
Press those cookies down. If you don’t gently press the crushed Oreos into the mousse, the layers will separate when you cut the cake. Just a light press with the spatula makes all the difference.
Use a hot knife for clean slices. Run your knife under hot water, wipe it dry, then cut. Clean the knife between each slice. This gives you those beautiful, Instagram-worthy layers.
Patience is everything. I know it’s tempting to dig in after 4 hours, but the texture won’t be right. The Oreos need time to absorb moisture from the mousse and soften into that cake-like consistency. Overnight is non-negotiable for the best results.
Variations & Adaptations
This cozy no-bake peanut butter Oreo icebox cake is surprisingly versatile. Here are some variations I’ve tried and loved:
Chocolate Lover’s Version: Add 1/4 cup of cocoa powder to the mousse mixture and use double-stuffed Oreos for extra chocolate goodness. My friend Sarah requests this version for every birthday party.
Gluten-Free Option: Swap regular Oreos for gluten-free chocolate sandwich cookies. The texture is slightly different, but honestly, it’s still amazing. I tested this for my cousin who has celiac disease, and she couldn’t tell the difference.
Banana Peanut Butter Twist: Slice 2 ripe bananas and layer them over the first mousse layer before adding the Oreos. The banana adds natural sweetness and a creamy texture that pairs beautifully with the peanut butter. This was a happy accident when I had leftover bananas one Sunday.
Vegan Adaptation: Use vegan cream cheese, coconut cream (chilled and whipped), and vegan chocolate sandwich cookies. It works surprisingly well, though the texture is slightly less firm.
Mint Chocolate Version: Add 1/2 teaspoon of peppermint extract to the mousse and use mint Oreos. Perfect for the holiday season or when you want a refreshing twist.
Serving & Storage Suggestions
This cozy no-bake peanut butter Oreo icebox cake is best served cold, straight from the refrigerator. I like to let it sit at room temperature for about 5 minutes before cutting—just enough to take the chill off without letting it get soft.
For presentation, I serve it on a simple white plate with a drizzle of chocolate syrup and a few extra crushed Oreos. It pairs beautifully with a cup of hot coffee or a cold glass of milk. Honestly, a tall glass of cold brew is my personal favorite pairing—the bitterness cuts through the sweetness perfectly.
Storage: Cover the dish tightly with plastic wrap or transfer slices to an airtight container. It will keep in the refrigerator for up to 5 days, though the texture is best within the first 3 days. The good news? It rarely lasts that long in my house.
Freezing: You can freeze this cake for up to 2 months. Wrap the entire dish in plastic wrap, then a layer of aluminum foil. To serve, thaw overnight in the refrigerator. The texture remains surprisingly good—I’ve done this multiple times for unexpected guests.
One thing I’ve noticed: the flavors actually deepen after a day in the fridge. The peanut butter becomes more pronounced, and the Oreos soften into this incredible, fudge-like texture. So if you can wait, day two is even better than day one.
Nutritional Information & Benefits
Let’s be honest—this is a treat, not a health food. But here’s the estimated nutritional breakdown per serving (based on 12 servings):
- Calories: 485
- Fat: 32g
- Carbohydrates: 42g
- Protein: 10g
- Sugar: 28g
- Fiber: 2g
That said, there are some redeeming qualities. Peanut butter provides protein and healthy fats that help keep you full. The cream cheese adds calcium, and hey, there’s a tiny bit of iron from the Oreos. I like to think of this as a dessert that at least has some nutritional value—unlike a candy bar.
For those with dietary concerns: This recipe contains dairy, gluten, peanuts, and soy. It’s not suitable for vegan or keto diets in its current form, though I’ve included variations above that address some of these needs.
My personal philosophy? Life is too short to skip dessert. This cozy no-bake peanut butter Oreo icebox cake is about joy, comfort, and treating yourself. One slice won’t derail your goals, but it might just make your day better.
Conclusion
This cozy no-bake peanut butter Oreo icebox cake is more than just a dessert—it’s a memory maker. It’s the cake I bring to potlucks when I want to impress without stress. It’s the recipe I turn to after a long week when I need something that feels like a hug. And honestly? It’s the closest I’ve come to recreating that diner magic from my hometown.
I hope you’ll make this your own. Add your favorite toppings, experiment with the variations, serve it at your next family gathering or quiet night in. The beauty of this recipe is that it’s forgiving—it wants you to succeed.
When you make it—and I really hope you do—come back and let me know how it turned out. Did you add a twist? Did your family love it? Did you eat three slices in one sitting? (No judgment here. I’ve been there.) Drop a comment below or tag me in your photos. I can’t wait to see your version of this cozy no-bake peanut butter Oreo icebox cake.
Now go make some magic. Your dessert awaits.
Frequently Asked Questions
Can I use natural peanut butter for this recipe?
I don’t recommend it. Natural peanut butter tends to separate and can make the mousse grainy or oily. Stick with a no-stir variety like Jif or Skippy for the smoothest texture. If you only have natural peanut butter, stir it very well and add an extra tablespoon of powdered sugar to help stabilize the mixture.
How far in advance can I make this cake?
You can make this cozy no-bake peanut butter Oreo icebox cake up to 2 days ahead of time. In fact, it tastes better on day two! Just keep it covered in the refrigerator. If you’re making it for a party, I recommend preparing it the night before so the flavors have time to meld.
Can I use a different type of cookie?
Absolutely. While Oreos are classic, you can experiment with other chocolate sandwich cookies. I’ve tried it with gluten-free versions and even with chocolate wafer cookies. The key is using a cookie that softens nicely when chilled. Avoid anything too crunchy or hard, as it won’t achieve that cake-like texture.
Why did my layers slide apart when I cut the cake?
This usually happens when the cake hasn’t chilled long enough. The mousse needs at least 6 hours to set properly. Also, make sure you’re pressing the crushed Oreos gently into each mousse layer. If the cake still slides, try using a serrated knife and cutting with a gentle sawing motion rather than pressing down.
Can I make this into individual servings?
Yes! Layer the mousse and crushed Oreos in small jars or glasses for a beautiful individual dessert. You’ll need about 2-3 tablespoons of mousse and 1 tablespoon of crushed Oreos per layer, repeating twice. Chill for at least 4 hours. These are perfect for parties or gift-giving.
Pin This Recipe!
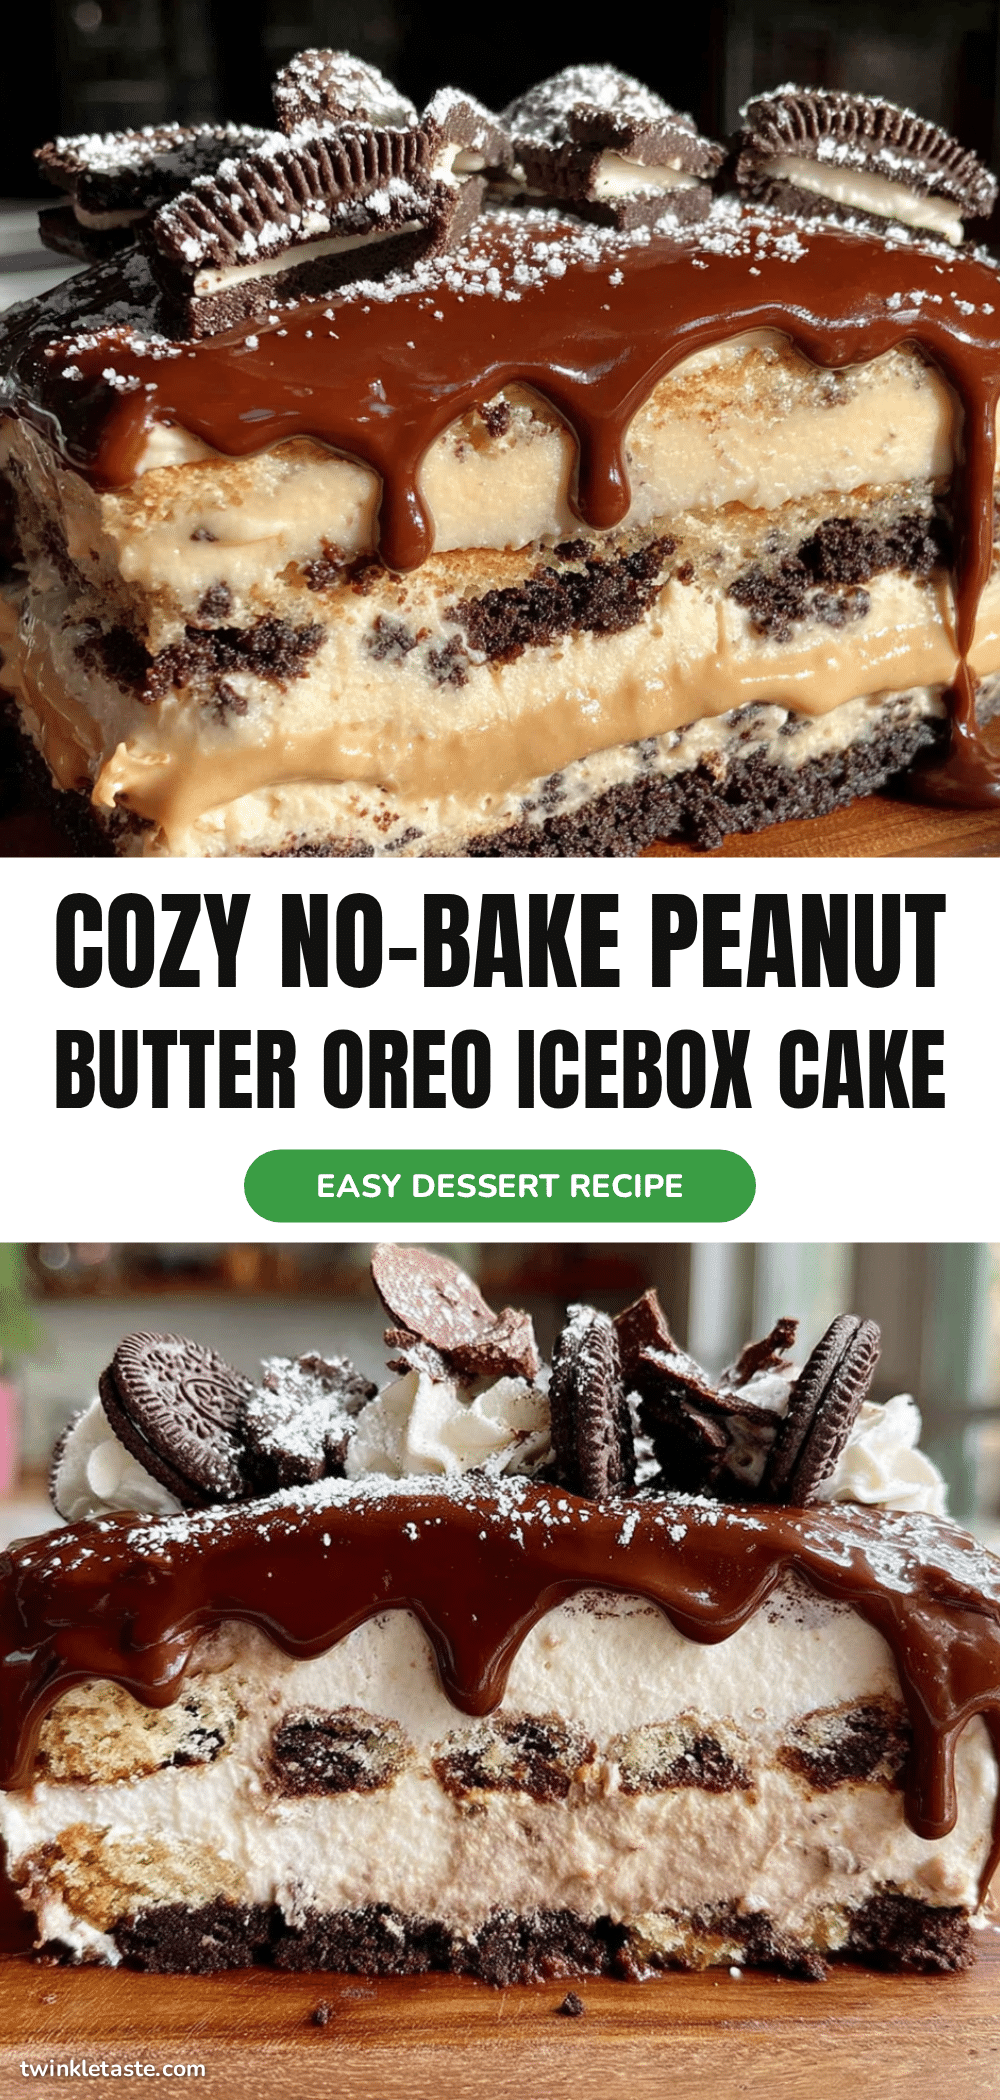
Easy No-Bake Peanut Butter Oreo Icebox Cake
A cozy no-bake dessert featuring layers of peanut butter mousse and crushed Oreos, topped with whipped cream and a drizzle of melted peanut butter. Perfect for summer heat or lazy Sundays, this crowd-pleaser requires no oven and simple ingredients.
- Prep Time: 20 minutes
- Cook Time: 0 minutes
- Total Time: 6 hours 20 minutes (includes chilling)
- Yield: 12 servings 1x
- Category: Dessert
- Cuisine: American
Ingredients
- 2 cups heavy cream, cold
- 1 cup creamy peanut butter (no-stir variety like Jif or Skippy)
- 8 ounces cream cheese, softened to room temperature
- 1 cup powdered sugar
- 1 teaspoon vanilla extract
- Pinch of salt
- 2 (14.3 ounce) packages Oreo cookies (about 72 cookies total)
- 1/4 cup creamy peanut butter, melted (for drizzling)
- 1 cup heavy cream, cold (for topping)
- 2 tablespoons powdered sugar (for topping)
- 1/2 teaspoon vanilla extract (for topping)
- Crushed Oreos for garnish (about 4 cookies)
- Peanut butter chips (optional, for garnish)
Instructions
- Make the peanut butter mousse: In a large bowl, beat softened cream cheese with an electric mixer until smooth and fluffy, about 2 minutes. Add 1 cup peanut butter and beat until fully combined. Add 1 cup powdered sugar, 1 teaspoon vanilla extract, and a pinch of salt. Beat until incorporated, scraping down sides.
- In a separate clean bowl, beat 2 cups cold heavy cream on medium-high speed until stiff peaks form, about 3-4 minutes.
- Gently fold the whipped cream into the peanut butter mixture using a spatula until no white streaks remain. The mixture should be light and airy.
- Crush about 60 Oreos in a large ziploc bag using a rolling pin until they are gravel-sized pieces. Reserve 12 cookies for topping and garnish.
- Layer the cake: Spread one-third of the peanut butter mousse evenly in the bottom of a 9×13 inch dish. Sprinkle half of the crushed Oreos over the mousse and press down gently.
- Repeat with another third of the mousse, then the remaining crushed Oreos. Finish with the final third of mousse, spreading evenly to the edges.
- Make the whipped cream topping: In a clean bowl, beat 1 cup heavy cream with 2 tablespoons powdered sugar and 1/2 teaspoon vanilla extract until soft peaks form. Spread evenly over the top of the cake.
- Garnish: Crush the remaining 4 Oreos and sprinkle over the whipped cream. Drizzle melted peanut butter in a zigzag pattern. Add peanut butter chips if desired.
- Cover with plastic wrap and refrigerate for at least 6 hours, preferably overnight. The longer it chills, the better the texture.
Notes
Make sure cream cheese is truly softened to avoid lumps. Don’t overwhip the cream. Press crushed Oreos gently into mousse to prevent layers from sliding. Use a hot knife for clean slices. Chilling overnight is non-negotiable for best texture. The cake can be stored in the refrigerator for up to 5 days or frozen for up to 2 months.
Nutrition
- Serving Size: 1 slice (1/12 of cak
- Calories: 485
- Sugar: 28
- Fat: 32
- Carbohydrates: 42
- Fiber: 2
- Protein: 10
Keywords: no-bake dessert, icebox cake, peanut butter, Oreo, easy dessert, summer dessert, comfort food


