Jenny wasn’t trying to be the cool mom. I’d stopped by to grab a book I’d lent her, and the sight hit me before I even got past her front door. A whole row of little plastic cups on her kitchen counter, each one topped with crushed chocolate cookies and a gummy worm wriggling its way out of the “dirt.” She shrugged when I stared. “Oh, that? Just something stupid for the kids’ Halloween party.” Just something stupid. She said it like it was nothing—like she hadn’t just created the most delightful, ridiculous, and utterly perfect dessert I’d ever seen for a weeknight. I stood there, honestly, a little jealous of how effortless she made it look.
Maybe you’ve been there. You see someone pull off a crazy-fun recipe without breaking a sweat, and you think, “I could never make that look that good.” But here’s the thing—Jenny’s dirt pudding cups weren’t complicated. They were simple, fast, and used stuff I already had in my pantry. She didn’t use a fancy recipe or any special equipment. She just grabbed some instant pudding, a bag of Oreos, and a pack of gummy worms. I mean, I almost laughed. All those years I’d spent stressing over complicated Halloween desserts, and the answer was right there in a six-pack of plastic cups. The whole thing took her maybe fifteen minutes, and the kids went absolutely wild for them.
That night, I went home and made my own batch. And honestly? I’ve been making them ever since. They’re not just for Halloween anymore. They’re for any night when you want to surprise your kids, impress a guest, or just eat something that tastes like childhood. This recipe stayed with me because it’s proof that you don’t need to be a pastry chef to make something memorable. You just need a little chocolate, a little crushed cookie, and a gummy worm or two. Let me tell you, once you try these, you’ll never look at a box of instant pudding the same way again.
Why You’ll Love This Recipe
These graveyard dirt pudding cups are the kind of dessert that makes everyone smile. I’ve tested this recipe more times than I can count, and it never fails to deliver. Here’s why you’re going to love it as much as I do:
- Quick & Easy: This comes together in under 15 minutes. No baking, no complicated steps. Perfect for busy weeknights or last-minute cravings when you need a fun treat fast.
- Simple Ingredients: You won’t need any fancy grocery trips. Chances are, you already have most of these items in your kitchen. Instant pudding, milk, Oreos, and gummy worms—that’s it.
- Perfect for Any Occasion: While these are a hit for Halloween parties, they’re also great for birthdays, classroom treats, or a silly weeknight dessert. The kids will beg you to make them again.
- Crowd-Pleaser: I’ve served these at parties, potlucks, and family dinners. Every single time, they get rave reviews from kids and adults alike. There’s something about eating “dirt” that brings out the kid in everyone.
- Unbelievably Delicious: The creamy chocolate pudding paired with the crunchy cookie crumb is a match made in heaven. The gummy worms add a fun, chewy surprise that makes every bite exciting.
What makes this recipe different from the rest? It’s the texture. I’ve found that crushing the Oreos just right—leaving some small chunks instead of making a fine powder—gives you that perfect “dirt” look without turning into mud. Plus, using whole milk instead of skim makes the pudding extra rich and creamy. This isn’t just another version of dirt pudding. It’s the best version I’ve ever made, and I’m confident you’ll agree.
This recipe isn’t just good—it’s the kind that makes you close your eyes after the first bite. It’s comfort food at its finest, but it’s also fun and playful. It’s the dessert that turns a regular Tuesday into something special. And honestly, isn’t that what we all need sometimes?
What Ingredients You Will Need
This recipe uses simple, everyday ingredients to create a dessert that’s both delicious and visually fun. Most of these are pantry staples, so you probably won’t need to make a special trip to the store. Here’s everything you’ll need:
For the Pudding Base
- 1 (3.9 oz) box instant chocolate pudding mix (I recommend Jell-O brand for the smoothest texture)
- 2 cups cold whole milk (use 2% or skim if you prefer, but whole milk gives the creamiest result)
- 1 teaspoon vanilla extract (optional, but adds a lovely depth of flavor)
For the Dirt Layer
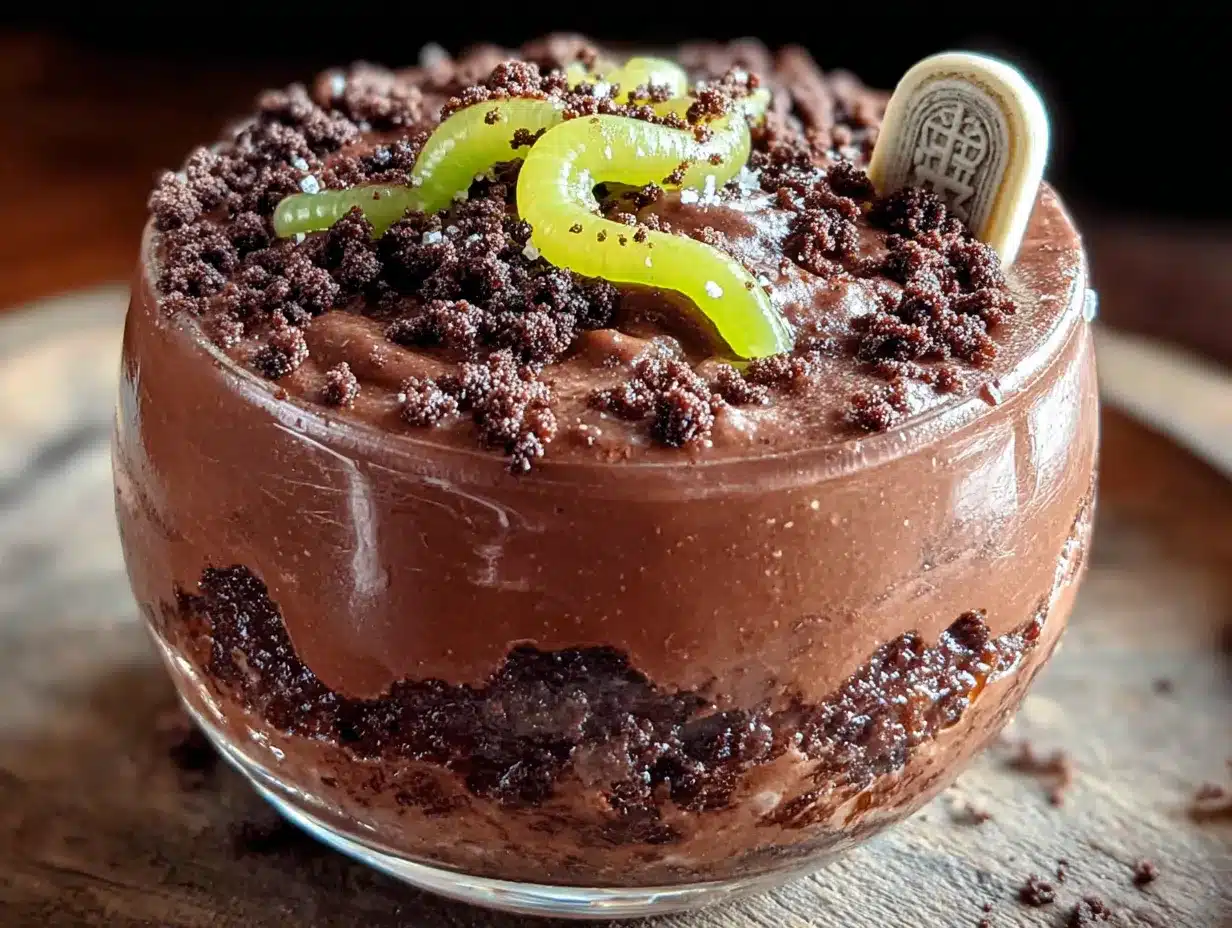
- 1 (14.3 oz) package Oreo cookies (about 36 cookies; you’ll use the whole package)
- 2 tablespoons melted butter (optional, helps the crumbs stick together for a more realistic “dirt” texture)
For the Decoration
- 1 (5 oz) bag gummy worms (use sour or regular, whichever you prefer)
- Optional: 4-6 gummy spiders or other Halloween candy (for extra creepy-crawly fun)
- Optional: 1-2 drops green food coloring (to tint the pudding for a “swamp” effect, if desired)
A few notes on ingredient selection: For the best texture, I always use whole milk. It makes the pudding set up creamier and richer. If you’re dairy-free, you can substitute with oat milk or coconut milk, but the pudding will be slightly less thick. For the Oreos, don’t bother separating the cream filling—just crush the whole cookie. The filling actually helps the crumbs stick together better. And for the gummy worms, I’ve found that the sour ones hold up better over time and don’t get as sticky. But honestly, any gummy worm will work.
You can also get creative with substitutions. If you don’t have Oreos, any chocolate sandwich cookie will work. You can even use chocolate graham crackers for a slightly different flavor. For a gluten-free version, use gluten-free chocolate sandwich cookies. And if you want to make this nut-free, just double-check your pudding mix and cookie labels—most are safe, but it’s always good to verify.
Equipment Needed
You don’t need any fancy equipment for this recipe. That’s part of the beauty of it. Here’s what you’ll need:
- 6-8 small plastic cups or clear glass jars (I use 8-ounce cups; clear cups let you see the layers, which is half the fun)
- A large mixing bowl (for the pudding)
- A whisk or electric hand mixer (a whisk works fine, but a hand mixer makes it faster)
- A food processor or a zip-top bag and a rolling pin (for crushing the Oreos)
- A small bowl (for the crushed cookies)
- A spoon or small spatula (for layering)
- A measuring cup (for the milk)
If you don’t have a food processor, don’t worry. I’ve made these plenty of times using just a zip-top bag and a rolling pin. It’s actually kind of therapeutic—you get to take out any frustrations on the cookies! Just put the Oreos in a sturdy bag, seal it, and crush away. For the cups, you can use anything from small mason jars to disposable plastic cups. I personally love using clear plastic cups because you can see the layers, and they’re perfect for parties. If you’re making these for a classroom or event, the disposable ones make cleanup a breeze.
Preparation Method
Making these graveyard dirt pudding cups is incredibly simple. Follow these steps, and you’ll have a spooky, delicious dessert in no time. I’ve included time estimates and sensory cues so you know exactly what to look for at each stage.
- Make the pudding (5 minutes): In a large mixing bowl, combine the instant chocolate pudding mix and 2 cups of cold whole milk. Whisk vigorously for about 2 minutes, or until the pudding starts to thicken. If you’re using a hand mixer, beat on low speed for 1-2 minutes. You’ll know it’s ready when it has a smooth, creamy consistency and holds soft peaks when you lift the whisk. Add the vanilla extract now if you’re using it, and give it one more stir. Set the pudding aside to set while you prepare the cookies. It will continue to thicken as it sits.
- Crush the Oreos (5 minutes): Place the entire package of Oreos (cream filling and all) into a food processor. Pulse 10-15 times until the cookies are broken into small crumbs. You want a mix of fine crumbs and small chunks—this gives the “dirt” a more realistic texture. If you’re using the zip-top bag method, put the cookies in the bag, seal it, and crush them with a rolling pin until you have a similar consistency. Transfer the crumbs to a small bowl. If you’re using the melted butter, drizzle it over the crumbs and stir with a fork until evenly distributed. This step is optional, but it helps the crumbs clump together slightly, mimicking real dirt.
- Layer the cups (5 minutes): Take your 6-8 plastic cups or jars. Start by adding a layer of crushed Oreos to the bottom of each cup—about 2 tablespoons per cup. This creates the “dirt” base. Next, spoon or pour the pudding over the cookie layer, filling each cup about halfway. Use the back of a spoon to spread the pudding evenly. Then, add another layer of crushed Oreos on top of the pudding—another 2 tablespoons or so. You want a thick enough layer to completely cover the pudding. The top should look like a solid layer of dirt.
- Add the gummy worms (2 minutes): Now for the fun part. Take 2-3 gummy worms per cup and gently press them into the top cookie layer. You can position them so they look like they’re crawling out of the dirt—push one end in deep and leave the other end sticking out. You can also bury some worms completely for a fun surprise when someone digs in. If you’re using gummy spiders or other Halloween candy, add those now too.
- Chill and serve (at least 30 minutes): Place the cups in the refrigerator for at least 30 minutes before serving. This allows the pudding to fully set and the flavors to meld together. The longer they sit, the better they taste—the cookies soften slightly, and the pudding becomes perfectly creamy. If you’re making these ahead of time, you can refrigerate them for up to 24 hours. Just wait to add the gummy worms until right before serving, or they’ll get too soft and lose their shape.
- Garnish and enjoy (1 minute): Right before serving, you can add a few extra cookie crumbs on top for a fresh “dirt” look. You can also place a small plastic shovel or spoon in each cup for a cute presentation. Serve cold and watch everyone’s face light up.
A quick note: If your pudding seems too thin after whisking, don’t panic. It will thicken as it chills. Just make sure you’re using cold milk and whisking for the full 2 minutes. If it’s still runny after 5 minutes in the fridge, you may have used too much milk. In that case, you can add a little more pudding mix and whisk again.
Cooking Tips & Techniques
Over the years, I’ve learned a few tricks that make these dirt pudding cups even better. Here are my top tips for success:
Don’t over-crush the cookies. One of my early mistakes was pulsing the Oreos until they were a fine powder. The result? The “dirt” looked more like mud, and it was hard to see the layers. You want some texture—small chunks mixed with crumbs. It looks more realistic and gives a better crunch. Aim for a consistency similar to coarse sand.
Use cold milk for the pudding. This is crucial. If your milk is warm, the pudding won’t set properly. I always take the milk straight from the fridge. If I forget, I pop it in the freezer for 5 minutes to chill it down. Cold milk helps the pudding thicken faster and gives a smoother texture.
Layer with intention. The visual appeal of these cups is half the fun. When you’re layering, use a spoon to spread the pudding evenly. Make sure the top cookie layer is thick enough to completely hide the pudding. You want that “dirt” look to be a surprise when someone digs in. And when you add the gummy worms, press them in at different angles—some deep, some shallow—to create a more dynamic look.
Let them rest. I know it’s tempting to eat them right away, but trust me—wait at least 30 minutes. The cookies will soften slightly, and the pudding will set to the perfect creamy consistency. If you eat them too soon, the cookies will be too crunchy and the pudding might be runny. Patience pays off here.
Multitask like a pro. While the pudding is setting, crush the cookies. While the cups are chilling, clean up your kitchen. This recipe is so quick that you can easily make it while doing other things. I’ve made these while helping kids with homework and watching TV. It’s that forgiving.
One thing I learned the hard way: don’t use fat-free milk. I tried it once to save calories, and the pudding never set properly. It was soupy and sad. Stick with whole milk or at least 2% for the best results. Your taste buds will thank you.
Variations & Adaptations
One of the best things about this recipe is how easy it is to customize. Here are some of my favorite variations:
Spooky Swamp Cups
Add a few drops of green food coloring to the pudding before layering. This gives it a swampy, eerie look that’s perfect for Halloween. Top with gummy frogs or alligators instead of worms for a fun twist. I tried this last year, and the kids went crazy for the “swamp” effect.
Peanut Butter Dirt Cups
Stir 2 tablespoons of creamy peanut butter into the pudding mix before adding the milk. This gives the pudding a rich, nutty flavor that pairs beautifully with the chocolate cookies. Use peanut butter sandwich cookies instead of Oreos for an extra boost. Just be sure to check for allergies if you’re serving these at a party.
Vegan & Dairy-Free Version
Use a dairy-free chocolate pudding mix (like Simply Delish or Jell-O’s instant pudding made with oat milk) and substitute the milk with unsweetened oat milk or coconut milk. For the cookies, use vegan chocolate sandwich cookies (like Oreos, which are actually vegan!). The texture will be slightly different, but still delicious. I’ve made these for vegan friends, and they were a hit.
Birthday Party Dirt Cups
Swap the gummy worms for colorful gummy bears or candy eyeballs. You can also add a layer of rainbow sprinkles between the pudding and the cookie crumb for a festive look. These are perfect for kids’ birthday parties—they’re fun, easy to make, and everyone loves them.
Low-Sugar Option
Use sugar-free instant pudding mix and sugar-free chocolate sandwich cookies. You can also use unsweetened almond milk to cut down on sugar even more. The taste is still great, and you won’t feel guilty about having a second cup. I’ve tried this version for my own health kicks, and it works perfectly.
Serving & Storage Suggestions
These dirt pudding cups are best served cold, straight from the refrigerator. The contrast between the creamy pudding and the crunchy cookie crumb is perfect when chilled. I like to serve them in clear cups so everyone can see the layers. For a party, you can place them on a tray with a few extra gummy worms scattered around for a spooky effect.
For presentation, you can add a small plastic shovel or spoon to each cup. It’s a cute touch that kids love. You can also top each cup with a dollop of whipped cream and a few extra cookie crumbs for a more decadent look. If you’re serving these at a Halloween party, try placing a plastic spider ring on the rim of each cup for an extra creepy touch.
These cups pair wonderfully with a glass of cold milk or a warm cup of coffee. For a fun twist, serve them alongside a plate of soft pumpkin cookies for a complete Halloween dessert spread. The combination of creamy pudding and chewy cookies is irresistible.
For storage, keep the cups covered in the refrigerator for up to 3 days. The cookies will soften over time, but the flavor will still be delicious. If you’re making them ahead of time, I recommend waiting to add the gummy worms until right before serving. The worms can get soggy if they sit in the fridge for too long. If you have leftovers, just cover each cup with plastic wrap or a lid and store them in the fridge.
You can also freeze these cups for up to 1 month. Just wrap each cup tightly in plastic wrap and then in foil. To thaw, place them in the refrigerator overnight. The texture will be slightly different after freezing—the pudding might be a bit softer—but they’ll still taste great. I’ve done this for busy weeks, and it’s a lifesaver.
One thing I love about this recipe is how the flavors develop over time. The cookies absorb some of the moisture from the pudding, creating a softer, almost cake-like texture. Some people prefer them right away for the crunch, while others love them the next day for the softer texture. Try both and see which you prefer!
Nutritional Information & Benefits
While these dirt pudding cups are definitely a treat, they do offer a few surprising benefits. Here’s a rough estimate of the nutritional values per serving (based on 8 servings):
- Calories: 320-380 per cup
- Fat: 12-15g (mostly from the cookies and butter)
- Carbohydrates: 50-55g
- Protein: 5-7g (from the milk and pudding)
- Sugar: 35-40g
- Fiber: 2-3g (from the cookies)
The cocoa in the chocolate pudding and Oreos contains antioxidants called flavonoids, which can support heart health. The milk provides calcium and vitamin D for strong bones. And the gummy worms? Well, they’re mostly sugar, but they do bring a smile to everyone’s face—and that counts for something!
For those with dietary restrictions, this recipe can be adapted. As mentioned, you can make it vegan, dairy-free, or gluten-free with simple substitutions. The sugar content is moderate for a dessert, but you can reduce it by using sugar-free pudding mix and cookies. Just be aware that the taste and texture will be slightly different.
Personally, I see this recipe as a special occasion treat. It’s not something I make every day, but it’s perfect for birthdays, holidays, or any time you want to create a little magic in the kitchen. And honestly, sometimes you just need a dessert that makes you feel like a kid again.
Conclusion
These graveyard dirt pudding cups with gummy worms are more than just a Halloween dessert—they’re a reminder that the best recipes don’t have to be complicated. Jenny made them look effortless because they are. With just a few simple ingredients and about 15 minutes of your time, you can create something that brings joy to kids and adults alike.
I love this recipe because it’s proof that you don’t need to be a professional baker to impress people. It’s fun, it’s delicious, and it’s endlessly customizable. Whether you stick with the classic version or try one of my variations, I know you’ll love it as much as I do. So go ahead—grab some Oreos, a box of pudding, and a bag of gummy worms. Your inner child (and your actual children) will thank you.
If you make these, I’d love to hear about it! Leave a comment below and let me know how they turned out. Did you try any fun variations? Did the kids go wild? Share your photos and tag me on social media—I can’t wait to see your creepy-crawly creations. And if you’re looking for more fun desserts, be sure to check out my no-bake dessert collection for more quick and easy treats. Happy haunting, and happy eating!
Frequently Asked Questions
Can I make these dirt pudding cups ahead of time?
Yes! You can make them up to 24 hours in advance. Just wait to add the gummy worms until right before serving to keep them from getting too soft. Store the cups covered in the refrigerator.
Can I use homemade chocolate pudding instead of instant?
Absolutely. Homemade pudding will work, but it will be thicker and richer. Just make sure it’s completely cooled before layering. You may need to adjust the amount of milk in the recipe to achieve the right consistency.
What if I don’t have Oreos? Can I use another cookie?
Yes! Any chocolate sandwich cookie will work. You can also use chocolate graham crackers, chocolate wafer cookies, or even brownie crumbs. The key is to get that dark, “dirt-like” color. Vanilla cookies won’t give the same effect.
How do I keep the gummy worms from getting sticky?
Gummy worms can get sticky if they’re exposed to moisture. To prevent this, add them right before serving. If you’re making the cups ahead of time, store the worms separately and add them at the last minute. You can also toss the worms in a little powdered sugar to reduce stickiness.
Can I make these in a large dish instead of individual cups?
Yes! You can make this as a single large dessert in a 9×13-inch dish. Just layer the cookies, pudding, and more cookies in the dish, then top with gummy worms. It’s great for parties where you want people to serve themselves. Just be sure to give it a good stir before serving to mix the layers.
Pin This Recipe!
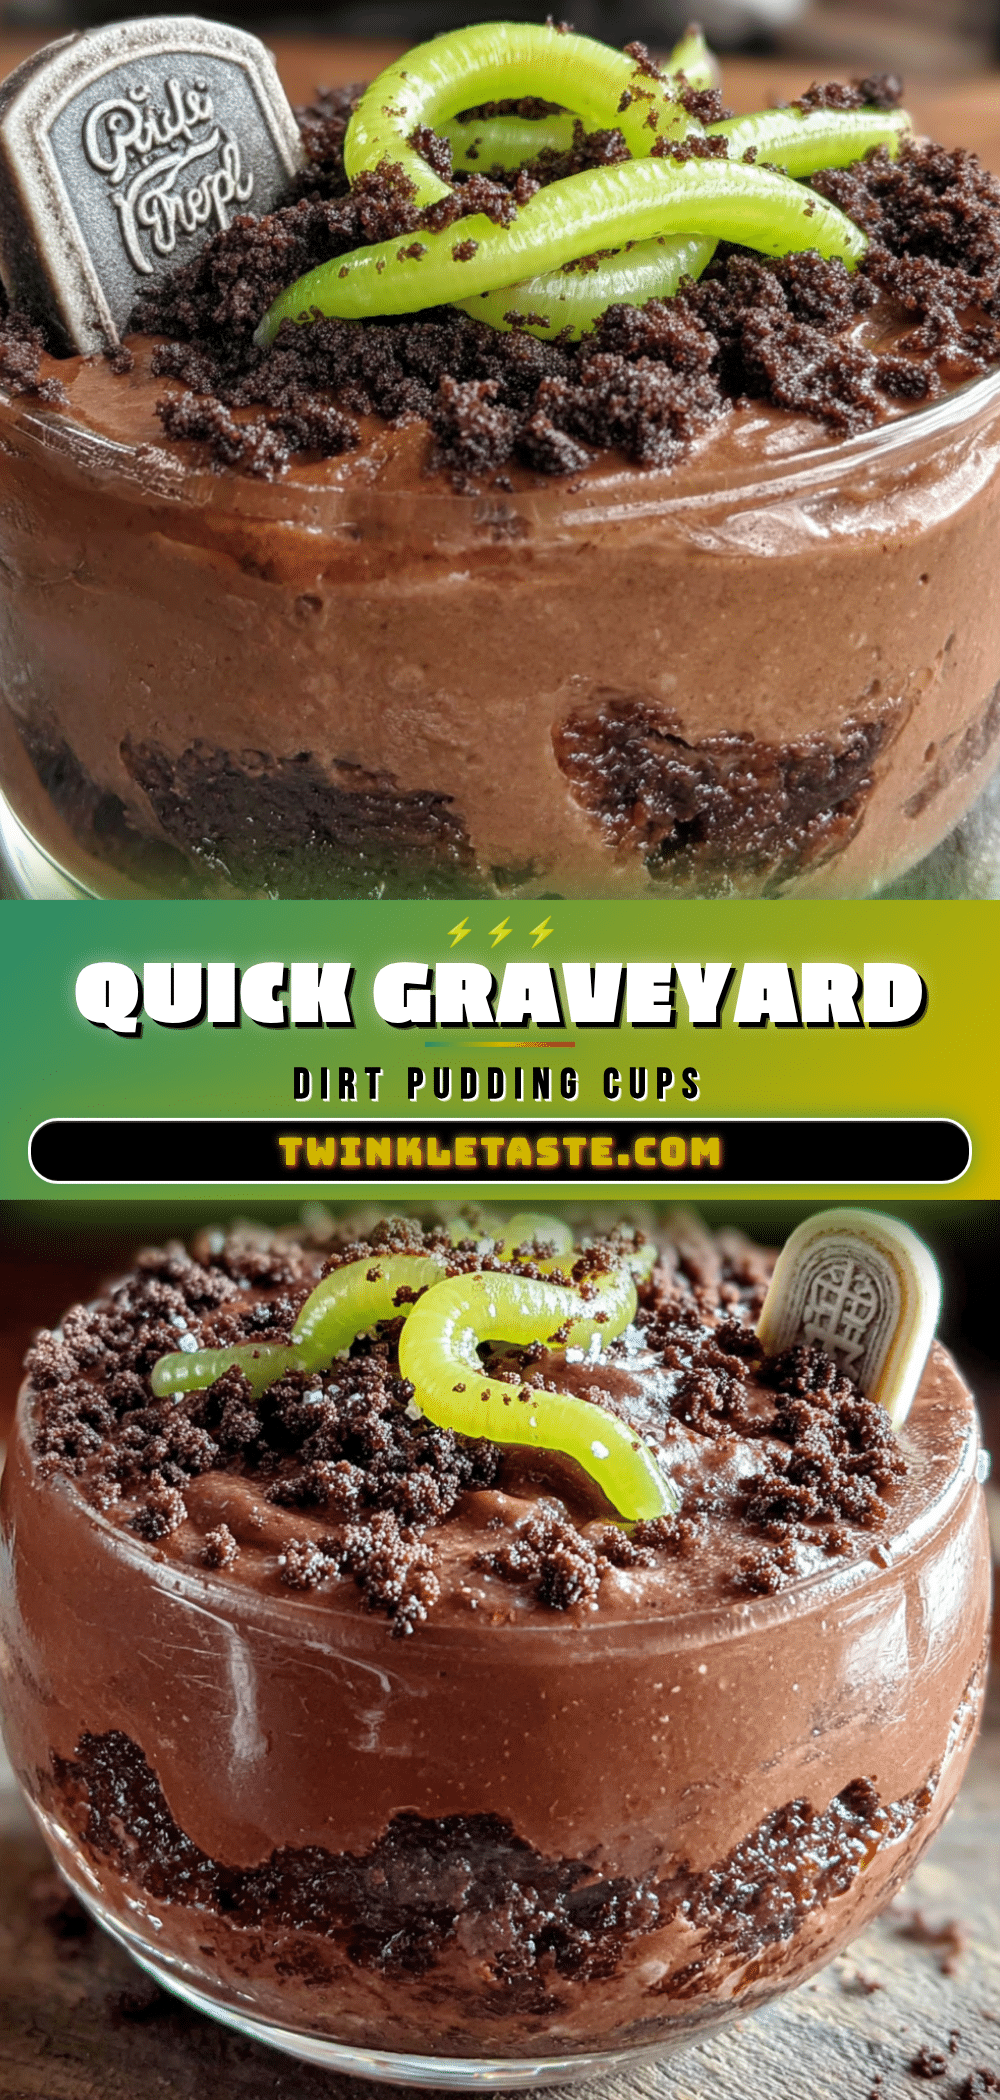
Easy Graveyard Dirt Pudding Cups with Gummy Worms Recipe
These no-bake dirt pudding cups are a quick and fun dessert made with creamy chocolate pudding, crushed Oreo cookies, and gummy worms. Perfect for Halloween or any occasion, they come together in under 15 minutes and are a guaranteed crowd-pleaser.
- Prep Time: 15 minutes
- Cook Time: 0 minutes
- Total Time: 45 minutes (includes chilling time)
- Yield: 8 servings 1x
- Category: Dessert
- Cuisine: American
Ingredients
- 1 (3.9 oz) box instant chocolate pudding mix
- 2 cups cold whole milk
- 1 teaspoon vanilla extract (optional)
- 1 (14.3 oz) package Oreo cookies (about 36 cookies)
- 2 tablespoons melted butter (optional)
- 1 (5 oz) bag gummy worms
- Optional: 4-6 gummy spiders or other Halloween candy
- Optional: 1-2 drops green food coloring
Instructions
- Make the pudding (5 minutes): In a large mixing bowl, combine the instant chocolate pudding mix and 2 cups of cold whole milk. Whisk vigorously for about 2 minutes, or until the pudding starts to thicken. If using a hand mixer, beat on low speed for 1-2 minutes. Add vanilla extract if desired and stir. Set aside to set.
- Crush the Oreos (5 minutes): Place the entire package of Oreos (cream filling and all) into a food processor. Pulse 10-15 times until broken into small crumbs with some chunks. Alternatively, place cookies in a zip-top bag and crush with a rolling pin. Transfer to a small bowl. If using melted butter, drizzle over crumbs and stir with a fork.
- Layer the cups (5 minutes): Take 6-8 plastic cups or jars. Add about 2 tablespoons of crushed Oreos to the bottom of each cup. Spoon or pour pudding over the cookie layer, filling each cup about halfway. Add another 2 tablespoons of crushed Oreos on top to completely cover the pudding.
- Add the gummy worms (2 minutes): Press 2-3 gummy worms per cup into the top cookie layer, positioning some to look like they are crawling out. Bury some worms completely if desired. Add optional gummy spiders or other Halloween candy.
- Chill and serve (at least 30 minutes): Refrigerate cups for at least 30 minutes before serving. For best results, chill up to 24 hours, but add gummy worms just before serving to prevent them from getting too soft.
- Garnish and enjoy (1 minute): Before serving, add extra cookie crumbs on top for a fresh look. Serve cold.
Notes
For best texture, use whole milk and cold milk. Do not over-crush the Oreos; leave some chunks for a realistic ‘dirt’ look. Let the cups chill for at least 30 minutes before serving. If making ahead, add gummy worms just before serving to prevent sogginess. For a dairy-free version, use oat milk or coconut milk and dairy-free pudding mix.
Nutrition
- Serving Size: 1 cup
- Calories: 350
- Sugar: 37.5
- Sodium: 380
- Fat: 13.5
- Saturated Fat: 5
- Carbohydrates: 52.5
- Fiber: 2.5
- Protein: 6
Keywords: dirt pudding cups, graveyard dessert, Halloween dessert, no-bake dessert, chocolate pudding, Oreo dessert, gummy worms, easy dessert, kid-friendly


