This was supposed to be chili. I mean, a big, warming pot of chili was the plan—the kind that simmers for an hour while you tidy the kitchen and pretend you’re the kind of person who has their life together. I had the ground turkey thawed, the canned tomatoes lined up on the counter, and a whole acorn squash sitting there, because I’d read somewhere that you could serve chili in a squash bowl and thought, “Sure, why not?” That was my first mistake, honestly—thinking I could multitask my way through dinner prep on a Tuesday night after a long day.
The power went out halfway through browning the meat. Not the whole house, just the outlet my stovetop was plugged into. I stood there, spatula in hand, staring at the burner like it had personally betrayed me. The turkey was half-cooked, the onions were sweating, and I had two hungry kids circling the kitchen asking when dinner would be ready. You know that feeling when a meal starts slipping away from you? That panic that rises in your chest as you realize Plan A is gone and you don’t have a Plan B?
So I did what any sensible, slightly desperate home cook would do: I abandoned the chili entirely. I scooped the half-cooked meat and onions into a bowl, threw the acorn squash into the microwave to soften it up (microwave—let me tell you, I usually avoid that thing for squash, but desperate times), and started winging it. I grabbed some quinoa from the pantry, a can of black beans, and a handful of cheese. I stuffed the squash halves with this random mishmash, baked them until the tops were bubbly, and served them with a side of sour cream. My husband took one bite and said, “This is better than chili.” I didn’t even know what to say. I mean, I was still annoyed about the power outlet. But he was right. These budget-friendly stuffed acorn squash bowls were born from a kitchen failure, and honestly, I’ve been making them on purpose ever since.
Why You’ll Love This Recipe
Let me tell you why this recipe has become a regular in our house—and why I think it’ll become one in yours too. First off, it’s ridiculously affordable. Acorn squash is usually one of the cheapest winter squashes you can find, especially when they’re in season. I’ve picked them up for as little as a dollar each at my local grocery store. The filling uses pantry staples like quinoa, black beans, and canned tomatoes—things you probably already have sitting in your cupboard. This isn’t a recipe that requires a special trip to a fancy market or a loan to cover the grocery bill.
Here are the standout benefits that keep me coming back:
- Quick & Easy: From start to finish, these stuffed squash bowls come together in about 45 minutes. The microwave does the heavy lifting for softening the squash, so you’re not waiting an hour for them to roast.
- Simple Ingredients: No fancy grocery trips needed. You likely already have everything in your kitchen—quinoa, black beans, onion, garlic, cheese, and a few spices.
- Perfect for Family Meals: This is the kind of dinner that pleases everyone. The squash is sweet and tender, the filling is savory and satisfying, and you can let each person customize their toppings.
- Crowd-Pleaser: I’ve served these to picky kids, skeptical in-laws, and hungry neighbors. They always get rave reviews. Even my five-year-old, who usually pushes vegetables around her plate, asked for seconds.
- Unbelievably Delicious: The combination of roasted squash, spiced quinoa and black beans, and melted cheese is next-level comfort food. It’s hearty without being heavy, and the flavors just work together perfectly.
What makes this recipe different from all the other stuffed squash recipes out there? It’s the balance. I’ve tested versions that were too dry, too mushy, or just plain boring. This one nails the texture—the quinoa stays fluffy, the beans add creaminess, and the squash holds its shape without turning into a sad, limp boat. Plus, the seasoning is spot-on: smoky cumin, a little chili powder, and a pinch of cinnamon that you wouldn’t expect but absolutely need. Trust me on that one.
This recipe isn’t just good—it’s the kind that makes you close your eyes after the first bite. It’s comfort food reimagined: healthier, faster, and cheaper than takeout, but with the same soul-soothing satisfaction. Perfect for impressing guests without stress, or turning a simple Tuesday into something memorable.
What Ingredients You Will Need
This recipe uses simple, wholesome ingredients to deliver bold flavor and satisfying texture without the fuss. Most of these are pantry staples or easy to find at any grocery store. Let me walk you through what you’ll need and why each ingredient matters.
For the Squash
- 2 medium acorn squash (look for ones that feel heavy for their size and have a deep green color with some orange patches—that means they’re ripe)
- 1 tablespoon olive oil (for brushing the cut sides of the squash before baking)
- Salt and black pepper (a generous pinch of each)
For the Filling
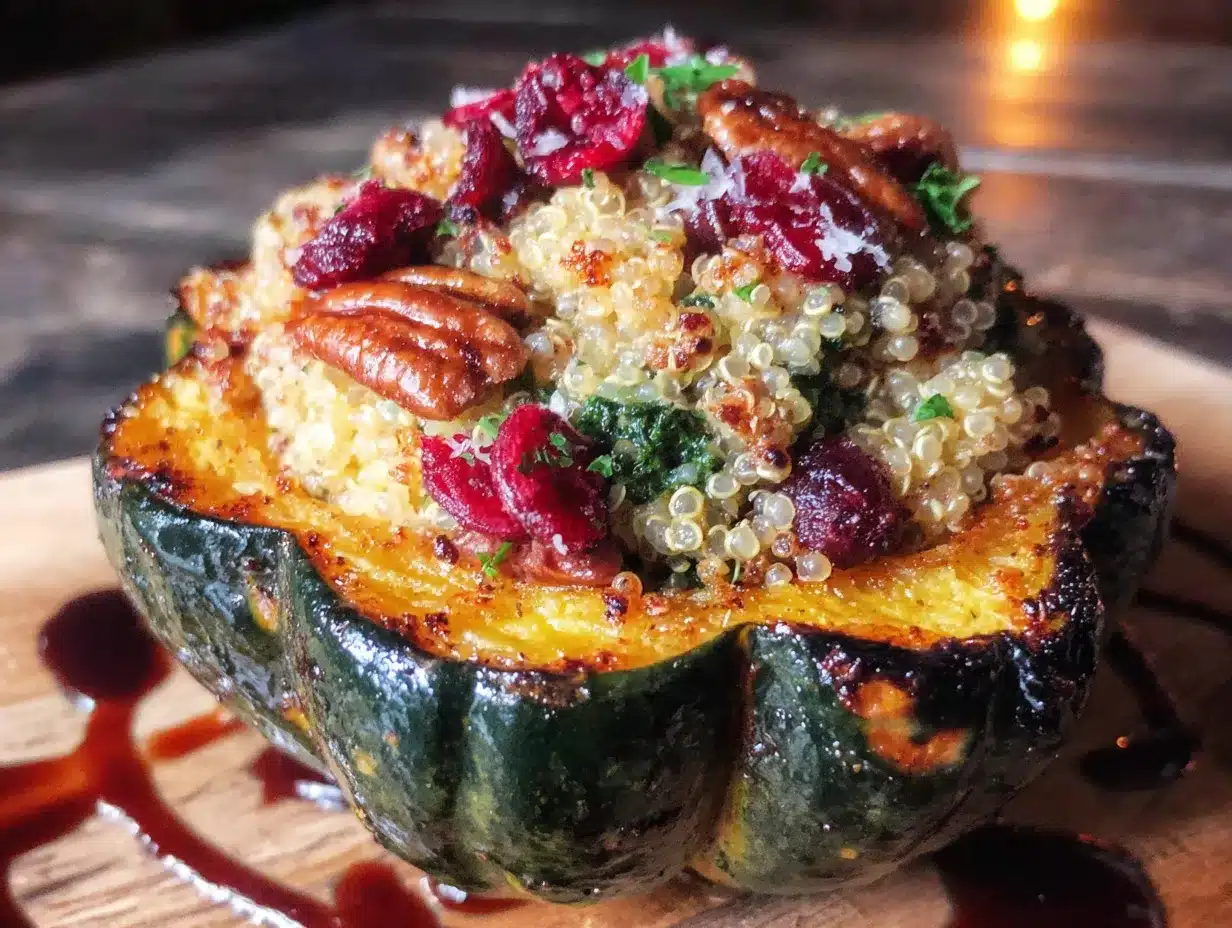
- 1 cup quinoa, rinsed (I prefer white quinoa for its fluffier texture, but tricolor works too—just adjust cooking time slightly)
- 1 can (15 oz) black beans, drained and rinsed (you can use pinto or kidney beans if that’s what you have)
- 1 small yellow onion, diced (about 1 cup—red onion works in a pinch)
- 3 cloves garlic, minced (or 1 teaspoon garlic powder if you’re in a rush)
- 1 can (14.5 oz) diced tomatoes, undrained (fire-roasted adds a nice smoky depth, but regular is fine)
- 1 teaspoon ground cumin (I recommend buying whole cumin seeds and grinding them yourself—the flavor difference is huge)
- 1 teaspoon chili powder (use a mild one for kids or a spicy blend if you like heat)
- 1/2 teaspoon smoked paprika (this is my secret weapon—adds that “cooked all day” flavor)
- 1/4 teaspoon ground cinnamon (trust me on this—it doesn’t make it sweet, just rounds out the earthy spices)
- 1/2 cup shredded cheese (cheddar, Monterey Jack, or a Mexican blend work great—use dairy-free if needed)
- 2 tablespoons olive oil (for sautéing the onion and garlic)
- Salt and black pepper to taste
For Toppings (Optional but Recommended)
- Sour cream or Greek yogurt (adds a cool, creamy contrast)
- Fresh cilantro, chopped (a handful for brightness)
- Avocado, diced (if avocados are on sale—they’re not always budget-friendly)
- Lime wedges (a squeeze of lime juice wakes everything up)
I want to add a quick note about the quinoa. I’ve tried this recipe with brown rice and even couscous, and quinoa really is the best choice here. It cooks quickly, has a nice fluffy texture that holds up to the beans and tomatoes, and it’s packed with protein—which means this meal keeps you full without needing meat. If you’re gluten-free, quinoa is naturally safe, so no worries there.
For the cheese, I usually grab whatever block of cheddar is on sale and shred it myself. Pre-shredded cheese has anti-caking agents that prevent it from melting as smoothly. It’s a small thing, but it makes a difference when you want that gooey, golden-brown top.
And about the cinnamon—I know it sounds weird. I was skeptical the first time I tried it in a savory dish. But it doesn’t make the filling taste like dessert. Instead, it enhances the natural sweetness of the squash and the smokiness of the paprika. It’s one of those little touches that makes people ask, “What’s in this? It tastes amazing.”
Equipment Needed
You don’t need a fancy kitchen to make these stuffed acorn squash bowls. Here’s what you’ll need:
- Sharp chef’s knife (acorn squash can be tough to cut through—a dull knife is dangerous, so make sure yours is sharp)
- Cutting board (a large, stable one is best)
- Large skillet or sauté pan (for cooking the filling—I use my trusty cast iron skillet, but any non-stick or stainless steel pan works)
- Medium saucepan with lid (for cooking the quinoa)
- Baking sheet or dish (large enough to hold the squash halves without crowding them)
- Mixing bowl (for combining the filling ingredients)
- Measuring cups and spoons
- Microwave-safe dish (for softening the squash—optional but saves time)
- Fork or spoon (for testing the squash tenderness)
If you don’t have a microwave, you can roast the squash directly in the oven for about 30-40 minutes at 400°F before stuffing them. It takes a little longer, but the flavor is even better—the natural sugars caramelize beautifully. I’ve done it both ways, and honestly, the microwave shortcut is my go-to on busy weeknights. No shame in that game.
One tip: invest in a good vegetable peeler if you don’t already have one. Sometimes I like to peel the squash before cutting it into rings instead of halving it—it’s a fun variation and makes eating easier for kids. But for this recipe, leaving the skin on is fine. It’s edible once roasted, though some people prefer to scoop out the flesh.
Preparation Method
Alright, let’s get cooking. I’ve broken this down into clear steps so you can follow along without any stress. Take your time, and don’t worry if things aren’t perfect—remember, this recipe started as a mistake and turned out amazing.
Step 1: Prepare the Squash
Preheat your oven to 400°F (200°C). Carefully cut each acorn squash in half from stem to tip. Use a sturdy chef’s knife and go slow—acorn squash can be tough. Scoop out the seeds and stringy pulp with a spoon. You can save the seeds to roast later if you want (they make a great snack!). Brush the cut sides and the cavities with olive oil, then season with salt and pepper.
Quick Tip: To make cutting easier, microwave the whole squash for 2-3 minutes first. It softens the skin just enough to make slicing a breeze. I learned this after nearly losing a finger to a stubborn squash—no joke.
Step 2: Soften the Squash (Optional but Recommended)
Place the squash halves cut-side down in a microwave-safe dish with about 1/4 cup of water. Microwave on high for 5-7 minutes, until the flesh is just starting to soften. This step isn’t strictly necessary, but it cuts the oven time in half and ensures the squash is perfectly tender by the time the filling is done. If you skip this, just roast the squash for about 20 minutes before adding the filling.
Step 3: Cook the Quinoa
While the squash is in the microwave, rinse the quinoa under cold water in a fine-mesh strainer. This removes the natural bitterness (saponins) that can make quinoa taste soapy. In a medium saucepan, combine the rinsed quinoa with 2 cups of water and a pinch of salt. Bring to a boil, then reduce the heat to low, cover, and simmer for 15 minutes. Remove from heat and let it sit, covered, for 5 minutes. Fluff with a fork.
Sensory Cue: You’ll know the quinoa is done when the tiny white rings separate from the grain and the water is fully absorbed. It should look fluffy, not mushy.
Step 4: Sauté the Aromatics
While the quinoa cooks, heat 2 tablespoons of olive oil in a large skillet over medium heat. Add the diced onion and cook for 3-4 minutes, until it’s translucent and starting to brown at the edges. Add the minced garlic and cook for another 30 seconds, just until fragrant. Don’t let the garlic burn—it turns bitter fast.
Step 5: Build the Filling
Add the drained black beans, undrained diced tomatoes, cumin, chili powder, smoked paprika, and cinnamon to the skillet. Stir everything together and let it simmer for 5 minutes, until the liquid reduces slightly and the flavors meld. Fold in the cooked quinoa and stir until everything is well combined. Season with salt and pepper to taste. Remove from heat.
Personal Note: I always taste the filling at this point and adjust the seasoning. Sometimes I add a little more cumin or a pinch of cayenne if I want heat. Don’t be shy—make it yours.
Step 6: Stuff the Squash
Place the softened squash halves cut-side up on a baking sheet. Divide the filling evenly among the four halves, mounding it slightly. Top each with about 2 tablespoons of shredded cheese. If you’re feeling fancy, you can sprinkle some extra smoked paprika on top for color.
Step 7: Bake Until Golden
Bake the stuffed squash bowls for 15-20 minutes, until the cheese is melted and bubbly and the squash is fork-tender. If you want a deeper golden crust on the cheese, switch the oven to broil for the last 2 minutes—but watch it closely so it doesn’t burn.
Warming Note: The filling will be piping hot, so let the squash cool for 5 minutes before serving. I’ve burned my tongue more times than I’d like to admit.
Step 8: Garnish and Serve
Top each stuffed squash bowl with a dollop of sour cream or Greek yogurt, a sprinkle of fresh cilantro, and a squeeze of lime juice. If you have avocado, add some diced pieces on top. Serve immediately, with extra lime wedges on the side.
Cooking Tips & Techniques
I’ve made this recipe more times than I can count, and I’ve learned a few things along the way. Let me share some tips that’ll help you nail it on the first try.
Don’t Overcook the Squash in the Microwave. I know I said to soften it, but you don’t want it fully cooked before it goes in the oven. If it’s too soft, it’ll fall apart when you try to stuff it. Aim for just barely tender—the oven will finish the job.
Toast the Cumin First. This is a pro tip I picked up from a chef friend. Before adding the cumin to the skillet, toast it in a dry pan for 30 seconds until it smells fragrant. It releases the essential oils and makes the flavor much deeper. I do this with all my ground spices now—it’s a game-changer.
Use a Cookie Scoop for Even Filling. If you want your stuffed squash bowls to look picture-perfect, use a cookie scoop or ice cream scoop to portion the filling. It keeps things neat and ensures each half gets the same amount. I’m not usually that precise, but it’s nice when I’m serving guests.
Make the Filling Ahead of Time. This is my favorite time-saving trick. The quinoa-bean mixture can be made up to three days in advance and stored in the fridge. When you’re ready to eat, just prep the squash, stuff them, and bake. It turns this into a 30-minute meal on busy nights.
Watch the Salt. Canned beans and tomatoes often have added salt, so be careful when seasoning. I always taste before adding any extra salt—better to under-season and adjust at the table than to end up with a salty mess.
One Mistake I Made: The first time I made these, I skipped the step of rinsing the quinoa. The filling had this weird bitter aftertaste that I couldn’t figure out. Now I never skip the rinse—it makes a real difference.
Variations & Adaptations
One of the best things about this recipe is how flexible it is. Here are some ways to make it your own.
Make It Vegan
Skip the cheese or use a dairy-free alternative. Nutritional yeast sprinkled on top adds a cheesy, nutty flavor without any dairy. The filling is already plant-based, so this is an easy swap.
Add Protein
If you want a heartier meal, add cooked ground turkey, chicken, or beef to the filling. Brown it along with the onion and garlic, then proceed with the recipe. Leftover rotisserie chicken works great too—just shred it and stir it in.
Try Different Grains
Quinoa is my go-to, but this works beautifully with brown rice, farro, or even couscous. Adjust the cooking time based on the grain you choose. For a low-carb option, use cauliflower rice—just sauté it with the aromatics and skip the grain altogether.
Seasonal Variations
In the summer, swap the black beans for fresh corn kernels and add diced zucchini to the filling. In the fall, add roasted butternut squash cubes or dried cranberries for a sweet-savory twist. I made a Thanksgiving version last year with leftover turkey, cranberry sauce, and sage—it was incredible.
Spice It Up
For those who like heat, add a diced jalapeño (seeds removed if you want less fire) along with the onion, or stir in a teaspoon of chipotle powder. A dash of hot sauce on top at the end works too.
Use Different Squash
If you can’t find acorn squash, this recipe works with small butternut squash, delicata squash, or even large bell peppers. Adjust the cooking time based on the vegetable you choose—delicata cooks faster, while butternut takes a bit longer.
Serving & Storage Suggestions
These stuffed acorn squash bowls are a complete meal on their own, but they pair beautifully with a simple side salad or some crusty bread. I like to serve them with a green salad dressed with lemon vinaigrette—the acidity cuts through the richness of the cheese and squash.
For drinks, a crisp white wine like Sauvignon Blanc or a light beer complements the smoky flavors. My kids love these with a glass of cold milk, which sounds weird but works.
Storing Leftovers: If you have leftovers (which is rare in my house), store the stuffed squash halves in an airtight container in the refrigerator for up to 4 days. The flavors actually get better as they sit—the spices meld and the squash absorbs the filling.
Reheating: The best way to reheat these is in the oven at 350°F for 10-15 minutes, until warmed through. The microwave works in a pinch, but the squash can get a bit watery. If you’re using the microwave, place the squash on a paper towel to absorb excess moisture.
Freezing: You can freeze the filling separately for up to 3 months. Thaw it in the fridge overnight, then stuff fresh squash halves and bake. I don’t recommend freezing the assembled squash bowls—the texture of the squash changes too much after thawing.
How Flavors Develop: I actually think these are even better the next day. The quinoa absorbs the tomato juices, and the spices settle into something deeper and more complex. It’s one of those rare dishes that tastes like leftovers you actually look forward to eating.
Nutritional Information & Benefits
Here’s an approximate nutritional breakdown for one stuffed squash half (using the recipe as written, with cheese and without toppings):
| Nutrient | Amount Per Serving |
|---|---|
| Calories | 385 |
| Protein | 14g |
| Carbohydrates | 52g |
| Fiber | 12g |
| Fat | 14g |
| Saturated Fat | 4g |
| Sodium | 580mg |
| Vitamin A | 25% DV |
| Vitamin C | 30% DV |
| Iron | 20% DV |
| Calcium | 15% DV |
Acorn squash is a nutritional powerhouse—it’s loaded with vitamin A (for eye health), vitamin C (for immunity), and fiber (for digestion). The black beans and quinoa provide plant-based protein and iron, making this a well-rounded meal that keeps you full without weighing you down.
This recipe is naturally gluten-free, vegetarian, and can easily be made vegan. It’s also low in added sugars and uses whole-food ingredients. The only potential allergen is dairy from the cheese, but that’s easy to swap out.
From a personal perspective, I love that this meal feels indulgent but is actually really good for you. It’s the kind of food that makes you feel energized afterward, not sluggish. That’s a win in my book.
Conclusion
So there you have it—budget-friendly stuffed acorn squash bowls that started as a kitchen disaster and became one of my most-requested recipes. I hope you give them a try, even if you’re skeptical about the cinnamon or the microwave shortcut. Trust the process, and don’t be afraid to make them your own.
This recipe is proof that you don’t need expensive ingredients or hours of prep time to make something truly delicious. It’s affordable, flexible, and the kind of meal that brings people together around the table. Whether you’re feeding a family on a budget or just looking for a comforting weeknight dinner, these squash bowls deliver.
I’d love to hear how yours turn out. Did you add something unexpected? Did your kids love them? Did you burn the garlic like I did the first time? Drop a comment below and let me know—I read every single one. And if you snap a photo, tag me on Pinterest so I can see your creation. Happy cooking, friend!
Frequently Asked Questions
Can I use a different type of squash?
Absolutely! Delicata, small butternut, or even carnival squash work well. Just adjust the roasting time based on the size and density of the squash you choose. Delicata cooks faster, while butternut may need a few extra minutes.
Do I have to peel the acorn squash?
Nope! The skin of acorn squash is edible once roasted. It becomes tender and slightly chewy, similar to roasted pumpkin skin. Some people prefer to scoop out the flesh and leave the skin behind, but it’s perfectly fine to eat.
Can I make this recipe in advance for meal prep?
Yes, with a small adjustment. Cook the filling and prep the squash halves (cut and seed them) up to three days ahead. Store them separately in the fridge. When you’re ready to eat, soften the squash in the microwave, stuff them, and bake. This cuts the active cooking time down to about 20 minutes.
What can I use instead of quinoa?
Brown rice, farro, couscous, or even cooked lentils work beautifully. For a low-carb option, use cauliflower rice—just sauté it with the aromatics and skip the grain. The cooking time for the filling will vary slightly depending on what you choose.
How do I prevent the squash from being watery?
Don’t overcook the squash in the microwave—it should be just barely tender, not fully cooked. Also, make sure your quinoa is well-drained and fluffy before adding it to the filling. If your diced tomatoes are very watery, you can drain them slightly before adding them to the skillet.
Pin This Recipe!
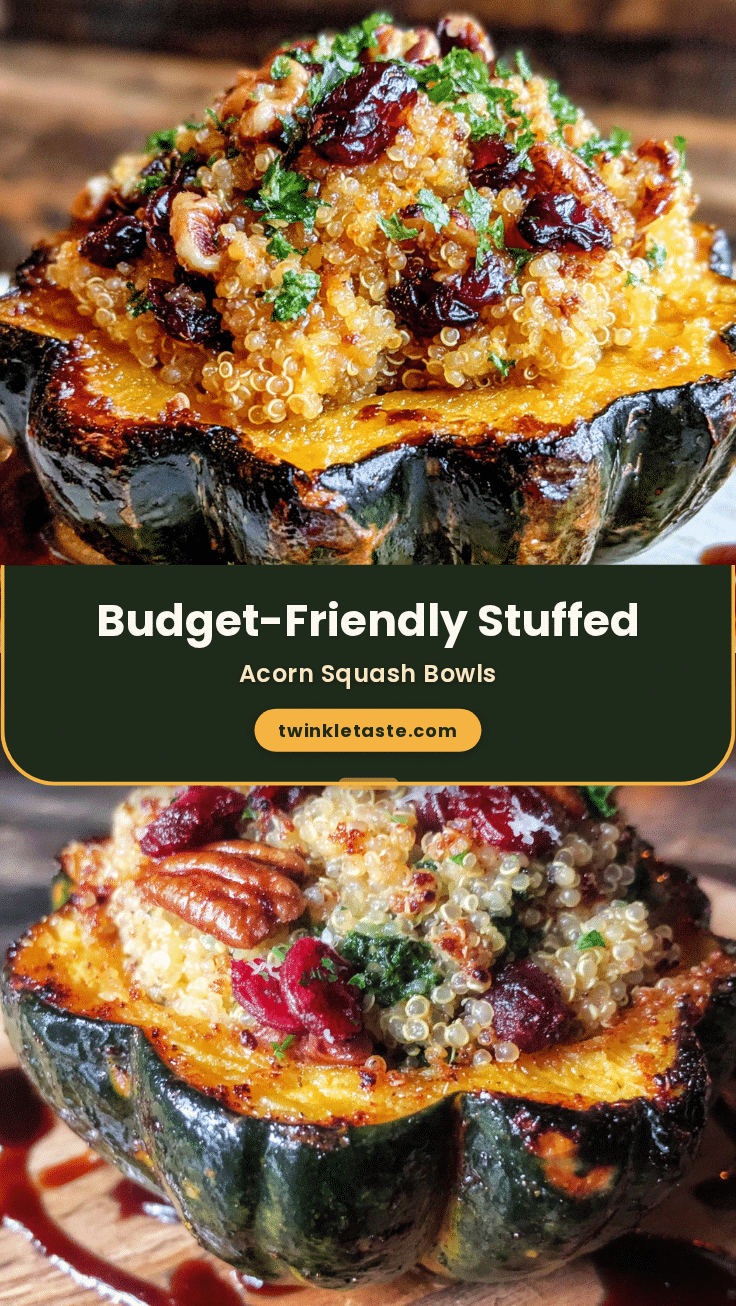
Easy Budget-Friendly Stuffed Acorn Squash Bowls
These budget-friendly stuffed acorn squash bowls are filled with a savory quinoa and black bean mixture, topped with melted cheese, and baked to perfection. A quick and easy weeknight dinner that’s both affordable and delicious.
- Prep Time: 15 minutes
- Cook Time: 30 minutes
- Total Time: 45 minutes
- Yield: 4 servings 1x
- Category: Main Course
- Cuisine: American
Ingredients
- 2 medium acorn squash
- 1 tablespoon olive oil
- Salt and black pepper to taste
- 1 cup quinoa, rinsed
- 1 can (15 oz) black beans, drained and rinsed
- 1 small yellow onion, diced (about 1 cup)
- 3 cloves garlic, minced
- 1 can (14.5 oz) diced tomatoes, undrained
- 1 teaspoon ground cumin
- 1 teaspoon chili powder
- 1/2 teaspoon smoked paprika
- 1/4 teaspoon ground cinnamon
- 1/2 cup shredded cheese (cheddar, Monterey Jack, or Mexican blend)
- 2 tablespoons olive oil
- Salt and black pepper to taste
- Sour cream or Greek yogurt (for topping, optional)
- Fresh cilantro, chopped (for topping, optional)
- Avocado, diced (for topping, optional)
- Lime wedges (for serving, optional)
Instructions
- Preheat oven to 400°F (200°C). Cut each acorn squash in half from stem to tip. Scoop out seeds and stringy pulp. Brush cut sides and cavities with 1 tablespoon olive oil, then season with salt and pepper.
- Place squash halves cut-side down in a microwave-safe dish with 1/4 cup water. Microwave on high for 5-7 minutes until just starting to soften. (Optional but recommended to reduce oven time.)
- Rinse quinoa under cold water. In a medium saucepan, combine quinoa with 2 cups water and a pinch of salt. Bring to a boil, reduce heat to low, cover, and simmer for 15 minutes. Remove from heat, let sit covered for 5 minutes, then fluff with a fork.
- Heat 2 tablespoons olive oil in a large skillet over medium heat. Add diced onion and cook for 3-4 minutes until translucent. Add minced garlic and cook for 30 seconds until fragrant.
- Add black beans, undrained diced tomatoes, cumin, chili powder, smoked paprika, and cinnamon to the skillet. Stir and simmer for 5 minutes until liquid reduces slightly. Fold in cooked quinoa. Season with salt and pepper to taste.
- Place softened squash halves cut-side up on a baking sheet. Divide filling evenly among the four halves, mounding slightly. Top each with about 2 tablespoons shredded cheese.
- Bake for 15-20 minutes until cheese is melted and bubbly and squash is fork-tender. For a deeper golden crust, broil for the last 2 minutes, watching closely.
- Let cool for 5 minutes. Top with sour cream or Greek yogurt, fresh cilantro, diced avocado, and a squeeze of lime juice. Serve immediately with extra lime wedges.
Notes
To make cutting easier, microwave the whole squash for 2-3 minutes first. For a vegan version, skip the cheese or use dairy-free alternative and add nutritional yeast. The filling can be made up to 3 days ahead and stored in the fridge. Leftovers keep in an airtight container in the refrigerator for up to 4 days. Reheat in the oven at 350°F for 10-15 minutes.
Nutrition
- Serving Size: 1 stuffed squash hal
- Calories: 385
- Sodium: 580
- Fat: 14
- Saturated Fat: 4
- Carbohydrates: 52
- Fiber: 12
- Protein: 14
Keywords: stuffed acorn squash, budget-friendly, quinoa, black beans, vegetarian, gluten-free, weeknight dinner


