Introduction
“Are those really supposed to look like fingers?” — and that was it. My niece’s incredulous tone when she first spotted the tray of crispy witch finger cookies I’d just pulled from the oven made me smile. Honestly, I wasn’t sure if I was making snacks or a Halloween prop, but somehow these crispy witch finger cookies with almond nails ended up as the star of our Halloween party. The smell of buttery dough crisping up, mingling with a subtle hint of almond and a touch of spooky charm, filled the kitchen in a way that felt mischievously festive. I remember carefully pressing each sliced almond at the tip, imagining little witch fingers twitching on the platter. The crackle when you bite in is oddly satisfying, and you kinda hope it’s crunchy enough to mimic, well, a finger bone snapping. It’s silly, yes, but this recipe stuck with me because it’s just the right mix of creepy and cozy. Plus, it’s a fun project — like a crafty little ritual to get into the Halloween spirit without needing a ton of complicated ingredients or skills.
Years later, every Halloween when I’m pulling out these cookies, I remember that conversation and a quiet thought sneaks in — it’s not just a cookie, it’s a little piece of the season’s magic. You know, the kind that makes you smile even when the night is dark and a bit eerie. These crispy witch finger cookies with almond nails aren’t just treats; they’re a playful tradition that I’m happy to share with you.
Why You’ll Love This Recipe
Making these crispy witch finger cookies is like having the best of both worlds: a fun Halloween project and a seriously delicious snack. Here’s why this recipe quickly became a favorite in my circle:
- Quick & Easy: You can whip these up in under 45 minutes — perfect for last-minute Halloween prep or an afternoon baking session with the kids.
- Simple Ingredients: All pantry staples here — butter, flour, sugar, and a few little extras like almond slices for nails that add a spooky touch without fuss.
- Perfect for Halloween Parties: These crispy witch finger cookies bring a quirky charm to your dessert table, catching everyone’s eye and sparking conversations.
- Crowd-Pleaser: Weirdly enough, kids and adults alike love them — crunchy, buttery, with just a hint of almond that keeps you coming back for more.
- Unbelievably Delicious: The crisp texture contrasts with a subtle chewiness, and those almond nails add a perfect crunch, making it more than just a novelty cookie.
This isn’t just another Halloween cookie recipe. The trick (or treat!) lies in the little details — the way you shape the fingers with knuckle indentations, gently score the dough, and the use of sliced almonds for nails that really sell the spooky vibe. My method keeps the cookies from getting too soft or cakey, so you get that satisfying crunch every time. Plus, I’ve added a pinch of almond extract to the dough for a subtle, hauntingly good aroma that lingers even after the cookies vanish.
Honestly, this recipe sticks because it’s both playful and reliable — perfect for impressing guests without stress. It’s like the ultimate Halloween comfort food that’s just a tad bit mischievous.
What Ingredients You Will Need
This recipe uses simple, wholesome ingredients to deliver bold flavor and that satisfying crisp texture without the fuss. Most are pantry staples, and I’ve included a few notes to help you pick the best options for your crispy witch finger cookies with almond nails.
- All-purpose flour (2 ½ cups / 315 g) – the base for a sturdy but tender cookie dough.
- Unsalted butter (1 cup / 227 g, softened) – I prefer Land O Lakes for its creamy richness, but any good-quality butter works.
- Granulated sugar (¾ cup / 150 g) – adds sweetness and helps the cookies crisp up nicely.
- Almond extract (1 tsp) – gives that hauntingly sweet aroma that’s subtle but important. Don’t skip this!
- Vanilla extract (1 tsp) – balances the almond flavor and adds depth.
- Baking powder (1 tsp) – a little lift to keep the cookies light.
- Salt (½ tsp) – to enhance all the flavors.
- Egg (1 large, room temperature) – binds everything together and helps with the dough’s structure.
- Sliced almonds (about 40-50 pieces) – these are your witch nails! Look for thin, uniform slices for the best effect.
- Optional: Red food coloring gel or strawberry jam for a little “bloody” effect at the base of the almond nails (just a dab makes it extra spooky).
If you need a gluten-free option, swapping the all-purpose flour for a 1:1 gluten-free baking flour blend works pretty well, though the texture will be slightly different. For a dairy-free version, use a vegan butter substitute that behaves like regular butter in baking.
In terms of sourcing, I like to grab my almond slices from the bulk section of the grocery store — fresher and often cheaper. And if you want to make the cookies a little more festive, try adding a pinch of cinnamon or pumpkin pie spice to the dough. Just a whisper, don’t go crazy!
Equipment Needed

Luckily, these crispy witch finger cookies don’t call for any fancy gadgets — just basics you probably already have. Here’s what you’ll need:
- Mixing bowls: One large for the dough and a small one for wet ingredients.
- Electric mixer or stand mixer: Helpful but not mandatory. You can mix by hand if you have a strong wrist!
- Baking sheet: Standard size works fine. Line it with parchment paper or a silicone baking mat for easy cleanup.
- Spoons or small spatula: For mixing and shaping dough.
- Sharp knife or toothpick: For making knuckle indentations on the cookie fingers.
- Cooling rack: Essential to let your cookies crisp up completely after baking.
If you don’t have a stand mixer, a handheld mixer or even vigorous whisking will do. For shaping the fingers, I find using my fingers plus a butter knife works better than any fancy tool — you get a more natural, creepy shape that way. Also, if you want to keep your baking sheets in good shape, avoid metal spatulas when removing cookies to prevent scratches on silicone mats.
Preparation Method
- Preheat your oven to 350°F (175°C). Line two baking sheets with parchment paper or silicone mats. This keeps the cookies from sticking and helps them brown evenly. (10 minutes)
- Cream the butter and sugar: In a large bowl, beat 1 cup (227 g) softened unsalted butter with ¾ cup (150 g) granulated sugar until light and fluffy, about 2-3 minutes. This step is key for that crispy texture. If you rush it, cookies can be dense.
- Add egg and extracts: Beat in 1 large egg, 1 teaspoon almond extract, and 1 teaspoon vanilla extract until fully incorporated. The almond extract gives those crispy witch finger cookies their signature eerie aroma.
- Combine dry ingredients: In a separate bowl, whisk together 2 ½ cups (315 g) all-purpose flour, 1 teaspoon baking powder, and ½ teaspoon salt.
- Mix dry into wet: Gradually add the dry ingredients to the wet mixture, mixing on low speed until a soft dough forms. It should be pliable but not sticky. If it feels too sticky, add a tablespoon more flour.
- Shape your fingers: Pinch off dough pieces about 1 tablespoon each (roughly 18-20 pieces). Roll each into a finger shape, about 3 inches (7.5 cm) long. Press and shape knuckle indentations gently with a knife or toothpick—don’t overdo it or the dough might crack during baking.
- Add almond nails: Press a sliced almond on one end of each finger, gently pushing it into the dough so it sticks during baking. If you want that bloody effect, dab a tiny bit of red food coloring gel or strawberry jam at the base of the almond.
- Arrange and bake: Place the shaped fingers on the prepared baking sheets about 1 inch (2.5 cm) apart. Bake for 18-22 minutes until edges are golden and fingers look crispy but not burnt.
- Cool completely: Transfer cookies to a cooling rack and let cool fully — this is when they reach their signature crispiness.
Pro tip: If your dough feels too soft to shape, pop it in the fridge for 15 minutes to firm up. Also, keep an eye on your baking time — every oven is different, and you want that perfect crispy snap without overbaking.
Cooking Tips & Techniques
Making crispy witch finger cookies is fun but there are a few tricks to get them just right. Here’s what I’ve learned through trial, error, and a few “oops” moments:
- Don’t rush creaming the butter and sugar: This controls the texture. I once skipped this step and ended up with cookies that were more dense than crispy — not spooky enough.
- Use room temperature butter and egg: It helps everything mix smoothly and results in better texture. Cold ingredients can lead to uneven dough.
- Shape gently, but with character: The knuckle dents really sell the creepy vibe, so don’t be shy with your knife or toothpick. Just avoid deep cuts that can cause cracking.
- Don’t overcrowd the baking sheet: Give each finger some breathing room to bake evenly and crisp up. I learned this the hard way when my cookies baked into a spooky cookie blob.
- Watch the baking time closely: These cookies can go from golden to burnt quickly, especially around the tips. Start checking at 18 minutes.
- Cool on a wire rack: This avoids soggy bottoms and keeps the crisp texture intact.
Multitasking tip: While the cookies bake, you can prep a simple seasonal dip or snack like fresh cucumber tomato salad for a lighter counterbalance at your Halloween spread. It’s always nice to have something fresh alongside the treats.
Variations & Adaptations
You can easily tweak this recipe to suit different tastes or dietary needs. Here are some ideas I’ve tried or thought about:
- Chocolate-Dipped Witch Fingers: After baking and cooling, dip the tips in melted dark chocolate for a rich, spooky twist.
- Gluten-Free Version: Use a 1:1 gluten-free flour blend. The texture is a bit softer but still crisp and tasty.
- Spiced Witch Fingers: Add ½ teaspoon cinnamon, nutmeg, or pumpkin pie spice to the dough for a cozy fall flavor.
- Vegan Adaptation: Substitute vegan butter and use a flax egg (1 tbsp ground flaxseed + 3 tbsp water) to bind the dough.
- Colored Almond Nails: Use natural food dye or edible markers to tint the almond nails for a more dramatic effect.
One year I swapped the sliced almonds for pumpkin seeds, which gave a different texture and shape but still looked creepy enough to work. Also, if you want to get fancy, try adding a tiny bit of black cocoa powder to the dough for a darker, more witchy look — but keep the balance to avoid bitterness.
Serving & Storage Suggestions
These crispy witch finger cookies are best served at room temperature to enjoy their full crispness. Arrange them on a platter with a little “blood” jam or raspberry sauce for dipping — it adds a fun, interactive element for guests.
They pair surprisingly well with warm drinks like spiced cider or rich hot chocolate, making them perfect for chilly Halloween nights. If you want to balance the sweetness, serve alongside a small cheese plate or something fresh like the quick pickled cucumber snacks I love for a contrast.
Storage: Store cooled cookies in an airtight container at room temperature for up to 5 days. For longer storage, freeze them in a freezer-safe bag for up to 2 months. To re-crisp, pop them in a 300°F (150°C) oven for 5-7 minutes before serving.
Flavors develop a bit over time, with the almond aroma becoming more pronounced after a day. So if you can wait, a little patience pays off.
Nutritional Information & Benefits
Each crispy witch finger cookie contains approximately:
| Calories | Fat | Carbohydrates | Protein | Sugar |
|---|---|---|---|---|
| 120 kcal | 7 g | 14 g | 2 g | 6 g |
The almond slices add a bit of healthy fat and protein, while the almond extract contributes trace amounts of antioxidants. These cookies are naturally free of artificial preservatives and can be made gluten-free or vegan with simple swaps. Just a heads-up: they do contain nuts and gluten unless modified, so keep that in mind for sensitive guests.
Personally, I think treats like these fit nicely into a balanced diet — a little indulgence with a side of fun always brightens the season.
Conclusion
So, if you’re looking for a Halloween treat that’s equal parts spooky and scrumptious, these crispy witch finger cookies with almond nails are it. They’re fun to make, satisfying to eat, and bring a playful touch to any fall gathering. I love this recipe because it’s simple enough to pull off even if you’re not a cookie pro, but detailed enough to impress your friends and family.
Feel free to customize the flavors, colors, or decorations to match your own Halloween vibe. And hey, if you try adding a fun dip or pairing them with a fresh salad like the creamy dill cucumber tomato salad, you’re basically winning at party hosting.
Give it a go, share your results, and tell me how your spooky snacks turned out. It’s the little creepy details that make celebrations memorable!
FAQs
Can I make these witch finger cookies ahead of time?
Yes! They keep well in an airtight container for up to 5 days at room temperature. For longer storage, freeze and re-crisp before serving.
What if I don’t have almond extract? Can I skip it?
You can skip it, but the almond extract adds a subtle, signature flavor that really makes these cookies stand out. If you don’t have it, vanilla extract alone will still work.
How do I make the cookies crispier?
Make sure to cream the butter and sugar well, bake until golden but not burnt, and cool completely on a wire rack. Avoid overcrowding the pan to help even baking.
Can I use whole almonds instead of sliced almonds for the nails?
Sliced almonds work best because they resemble nails more closely and bake evenly. Whole almonds might be too bulky and could fall off easily.
Are these cookies safe for kids with nut allergies?
Unfortunately, no, because of the almond extract and sliced almonds. You could try substituting the almond extract with vanilla and the nails with small pieces of dried fruit or candy for a nut-free version.
Pin This Recipe!
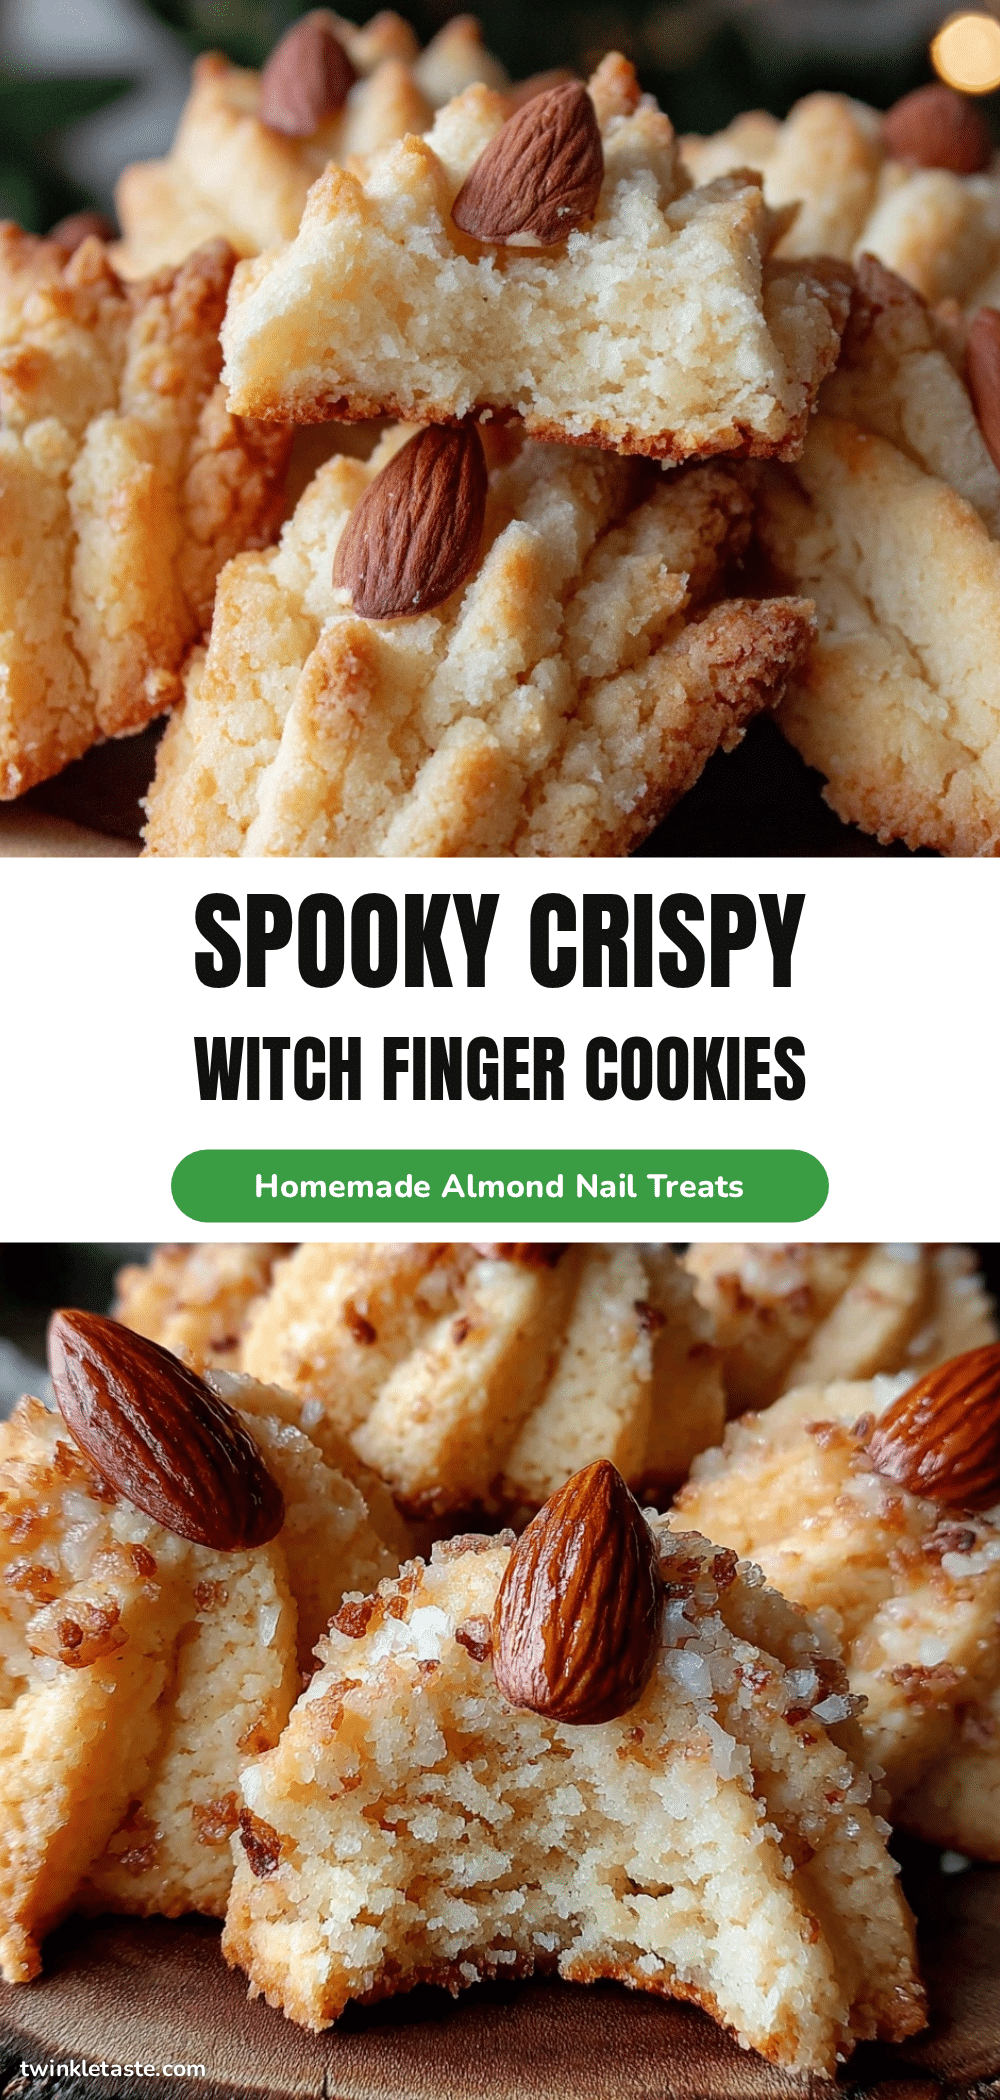
Crispy Witch Finger Cookies

These crispy witch finger cookies with almond nails are a fun and spooky Halloween treat that combines a satisfying crunch with a subtle almond aroma. Perfect for parties and easy to make with simple pantry ingredients.
- Prep Time: 15 minutes
- Cook Time: 20 minutes
- Total Time: 35 minutes
- Yield: 18-20 cookies 1x
- Category: Dessert
- Cuisine: American
Ingredients
- 2 ½ cups (315 g) all-purpose flour
- 1 cup (227 g) unsalted butter, softened
- ¾ cup (150 g) granulated sugar
- 1 tsp almond extract
- 1 tsp vanilla extract
- 1 tsp baking powder
- ½ tsp salt
- 1 large egg, room temperature
- 40–50 sliced almonds
- Optional: red food coloring gel or strawberry jam for bloody effect
Instructions
- Preheat your oven to 350°F (175°C). Line two baking sheets with parchment paper or silicone mats.
- Cream the butter and sugar in a large bowl until light and fluffy, about 2-3 minutes.
- Beat in the egg, almond extract, and vanilla extract until fully incorporated.
- In a separate bowl, whisk together the flour, baking powder, and salt.
- Gradually add the dry ingredients to the wet mixture, mixing on low speed until a soft dough forms. Add more flour if too sticky.
- Pinch off dough pieces about 1 tablespoon each (18-20 pieces). Roll each into a 3-inch finger shape and gently press knuckle indentations with a knife or toothpick.
- Press a sliced almond onto one end of each finger to form the nail. Optionally, dab a bit of red food coloring gel or strawberry jam at the base of the almond for a bloody effect.
- Place the shaped fingers on the baking sheets about 1 inch apart.
- Bake for 18-22 minutes until edges are golden and cookies are crispy but not burnt.
- Transfer cookies to a cooling rack and cool completely to achieve crispiness.
Notes
Do not rush creaming the butter and sugar to ensure a crispy texture. Use room temperature butter and egg for better mixing. Shape fingers gently to avoid cracks. Avoid overcrowding baking sheets and watch baking time closely to prevent burning. Cool cookies completely on a wire rack for best crispiness. Dough can be chilled for 15 minutes if too soft to shape.
Nutrition
- Serving Size: 1 cookie
- Calories: 120
- Sugar: 6
- Fat: 7
- Carbohydrates: 14
- Protein: 2
Keywords: Halloween cookies, witch finger cookies, crispy cookies, almond cookies, spooky treats, easy Halloween recipe


