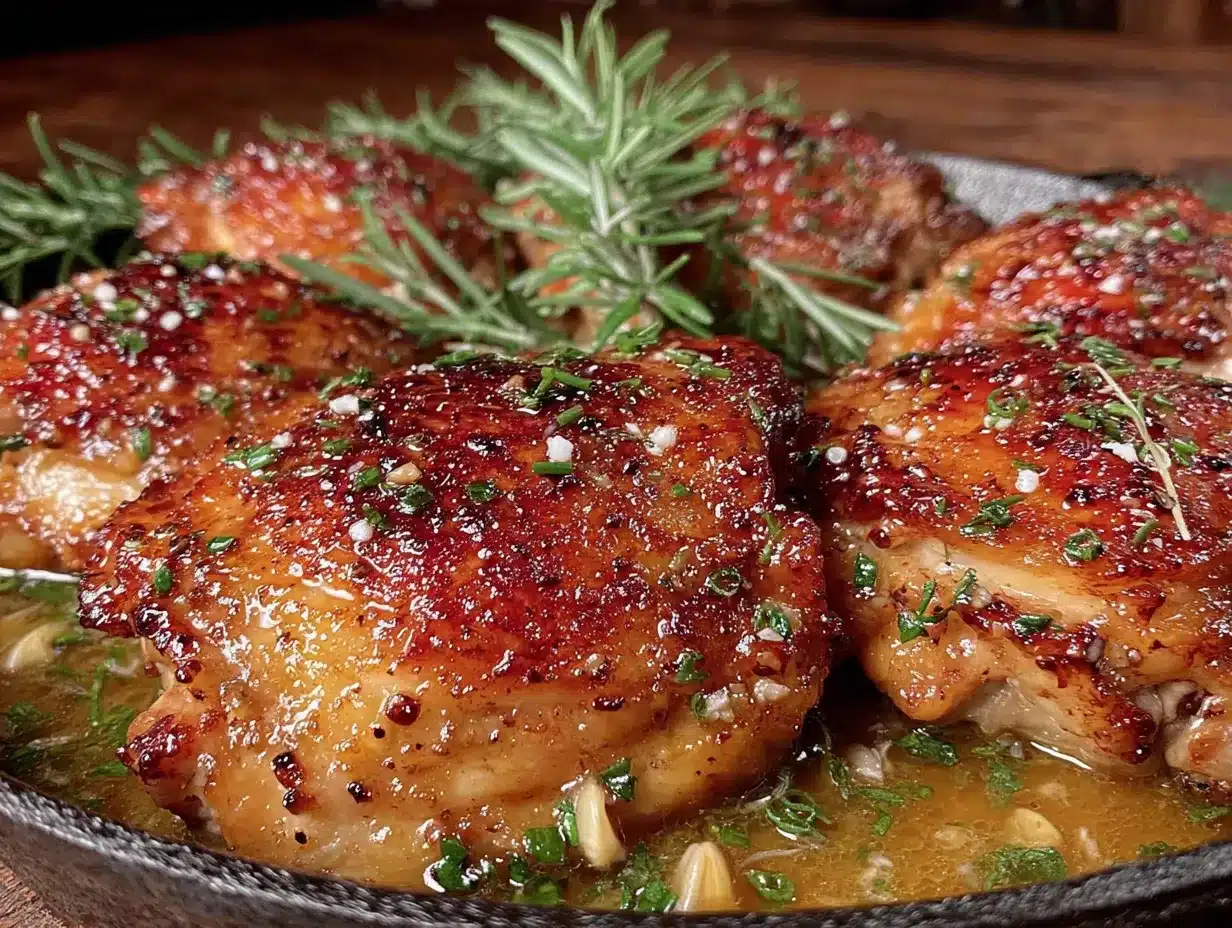
The skin on these chicken thighs shatters when you press down with the side of your fork — that crackling, glassy break that gives way to juice-soaked meat underneath — and honestly, that’s the whole point of this recipe. Everything else is just supporting the crunch.
I’ve been chasing that specific sound for years, the one that tells you the skin rendered properly, that you didn’t rush it, that you let the pan do its thing. I’ve had plenty of failures along the way — chicken that steamed instead of seared, skin that stuck to the pan like glue, that sad, rubbery texture that makes you wonder why you bothered. But this one-pan version? It finally cracked the code.
It happened on a Tuesday night when I was too tired to think but too hungry to settle for takeout. I had chicken thighs in the fridge, a head of garlic that was starting to sprout (we’ve all been there), and a bundle of parsley that was wilting in the crisper drawer. I figured I’d just throw it all in a skillet and hope for the best. What came out of that pan was so absurdly good I actually stood at the counter eating straight from the skillet, burning my tongue on the second bite because I couldn’t wait.
The garlic butter pools in the pan and bubbles up around the thighs, infusing every crevice with that nutty, savory richness. The herbs crisp up in the butter, creating these little fried bits of flavor that cling to the skin. And the best part? One pan. That’s it. No flipping between pots, no complicated steps, no gadgets you’ll use once and forget about. Just a hot skillet, some patience, and a dinner that makes you look like you tried way harder than you actually did.
That Tuesday night skillet became a regular thing. Then it became the thing I made for friends who needed a good meal. Then it became the recipe I texted to my sister at 6 PM on a Wednesday when she asked what to make for dinner. So here it is — the crispy, garlicky, herb-flecked chicken that taught me that sometimes the best meals come from not overthinking it.
Why You’ll Love This Recipe
Let me tell you why this one-pan chicken has earned a permanent spot in my weekly rotation — and why it’ll probably end up in yours too.
- One Pan, Minimal Mess: Everything happens in a single skillet. You sear the chicken, build the garlic butter sauce, and finish it all in the same pan. Fewer dishes means more time actually enjoying your meal instead of scrubbing crusted-on food off three different pots.
- That Irresistible Crispy Skin: The skin comes out shatteringly crisp — the kind of crunch that echoes in a quiet kitchen. Getting restaurant-quality crispy skin at home is totally doable, and I’ll show you exactly how to nail it every single time.
- Simple Pantry Ingredients: Chicken thighs, butter, garlic, herbs, salt, and pepper. That’s basically it. No trips to specialty stores, no hunting down obscure ingredients. You probably have most of this stuff right now.
- Ready in Under 40 Minutes: From start to finish, this dinner comes together in about 35 minutes. Perfect for those nights when you need something satisfying but don’t have an hour to spend in the kitchen.
- Naturally Versatile: This recipe works with bone-in or boneless thighs, adapts to whatever herbs you have on hand, and pairs beautifully with just about any side dish you can think of. It’s the kind of recipe you’ll memorize because you’ll make it that often.
What really sets this apart from other chicken thigh recipes is the technique. Most recipes tell you to just sear the chicken and call it done. But I’ve learned that the real magic happens in the final basting step — when you spoon that sizzling garlic butter over the skin repeatedly, building up layers of flavor and crispiness that you just can’t get any other way. It’s a small extra step that makes a massive difference.
And honestly? This is the kind of meal that makes you close your eyes after the first bite. It’s comfort food that feels special enough for company but easy enough for a random Tuesday. The kind of recipe that reminds you why cooking at home is worth it.
What Ingredients You Will Need
This recipe keeps things refreshingly simple. Here’s what you’ll need to make the best crispy chicken thighs of your life:
For the Chicken
- 4 bone-in, skin-on chicken thighs (about 1.5 to 2 pounds total) — Bone-in thighs stay juicier during cooking, and the skin is essential for that crispy texture we’re after. If you only have boneless thighs, reduce cooking time by about 5-7 minutes.
- 1 tablespoon olive oil — For searing. Use a neutral oil with a high smoke point. I prefer extra virgin olive oil here, but avocado oil works great too.
- 1 teaspoon kosher salt — Don’t skimp on salt. It’s what draws moisture out of the skin, helping it crisp up beautifully.
- ½ teaspoon black pepper — Freshly ground, please. The pre-ground stuff just doesn’t hit the same way.
For the Garlic Butter Herb Sauce
- 4 tablespoons unsalted butter — Cut into tablespoons. Salted butter works too, just reduce the added salt slightly. I like using Kerrygold or Plugrà for their rich flavor.
- 6 cloves garlic — Minced finely. Don’t use the pre-minced stuff from a jar — it burns too quickly and doesn’t have the same punch. Fresh garlic makes a real difference here.
- 2 tablespoons fresh parsley — Chopped. Flat-leaf or curly both work. Parsley adds freshness that cuts through the richness of the butter.
- 1 tablespoon fresh thyme leaves — Strip the leaves from the stems. Thyme and chicken are a classic combo for good reason. Dried thyme works in a pinch (use 1 teaspoon), but fresh really shines here.
- 1 teaspoon fresh rosemary — Finely chopped. Rosemary adds that woodsy, aromatic note that makes this feel special. Go easy — it’s potent stuff.
- Optional: ½ teaspoon red pepper flakes — For a little heat. Totally optional, but I love the subtle kick it adds.
For Garnish (Optional but Recommended)
- Fresh parsley or thyme sprigs — For that final touch that makes it look restaurant-ready.
- Flaky sea salt — Like Maldon. A sprinkle right before serving adds a lovely crunch and pop of saltiness.
- Lemon wedges — A squeeze of fresh lemon juice right before eating brightens everything up beautifully.
Ingredient Tips from My Kitchen: When picking chicken thighs, look for ones with the skin still attached and intact — tears in the skin make it harder to get that even crispiness. If your chicken thighs are particularly large (over 8 ounces each), they might need an extra 5-7 minutes of cooking time. And here’s a little trick I learned the hard way: pat the chicken thighs really dry with paper towels before seasoning. Like, aggressively dry. Moisture is the enemy of crispy skin, and this one step makes more difference than you’d think.
For the garlic, I’ve tested this with both fresh and jarred, and the difference is noticeable. Fresh garlic gives you that sweet, nutty flavor when it cooks in the butter. Jarred garlic tends to taste metallic and can burn faster. Trust me on this one — take the extra 30 seconds to peel and mince fresh cloves.
Equipment Needed
The beauty of this recipe is that you don’t need much. Here’s what you’ll want to have on hand:
- A 10 or 12-inch cast iron skillet — This is my go-to for this recipe. Cast iron holds heat beautifully and gives you that perfect sear. If you don’t have one, any heavy-bottomed oven-safe skillet will work — stainless steel or carbon steel are great alternatives.
- Tongs — For flipping the chicken and handling it in the hot pan. Metal tongs with silicone tips are ideal — they won’t scratch your pan and give you good grip.
- A meat thermometer — This isn’t optional if you want perfectly cooked chicken. I use a simple instant-read thermometer, and it’s saved me from dry chicken more times than I can count. The Thermapen is pricey but worth it; a basic $10 one from the grocery store works fine too.
- A sharp knife and cutting board — For mincing garlic and chopping herbs. A good chef’s knife makes prep so much faster.
- Paper towels — For drying the chicken. This step is crucial, so don’t skip it.
- A small bowl — For mixing the herbs into the butter.
If you don’t have a cast iron skillet, don’t run out and buy one just for this recipe. A stainless steel skillet works beautifully — just make sure it’s heavy-bottomed so it holds heat evenly. Non-stick pans work too, but you won’t get quite as deep of a sear. And if you’re using a non-stick pan, avoid using metal utensils to protect the coating.
One thing I’ve learned over the years: a good pair of tongs is worth the investment. Cheap tongs that don’t grip well will have you dropping chicken in hot oil, and nobody needs that kind of excitement in their life. Spend the extra few dollars on a sturdy pair.
Preparation Method
Alright, let’s get cooking. This method has been tested and retested to give you the crispiest, most flavorful chicken thighs every single time.
- Prep the chicken (10 minutes before cooking): Start by patting your chicken thighs extremely dry with paper towels. I mean really dry — you want to remove as much surface moisture as possible. This is the single most important step for crispy skin. Season both sides generously with kosher salt and black pepper. Let the chicken sit at room temperature for 10 minutes — this helps it cook more evenly.
- Preheat your skillet (2 minutes): Place your cast iron skillet over medium-high heat and add the olive oil. Let it heat until the oil shimmers and you see the first wisp of smoke. This usually takes about 2 minutes. You want the pan hot enough that the chicken sizzles immediately when it hits the surface.
- Sear the chicken skin-side down (8-10 minutes): Place the chicken thighs in the skillet, skin-side down. Don’t crowd the pan — if your thighs are large, cook them in two batches. Press down gently on each thigh with a spatula for about 10 seconds to ensure maximum contact with the pan. Now — and this is important — do not move the chicken. Let it cook undisturbed for 8-10 minutes. You’ll know it’s ready to flip when the skin is deep golden brown and releases easily from the pan. If it sticks, it needs more time.
- Flip and cook the other side (5 minutes): Using your tongs, carefully flip each thigh over. The skin side should be beautifully browned and crispy. Cook for another 5 minutes on the second side. The chicken should be nearly cooked through at this point.
- Make the garlic butter (2 minutes): Reduce the heat to medium-low. Push the chicken to one side of the pan and add the butter to the empty space. Let it melt, then add the minced garlic, fresh thyme, rosemary, and red pepper flakes if using. Stir constantly for about 1 minute — you want the garlic fragrant and the herbs infused into the butter, but be careful not to burn the garlic. Burnt garlic turns bitter and will ruin the whole dish.
- Baste the chicken (3-4 minutes): Tilt the pan slightly so the garlic butter pools at one end. Using a large spoon, scoop up the butter and pour it over the chicken thighs. Repeat this basting process for about 3-4 minutes, spooning the butter over each thigh multiple times. This step builds incredible flavor and helps the skin get even crispier.
- Check for doneness: Insert your meat thermometer into the thickest part of a thigh, avoiding the bone. You’re looking for an internal temperature of 165°F (74°C). If it’s not there yet, continue cooking over medium-low heat for another 2-3 minutes and check again.
- Rest and serve (5 minutes): Remove the skillet from heat. Transfer the chicken to a plate and let it rest for 5 minutes — this lets the juices redistribute so your chicken stays moist. Spoon some of the garlic butter from the pan over the top before serving. Garnish with fresh parsley or thyme sprigs, a sprinkle of flaky sea salt, and a squeeze of lemon if desired.
Visual Cues to Watch For: The chicken skin should be deep golden brown with some darker spots — that’s the good stuff. The garlic should be just starting to turn golden at the edges, not brown. The butter should be bubbling gently, not violently. When you cut into a thigh, the juices should run clear, and the meat should be opaque all the way through with no pink near the bone.
One thing I learned after a few failed attempts: don’t rush the skin-side sear. I know it’s tempting to flip early, but that first side needs a solid 8-10 minutes to develop that deep crust. If you flip too soon, the skin won’t be crispy, and you’ll lose that texture you’re working so hard to achieve. Trust the process — your patience will be rewarded.
Cooking Tips & Techniques
Over the years, I’ve made just about every mistake you can make with chicken thighs. Here’s what I’ve learned so you don’t have to make the same mistakes.
The Secret to Truly Crispy Skin: It’s all about moisture removal. After patting the chicken dry, try this trick: leave the seasoned chicken uncovered in the fridge for 30 minutes (or up to overnight). The cold air dries out the skin even further, giving you an even crispier result. I do this whenever I have the foresight to plan ahead — which, let’s be honest, isn’t always.
Don’t Crowd the Pan: If you’re cooking for a crowd, cook the chicken in batches. When you overcrowd the pan, the temperature drops, and the chicken steams instead of searing. You’ll end up with pale, rubbery skin instead of that beautiful golden crust. I learned this the hard way when I tried to cook 8 thighs at once — it was a sad, soggy mess.
Use a Meat Thermometer: I cannot stress this enough. Chicken thighs are forgiving compared to breasts, but they can still dry out if overcooked. Pull them at 165°F (74°C) for perfectly juicy meat. If you don’t have a thermometer, look for clear juices running from the chicken when you pierce it with a knife, and make sure there’s no pink near the bone.
Keep the Garlic from Burning: Garlic burns quickly in hot butter, turning bitter and acrid. That’s why I add it after reducing the heat and keep it moving constantly. If you see the garlic turning dark brown, remove the pan from heat immediately and add a splash of chicken broth or water to stop the cooking process.
Let It Rest: I know you’re hungry. I know the kitchen smells incredible. But please let the chicken rest for 5 minutes before serving. This allows the juices to redistribute throughout the meat. If you cut into it immediately, all those delicious juices will run out onto the plate, leaving you with drier chicken. Those 5 minutes make a real difference.
Multitasking Strategy: While the chicken is searing (step 3), prep your garlic and herbs. While the chicken rests (step 8), quickly sauté some greens or roast some vegetables to serve alongside. This keeps your total dinner time around 35 minutes.
Variations & Adaptations
One of the best things about this recipe is how adaptable it is. Here are some of my favorite variations:
Lemon Herb Version: Add the zest of one lemon to the garlic butter along with 2 tablespoons of fresh lemon juice. The acidity cuts through the richness of the butter beautifully. Finish with a squeeze of fresh lemon over the chicken before serving. This version is especially bright and fresh — perfect for spring and summer.
Spicy Honey Garlic: Add 2 tablespoons of honey and an extra teaspoon of red pepper flakes to the butter sauce. The sweetness caramelizes on the skin, creating a sticky, spicy-sweet glaze that’s absolutely addictive. I make this version when I’m craving something with a little more punch.
Dairy-Free Adaptation: Substitute the butter with a high-quality vegan butter or use olive oil mixed with a splash of coconut cream. The texture won’t be quite as rich, but it’s still delicious. I’ve made this for friends with dairy sensitivities, and they couldn’t tell the difference.
Herb Swaps: Don’t have fresh thyme and rosemary? No problem. Try using tarragon and chives for a more delicate flavor, or oregano and marjoram for an Italian twist. Basil works surprisingly well too — add it at the very end to preserve its freshness. I’ve also made this with a tablespoon of dried Italian seasoning in a pinch, and it turned out great.
Boneless, Skinless Option: If you’re trying to cut back on fat, you can use boneless, skinless thighs. Reduce the cooking time by about 5 minutes total, and add an extra tablespoon of butter to compensate for the missing fat from the skin. The texture won’t be as crispy, but the flavor will still be fantastic.
Oven-Finished Method: After searing both sides, transfer the skillet to a preheated 400°F (200°C) oven for 12-15 minutes instead of finishing on the stovetop. This method gives you a slightly more even cook and frees up your stovetop for making sides. I use this method when I’m cooking for company and need to multitask.
My Personal Favorite Variation: I love adding a splash of white wine (about ¼ cup) to the pan after removing the chicken, scraping up all the browned bits from the bottom, and letting it reduce by half. Then I swirl in an extra tablespoon of cold butter to make a quick pan sauce. It’s restaurant-quality with almost zero extra effort.
Serving & Storage Suggestions
How to Serve: These chicken thighs are best served hot, straight from the skillet. Spoon some of the garlic butter from the pan over each thigh before serving — that buttery goodness is too good to waste. I like to serve them on a warm plate with a sprinkle of flaky sea salt and a lemon wedge on the side.
What to Serve With: These thighs pair beautifully with so many sides. For a complete meal, try serving them with:
- Mashed potatoes or creamy polenta to soak up all that garlic butter
- A simple green salad with a lemony vinaigrette to cut through the richness
- Roasted vegetables like asparagus, broccoli, or Brussels sprouts
- Crusty bread for dipping into the pan sauce
- Rice or quinoa to catch all those delicious juices
Storage Instructions: Store leftover chicken in an airtight container in the refrigerator for up to 4 days. The skin will lose its crispiness as it sits, but the flavor will still be excellent. I actually love leftovers — the garlic butter permeates the meat even more overnight.
How to Reheat: For best results, reheat the chicken in a skillet over medium heat with a splash of chicken broth or water. Cover the pan and let it steam for 3-4 minutes, then uncover and let the skin crisp up again for 1-2 minutes. The microwave works in a pinch, but it’ll make the skin soggy. If you have an air fryer, reheat at 375°F for 3-4 minutes — the skin gets almost as crispy as when it was fresh.
Freezer Instructions: These chicken thighs freeze beautifully. Let them cool completely, then wrap each thigh individually in plastic wrap and place in a freezer-safe bag. They’ll keep for up to 3 months. To reheat, thaw overnight in the refrigerator, then reheat in a skillet as described above.
Flavor Development: Here’s something interesting — the flavors actually deepen and meld together after a day in the fridge. The garlic becomes less sharp, the herbs infuse more deeply into the meat, and everything becomes more cohesive. I sometimes make these a day ahead on purpose, just so the leftovers are even more delicious.
Nutritional Information & Benefits
Here’s the approximate nutritional breakdown for one serving (one chicken thigh with garlic butter sauce):
| Nutrient | Amount Per Serving |
|---|---|
| Calories | 385 |
| Protein | 28g |
| Fat | 29g |
| Saturated Fat | 12g |
| Carbohydrates | 2g |
| Fiber | 0g |
| Sugar | 0g |
| Sodium | 620mg |
Chicken thighs are an excellent source of high-quality protein, which is essential for muscle repair and maintenance. They’re also rich in B vitamins, particularly B6 and B12, which support energy metabolism and brain function. The skin contains healthy fats that help your body absorb fat-soluble vitamins from any vegetables you serve alongside.
Garlic isn’t just for flavor — it’s packed with allicin, a compound with antimicrobial and anti-inflammatory properties. Fresh herbs like parsley, thyme, and rosemary are loaded with antioxidants that help fight oxidative stress in the body. And if you’re watching your carb intake, this recipe is naturally low-carb and keto-friendly.
Dietary Considerations: This recipe is naturally gluten-free, low-carb, and keto-friendly. For dairy-free, substitute the butter with vegan butter or olive oil. For lower fat, use boneless, skinless thighs and reduce the butter to 2 tablespoons.
Potential Allergens: This recipe contains dairy (butter). It does not contain nuts, eggs, soy, or gluten in its standard form, but always check your specific ingredient labels to be sure.
Conclusion
This crispy one-pan garlic butter herb chicken has become my go-to for so many reasons. It’s the recipe I turn to when I need something reliable, when I want to impress without stress, and when I just need a really good meal at the end of a long day. The shatteringly crisp skin, the fragrant garlic butter, the way the herbs cling to every bite — it’s simple food done right.
What I love most about this recipe is how forgiving it is. It doesn’t require perfect technique or fancy equipment. It just needs a hot pan, some patience while that skin crisps up, and a willingness to spoon butter over chicken for a few minutes. That’s it. And the result is so much more than the sum of its parts.
I’d love to hear how this turns out for you. Did you try one of the variations? Did you come up with your own twist? Drop a comment below and let me know — I read every single one, and your feedback helps me create better recipes for all of us. And if you loved this recipe, share it with a friend who needs a good dinner in their life. We could all use a little more garlic butter chicken, don’t you think?
Happy cooking, friend. Your skillet is waiting.
Frequently Asked Questions
Can I use chicken breasts instead of thighs?
You can, but I don’t recommend it for this recipe. Chicken breasts cook faster and dry out more easily, plus they don’t have the same fat content that makes the skin so crispy. If you must use breasts, go for bone-in, skin-on breasts and reduce the cooking time by about 5 minutes. Check the internal temperature at 160°F (71°C) and let carryover cooking bring it to 165°F (74°C).
Why is my chicken skin not getting crispy?
Nine times out of ten, it’s because the chicken wasn’t dry enough before it hit the pan. Pat those thighs down with paper towels until they’re practically desert-dry. The other common culprit is not letting the pan get hot enough — it should be sizzling when the chicken goes in. And don’t crowd the pan! Give each thigh room to breathe.
Can I make this recipe ahead of time?
Absolutely. You can sear the chicken and make the garlic butter sauce up to 2 days ahead. Store everything separately in the refrigerator, then reheat in a skillet over medium heat with a splash of chicken broth. The skin won’t be quite as crispy, but the flavor will still be fantastic. I often make the full recipe and reheat leftovers for lunch the next day.
What’s the best pan to use if I don’t have cast iron?
A heavy-bottomed stainless steel skillet is your next best option. It holds heat well and gives you a good sear. Carbon steel works great too. Non-stick pans will work, but you won’t get quite as deep of a sear because they don’t get as hot. Whatever pan you use, make sure it’s oven-safe in case you want to finish the chicken in the oven.
How do I know when the chicken is fully cooked without a thermometer?
If you don’t have a meat thermometer, look for these signs: the juices should run clear when you pierce the thickest part of the thigh with a knife, the meat should be opaque all the way through with no pink near the bone, and the internal temperature should feel hot when you touch it. But honestly, a $10 instant-read thermometer is one of the best investments you can make for your kitchen. It takes the guesswork out of cooking meat.
Pin This Recipe!

Crispy One-Pan Garlic Butter Herb Chicken Thighs

Shatteringly crispy skin, juicy meat, and a fragrant garlic butter herb sauce—all made in one skillet in under 40 minutes. This easy recipe delivers restaurant-quality results with simple pantry ingredients.
- Prep Time: 10 minutes
- Cook Time: 25 minutes
- Total Time: 35 minutes
- Yield: 4 servings 1x
- Category: Main Course
- Cuisine: American
Ingredients
- 4 bone-in, skin-on chicken thighs (about 1.5 to 2 pounds total)
- 1 tablespoon olive oil
- 1 teaspoon kosher salt
- ½ teaspoon black pepper, freshly ground
- 4 tablespoons unsalted butter, cut into tablespoons
- 6 cloves garlic, minced
- 2 tablespoons fresh parsley, chopped
- 1 tablespoon fresh thyme leaves
- 1 teaspoon fresh rosemary, finely chopped
- ½ teaspoon red pepper flakes (optional)
- Fresh parsley or thyme sprigs for garnish (optional)
- Flaky sea salt for garnish (optional)
- Lemon wedges for serving (optional)
Instructions
- Prep the chicken: Pat chicken thighs extremely dry with paper towels. Season both sides generously with kosher salt and black pepper. Let sit at room temperature for 10 minutes.
- Preheat skillet: Place a 10 or 12-inch cast iron skillet over medium-high heat and add olive oil. Heat until oil shimmers and first wisp of smoke appears, about 2 minutes.
- Sear chicken skin-side down: Place chicken thighs in skillet, skin-side down. Do not crowd the pan. Press down gently with a spatula for 10 seconds. Cook undisturbed for 8-10 minutes until skin is deep golden brown and releases easily.
- Flip and cook other side: Carefully flip each thigh. Cook for another 5 minutes. Chicken should be nearly cooked through.
- Make garlic butter: Reduce heat to medium-low. Push chicken to one side. Add butter to empty space and let melt. Add minced garlic, thyme, rosemary, and red pepper flakes (if using). Stir constantly for about 1 minute until fragrant.
- Baste chicken: Tilt pan so garlic butter pools. Spoon butter over chicken thighs repeatedly for 3-4 minutes.
- Check doneness: Insert meat thermometer into thickest part of thigh (avoiding bone). Internal temperature should reach 165°F (74°C). If not, continue cooking over medium-low heat for 2-3 more minutes.
- Rest and serve: Remove skillet from heat. Transfer chicken to a plate and let rest for 5 minutes. Spoon garlic butter from pan over top. Garnish with fresh herbs, flaky sea salt, and lemon wedges if desired.
Notes
Pat chicken extremely dry for crispiest skin. Don’t crowd the pan. Let chicken rest 5 minutes before serving. For extra crispy skin, refrigerate seasoned chicken uncovered for 30 minutes to overnight. Garlic burns quickly—add after reducing heat and stir constantly.
Nutrition
- Serving Size: 1 chicken thigh with
- Calories: 385
- Sodium: 620
- Fat: 29
- Saturated Fat: 12
- Carbohydrates: 2
- Protein: 28
Keywords: crispy chicken thighs, one-pan chicken, garlic butter chicken, herb chicken, easy chicken dinner, skillet chicken, gluten-free chicken, low-carb chicken


