This was supposed to be a batch of perfectly round, uniform chocolate chip cookies for my niece’s Halloween party. I had everything planned out—the butter was perfectly softened, the chocolate chips were measured, and I even bought that fancy parchment paper that promises zero sticking. Then my oven decided it wanted to be 50 degrees cooler than what the dial said, and I grabbed a bag of powdered sugar thinking it was flour. Let me tell you, I almost cried when I realized what I’d done. The dough was sticky, the sugar was everywhere, and I had exactly zero time to start over.
But here’s the thing about kitchen disasters—sometimes they turn into the best accidents you never knew you needed. I was already frustrated, the clock was ticking, and I thought, “Well, this is going to be a mess either way, so let’s just see what happens.” I added a little extra flour to compensate, shaped the cookies anyway, and right before they went in, I drizzled some melted chocolate in a web pattern on top. Honestly, I was just trying to make them look intentional. What came out of that oven was nothing like the plan—and way, way better.
The spider web design wasn’t just pretty; it became the whole reason these cookies exist. The powdered sugar mistake gave the dough this tender, almost melt-in-your-mouth texture that regular cookies just don’t have. My niece’s friends thought I’d spent hours on them. I didn’t correct them. Maybe you’ve been there—that moment when a recipe goes sideways and you just go with it, and somehow the universe rewards your stubbornness. That’s this cookie. It’s the happy accident I keep making on purpose now, and every time I pull a batch out of the oven, I remember that sometimes the best things come from letting go of control.
Why You’ll Love This Recipe
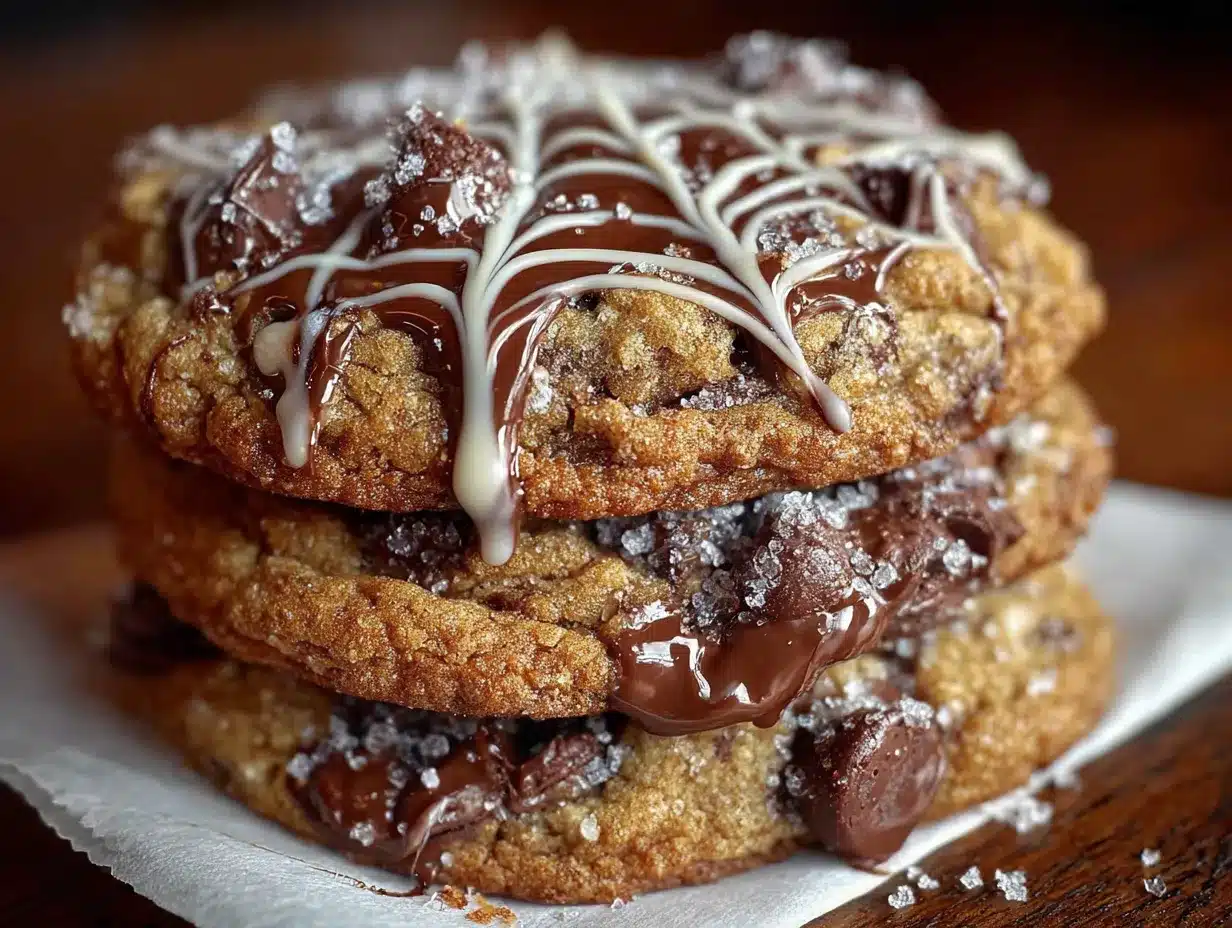
These Cozy Spider Web Chocolate Chip Cookies aren’t just another Halloween treat. They’re the kind of cookie that makes people stop and stare before they even take a bite. The spider web design is deceptively simple to create, but it looks like you spent hours piping intricate details. And the flavor? It’s pure comfort with a spooky twist.
- Quick & Easy: From start to finish, these cookies take about 30 minutes. Perfect for last-minute Halloween parties or a cozy night in when you want something special without the stress.
- Simple Ingredients: You probably have everything in your pantry right now. No weird extracts, no specialty flours—just classic cookie ingredients plus a little powdered sugar magic.
- Perfect for Halloween: Whether you’re hosting a costume party, sending treats to school, or just want something festive for a movie night, these cookies fit the bill. They’re spooky without being scary, which makes them great for kids.
- Crowd-Pleaser: I’ve brought these to three different gatherings now, and every single time, someone asks for the recipe. Kids love the design, adults love the taste, and everyone appreciates the effort (even though it’s minimal).
- Unbelievably Delicious: The texture is where these cookies shine. They’re soft in the middle, slightly crisp around the edges, and the powdered sugar gives them a tenderness that regular chocolate chip cookies just can’t match. The spider web adds a thin layer of chocolate that cracks beautifully when you bite into it.
What makes these different from every other Halloween cookie out there is the backstory. This isn’t a recipe I found online and tweaked—it’s a recipe that found me through a mistake. Every time I make them, I think about that chaotic afternoon, and it makes the cookies taste even better. Plus, the spider web design is genuinely foolproof. I’ve had friends who claim they can’t decorate anything pull off perfect webs on their first try. It’s that forgiving.
These cookies are comfort food reimagined for the spooky season. They’re the kind of treat that makes you close your eyes after the first bite, not because they’re fancy, but because they taste like home—if home had a little Halloween flair. Perfect for impressing guests without breaking a sweat, or turning a simple Tuesday night into something memorable.
What Ingredients You Will Need
This recipe uses simple, wholesome ingredients to deliver bold flavor and satisfying texture without any fuss. Most of these are pantry staples you probably already have, which makes these cookies perfect for spontaneous baking sessions.
- Unsalted butter, softened – 1 cup (2 sticks). I prefer using unsalted so I can control the salt level. Let it sit at room temperature for about 30 minutes before starting. If you’re in a rush, you can microwave it in 5-second bursts, but be careful not to melt it.
- Granulated sugar – ¾ cup. This gives the cookies their structure and helps them spread just the right amount.
- Powdered sugar – ½ cup. This is the secret ingredient that makes these cookies so tender. Don’t skip it—it’s what gives them that melt-in-your-mouth texture. I recommend using a sifted brand like Domino for the smoothest results.
- Large eggs – 2, room temperature. Cold eggs can seize the butter, so let them sit out for 15-20 minutes. If you forget, place them in a bowl of warm water for 5 minutes.
- Vanilla extract – 2 teaspoons. Pure vanilla extract makes a difference here. I’ve tried imitation in a pinch, and the flavor just isn’t as warm and rich.
- All-purpose flour – 2 ¼ cups. Spoon and level your flour—don’t scoop directly from the bag, or you’ll end up with dry cookies.
- Baking soda – 1 teaspoon. Make sure it’s fresh. If it doesn’t fizz when you drop it in vinegar, toss it and get a new box.
- Salt – ½ teaspoon. I use fine sea salt. It balances the sweetness without making the cookies taste salty.
- Semi-sweet chocolate chips – 2 cups. I’m partial to Ghirardelli for their size and melt quality. Reserve ½ cup for the spider web design.
- Optional: Milk or dark chocolate melting wafers – ¼ cup. These make the spider web design even easier to pipe. I like the Ghirardelli melting wafers because they don’t require tempering.
Ingredient Selection Tips: For the powdered sugar, look for one without added cornstarch if possible—it dissolves more evenly. If you’re using chocolate chips for the web design, make sure they’re fresh. Stale chocolate won’t melt smoothly and can seize up. For a dairy-free version, use vegan butter sticks (not tub margarine) and dairy-free chocolate chips. I’ve tested this with Earth Balance, and it works beautifully.
Substitution Guidance: If you’re out of powdered sugar, you can make your own by blending granulated sugar in a high-speed blender until it’s fine and fluffy. For gluten-free cookies, use a 1:1 gluten-free flour blend that contains xanthan gum. I’ve had good results with King Arthur’s Measure for Measure. And if you want a darker chocolate flavor, swap half the semi-sweet chips for dark chocolate chips—just be aware the cookies will be slightly less sweet.
Equipment Needed
You don’t need a fancy kitchen to make these cookies. Here’s what you’ll need:
- Mixing bowls – One large and one medium. I use glass bowls because they don’t retain odors, but any bowl will work.
- Electric hand mixer or stand mixer – A hand mixer is fine. If you’re mixing by hand, expect a good arm workout when creaming the butter and sugar.
- Baking sheets – Two standard half-sheet pans. If you only have one, let it cool completely between batches, or the dough will spread too much.
- Parchment paper or silicone baking mats – Parchment paper is cheaper and disposable. Silicone mats are reusable and give slightly crispier bottoms.
- Piping bag or small zip-top bag – For the spider web design. A zip-top bag with a tiny corner snipped off works perfectly and costs nothing.
- Cooling rack – Metal is best. If you don’t have one, let cookies cool on the baking sheet for 5 minutes, then transfer to a plate.
- Measuring cups and spoons – Accurate measurements matter here, especially for the powdered sugar.
- Rubber spatula – For scraping down the bowl and folding in chocolate chips.
Budget-Friendly Tips: You don’t need a stand mixer. I made these for months with just a wooden spoon and some elbow grease. Also, skip the fancy piping tips—a simple zip-top bag does the job perfectly. If you don’t have a cooling rack, a clean wire oven rack works in a pinch.
Preparation Method
- Preheat your oven to 375°F (190°C). Line two baking sheets with parchment paper. While the oven heats, take your butter and eggs out of the fridge if you haven’t already. They need to be at room temperature for the creaming process to work properly.
- Cream the butter and sugars together. In a large mixing bowl, beat the softened butter with the granulated sugar and powdered sugar until the mixture is light, fluffy, and pale in color—about 3-4 minutes with an electric mixer on medium speed. Scrape down the sides of the bowl halfway through. The powdered sugar makes the mixture look almost like frosting at this stage. Don’t rush this step; proper creaming is what gives cookies their tender texture.
- Add the eggs and vanilla. Crack the eggs into a small bowl first (just in case you get shell pieces), then add them one at a time to the butter mixture, beating well after each addition. Add the vanilla extract and beat until everything is fully incorporated. The batter might look slightly curdled at this point—that’s normal, especially if your eggs were a little cold. Keep going, and it will come together.
- Mix the dry ingredients separately. In a medium bowl, whisk together the all-purpose flour, baking soda, and salt. This ensures the leavening agent is evenly distributed. If you skip this step, you might end up with one cookie that’s flat and another that’s a puffy dome.
- Combine wet and dry ingredients. Gradually add the flour mixture to the wet ingredients, mixing on low speed or folding with a rubber spatula. Stop as soon as the flour disappears—overmixing develops gluten and makes cookies tough. The dough will be soft and slightly sticky, but it should hold together when pressed.
- Fold in the chocolate chips. Reserve about ½ cup of chocolate chips for the spider web design. Gently fold the remaining 1 ½ cups into the dough using a rubber spatula. Make sure they’re evenly distributed, but don’t overwork the dough.
- Chill the dough (optional but recommended). Cover the bowl with plastic wrap and refrigerate for 30 minutes. This step isn’t strictly necessary, but it prevents the cookies from spreading too much and gives them a thicker, chewier texture. If you’re in a hurry, you can skip it—just know your cookies will be flatter and crisper.
- Scoop and shape the cookies. Use a 1.5-tablespoon cookie scoop or a regular spoon to portion the dough into balls about 1.5 inches in diameter. Place them on the prepared baking sheets about 2 inches apart. They will spread, so give them room. For perfectly round cookies, roll each ball gently between your palms before placing them on the sheet.
- Bake the cookies. Bake one sheet at a time in the preheated oven for 9-11 minutes. The cookies are done when the edges are lightly golden and the centers still look slightly underbaked and puffy. They will continue to set as they cool. If you bake them until the centers are fully set, they’ll be overbaked and dry.
- Cool the cookies. Let the cookies rest on the baking sheet for 5 minutes. This allows them to firm up enough to transfer without breaking. Then move them to a wire cooling rack to cool completely before adding the spider web design. If you add the chocolate while they’re still warm, it will melt and slide off.
- Create the spider web design. While the cookies cool, melt the reserved ½ cup of chocolate chips (or melting wafers) in a microwave-safe bowl. Heat in 20-second intervals, stirring between each, until smooth. Let it cool slightly—about 2 minutes—so it’s still liquid but not hot. Transfer the melted chocolate to a small piping bag or a zip-top bag with a tiny corner snipped off.
- Pipe the webs. Starting from the center of each cookie, pipe a small dot of chocolate. Then pipe 3-4 concentric circles around it, spacing them about ¼ inch apart. Working quickly, use a toothpick or a skewer to drag lines from the center outward through all the circles, creating the web effect. Wipe the toothpick clean between cookies for the cleanest lines. Let the chocolate set completely—about 20 minutes at room temperature, or 10 minutes in the refrigerator.
Troubleshooting Tip: If your chocolate is too thick to pipe, add a teaspoon of coconut oil or vegetable shortening and stir until smooth. If it’s too thin, let it cool for another minute or two. And if your first web looks messy? Just eat that cookie and try again. Nobody’s judging.
Cooking Tips & Techniques
After making these cookies more times than I care to count, I’ve picked up a few tricks that make the process smoother and the results more consistent. Here’s what I wish someone had told me the first time.
Don’t overbake. This is the number one mistake I see people make with these cookies. Because the dough has powdered sugar, they brown differently than regular chocolate chip cookies. Trust the visual cues—golden edges, puffy centers—rather than the timer. Every oven runs differently, so start checking at 8 minutes. The cookies will look underdone when you pull them out, and that’s exactly what you want.
Chill the dough if you can. I know it’s tempting to skip this step, especially when you’re craving cookies right now. But that 30-minute chill makes a noticeable difference in texture. The cookies spread less, the centers stay softer, and the flavor has time to develop. I once made two batches back to back—one chilled, one not—and the chilled batch was unanimously preferred by my taste testers.
Let the chocolate cool slightly before piping. The first time I tried the spider web design, I used chocolate straight from the microwave. It was too hot, and it spread into a blob instead of a clean web. Letting it sit for 2-3 minutes after melting makes it thick enough to hold its shape but still fluid enough to pipe smoothly. If you’re using melting wafers, follow the package instructions exactly—they’re more forgiving than regular chocolate chips.
Practice the web technique on parchment paper first. Before you pipe on actual cookies, do a few practice webs on a piece of parchment. It takes maybe three tries to get the rhythm down. The key is to drag the toothpick from the center outward in one smooth motion, not back and forth. Once you feel confident, move to the cookies.
Work in batches. Don’t try to pipe all the webs at once. The chocolate will start to set, and the later webs will be messier. Pipe 4-5 cookies, let the chocolate set, then move on to the next batch. This also gives you a chance to adjust your technique if needed.
My biggest failure: I once tried to speed up the process by piping webs on warm cookies. The chocolate melted into a puddle, and I ended up with cookies that looked like they’d been through a chocolate rainstorm. They still tasted great, but they were not Instagram-worthy. Learn from my impatience.
Variations & Adaptations
One of the best things about these Cozy Spider Web Chocolate Chip Cookies is how adaptable they are. Here are some variations I’ve tried and loved.
Gluten-Free Version: Substitute the all-purpose flour with a 1:1 gluten-free baking flour. I’ve tested this with King Arthur’s Measure for Measure, and the texture is remarkably close to the original. Add an extra tablespoon of milk to the dough if it seems too dry. The spider web design works exactly the same way.
Vegan Version: Use vegan butter sticks (not tub margarine) and a flax egg (1 tablespoon ground flaxseed mixed with 3 tablespoons water, let sit for 5 minutes). The cookies will be slightly less tender, but the flavor is still fantastic. Use dairy-free chocolate chips for both the dough and the web design. I’ve had good results with Enjoy Life brand.
White Chocolate Spider Webs: For a more dramatic look, use white chocolate or candy melts for the web design instead of dark chocolate. The contrast against the golden cookie is stunning. Just be careful not to overheat white chocolate—it seizes easily. Melt it in 15-second intervals and stir frequently.
Spooky Add-Ins: Add ½ cup of mini candy eyeballs or orange sprinkles to the dough along with the chocolate chips. The cookies look even more festive, and kids absolutely love finding the eyes. You can also add a pinch of cinnamon or pumpkin pie spice to the dough for a fall twist.
Different Web Colors: Use colored candy melts to match your party theme. Orange and purple webs look amazing for Halloween. Green webs give a Frankenstein vibe. Just make sure you’re using candy melts designed for melting and piping—regular chocolate chips won’t color well with food coloring.
My personal favorite variation: I once added a teaspoon of espresso powder to the dough along with the vanilla. It doesn’t make the cookies taste like coffee—it just deepens the chocolate flavor and adds a subtle richness. My husband still asks for that version every time I bake.
Serving & Storage Suggestions
These cookies are best served at room temperature, which lets the chocolate web stay firm while the cookie itself stays soft. If you’ve refrigerated them, let them sit out for about 15 minutes before serving.
Presentation Ideas: Arrange the cookies on a platter lined with orange or black napkins for a Halloween-themed display. You can also stack them in a clear jar tied with a ribbon for a festive gift. For parties, place them next to a bowl of popcorn balls or caramel apples for a complete treat table.
Complementary Dishes: These cookies pair beautifully with a cold glass of milk—classic, I know, but it works. For an adult twist, serve them with a warm mug of spiced apple cider or a pumpkin spice latte. The sweetness of the cookie balances the tartness of the cider perfectly.
Storage Instructions: Store the cookies in an airtight container at room temperature for up to 5 days. Layer them between sheets of parchment paper to prevent the chocolate webs from sticking together. If you live in a humid climate, add a piece of bread to the container—it absorbs excess moisture and keeps the cookies soft.
Freezer Instructions: You can freeze the baked cookies (without the spider web design) for up to 3 months. Wrap them individually in plastic wrap, then place them in a freezer-safe bag. When you’re ready to serve, thaw them at room temperature, then add the spider web design. The webs won’t hold up well through freezing and thawing, so it’s best to add them fresh.
Reheating Tips: If you want that fresh-from-the-oven experience, microwave a single cookie for 10-15 seconds. The chocolate web will soften slightly, but it will still look beautiful. For a whole batch, warm them in a 300°F oven for 3-4 minutes, then let them cool for 2 minutes before serving.
Flavor Development: These cookies actually taste better the day after baking. The flavors meld together, and the texture becomes even more tender. If you can resist eating them all on day one, you’re in for a treat on day two.
Nutritional Information & Benefits
While these are definitely a treat, they’re made with simple, recognizable ingredients that you can feel good about. Here’s the estimated nutritional breakdown for one cookie (based on 24 cookies per batch):
| Nutrient | Amount Per Cookie |
|---|---|
| Calories | 185 |
| Total Fat | 10g |
| Saturated Fat | 6g |
| Cholesterol | 28mg |
| Sodium | 95mg |
| Total Carbohydrates | 24g |
| Dietary Fiber | 1g |
| Sugars | 15g |
| Protein | 2g |
Health Benefits: Dark chocolate contains antioxidants called flavonoids, which can support heart health when consumed in moderation. The butter provides vitamin A, and the eggs offer high-quality protein. While these cookies aren’t health food, they’re made from whole ingredients without artificial preservatives or additives. That’s something I feel good about when I share them with my family.
Dietary Considerations: This recipe contains gluten, dairy, and eggs. For gluten-free or vegan options, see the variations section above. The cookies are nut-free as written, making them safe for school parties where nut allergies are a concern. Always check your specific ingredient labels if you’re serving someone with severe allergies.
Personal Wellness Perspective: I believe in balance. These cookies are a special treat for a special season, and there’s nothing wrong with enjoying them mindfully. Pair one with a piece of fruit or a handful of nuts for a more balanced snack, or simply savor it as is. Life’s too short to skip the cookies.
Conclusion
These Cozy Spider Web Chocolate Chip Cookies started as a mistake, but they’ve become one of my most-requested recipes. They’re proof that sometimes the best things in life come from things going wrong. The tender texture from that accidental powdered sugar, the dramatic spider web design that looks way harder than it is, and the pure joy of biting into a cookie that tastes like Halloween—it all adds up to something special.
I hope you give these cookies a try, whether you’re making them for a party, a cozy night in, or just because you want to surprise your family with something fun. Don’t be afraid to make them your own—swap the chocolate chips for white chocolate, add some sprinkles, or experiment with different web colors. The beauty of this recipe is that it’s forgiving. It was born from a mistake, after all.
I’d love to hear how yours turn out. Drop a comment below and let me know if your spider webs were perfect on the first try or if you had to eat a few “practice” cookies along the way. Share your photos, your variations, and your own happy accidents. And if you’re looking for more cozy fall treats, don’t miss my pumpkin spice blondies or these cinnamon sugar pumpkin muffins for even more seasonal baking inspiration. Happy baking, and remember—sometimes the best recipes are the ones you never planned to make.
Frequently Asked Questions
Can I make the dough ahead of time?
Absolutely. You can prepare the dough up to 48 hours in advance and keep it covered in the refrigerator. Let it sit at room temperature for about 15 minutes before scooping and baking—it will be too firm to work with straight from the fridge. The flavor actually improves as the dough rests.
Why did my spider web design turn into a blob?
This usually happens for one of two reasons: the chocolate was too hot when you piped it, or the cookies were still warm. Make sure your cookies are completely cool before adding the web design, and let the melted chocolate cool for 2-3 minutes after microwaving. If the chocolate is still too thin, stir in a teaspoon of melted coconut oil to thicken it.
Can I use a different type of chocolate for the web?
Yes! White chocolate, milk chocolate, or colored candy melts all work beautifully. Just keep in mind that different chocolates have different melting points. White chocolate is more delicate and can seize if overheated, so melt it in 15-second intervals and stir gently. Candy melts are the most forgiving option for beginners.
How do I prevent the cookies from spreading too much?
Chill the dough for at least 30 minutes before baking. This solidifies the butter and prevents the cookies from spreading into flat discs. Also, make sure your baking sheets are completely cool before placing new dough on them. A hot sheet will cause the butter to melt before the cookies have a chance to set.
Can I freeze these cookies with the spider web design?
I don’t recommend it. The chocolate web can crack or become discolored during freezing and thawing. Instead, freeze the baked cookies without the web design, then add the spider web after they’ve thawed. The process takes just a few minutes, and the results are much more reliable.
Pin This Recipe!
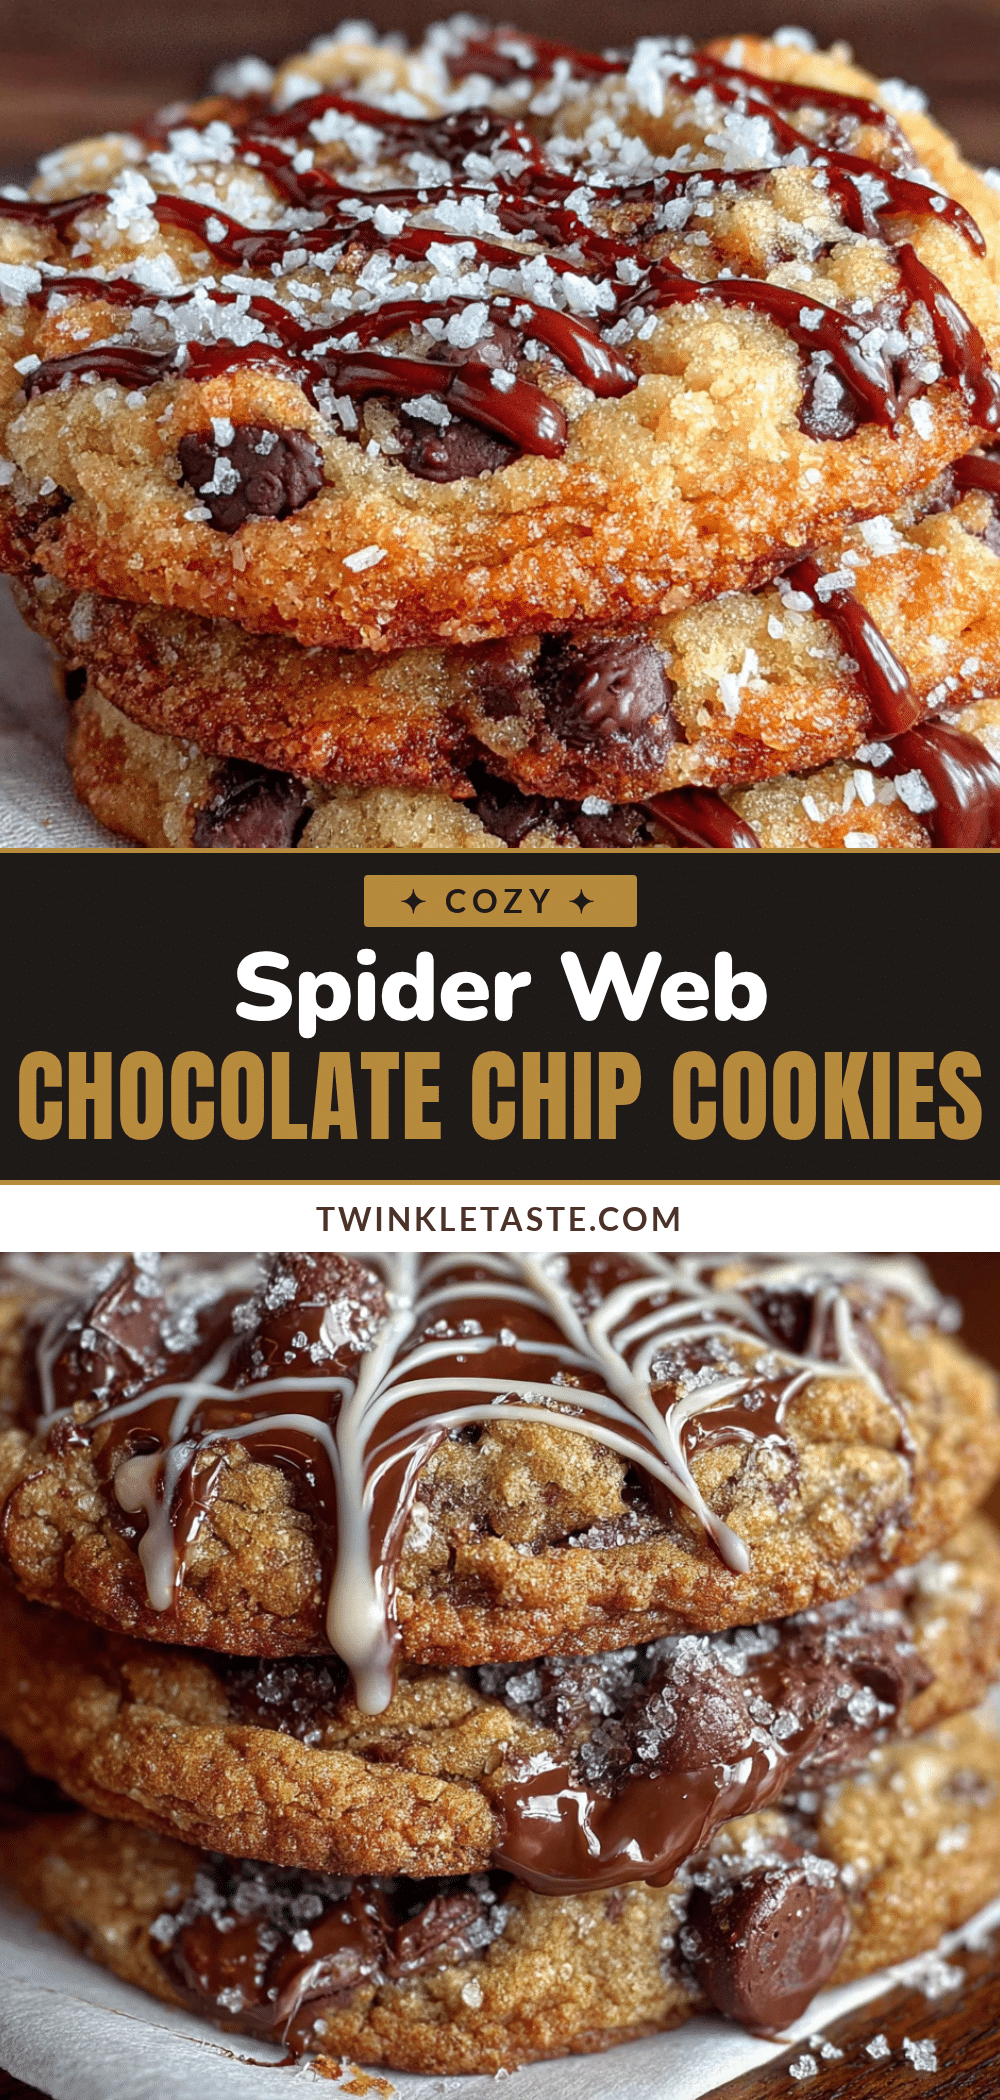
Cozy Spider Web Chocolate Chip Cookies: Easy Halloween Treat

These Cozy Spider Web Chocolate Chip Cookies are a happy accident turned into a beloved Halloween tradition. With a tender, melt-in-your-mouth texture from a powdered sugar mistake and a deceptively simple spider web design, they’re the perfect spooky treat that looks impressive but is easy to make.
- Prep Time: 15 minutes
- Cook Time: 10 minutes
- Total Time: 30 minutes (plus optional 30 minutes chilling time)
- Yield: 24 cookies 1x
- Category: Dessert
- Cuisine: American
Ingredients
- 1 cup (2 sticks) unsalted butter, softened
- ¾ cup granulated sugar
- ½ cup powdered sugar
- 2 large eggs, room temperature
- 2 teaspoons vanilla extract
- 2 ¼ cups all-purpose flour
- 1 teaspoon baking soda
- ½ teaspoon fine sea salt
- 2 cups semi-sweet chocolate chips (reserve ½ cup for spider web design)
- Optional: ¼ cup milk or dark chocolate melting wafers
Instructions
- Preheat your oven to 375°F (190°C). Line two baking sheets with parchment paper.
- In a large mixing bowl, beat the softened butter with the granulated sugar and powdered sugar until light, fluffy, and pale in color, about 3-4 minutes with an electric mixer on medium speed. Scrape down the sides of the bowl halfway through.
- Add the eggs one at a time, beating well after each addition. Add the vanilla extract and beat until fully incorporated.
- In a medium bowl, whisk together the all-purpose flour, baking soda, and salt.
- Gradually add the flour mixture to the wet ingredients, mixing on low speed or folding with a rubber spatula until just combined. Do not overmix.
- Reserve ½ cup of chocolate chips for the spider web design. Gently fold the remaining 1 ½ cups into the dough using a rubber spatula.
- Cover the bowl with plastic wrap and refrigerate for 30 minutes (optional but recommended for thicker, chewier cookies).
- Scoop the dough into balls about 1.5 inches in diameter and place them on the prepared baking sheets about 2 inches apart.
- Bake one sheet at a time for 9-11 minutes, until the edges are lightly golden and the centers still look slightly underbaked and puffy.
- Let the cookies rest on the baking sheet for 5 minutes, then transfer to a wire cooling rack to cool completely.
- While the cookies cool, melt the reserved ½ cup of chocolate chips (or melting wafers) in a microwave-safe bowl in 20-second intervals, stirring between each, until smooth. Let cool for about 2 minutes.
- Transfer the melted chocolate to a small piping bag or a zip-top bag with a tiny corner snipped off.
- Starting from the center of each cookie, pipe a small dot of chocolate. Pipe 3-4 concentric circles around it, spacing them about ¼ inch apart. Working quickly, use a toothpick or skewer to drag lines from the center outward through all the circles, creating the web effect. Wipe the toothpick clean between cookies.
- Let the chocolate set completely, about 20 minutes at room temperature or 10 minutes in the refrigerator.
Notes
For best results, chill the dough for 30 minutes to prevent spreading. Let cookies cool completely before adding the spider web design. If chocolate is too thick to pipe, add a teaspoon of coconut oil or vegetable shortening. Practice the web technique on parchment paper first. Cookies taste even better the day after baking.
Nutrition
- Serving Size: 1 cookie
- Calories: 185
- Sugar: 15
- Sodium: 95
- Fat: 10
- Saturated Fat: 6
- Carbohydrates: 24
- Fiber: 1
- Protein: 2
Keywords: Halloween cookies, spider web cookies, chocolate chip cookies, easy Halloween treat, spooky cookies, fall baking, powdered sugar cookies


