This was supposed to be a batch of oatmeal raisin cookies. I had the oats measured, the raisins plumped in warm water, and my grandmother’s old mixing bowl—the one with a faint chip on the rim—waiting on the counter. But somewhere between answering a text and realizing the butter was already too soft, I grabbed the bag of chocolate chips instead of the raisins. I mean, they’re both in the baking aisle, right? My brain just… short-circuited. And the oats? I completely forgot to add them. I only noticed when I looked at the dough and thought, “Huh, this looks awfully smooth.”
Honestly, I was ready to scrap the whole thing. The oven was preheated, my hands were covered in dough, and I was already annoyed at myself for not paying attention. But the idea of wasting butter and sugar—two things I hold very sacred—felt like a small tragedy. So I scooped the dough onto the tray anyway, figuring I’d have a few mediocre, oddly-textured cookies to snack on while I started over. Maybe you’ve been there, staring at a baking fail that looks nothing like the picture in your head.
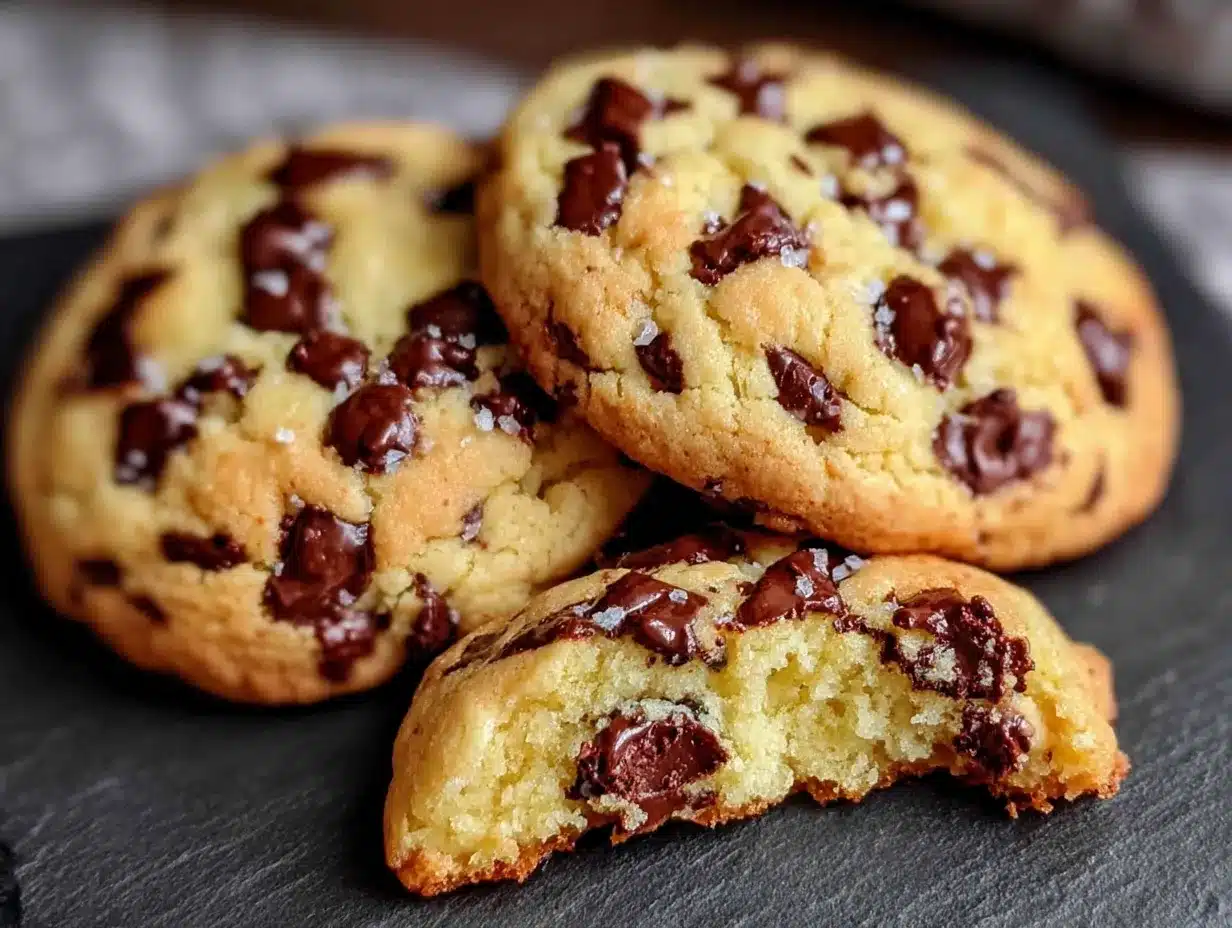
What came out of the oven was not a mistake. It was a revelation. The cookies were golden at the edges, soft and almost gooey in the center, with pools of melted chocolate that tasted like pure comfort. They weren’t the chewy, hearty cookies I planned. They were something better—delicate, buttery, and exactly the kind of thing you want when the world feels a little too loud. That’s how this recipe was born: from a distracted moment and a refusal to give up. And now, I can’t imagine making cookies any other way.
Why You’ll Love This Recipe
Let me tell you why these small batch cookies have become my go-to. It’s not just because they taste incredible—though they really, really do. It’s because they solve a very real problem: the craving for a warm, homemade cookie without the commitment of a full batch. You know that feeling when you want something sweet, but you don’t want to be stuck with two dozen cookies for the rest of the week? This is the answer.
- Quick & Easy: From start to finish, you’re looking at about 20 minutes. No chilling the dough, no complicated steps. Just mix, scoop, and bake.
- Simple Ingredients: You probably have everything in your pantry right now. Butter, sugar, an egg, flour, and chocolate chips. That’s it. No trips to a specialty store.
- Perfect for Cozy Nights: This is the recipe for a rainy Tuesday, a slow Sunday afternoon, or a day when you just need a little pick-me-up. It’s comfort food in its purest form.
- Crowd-Pleaser: I’ve made these for friends, for neighbors, and for myself on a bad day. They disappear every single time. Kids and adults alike go back for seconds.
- Unbelievably Delicious: The texture is what gets me every time. Crispy edges, a soft and tender center, and chocolate that melts into every bite. It’s next-level comfort.
What makes this recipe different from the rest? It’s the technique. By using melted butter and a slightly higher ratio of brown sugar to white sugar, we get a cookie that stays soft for days. It’s not just another chocolate chip cookie recipe—it’s the one you’ll keep coming back to. And honestly, it’s the kind of cookie that makes you close your eyes after the first bite. It’s soul-soothing, and that’s exactly what we need sometimes.
What Ingredients You Will Need
This recipe uses simple, wholesome ingredients to deliver that perfect balance of flavor and texture. No fuss, no frills—just the good stuff. Here’s what you’ll need to pull together these cozy small batch chocolate chip cookies.
- Unsalted butter, melted (4 tablespoons, or 57 grams): Melting the butter is key here. It gives the cookies a chewier texture and a richer flavor. I always use unsalted so I can control the salt level. If you only have salted butter, just skip the added salt in the recipe.
- Light brown sugar, packed (1/4 cup, or 50 grams): Brown sugar brings moisture and a deep, caramel-like sweetness. It’s what makes the centers soft and chewy. Trust me, don’t skip it.
- Granulated sugar (2 tablespoons, or 25 grams): A little white sugar helps the edges crisp up perfectly. It balances the brown sugar and keeps the cookie from being too dense.
- One large egg yolk (save the white for breakfast): Using just the yolk adds richness and tenderness without making the dough too wet. It’s a trick I learned from a pastry chef friend, and it works like a charm.
- Vanilla extract (1/2 teaspoon): Pure vanilla extract is non-negotiable for me. It rounds out the flavors and makes the whole kitchen smell incredible. If you have vanilla bean paste, even better.
- All-purpose flour (1/2 cup, or 60 grams): Standard all-purpose flour gives the cookies structure without making them tough. Spoon and level your flour—don’t scoop directly from the bag, or you’ll end up with dry cookies.
- Baking soda (1/4 teaspoon): This helps the cookies spread just a little and keeps them from being too dense. Make sure it’s fresh!
- Salt (1/4 teaspoon): Salt isn’t just for flavor—it balances the sweetness and makes the chocolate taste more chocolatey. I use fine sea salt.
- Semi-sweet chocolate chips (1/3 cup, or 60 grams): I prefer semi-sweet because it’s not too sugary and it melts beautifully. You can use dark chocolate or milk chocolate if that’s your thing. For a fancier touch, chop up a chocolate bar instead—the irregular pieces melt into puddles.
Ingredient tip: I always recommend using a good-quality vanilla extract—it makes a difference. And for the chocolate, Ghirardelli or Guittard are my go-to brands. They melt smoothly and taste rich without being bitter.
Equipment Needed
You don’t need a fancy kitchen to make these cookies. In fact, you probably already have everything you need. Here’s the short list:
- Mixing bowls: One medium bowl for the wet ingredients and another small one for the dry. I use a set of glass nesting bowls that I’ve had for years—they’re sturdy and easy to clean.
- Whisk and spatula: A whisk helps combine the sugars and butter smoothly. A rubber spatula is perfect for folding in the chocolate chips without overmixing.
- Baking sheet: A standard half-sheet pan works great. If you only have a dark non-stick pan, keep an eye on the cookies—they can brown faster.
- Parchment paper or silicone baking mat: This prevents sticking and makes cleanup a breeze. I prefer parchment paper because it’s disposable and gives the cookies a slightly crisper bottom.
- Cookie scoop or tablespoon: A small cookie scoop (about 1.5 tablespoons) ensures even-sized cookies that bake uniformly. If you don’t have one, just use a regular spoon and try to make them roughly the same size.
- Cooling rack: Letting the cookies cool on a rack stops them from over-baking on the hot pan. If you don’t have one, slide the parchment paper onto the counter after a few minutes.
That’s it! No stand mixer, no fancy gadgets. Just the basics and a little bit of love.
Preparation Method
Alright, let’s get to the good part. Follow these steps, and you’ll have warm, gooey cookies in no time. I’ve included all the little details I wish someone had told me when I first started baking.
- Preheat your oven to 350°F (175°C). Line a baking sheet with parchment paper. Do this first so the oven is ready when your dough is. A hot oven is crucial for that perfect golden edge.
- Melt the butter. In a medium microwave-safe bowl, melt 4 tablespoons of unsalted butter. I do it in 20-second bursts, stirring in between, until it’s just melted. You don’t want it hot—just liquid. Let it cool for a minute so it doesn’t scramble the egg yolk later.
- Mix the sugars and butter. Add the 1/4 cup packed brown sugar and 2 tablespoons granulated sugar to the melted butter. Whisk vigorously for about 30 seconds. The mixture should look like a thick paste and smell amazing. This step helps dissolve the sugar, which makes the cookies smoother.
- Add the egg yolk and vanilla. Drop in the egg yolk and 1/2 teaspoon of vanilla extract. Whisk until everything is well combined and the mixture looks glossy. It might look a little separated at first, but keep whisking—it will come together.
- Combine the dry ingredients. In a separate small bowl, whisk together 1/2 cup flour, 1/4 teaspoon baking soda, and 1/4 teaspoon salt. Make sure there are no lumps. This is your insurance policy against biting into a pocket of baking soda—trust me, it’s not pleasant.
- Fold the dry ingredients into the wet. Pour the flour mixture into the butter-sugar mixture. Use your rubber spatula to fold gently. Stir just until you no longer see streaks of flour. Overmixing will make the cookies tough, so stop as soon as it comes together.
- Add the chocolate chips. Fold in the 1/3 cup of chocolate chips. Reserve a few chips to press onto the tops of the dough balls before baking—it makes them look bakery-style. The dough will be soft and slightly sticky. That’s exactly what you want.
- Scoop the dough. Use your cookie scoop or a tablespoon to portion the dough into 5 to 6 evenly sized balls. Place them on the prepared baking sheet, spacing them about 2 inches apart. They will spread, but not too much.
- Bake for 9 to 11 minutes. The cookies are done when the edges are golden brown and the centers look slightly underdone and puffy. They will continue to set on the hot pan, so don’t wait for the centers to look fully baked. I usually pull mine at the 10-minute mark.
- Cool on the pan for 5 minutes. This is the hardest part—the waiting. Let the cookies rest on the baking sheet for 5 minutes. This allows them to firm up without drying out. Then transfer them to a cooling rack.
Sensory cue: Your kitchen should smell like butter and vanilla and happiness. The edges will be a deep golden brown, and the centers will look soft and slightly puffed. If you tap the top gently, it should feel set but not hard.
Cooking Tips & Techniques
I’ve made these cookies more times than I can count, and I’ve learned a few things along the way. Here are my best tips to make sure yours turn out perfect every time.
- Don’t skip the melted butter. I know it’s tempting to use room-temperature butter because that’s what most recipes call for. But melted butter is the secret to a chewier, denser cookie. It coats the flour proteins differently, which gives you that soft, almost fudge-like center.
- Measure your flour correctly. This is the most common mistake I see. Scooping flour directly from the bag packs it down, and you can end up with way too much. Use a spoon to fluff the flour, then spoon it into your measuring cup and level it off with a knife. It takes two extra seconds and makes a huge difference.
- Let the dough rest (if you have time). I know I said no chilling required, and that’s true—you can bake these right away. But if you have 30 minutes to spare, let the scooped dough rest in the fridge. It allows the flavors to meld and the sugar to absorb more moisture, resulting in an even better texture.
- Use a light-colored baking sheet. Dark pans absorb more heat and can cause the bottoms of your cookies to burn before the centers are done. If you only have a dark pan, reduce the oven temperature by 25°F and keep a close eye on them.
- Press extra chips on top. Before baking, press a few chocolate chips into the tops of the dough balls. This ensures every cookie looks loaded with chocolate, even if some chips get hidden inside during baking. It’s a small step that makes them look professional.
I once forgot the baking soda entirely. The cookies came out flat and sad, like little puddles of sadness. So yes, that little 1/4 teaspoon matters. Learn from my mistakes!
Variations & Adaptations
One of the best things about this recipe is how easy it is to adapt. Here are a few ways I’ve changed it up over the years, depending on my mood or what I have in the pantry.
- Gluten-Free Version: Swap the all-purpose flour with a 1:1 gluten-free baking flour blend. I’ve used King Arthur’s Measure for Measure blend with great results. The cookies will be slightly more delicate, but just as delicious.
- Double Chocolate: Replace 1 tablespoon of flour with unsweetened cocoa powder. Use white chocolate chips or milk chocolate chips instead of semi-sweet. It’s like a mini brownie-cookie hybrid, and it’s incredible.
- Add Some Crunch: Fold in 1/4 cup of toasted chopped walnuts or pecans along with the chocolate chips. The nuttiness pairs beautifully with the brown sugar and adds a lovely texture contrast.
- Vegan Option: Use melted coconut oil or vegan butter instead of dairy butter. Replace the egg yolk with 1 tablespoon of aquafaba (the liquid from a can of chickpeas) or a flax egg (1 tablespoon ground flaxseed mixed with 3 tablespoons water, let sit for 5 minutes). The texture will be slightly different, but still very good.
- Flavor Twist: Add 1/4 teaspoon of cinnamon or a pinch of espresso powder to the dry ingredients. The warmth of cinnamon makes them taste even cozier, and espresso powder enhances the chocolate flavor without making them taste like coffee.
My personal favorite variation? The double chocolate version with a sprinkle of flaky sea salt right when they come out of the oven. It’s a little indulgent, but honestly, sometimes you just need that.
Serving & Storage Suggestions
These cookies are best enjoyed warm, straight from the oven, with a tall glass of cold milk. But let’s be real—they’re pretty amazing at room temperature too. Here’s how to serve and store them so you can enjoy them for days.
- Serving Temperature: Warm is ideal. If you’ve stored them, pop a cookie in the microwave for 10 to 15 seconds. It softens the chocolate and makes the center gooey again. You can also warm them in a 300°F oven for 3 to 4 minutes.
- Presentation: Stack them on a small plate or arrange them in a jar for a cozy, rustic look. A dusting of powdered sugar or a drizzle of melted chocolate makes them feel extra special for guests.
- Storage: Keep the cookies in an airtight container at room temperature. They will stay soft and chewy for up to 4 days. Layer them with parchment paper if you’re stacking to prevent sticking.
- Freezing: You can freeze the baked cookies for up to 3 months. Wrap them individually in plastic wrap, then place them in a freezer-safe bag. Thaw at room temperature or warm gently in the oven. You can also freeze the unbaked dough balls—just scoop them, freeze on a tray, then transfer to a bag. Bake from frozen, adding 1 to 2 minutes to the baking time.
- Flavor Development: Honestly, these cookies taste even better on day two. The flavors have time to meld, and the texture becomes perfectly soft. If you can resist eating them all on day one, you’re in for a treat.
Nutritional Information & Benefits
Let’s be honest—these cookies are a treat, not a health food. But that doesn’t mean they can’t fit into a balanced lifestyle. Here’s a rough breakdown per cookie (based on 6 cookies):
- Calories: Approximately 220-250 per cookie
- Fat: 13g (mostly from butter and chocolate)
- Carbohydrates: 28g
- Sugar: 18g
- Protein: 3g
While these aren’t low-calorie, they are made with real, recognizable ingredients. There’s no weird preservatives or artificial flavors. The butter provides a small amount of vitamin A, and the dark chocolate (if you use semi-sweet or dark) contains antioxidants. Plus, there’s something to be said for the mental health benefits of a warm cookie on a tough day. Sometimes, that’s exactly what the doctor ordered.
Dietary Note: This recipe contains gluten, dairy, and eggs. For gluten-free and vegan options, see the variations section above.
Frequently Asked Questions
Can I double this recipe?
Absolutely! This recipe scales perfectly. Just double all the ingredients and bake in batches. You’ll have enough for a crowd or for stashing some in the freezer for later.
Why are my cookies flat?
Flat cookies usually mean the butter was too warm or the flour was under-measured. Make sure your melted butter is cooled slightly before mixing, and spoon and level your flour. Also, check that your baking soda is fresh—old baking soda loses its power.
Can I use margarine instead of butter?
You can, but the texture will be different. Butter gives the cookies a richer flavor and better structure. Margarine has a higher water content, which can make the cookies spread more and turn out less tender. I recommend sticking with butter.
How do I make the cookies softer?
For softer cookies, reduce the baking time by 1 to 2 minutes. Pull them out when the centers still look slightly underdone. You can also add an extra tablespoon of brown sugar for more moisture.
Can I use a different type of chocolate?
Yes! Milk chocolate will make them sweeter, dark chocolate will make them richer, and white chocolate will add a creamy sweetness. You can even use a mix of different chips or chop up a chocolate bar for those beautiful chocolate puddles.
Conclusion
This recipe started as a happy accident, but it’s become one of my most trusted go-tos. It’s proof that sometimes the best things happen when you stop trying so hard and just go with the flow. These cookies are warm, comforting, and exactly what you need when you want something sweet without the fuss of a full batch. I hope you make them on a quiet evening, share them with someone you love, or keep them all to yourself—no judgment here.
I’d love to hear how yours turn out! Leave a comment below and let me know if you tried any of the variations or came up with your own twist. Don’t forget to share this recipe with a friend who needs a little cozy treat in their life. Until next time, happy baking!
Pin This Recipe!
Cozy Small Batch Chocolate Chip Cookies: The Best Easy Recipe

These small batch chocolate chip cookies are soft, buttery, and loaded with melted chocolate. Made with simple ingredients and no chilling required, they’re the perfect treat for a cozy night in.
- Prep Time: 10 minutes
- Cook Time: 10 minutes
- Total Time: 20 minutes
- Yield: 5-6 cookies 1x
- Category: Dessert
- Cuisine: American
Ingredients
- 4 tablespoons (57 g) unsalted butter, melted
- 1/4 cup (50 g) light brown sugar, packed
- 2 tablespoons (25 g) granulated sugar
- 1 large egg yolk
- 1/2 teaspoon vanilla extract
- 1/2 cup (60 g) all-purpose flour
- 1/4 teaspoon baking soda
- 1/4 teaspoon salt
- 1/3 cup (60 g) semi-sweet chocolate chips
Instructions
- Preheat your oven to 350°F (175°C). Line a baking sheet with parchment paper.
- Melt the butter in a medium microwave-safe bowl in 20-second bursts, stirring in between, until just melted. Let cool for a minute.
- Add the brown sugar and granulated sugar to the melted butter. Whisk vigorously for about 30 seconds until it forms a thick paste.
- Add the egg yolk and vanilla extract. Whisk until well combined and glossy.
- In a separate small bowl, whisk together the flour, baking soda, and salt.
- Pour the flour mixture into the butter-sugar mixture. Fold gently with a rubber spatula until just combined. Do not overmix.
- Fold in the chocolate chips. Reserve a few chips to press onto the tops of the dough balls before baking.
- Scoop the dough into 5 to 6 evenly sized balls (about 1.5 tablespoons each). Place them on the prepared baking sheet, spacing them about 2 inches apart.
- Bake for 9 to 11 minutes, until the edges are golden brown and the centers look slightly underdone and puffy.
- Cool on the baking sheet for 5 minutes, then transfer to a cooling rack.
Notes
For best results, use a light-colored baking sheet. If you have time, let the scooped dough rest in the fridge for 30 minutes for even better texture. Press extra chocolate chips on top before baking for a bakery-style look.
Nutrition
- Serving Size: 1 cookie
- Calories: 235
- Sugar: 18
- Sodium: 135
- Fat: 13
- Saturated Fat: 8
- Carbohydrates: 28
- Fiber: 1
- Protein: 3
Keywords: small batch chocolate chip cookies, easy chocolate chip cookies, no chill cookies, soft chocolate chip cookies, quick cookies


