“You can’t make a crisp for two people. It just doesn’t work.” That’s what my friend Jenna said to me last September, standing in my kitchen with a bag of Honeycrisp apples she’d picked up from the orchard that morning. She was holding a tiny baking dish she’d brought over, looking at it like it might be a problem.
I grabbed the apples out of her hand. “Watch me.”
Honestly, I get where she was coming from. Most apple crisp recipes are designed to feed a crowd—or at least leave you with leftovers for a week. And leftovers are great, don’t get me wrong. But sometimes you want something that feels special just for the two of you. A little dessert that doesn’t require a party or a holiday. Just a Tuesday night, a couple of spoons, and maybe some vanilla ice cream melting into warm caramel.
This cozy salted caramel apple crisp for two came together after a few test runs that were, let’s be real, not all winners. The first one was too sweet. The second one had a topping that sank right into the apples like it was trying to hide. But the third version? That’s the one I kept making. The one Jenna now asks for by name.
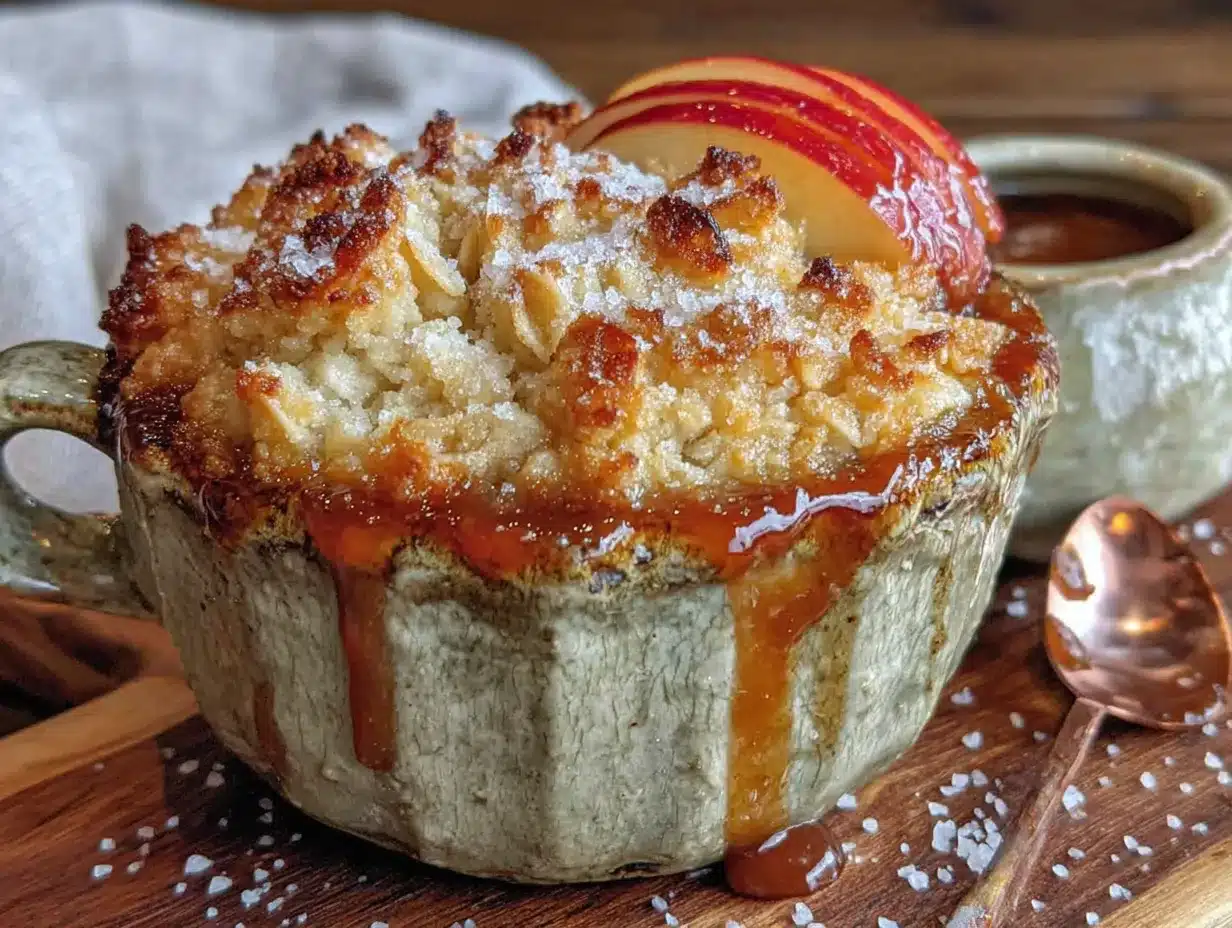
It’s got tender apples tossed with a homemade salted caramel sauce that’s easier than you think, topped with a buttery oat crumble that stays crisp on top and soft underneath. It bakes in a small dish—perfect for two people who want dessert without a week’s worth of leftovers staring at them from the fridge.
There’s something about pulling a hot little dish out of the oven, the caramel still bubbling around the edges, that just feels right. Like you’re taking care of someone. Or yourself. Or both.
Why You’ll Love This Recipe
This isn’t just another apple crisp recipe scaled down. I tested this thing six times before I got the proportions right. The topping-to-apple ratio had to be perfect—enough crunch on top but not so much that it overpowers the fruit. And the caramel? It had to be salty enough to cut through the sweetness without making you pucker.
- Perfectly Portioned: No leftovers. No waste. Just two generous servings that feel like a treat.
- Simple Ingredients: You probably have most of this in your pantry right now. Butter, flour, oats, brown sugar, apples. The caramel uses cream and salt, but that’s it.
- 30 Minutes to Dessert: From start to finish, you’re looking at about 30 minutes. That’s faster than driving to the store for a pint of something.
- No Special Equipment: One baking dish, one saucepan, one bowl. That’s all you need.
- Customizable: Swap the apples, change the nuts, make it gluten-free. It’s forgiving.
What makes this different from other small-batch crisps is the caramel. Most recipes just toss apples with sugar and cinnamon and hope for the best. But taking five extra minutes to make a quick salted caramel sauce changes everything. It coats the apples in something rich and buttery, and when it bakes, it thickens into this incredible syrup that soaks into the crumble topping just enough to make it magical.
This is the kind of dessert that makes you close your eyes after the first bite. It’s comfort food at its finest—warm, sweet, salty, and made for sharing with someone you like.
What Ingredients You Will Need
This recipe uses simple ingredients you can find at any grocery store. No hunting down specialty items or spending a fortune. Here’s what you’ll need for the filling and the topping.
For the Salted Caramel Apple Filling
- 2 medium apples (about 300g total) – I recommend Honeycrisp or Granny Smith. Honeycrisp gives you sweetness and a firm texture that holds up during baking. Granny Smith adds a nice tartness that balances the caramel. You can also use Fuji or Braeburn if that’s what you have.
- 2 tablespoons unsalted butter (28g) – For the caramel sauce. Use good quality butter here since it’s a main flavor.
- 1/4 cup packed light brown sugar (50g) – Light brown sugar gives the caramel a milder flavor. Dark brown sugar works too but will give a deeper, more molasses-like taste.
- 2 tablespoons heavy cream (30ml) – This makes the caramel smooth and rich. You can substitute half-and-half in a pinch, but the sauce won’t be as thick.
- 1/2 teaspoon vanilla extract – Adds warmth and depth. Pure vanilla is best, but imitation works fine.
- 1/4 teaspoon flaky sea salt (plus more for finishing) – I use Maldon sea salt flakes. They dissolve partially into the caramel and leave little bursts of saltiness.
- 1/2 teaspoon ground cinnamon – For that classic apple crisp warmth.
- 1/8 teaspoon ground nutmeg (optional but recommended) – Adds a subtle spiciness that pairs beautifully with caramel.
- 1 teaspoon lemon juice – Keeps the apples from browning and brightens the flavor.
- 1 teaspoon cornstarch – Helps thicken the juices as the crisp bakes so you don’t end up with watery filling.
For the Oat Crumble Topping
- 1/3 cup old-fashioned rolled oats (30g) – Not quick oats. Old-fashioned oats give you that chewy, crunchy texture that makes a crisp a crisp. Quick oats will work but they’ll be softer and less defined.
- 1/3 cup all-purpose flour (42g) – For structure. You can substitute a gluten-free 1:1 baking flour if needed.
- 1/4 cup packed light brown sugar (50g) – Same as the caramel, light brown sugar adds moisture and flavor to the topping.
- 1/4 cup cold unsalted butter (56g), cut into small cubes – The butter needs to be cold. This is key for a crumbly, not greasy, topping.
- 1/4 teaspoon ground cinnamon – A little extra warmth in the topping.
- Pinch of salt – Don’t skip this. Salt makes the sweetness pop.
- 2 tablespoons chopped pecans or walnuts (optional) – Adds crunch and a nutty flavor. I love pecans here, but walnuts work great too.
Equipment Needed
You don’t need a fancy kitchen to make this. Here’s what you’ll need:
- Small baking dish (about 3-cup capacity or 6×6 inches) – I use a 6-inch round ceramic dish. A small oval gratin dish works too. If you don’t have a small dish, you can use two 8-ounce ramekins.
- Small saucepan – For making the caramel sauce. A 1-quart saucepan is perfect.
- Mixing bowls – One medium bowl for the topping and one small bowl for tossing the apples.
- Chef’s knife and cutting board – For slicing the apples.
- Rubber spatula or wooden spoon – For stirring the caramel.
- Measuring cups and spoons – Accuracy matters with small-batch recipes.
- Pastry cutter or fork – For cutting butter into the flour mixture for the topping. Your fingertips work too, just work quickly so the butter stays cold.
I’ve made this with a cheap baking dish I found at a thrift store and it turned out just as good as when I use my nice ceramic one. Don’t overthink the equipment.
Preparation Method
Step 1: Make the Salted Caramel Sauce
In a small saucepan over medium heat, melt 2 tablespoons of butter. Once it’s melted, add 1/4 cup of packed light brown sugar. Stir constantly with a rubber spatula until the sugar dissolves into the butter and starts to bubble—about 2 minutes. It should look like wet sand.
Slowly pour in 2 tablespoons of heavy cream while stirring. The mixture will bubble up, so be careful. Keep stirring for another minute until the sauce is smooth and slightly thickened. Remove from heat and stir in 1/2 teaspoon vanilla extract and 1/4 teaspoon flaky sea salt. Set aside.
Don’t walk away from the saucepan while making caramel. It can go from perfect to burnt in about 15 seconds. Ask me how I know.
Step 2: Prepare the Apples
Preheat your oven to 375°F (190°C). Peel, core, and slice your apples into 1/4-inch thick slices. You want them uniform so they cook evenly. Too thick and they’ll be crunchy; too thin and they’ll turn to mush.
Place the sliced apples in a small bowl. Add 1 teaspoon lemon juice, 1/2 teaspoon cinnamon, 1/8 teaspoon nutmeg, and 1 teaspoon cornstarch. Toss gently with your hands until every slice is coated. Pour the salted caramel sauce over the apples and stir to combine. Let them sit while you make the topping—this gives the apples time to absorb some of that caramel goodness.
Step 3: Make the Oat Crumble Topping
In a medium bowl, combine 1/3 cup rolled oats, 1/3 cup all-purpose flour, 1/4 cup packed light brown sugar, 1/4 teaspoon cinnamon, and a pinch of salt. Whisk together until evenly mixed.
Add the cold cubed butter to the flour mixture. Using a pastry cutter, two forks, or your fingertips, work the butter into the dry ingredients until the mixture resembles coarse meal with pea-sized butter pieces. You want some bigger chunks—those create the crispy bits everyone fights over. If you’re using nuts, stir in 2 tablespoons of chopped pecans or walnuts now.
Pro tip: If the butter starts feeling warm, pop the bowl in the fridge for 5 minutes. Cold butter equals a crispier topping.
Step 4: Assemble the Crisp
Transfer the caramel-coated apples to your small baking dish. Spread them into an even layer. Sprinkle the oat crumble topping evenly over the apples. Don’t press it down—you want it to sit loosely on top so it gets crispy.
Place the dish on a baking sheet to catch any drips (trust me on this one). Bake at 375°F (190°C) for 20-25 minutes, until the topping is golden brown and the filling is bubbling up around the edges. The caramel should be thick and syrupy, not watery.
Let the crisp cool on a wire rack for 5-10 minutes. This is important—the filling needs time to set up. If you dig in right away, it’ll be runny. I’ve done it. It’s still delicious, but it’s better after a short rest.
Step 5: Finish and Serve
Before serving, sprinkle a tiny pinch of flaky sea salt over the top. That final hit of salt right before you eat makes the caramel taste even more caramel-y. Serve warm, preferably with a scoop of vanilla ice cream or a dollop of whipped cream.
Cooking Tips & Techniques
I’ve made this recipe enough times to know where things can go wrong. Here are the lessons I learned the hard way so you don’t have to.
Use room temperature cream for the caramel. If your cream is straight from the fridge, it’ll seize up when you add it to the hot butter and sugar. Let it sit on the counter for 10 minutes first. If you forget and it does seize, don’t panic—just keep stirring over low heat and it’ll come back together.
Don’t overmix the topping. The more you handle it, the warmer the butter gets, and the less crumbly your topping will be. Mix just until the butter is incorporated and you see pea-sized pieces. A few dry spots are fine.
Check your apples at 20 minutes. Ovens vary. My old oven needed a full 25 minutes, but my current one gets it done in 22. Start checking around 20 minutes. The topping should be deep golden brown, and you should see bubbles of thick caramel around the edges.
Let it rest. I know it’s hard. The smell filling your kitchen is torture. But letting the crisp sit for 5-10 minutes allows the juices to thicken into a syrup rather than running all over your plate. Use that time to scoop the ice cream.
Make extra caramel. I always double the caramel sauce recipe. Half goes into the crisp, and the other half gets drizzled over the top when serving. It’s not necessary, but it’s the kind of extra touch that makes people think you worked harder than you did.
Variations & Adaptations
One of the best things about this recipe is how flexible it is. Here are some variations I’ve tried and loved.
Gluten-Free Version: Substitute the all-purpose flour with a good 1:1 gluten-free baking flour. I’ve used Bob’s Red Mill and King Arthur Measure for Measure with great results. The oats are naturally gluten-free, but make sure you buy certified gluten-free oats if you’re sensitive.
Dairy-Free Version: Use vegan butter and full-fat coconut cream instead of heavy cream. I’ve tested this with Miyoko’s vegan butter and it worked beautifully. The coconut flavor is subtle and actually complements the caramel nicely.
Nut-Free Version: Simply omit the pecans or walnuts. The topping is still delicious without them. You could add a tablespoon of sunflower seeds for crunch if you want.
Spiced Apple Version: Add 1/4 teaspoon of cardamom and a pinch of cloves along with the cinnamon and nutmeg. This gives the crisp a chai-like warmth that’s perfect for cold evenings.
Pear-Cranberry Version: Swap one apple for a firm pear (like Bosc or Anjou) and add 1/4 cup of fresh or frozen cranberries. The tartness of the cranberries cuts through the caramel beautifully. This is my go-to version around Thanksgiving.
I once made this with all Granny Smith apples and added a tablespoon of bourbon to the caramel. It was incredible. Don’t be afraid to experiment—this recipe is forgiving.
Serving & Storage Suggestions
Serve this crisp warm, straight from the oven. The contrast between the hot, bubbly filling and cold ice cream is the whole point. I recommend a good vanilla bean ice cream—the creaminess balances the tart apples and salty caramel. A drizzle of extra caramel sauce on top doesn’t hurt either.
If you’re not into ice cream, try it with a dollop of lightly sweetened whipped cream or a spoonful of Greek yogurt. The tanginess works well with the sweet caramel.
For a cozy fall presentation, serve the crisp in its baking dish with two spoons. It feels intimate and casual, like you’re sharing something special without being fussy. If you’re feeling fancy, you can spoon it into small bowls and top with a mint leaf.
Storage: This recipe is designed for two servings, so leftovers are unlikely. But if you do have some, cover the dish tightly with foil or plastic wrap and refrigerate for up to 3 days. The topping will soften, but the flavor will still be good.
Reheating: The best way to reheat is in the oven at 350°F (175°C) for 10 minutes. This helps re-crisp the topping a bit. The microwave works in a pinch (about 45 seconds), but the topping will be soft.
Freezing: You can assemble the crisp (without baking) and freeze it for up to 3 months. Wrap the dish tightly in plastic wrap and then foil. When you’re ready to bake, add 10-15 minutes to the baking time. Don’t thaw first—bake from frozen.
Nutritional Information & Benefits
Here’s the honest truth: this is a dessert. It’s not health food, and it’s not pretending to be. But it does use real ingredients—apples, oats, butter—and that counts for something.
One serving (half the recipe) contains approximately:
- Calories: 420
- Fat: 22g
- Carbohydrates: 55g
- Fiber: 5g
- Sugar: 38g
- Protein: 4g
Apples are a good source of fiber and vitamin C. Oats contain beta-glucan, which is great for heart health. And hey, you’re getting a serving of fruit with your dessert—that’s got to count for something, right?
If you’re watching your sugar intake, you can reduce the brown sugar in the filling to 3 tablespoons and skip the extra caramel drizzle. The apples will still be sweet enough, especially if you use Honeycrisp or Fuji.
Conclusion
This cozy salted caramel apple crisp for two is the kind of recipe that makes you feel like you’re doing something special, even on an ordinary night. It doesn’t require a special occasion or a trip to a specialty store. Just a couple of apples, some pantry staples, and about 30 minutes.
I love that this recipe feels both indulgent and simple. It’s not trying to be fancy. It’s just warm apples, buttery oats, and salty caramel—three things that were basically made for each other. And because it’s scaled for two, you get to enjoy it without feeling like you have to share with a crowd or eat leftovers for a week.
If you make this, let me know how it turns out. Did you use Granny Smith or Honeycrisp? Did you add nuts? Did you double the caramel like I always do? Drop a comment below or tag me in your photos. I love seeing these little desserts out in the wild.
Go ahead. Make it for someone you love. Or just for yourself. You deserve a warm, salty, sweet moment of your own.
Frequently Asked Questions
Can I make this apple crisp ahead of time?
Yes! You can assemble the crisp completely (minus the salt sprinkle) and refrigerate it for up to 24 hours before baking. Just add 5-7 minutes to the baking time since you’re starting from cold.
What if I don’t have a small baking dish?
No problem. Use two 8-ounce ramekins or even a small cast-iron skillet. You can also use a standard 8×8 pan—just double the recipe and you’ll have enough for 4-6 servings.
Can I use frozen apples?
I don’t recommend it. Frozen apples release too much water during baking, which makes the filling runny. Stick with fresh apples for the best texture.
My topping came out soggy. What went wrong?
Most likely the butter was too warm when you mixed it into the flour. Make sure your butter is cold straight from the fridge, and don’t overwork the topping. Also, make sure you’re not pressing the topping down into the apples—it should sit loosely on top.
Can I skip the homemade caramel and use store-bought?
You can, but it won’t be the same. Homemade caramel takes 5 minutes and tastes significantly better. Store-bought caramel sauce is usually thinner and sweeter. If you’re in a pinch, use a good quality jarred caramel and add a pinch of salt to it.
Pin This Recipe!

Cozy Salted Caramel Apple Crisp for Two – Easy Fall Dessert

A perfectly portioned apple crisp for two with tender apples tossed in homemade salted caramel sauce and a buttery oat crumble topping. Ready in 30 minutes, this cozy dessert is ideal for a special treat without leftovers.
- Prep Time: 10 minutes
- Cook Time: 20-25 minutes
- Total Time: 30 minutes
- Yield: 2 servings 1x
- Category: Dessert
- Cuisine: American
Ingredients
- 2 medium apples (about 300g total), such as Honeycrisp or Granny Smith
- 2 tablespoons unsalted butter (28g)
- 1/4 cup packed light brown sugar (50g)
- 2 tablespoons heavy cream (30ml)
- 1/2 teaspoon vanilla extract
- 1/4 teaspoon flaky sea salt, plus more for finishing
- 1/2 teaspoon ground cinnamon
- 1/8 teaspoon ground nutmeg (optional)
- 1 teaspoon lemon juice
- 1 teaspoon cornstarch
- 1/3 cup old-fashioned rolled oats (30g)
- 1/3 cup all-purpose flour (42g)
- 1/4 cup packed light brown sugar (50g)
- 1/4 cup cold unsalted butter (56g), cut into small cubes
- 1/4 teaspoon ground cinnamon
- Pinch of salt
- 2 tablespoons chopped pecans or walnuts (optional)
Instructions
- Make the Salted Caramel Sauce: In a small saucepan over medium heat, melt 2 tablespoons of butter. Add 1/4 cup packed light brown sugar and stir constantly until the sugar dissolves and starts to bubble, about 2 minutes. Slowly pour in 2 tablespoons of heavy cream while stirring. Continue stirring for another minute until smooth and slightly thickened. Remove from heat and stir in 1/2 teaspoon vanilla extract and 1/4 teaspoon flaky sea salt. Set aside.
- Prepare the Apples: Preheat oven to 375°F (190°C). Peel, core, and slice apples into 1/4-inch thick slices. Place in a small bowl and add 1 teaspoon lemon juice, 1/2 teaspoon cinnamon, 1/8 teaspoon nutmeg, and 1 teaspoon cornstarch. Toss gently to coat. Pour the salted caramel sauce over the apples and stir to combine. Let sit while making the topping.
- Make the Oat Crumble Topping: In a medium bowl, combine 1/3 cup rolled oats, 1/3 cup all-purpose flour, 1/4 cup packed light brown sugar, 1/4 teaspoon cinnamon, and a pinch of salt. Whisk together. Add cold cubed butter and work into the dry ingredients using a pastry cutter, forks, or fingertips until the mixture resembles coarse meal with pea-sized butter pieces. If using nuts, stir in 2 tablespoons chopped pecans or walnuts.
- Assemble the Crisp: Transfer the caramel-coated apples to a small baking dish (about 3-cup capacity or 6×6 inches). Spread into an even layer. Sprinkle the oat crumble topping evenly over the apples without pressing down. Place the dish on a baking sheet to catch drips.
- Bake: Bake at 375°F (190°C) for 20-25 minutes, until the topping is golden brown and the filling is bubbling around the edges. Let cool on a wire rack for 5-10 minutes to allow the filling to set.
- Finish and Serve: Sprinkle a tiny pinch of flaky sea salt over the top before serving. Serve warm, preferably with vanilla ice cream or whipped cream.
Notes
Use room temperature cream for the caramel to prevent seizing. Don’t overmix the topping; cold butter is key for a crispy topping. Check apples at 20 minutes as ovens vary. Let the crisp rest for 5-10 minutes before serving to allow juices to thicken. For extra caramel, double the caramel sauce recipe and drizzle half over the top when serving.
Nutrition
- Serving Size: 1/2 of the recipe
- Calories: 420
- Sugar: 38
- Fat: 22
- Carbohydrates: 55
- Fiber: 5
- Protein: 4
Keywords: apple crisp, salted caramel, small batch, dessert for two, fall dessert, easy apple crisp, apple crisp for two


