I was standing in line at the post office—a Tuesday, just before closing—when the older gentleman ahead of me turned around and asked if I baked. I had flour under my nails and probably smelled like vanilla extract, so the question wasn’t exactly out of left field. He handed me a folded piece of wax paper with handwriting so tiny I had to squint. “My wife passed three years ago,” he said, “and these were her specialty. She’d want someone to keep making them.” I wasn’t expecting baking advice from a stranger in the post office, but there I was, clutching a recipe for red velvet cupcakes while my package sat unattended on the counter.
I almost lost that piece of wax paper twice. Once it fell behind my car seat, and another time I nearly used it to line a trash can. But something made me hold onto it—maybe the way he said “her specialty” with such quiet pride. The first time I made them, I burned the cream cheese frosting because I got distracted by a phone call. Let me tell you, scorched cream cheese is not a pleasant kitchen smell. But the second time? The third? Something clicked. The crumb was tender, the color was that deep, velvety red, and the frosting turned out silky and just tangy enough to balance the sweetness.
Honestly, I think about that man sometimes. I wonder if he’d approve of the way I’ve tweaked the recipe over the years—adding a touch more cocoa, using buttermilk instead of regular milk, piping the frosting into little heart shapes. Maybe you’ve been there, where a recipe comes from the most unexpected place and somehow becomes part of your regular rotation. These cupcakes are that for me. They’re the ones I make when I need comfort, when I want to show someone I care, or when a Tuesday just feels like it needs a little red velvet energy.
Why You’ll Love This Recipe
These aren’t just any red velvet cupcakes. After dozens of batches and plenty of trial and error, I can tell you exactly why this version stands out from the crowd.
- Quick & Easy: From start to finish, you’re looking at about 45 minutes. The batter comes together in one bowl with no complicated techniques involved.
- Simple Ingredients: Nothing weird here. Cocoa powder, flour, sugar, eggs, buttermilk, oil, vinegar, and red food coloring. You probably have most of this in your pantry right now.
- Perfect for Cozy Occasions: These cupcakes were made for cold evenings, rainy afternoons, Valentine’s Day, or just a Tuesday that needs a little brightening up.
- Crowd-Pleaser: I’ve brought these to potlucks, birthday parties, and casual get-togethers. They disappear faster than almost anything else I make.
- Unbelievably Delicious: The texture is what gets people. Light, moist, with a fine crumb that practically melts. And that cream cheese frosting? It’s the kind of smooth and tangy that makes you close your eyes after the first bite.
What makes this recipe different is the balance. So many red velvet recipes lean too hard on the food coloring or end up tasting like plain chocolate cake with red dye. This one has just enough cocoa to give depth without overpowering, and the buttermilk and vinegar reaction creates a tenderness you just can’t fake. It’s comfort food reimagined—familiar, yes, but with that little extra something that makes it feel special.
What Ingredients You Will Need
This recipe relies on simple, everyday ingredients that work together to create something genuinely special. The magic is in how they interact, not in fancy components.
- All-purpose flour, 1 ½ cups (190g) – Spoon and level for best results. Too much flour makes dense cupcakes.
- Unsweetened cocoa powder, 1 tablespoon (8g) – I prefer Hershey’s or Droste for that deep chocolate flavor without bitterness.
- Granulated sugar, 1 cup (200g) – Regular white sugar works perfectly here.
- Vegetable oil, ½ cup (120ml) – Keeps the cupcakes incredibly moist. Canola or any neutral oil works fine.
- Buttermilk, ½ cup (120ml) – Adds tanginess and activates the baking soda for a tender crumb. If you don’t have buttermilk, add 1 teaspoon of lemon juice or vinegar to regular milk and let it sit for 5 minutes.
- Large eggs, 2, room temperature – Room temperature eggs incorporate better into the batter.
- Red food coloring, 1-2 tablespoons (15-30ml) – I use gel food coloring for a more vibrant color without thinning the batter. Liquid works too, just add an extra tablespoon of flour if the batter seems thin.
- Distilled white vinegar, 1 teaspoon – Reacts with the baking soda to create lift. Don’t skip it—it’s essential for texture.
- Baking soda, 1 teaspoon – Make sure it’s fresh. Old baking soda won’t give you the rise you need.
- Salt, ½ teaspoon – Balances the sweetness.
- Vanilla extract, 1 teaspoon – Pure vanilla extract makes a noticeable difference over imitation.
For the Cream Cheese Frosting:
- Unsalted butter, ½ cup (113g), softened – Let it sit out for at least 30 minutes. Cold butter creates lumpy frosting.
- Cream cheese, 8 oz (226g), softened – Full-fat cream cheese gives the best texture and flavor. Philadelphia is my go-to brand.
- Powdered sugar, 3-4 cups (360-480g) – Sift it if you can. Lumps in powdered sugar show up in the final frosting.
- Vanilla extract, 1 teaspoon – Enhances the creamy flavor.
- Pinch of salt – Just a tiny bit to cut the sweetness.
For the red color, I’ve tried beet powder and natural alternatives, but honestly? Nothing gives that classic red velvet hue quite like good old-fashioned food coloring. If you prefer natural options, know that the color will be more of a rusty red or brownish shade. Still delicious, just different visually.
Equipment Needed
You don’t need a bakery-level setup for these cupcakes, but having the right tools makes the process smoother and more enjoyable.
- Muffin tin – Standard 12-cup tin. Non-stick is nice but not required.
- Paper liners – I like using white or red liners for contrast against the dark cupcake.
- Mixing bowls – One large bowl for the dry ingredients, one medium for the wet ingredients.
- Whisk – For combining dry ingredients evenly.
- Hand mixer or stand mixer – A hand mixer works perfectly for both the batter and the frosting. A stand mixer with a paddle attachment is great if you have one.
- Rubber spatula – For scraping down the sides of the bowl and folding ingredients.
- Measuring cups and spoons – Dry measuring cups for flour and sugar, liquid measuring cup for oil and buttermilk.
- Cooling rack – Wire rack allows air to circulate so cupcakes cool evenly without soggy bottoms.
- Piping bag and tip – A large star tip (like Wilton 1M) creates beautiful swirls. A zip-top bag with the corner snipped off works in a pinch.
- Offset spatula – For smoothing frosting if you’re not piping.
If you don’t have a piping bag, don’t stress. A generous swoop with a butter knife has its own rustic charm. I’ve done it plenty of times when my piping bag decided to split at the seam mid-swirl—learn from my mistakes and use a double bag if yours seems flimsy.
Preparation Method
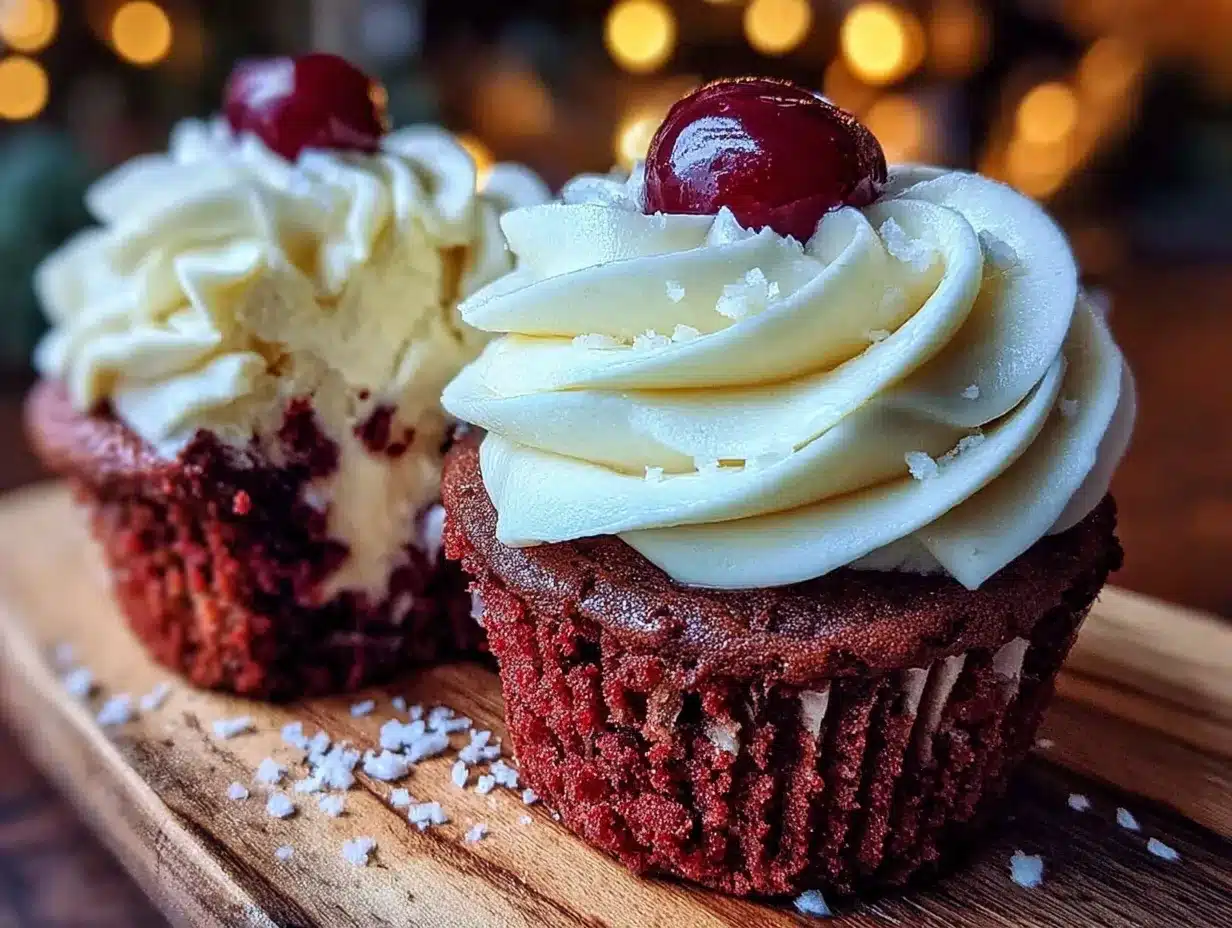
Let’s walk through this step by step. I’ve made these cupcakes dozens of times, and these are the exact steps that give consistent, beautiful results every time.
- Preheat your oven to 350°F (175°C) and line your muffin tin with paper liners. This ensures the oven is fully hot when the batter goes in.
- In a large mixing bowl, whisk together the flour, cocoa powder, baking soda, and salt. Make sure there are no lumps in the cocoa powder. I usually give it an extra few whisks just to be safe.
- In a separate medium bowl, whisk together the sugar, oil, buttermilk, eggs, food coloring, vinegar, and vanilla extract. Whisk until everything is well combined and the color is uniform. The mixture should be a vibrant red at this point.
- Pour the wet ingredients into the dry ingredients. Gently fold together with a rubber spatula until just combined. Do not overmix—stop as soon as you no longer see streaks of flour. Overmixing develops gluten and makes tough cupcakes.
- Divide the batter evenly among the 12 cupcake liners. Fill each about ⅔ to ¾ full. I use a cookie scoop for even distribution. The batter will be slightly thin—that’s normal.
- Bake for 18-22 minutes, or until a toothpick inserted into the center of a cupcake comes out clean or with just a few moist crumbs. The tops should spring back when lightly touched. My oven runs hot, so I start checking at 18 minutes.
- Let the cupcakes cool in the pan for 5 minutes, then transfer them to a wire cooling rack. Let them cool completely before frosting. This is crucial—warm cupcakes will melt your cream cheese frosting into a sad puddle.
- While the cupcakes cool, make the frosting. In a large bowl using a hand mixer or stand mixer with paddle attachment, beat the softened butter and cream cheese together on medium speed until smooth and creamy, about 2 minutes. Scrape down the sides of the bowl.
- Add the vanilla extract and pinch of salt, then gradually add the powdered sugar, one cup at a time, mixing on low speed to prevent a sugar cloud. Once all the sugar is incorporated, increase speed to medium-high and beat for 2-3 minutes until light and fluffy. If the frosting seems too soft, refrigerate for 15-20 minutes before piping.
- Pipe or spread the frosting onto the cooled cupcakes. For heart shapes, pipe a swirl and use a toothpick to gently drag the tip of the swirl into a heart shape, or use a heart-shaped cookie cutter as a stencil with sprinkles. For a simpler approach, just swirl generously—each one will look beautiful in its own way.
A note on timing: The entire process takes about 45 minutes from start to finish, not including cooling time. The cupcakes need at least 30 minutes to cool completely, so plan accordingly. I usually make the cupcakes in the morning, let them cool while I do other things, and frost them in the afternoon.
Cooking Tips & Techniques
After more batches than I can count, here are the things I wish someone had told me when I first started making these.
Don’t overmix the batter. This is the number one mistake I see. Red velvet batter is thinner than regular cake batter, so it’s tempting to keep mixing until it looks “right.” Stop when the flour disappears. A few small lumps are fine—they’ll bake out.
Room temperature ingredients matter. Cold eggs and cold buttermilk don’t emulsify as well, which can lead to a denser texture. Take them out of the fridge 30 minutes before you start. I’ve forgotten this step more times than I’d like to admit, and the difference is noticeable.
Use gel food coloring for better color. Liquid food coloring works but requires more volume, which can thin the batter. Gel coloring gives you that deep red with just a teaspoon or two. If you’re using liquid, add an extra tablespoon of flour to compensate.
Check your baking soda freshness. Drop a little into vinegar—if it fizzes vigorously, it’s good. Flat baking soda means flat cupcakes. I learned this the hard way when I made a batch that came out like hockey pucks.
Let the frosting chill if it’s too soft. Warm hands or a warm kitchen can make cream cheese frosting too soft to pipe. Pop it in the fridge for 15-20 minutes if it seems runny. Don’t skip this step—runny frosting is frustrating and won’t hold its shape.
Use a cookie scoop for even cupcakes. This ensures all 12 cupcakes are the same size and bake evenly. It’s a small tool that makes a big difference.
Variations & Adaptations
One of the best things about this recipe is how flexible it is. Here are some variations I’ve tried and loved.
Gluten-Free Version: Substitute the all-purpose flour with a 1:1 gluten-free baking flour blend. I’ve had good results with Bob’s Red Mill 1:1 Baking Flour. Add an extra tablespoon of buttermilk since gluten-free flours tend to absorb more moisture.
Dairy-Free Adaptation: Use dairy-free cream cheese (like Kite Hill or Tofutti) and substitute the buttermilk with almond milk mixed with 1 teaspoon of lemon juice. Use vegan butter in the frosting. The texture will be slightly different but still delicious.
Heart-Shaped Cupcakes: For a festive touch, place a marble or foil ball between the liner and the tin before baking to create a heart shape. Or simply pipe the frosting into heart shapes on top—much easier and equally adorable.
Chocolate Lover’s Twist: Increase the cocoa powder to 2 tablespoons for a deeper chocolate flavor. This moves it closer to a red chocolate cake, which is absolutely not a bad thing.
Lemon Cream Cheese Frosting: Add 1 tablespoon of lemon zest and 1 teaspoon of lemon juice to the frosting for a bright, citrusy twist. It pairs surprisingly well with the mild chocolate flavor of the cupcakes.
I once made a batch with beet powder instead of food coloring for a friend who avoids artificial dyes. The color was more of a deep maroon, but the flavor was fantastic. Sometimes the “imperfect” versions become new favorites.
Serving & Storage Suggestions
These cupcakes are best served at room temperature. The crumb is tender, the frosting is creamy, and everything just tastes more flavorful when it’s not straight from the fridge.
For serving: Arrange them on a pretty cake stand or platter. A dusting of cocoa powder or a few red sprinkles on top adds a nice finishing touch. They pair beautifully with a cup of hot coffee, a glass of cold milk, or even a warm mug of tea on a chilly evening.
For storage: Store unfrosted cupcakes in an airtight container at room temperature for up to 2 days. Frosted cupcakes should be stored in the refrigerator in an airtight container for up to 5 days. The cream cheese frosting needs refrigeration, but let the cupcakes sit at room temperature for about 20 minutes before serving for the best texture.
For freezing: You can freeze unfrosted cupcakes for up to 3 months. Wrap each one individually in plastic wrap, then place them in a freezer-safe bag. Thaw at room temperature before frosting. Frosted cupcakes can also be frozen, but the texture of the cream cheese frosting may change slightly upon thawing.
The flavors actually develop and deepen after a day in the fridge. I sometimes make these a day ahead for events, and they’re always a hit. Just remember to bring them to room temperature before serving.
Nutritional Information & Benefits
Let’s be real—these are cupcakes, not health food. But knowing what’s in them helps with mindful indulgence.
Estimated per cupcake (with frosting): Approximately 380-420 calories, 18g fat, 55g carbohydrates, 4g protein, 35g sugar. Values will vary based on exact ingredients and frosting amount.
Ingredient benefits: Cocoa powder contains antioxidants called flavonoids that support heart health. Cream cheese provides calcium and protein. Buttermilk adds probiotics and calcium. The eggs contribute high-quality protein and essential vitamins.
Dietary considerations: This recipe contains gluten, dairy, and eggs. It can be adapted for gluten-free and dairy-free diets using the substitutions mentioned in the variations section. It is not suitable for vegan diets without significant modification.
Potential allergens: Wheat (gluten), dairy (milk, cream cheese, butter), eggs.
I believe in balance. These cupcakes are a treat, something to enjoy on special occasions or when you need a little comfort. They’re not an everyday food, and that’s okay. Sometimes the best thing you can do for your soul is eat a really good cupcake without guilt.
Conclusion
These cozy red velvet heart cupcakes with cream cheese frosting have become my go-to for so many occasions. They came from an unexpected source—a stranger in a post office line—and they’ve brought so much warmth into my kitchen. The tender crumb, the deep red color, that tangy-sweet frosting piled high on top. It’s the kind of recipe that feels like a hug in food form.
I hope you’ll try them and make them your own. Maybe you’ll add a little extra vanilla, or pipe them into hearts, or serve them at your next cozy gathering. The best recipes are the ones that evolve with the people who make them. Don’t be afraid to tweak, experiment, and find your perfect version.
I’d love to hear how yours turn out. Drop a comment below and let me know if you tried any variations, or tag me in your photos if you share them online. There’s something special about knowing this recipe is being made in kitchens beyond my own—it feels like that post office man’s wife is still sharing her specialty with the world, one cupcake at a time.
Happy baking, friends. May your kitchen smell like vanilla and your heart feel full.
Frequently Asked Questions
Can I make these cupcakes without red food coloring?
Yes, absolutely. The cupcakes will be more of a brown or maroon color, but the flavor will still be delicious. You can try natural alternatives like beet powder or pomegranate juice, but the color won’t be as vibrant. The taste is what really matters anyway.
Why did my cream cheese frosting turn out runny?
This usually happens for one of three reasons: your cream cheese or butter was too soft (almost melted), you overbeat the frosting, or your kitchen was too warm. Make sure your ingredients are softened but still cool to the touch, and don’t beat the frosting longer than 3 minutes. If it’s already runny, pop it in the fridge for 20-30 minutes to firm up.
Can I use this recipe to make a cake instead of cupcakes?
Yes! Pour the batter into two greased and floured 8-inch round cake pans. Bake at 350°F (175°C) for 25-30 minutes, or until a toothpick comes out clean. The frosting recipe will need to be doubled for a layered cake. Keep in mind that cake layers may need slightly longer to cool completely before frosting.
How do I get the perfect heart shape on top?
The easiest method is to pipe a large swirl of frosting, then use a toothpick or small skewer to gently drag the tip of the swirl downward into a point, creating the heart shape. Alternatively, you can use a heart-shaped cookie cutter as a stencil and fill it with sprinkles or colored sugar. Practice makes perfect—don’t worry if your first few look a little abstract.
Can I prepare these cupcakes ahead of time for a party?
Definitely. Bake the cupcakes up to 2 days in advance and store them unfrosted in an airtight container at room temperature. Make the frosting up to 3 days ahead and keep it refrigerated. Frost the cupcakes the day of your event for the freshest appearance. Bring them to room temperature for about 20 minutes before serving for the best flavor and texture.
Pin This Recipe!
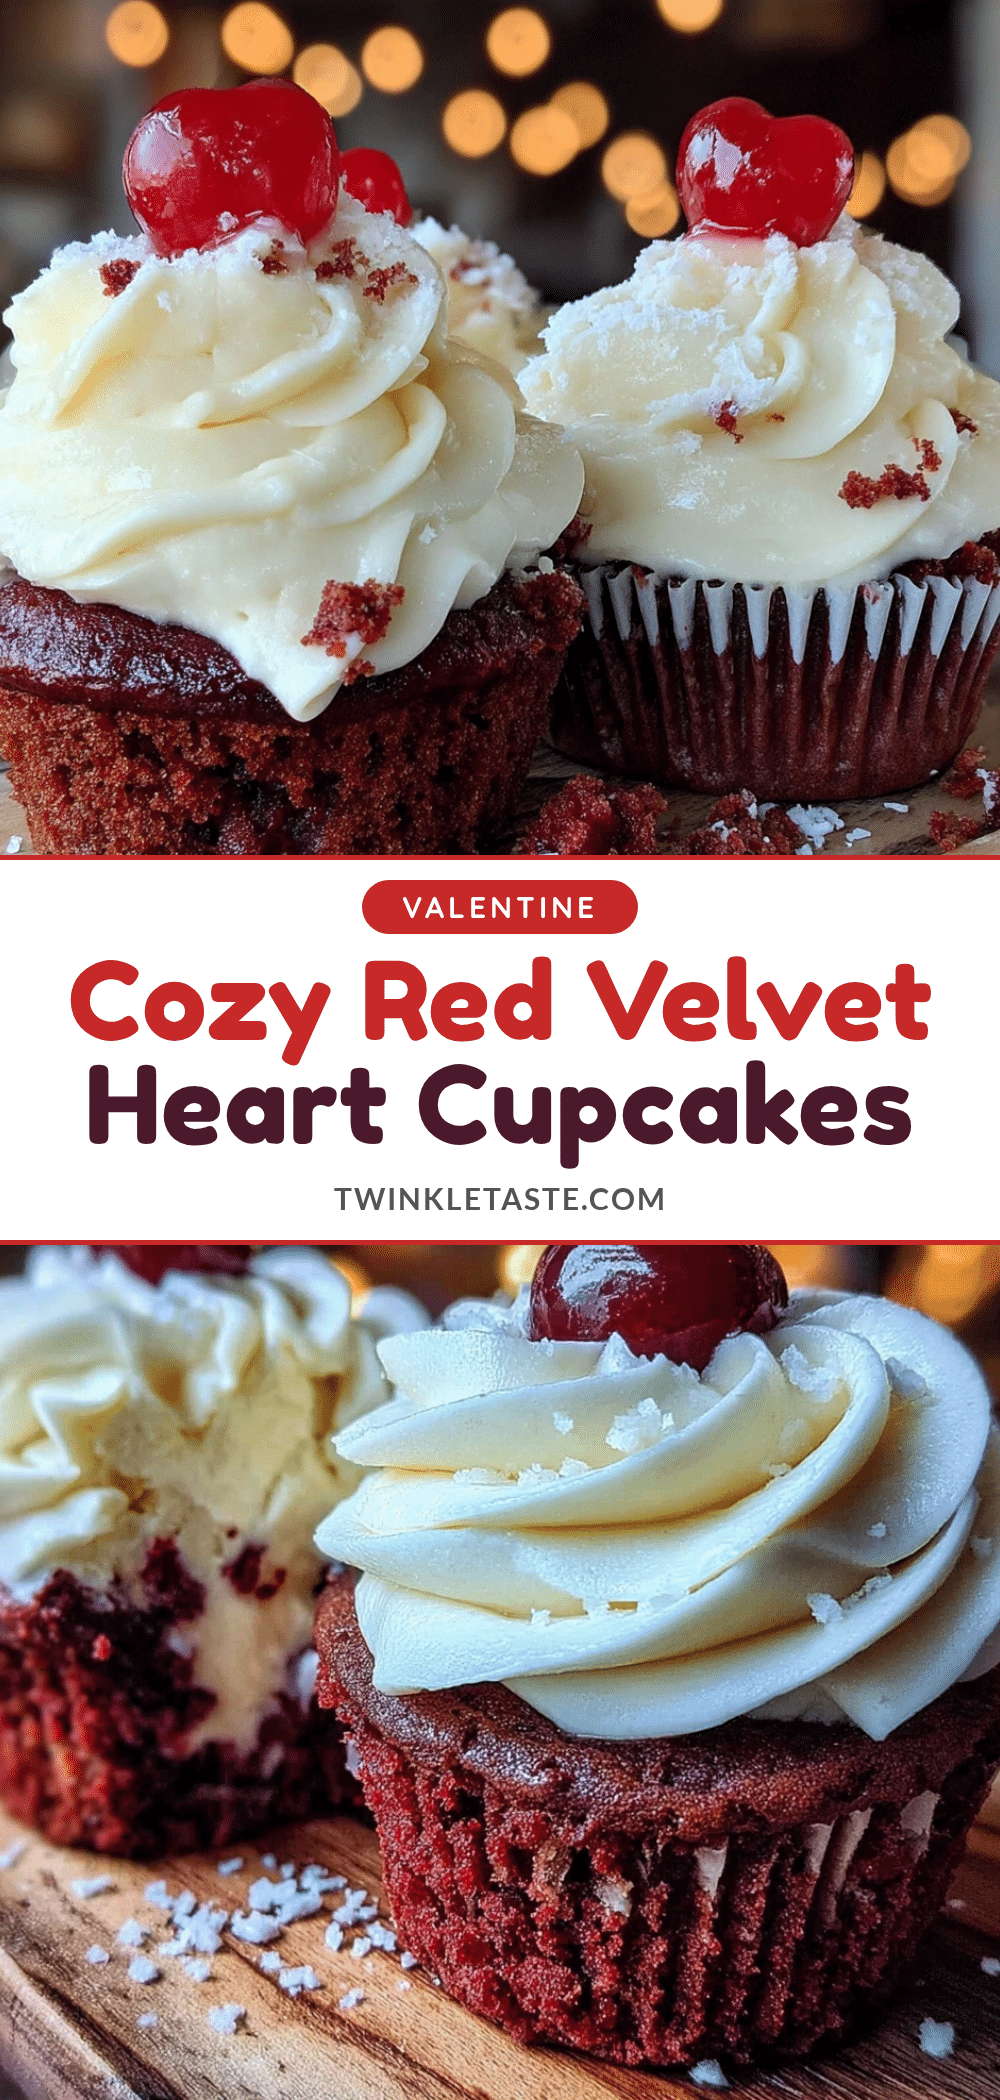
Cozy Red Velvet Heart Cupcakes with Easy Cream Cheese Frosting
These tender, moist red velvet cupcakes are topped with a silky cream cheese frosting and shaped into hearts. Made with simple ingredients and ready in about 45 minutes, they’re perfect for cozy occasions, Valentine’s Day, or any day that needs a little red velvet energy.
- Prep Time: 15 minutes
- Cook Time: 20 minutes
- Total Time: 45 minutes (plus 30 minutes cooling time)
- Yield: 12 cupcakes 1x
- Category: Dessert
- Cuisine: American
Ingredients
- 1 ½ cups (190g) all-purpose flour
- 1 tablespoon (8g) unsweetened cocoa powder
- 1 cup (200g) granulated sugar
- ½ cup (120ml) vegetable oil
- ½ cup (120ml) buttermilk
- 2 large eggs, room temperature
- 1–2 tablespoons (15-30ml) red food coloring (gel preferred)
- 1 teaspoon distilled white vinegar
- 1 teaspoon baking soda
- ½ teaspoon salt
- 1 teaspoon vanilla extract
- ½ cup (113g) unsalted butter, softened
- 8 oz (226g) cream cheese, softened
- 3–4 cups (360-480g) powdered sugar, sifted
- 1 teaspoon vanilla extract (for frosting)
- Pinch of salt (for frosting)
Instructions
- Preheat your oven to 350°F (175°C) and line a 12-cup muffin tin with paper liners.
- In a large mixing bowl, whisk together the flour, cocoa powder, baking soda, and salt until no lumps remain.
- In a separate medium bowl, whisk together the sugar, oil, buttermilk, eggs, food coloring, vinegar, and vanilla extract until well combined and uniformly colored.
- Pour the wet ingredients into the dry ingredients. Gently fold together with a rubber spatula until just combined. Do not overmix; a few small lumps are fine.
- Divide the batter evenly among the 12 cupcake liners, filling each about ⅔ to ¾ full.
- Bake for 18-22 minutes, or until a toothpick inserted into the center comes out clean or with a few moist crumbs. The tops should spring back when lightly touched.
- Let the cupcakes cool in the pan for 5 minutes, then transfer them to a wire cooling rack. Cool completely before frosting.
- While the cupcakes cool, make the frosting: In a large bowl, beat the softened butter and cream cheese together on medium speed until smooth and creamy, about 2 minutes. Scrape down the sides.
- Add the vanilla extract and pinch of salt, then gradually add the powdered sugar, one cup at a time, mixing on low speed. Once incorporated, increase speed to medium-high and beat for 2-3 minutes until light and fluffy. If too soft, refrigerate for 15-20 minutes.
- Pipe or spread the frosting onto the cooled cupcakes. For heart shapes, pipe a swirl and use a toothpick to gently drag the tip into a heart shape, or use a heart-shaped cookie cutter as a stencil with sprinkles.
Notes
Don’t overmix the batter; stop when flour disappears. Use room temperature ingredients for best texture. Gel food coloring gives a more vibrant red without thinning the batter. Check baking soda freshness by dropping a little into vinegar—it should fizz vigorously. Let cupcakes cool completely before frosting to prevent melting. For runny frosting, refrigerate 15-20 minutes to firm up. Store frosted cupcakes in the refrigerator for up to 5 days; bring to room temperature 20 minutes before serving. Unfrosted cupcakes can be frozen for up to 3 months.
Nutrition
- Serving Size: 1 cupcake
- Calories: 400
- Sugar: 35
- Sodium: 220
- Fat: 18
- Saturated Fat: 8
- Carbohydrates: 55
- Fiber: 1
- Protein: 4
Keywords: red velvet cupcakes, cream cheese frosting, heart cupcakes, Valentine's Day dessert, easy cupcakes, homemade cupcakes, red velvet dessert


