That first drag of a Sharpie across a cookie — the kind that smells faintly of alcohol and possibility — still takes me straight to my aunt’s kitchen table, circa 2002. She wasn’t a baker, not really. But every October, she’d pull out a beat-up cookie tin and a box of royal icing mix, and we’d sit there for hours, drawing spiderwebs on sugar cookies until our hands cramped. She never used a piping bag; she’d snip the corner off a Ziploc bag and call it good. And honestly? Those lopsided, messy webs were the best part of Halloween. Not the candy. Not the costumes. Just that quiet, sticky hour of making something that felt just a little bit magic. This recipe for Classic Halloween Sugar Cookies with Royal Icing Spiderwebs is my grown-up version of that memory — a buttery, soft sugar cookie base with a crisp royal icing that cracks just right when you bite into it. The spiderwebs are easier than you think, I promise. And once you get the hang of it, you won’t want to stop.
Why You’ll Love This Recipe
I’ve tested a lot of sugar cookie recipes over the years — some too crunchy, some that spread into blobs, some that tasted like sweet cardboard. This one? It’s the Goldilocks of sugar cookies. Soft in the middle, slightly crisp at the edges, and sturdy enough to hold a thick layer of royal icing without crumbling. The icing itself dries to a glossy, hard finish that’s perfect for stacking, gifting, or just admiring on your counter for a day before you eat them all.
- Quick & Easy: The dough comes together in about 15 minutes, and the chilling time is only 30 minutes — not the usual 2 hours most recipes demand.
- Simple Ingredients: Butter, sugar, eggs, flour, vanilla — you probably have everything already. No weird extracts or hard-to-find specialty flours.
- Perfect for Halloween Parties: These are the cookies that disappear first at any gathering. Kids love decorating them, and adults love eating them.
- Crowd-Pleaser: I’ve brought these to potlucks, school parties, and neighbor gifts. They get rave reviews every single time.
- Unbelievably Delicious: The combination of soft, buttery cookie and crunchy, sweet royal icing is pure comfort. It’s the kind of cookie that makes you close your eyes after the first bite.
What makes this recipe different from the rest? It’s the technique. I use a tiny bit of cream cheese in the dough — just enough to add tenderness without making the cookies taste like cheesecake. And the royal icing? I’ve found the perfect ratio of meringue powder to water so it flows smoothly for flooding but still holds its shape for piping details. No guesswork, no stress. Just perfect Halloween cookies, every time.
This recipe isn’t just good — it’s the kind that makes you feel like a professional baker, even if you’ve never held a piping bag before. It’s Halloween baking reimagined: less frantic, more fun, with the same soul-soothing satisfaction of biting into a cookie you made yourself.
What Ingredients You Will Need
This recipe uses simple, wholesome ingredients to deliver that classic sugar cookie flavor and a royal icing that sets up beautifully. Most of these are pantry staples, so you might not even need a grocery run.
For the Sugar Cookies
- 1 cup (226g) unsalted butter, softened — I use Land O’Lakes for its consistent fat content. Make sure it’s truly soft, not melted.
- 1 cup (200g) granulated sugar — Regular white sugar gives the cookies that classic sweetness and light crunch on the edges.
- 1 large egg, room temperature — Cold eggs can seize the butter, so let it sit out for 30 minutes.
- 2 teaspoons vanilla extract — Pure vanilla makes a difference here. Imitation works, but pure adds a richer flavor.
- 2 tablespoons cream cheese, softened — This is my secret ingredient. It adds tenderness without affecting the flavor.
- 2 ½ cups (315g) all-purpose flour — Spoon and level it; don’t scoop directly from the bag or you’ll end up with dry cookies.
- ½ teaspoon baking powder — Helps the cookies puff just slightly without spreading too much.
- ¼ teaspoon salt — Balances the sweetness and enhances the buttery flavor.
For the Royal Icing
- 3 cups (360g) powdered sugar — Sift it if it’s lumpy. Trust me on this.
- 3 tablespoons meringue powder — I recommend Wilton brand for best results. It stabilizes the icing and gives it that professional shine.
- 4-5 tablespoons water, plus more as needed — Start with 4 tablespoons and add one teaspoon at a time until you reach the right consistency.
- 1 teaspoon vanilla extract — Optional, but I like a hint of vanilla in the icing too.
- Black gel food coloring — Americolor Super Black is my go-to. Liquid coloring will thin the icing too much.
For the Spiderweb Design
- White royal icing (base coat) — Flood consistency (more on that below).
- Black royal icing (for webs) — Stiff consistency for piping the lines.
- Piping bags or zip-top bags — I use disposable piping bags with a #2 tip for precision.
- Toothpicks or scribe tool — For dragging the web lines into that iconic pattern.
Equipment Needed
- Stand mixer or hand mixer — A stand mixer makes creaming butter and sugar effortless, but a hand mixer works just fine.
- Rolling pin — I prefer a French rolling pin (no handles) for better control, but any rolling pin works.
- Cookie cutters — Round or scalloped circles work best for spiderwebs. I use a 3-inch round cutter.
- Baking sheets — Light-colored, non-stick sheets give the most even bake. Dark sheets can over-brown the bottoms.
- Parchment paper or silicone baking mats — Silpat mats are my favorite; they prevent spreading and make cleanup a breeze.
- Piping bags and tips — A #2 round tip is perfect for piping spiderweb lines. If you don’t have piping bags, snip a tiny corner off a zip-top bag.
- Cooling rack — Essential for letting cookies cool completely before icing. I use a wire rack with a grid pattern.
- Offset spatula — Great for spreading icing if you’re not piping the base coat. A butter knife works too.
- Toothpicks — For dragging the spiderweb design. You’ll need several; they get sticky fast.
Preparation Method
Step 1: Make the Cookie Dough
In the bowl of a stand mixer fitted with the paddle attachment, cream the softened butter and granulated sugar together on medium speed until light and fluffy — about 3 to 4 minutes. You want it to look pale and almost doubled in volume. Scrape down the sides of the bowl with a spatula halfway through.
Add the room-temperature egg, vanilla extract, and softened cream cheese. Mix on low until just combined. Don’t overmix here; you just want everything incorporated.
In a separate bowl, whisk together the all-purpose flour, baking powder, and salt. With the mixer on low, gradually add the dry ingredients to the wet mixture. Mix until the dough just comes together — it will look crumbly at first, then form a cohesive ball. If it feels too sticky, add a tablespoon more flour. If it’s too dry, add a teaspoon of milk.
Step 2: Chill the Dough
Divide the dough in half and flatten each half into a disc about 1-inch thick. Wrap tightly in plastic wrap and refrigerate for at least 30 minutes. This step is non-negotiable — chilled dough spreads less and holds its shape better when baked. You can chill it for up to 3 days, or freeze it for up to 3 months (thaw in the fridge overnight before rolling).
Step 3: Roll and Cut
Preheat your oven to 375°F (190°C). Line two baking sheets with parchment paper or silicone mats.
Lightly flour your work surface and rolling pin. Roll one disc of dough to about ¼-inch thickness. I like to roll between two sheets of parchment paper for zero mess and no extra flour. Use your cookie cutter to cut out shapes, and transfer them to the prepared baking sheets, spacing them about 2 inches apart. Gather the scraps, re-roll, and cut again — you should get about 24 to 30 cookies, depending on your cutter size.
Pro tip: If the dough gets too soft to work with, pop it back in the fridge for 10 minutes. Warm dough sticks to the cutter and loses its shape.
Step 4: Bake
Bake for 8 to 10 minutes, rotating the sheets halfway through. The cookies should look set around the edges but still pale in the center — they will continue to firm up as they cool. Overbaking makes them dry. Let the cookies cool on the baking sheets for 5 minutes, then transfer them to a wire rack to cool completely. Do not ice warm cookies, or the icing will slide right off.
Step 5: Make the Royal Icing
In the bowl of a stand mixer fitted with the whisk attachment (or using a hand mixer), combine the powdered sugar and meringue powder. Add 4 tablespoons of water and the vanilla extract. Beat on low until combined, then increase to medium-high and whip for 5 to 7 minutes. The icing should be glossy and thick enough to hold a stiff peak when you lift the whisk.
For the base coat (flood consistency), add water one teaspoon at a time until the icing flows like honey — it should settle smooth within 10 seconds after you stir it. For the black spiderweb lines, leave the icing at stiff peak consistency. Divide the icing into two bowls. Leave one white (or tint it with a tiny drop of black for a ghostly gray base). Tint the other bowl with black gel food coloring until you reach your desired darkness.
Step 6: Decorate the Cookies
Fit a piping bag with a #2 tip and fill it with the white flood-consistency icing. Pipe an outline around the edge of each cookie, then fill in the center with a zigzag motion. Use a toothpick to gently spread the icing into the corners and pop any air bubbles. Let the base coat dry for at least 1 hour — it should be firm to the touch before you add the spiderwebs.
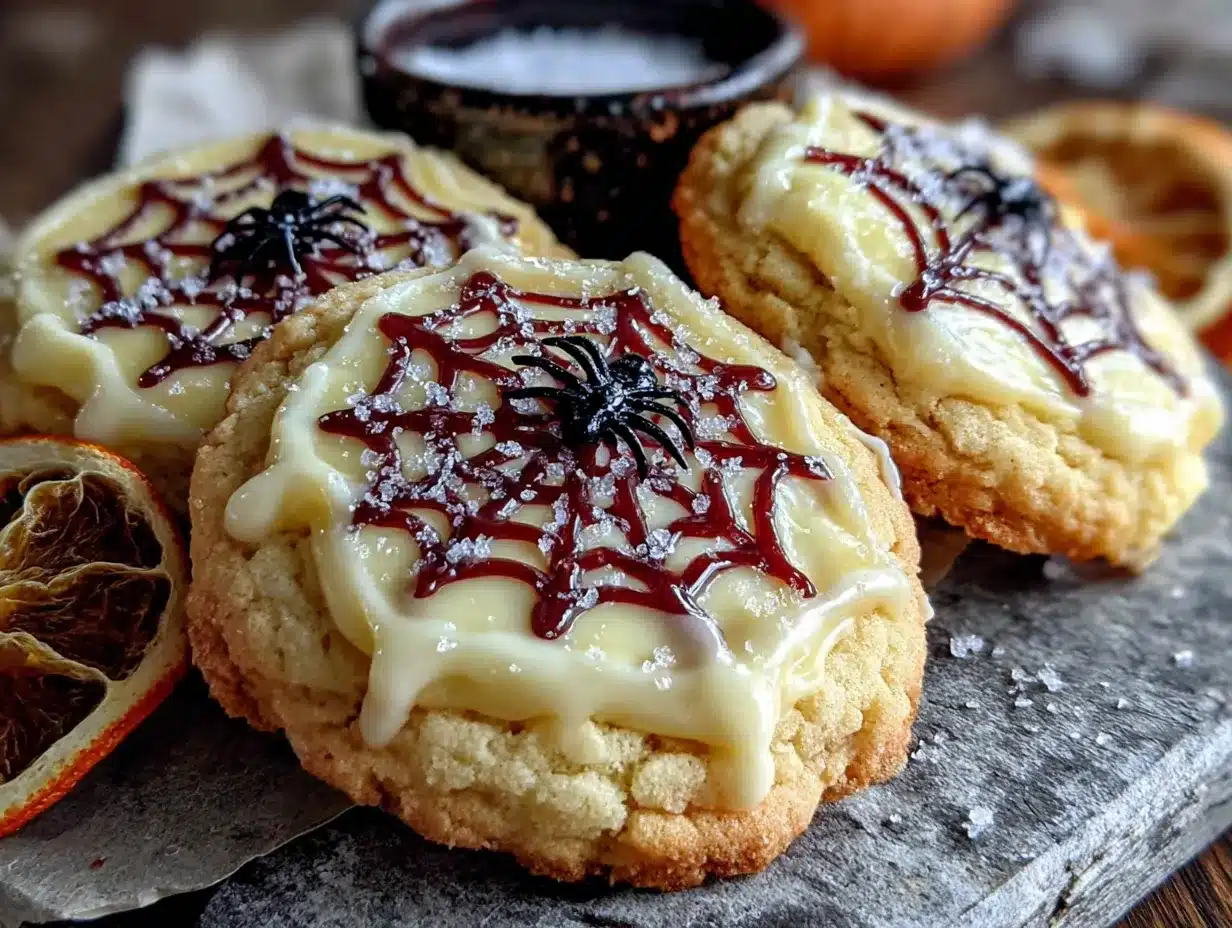
Once the base coat is dry, switch to the black stiff-consistency icing in a piping bag with a #2 tip. Pipe a small dot in the center of each cookie. Then pipe 4 to 6 straight lines radiating outward from the dot to the edge of the cookie, like spokes on a wheel. Immediately — before the lines dry — use a toothpick to drag from the center outward through each line, creating a curved web effect. Wipe the toothpick clean between each drag for clean lines. Let the cookies dry completely, about 2 to 4 hours.
Cooking Tips & Techniques
I learned the hard way that chilling the dough isn’t optional. The first time I made these, I skipped the chill and ended up with flat, misshapen blobs that looked more like pancakes than cookies. Now I set a timer for 30 minutes and don’t touch the dough until it’s firm. Another thing: don’t overwork the dough when rolling. If you keep re-rolling the scraps, the cookies get tough. I try to get as many cuts as possible from the first roll, then gather the scraps and roll only once more.
For the royal icing, the biggest mistake people make is adding too much water at once. Add it drop by drop. I use a spray bottle to mist the icing if it gets too thick while piping — it’s a game-changer. And if your hands get tired from piping? Take a break. Iced cookies don’t care if you finish them in 20 minutes or two hours.
Timing is everything with the spiderweb design. You have to drag the toothpick through the black lines while they’re still wet, but after the white base has set. If you wait too long, the black lines will be dry and won’t drag. If you do it too soon, the black will bleed into the white. Practice on a paper towel first — it sounds silly, but it saves you from ruining a whole batch of cookies.
Variations & Adaptations
These cookies are surprisingly flexible. Here are a few ways I’ve adapted them over the years:
- Gluten-Free Version: Swap the all-purpose flour with a 1:1 gluten-free baking flour (I like Bob’s Red Mill). Add an extra tablespoon of cream cheese to compensate for the dryness of gluten-free flour.
- Vegan Adaptation: Use vegan butter (like Earth Balance), a flax egg (1 tablespoon ground flaxseed + 3 tablespoons water), and omit the cream cheese or use vegan cream cheese. For the royal icing, use aquafaba (chickpea water) instead of meringue powder — 3 tablespoons of aquafaba whipped to stiff peaks works beautifully.
- Flavor Twist: Add ½ teaspoon of almond extract to the dough for a subtle, nutty undertone that pairs perfectly with the vanilla icing. Or swap the vanilla in the icing for peppermint extract for a holiday version.
- Different Designs: Skip the spiderwebs and pipe ghosts, pumpkins, or bats instead. The same royal icing technique works for any Halloween shape. If you’re feeling ambitious, try my Perfect Frosted Halloween Sugar Cookies with Royal Icing Spiders for another creepy-crawly design.
- No Royal Icing? You can skip the royal icing entirely and just dust the cookies with powdered sugar for a simpler, rustic look. Or drizzle with melted white chocolate and add sprinkles.
Serving & Storage Suggestions
These cookies are best served at room temperature. The royal icing should be fully set — dry to the touch and hard when you tap it. Arrange them on a platter with other Halloween treats like Spooky Witch Finger Pretzel Rods and Spooky Black Velvet Cupcakes for a show-stopping dessert table. They pair beautifully with a glass of cold milk, a warm cup of apple cider, or even a Cozy Brown Sugar Pumpkin Chai Latte for a grown-up twist.
To store, layer the cookies between sheets of parchment paper in an airtight container. They’ll stay fresh at room temperature for up to 5 days. Do not refrigerate — the humidity can make the icing tacky. For longer storage, freeze the undecorated cookies (without icing) in a freezer-safe bag for up to 3 months. Thaw at room temperature, then decorate. The flavors actually deepen after a day or two, so don’t be afraid to make them ahead.
Nutritional Information & Benefits
Each cookie (based on a 3-inch round cutter, with royal icing) contains approximately 180 calories, 8g fat, 26g carbohydrates, 2g protein, and 15g sugar. These are a treat, not a health food — but they’re made with real butter and eggs, so you know exactly what’s in them. The cream cheese adds a small amount of calcium and protein, and the vanilla extract offers a touch of antioxidants. For a lighter option, you can reduce the sugar in the dough to ¾ cup, but the cookies will be slightly less tender. If you’re watching your sugar intake, consider skipping the royal icing and just dusting with cinnamon sugar instead.
Conclusion
These Classic Halloween Sugar Cookies with Royal Icing Spiderwebs are more than just a recipe — they’re a tradition waiting to happen. They’re the cookies you’ll make with your kids, the ones you’ll bring to the party, the ones that will sit on your counter and make you smile every time you walk past. The dough is forgiving, the icing is satisfying, and the spiderweb design is just plain fun. I’ve been making these for over a decade, and they never get old. I’d love to hear how yours turn out — leave a comment below and tell me about your favorite Halloween baking memory. And if you try a different color scheme or design, share a photo! Happy Halloween, friend. Go make some magic.
Frequently Asked Questions
Can I make the dough ahead of time?
Absolutely. You can refrigerate the dough discs for up to 3 days, or freeze them for up to 3 months. Just thaw in the fridge overnight before rolling.
Why did my cookies spread too much?
Most likely the dough wasn’t chilled long enough, or your butter was too soft. Make sure the butter is softened but not melted, and chill the dough for at least 30 minutes.
Can I use liquid food coloring instead of gel?
You can, but liquid coloring will thin the royal icing and make it harder to pipe. Gel food coloring is much more concentrated and doesn’t affect the consistency.
How do I know when the royal icing is the right consistency?
For flooding, the icing should flow like honey and settle smooth within 10 seconds after you stir it. For piping, it should hold a stiff peak when you lift the whisk.
Can I skip the royal icing and use store-bought frosting?
You can, but store-bought frosting won’t dry hard like royal icing, so the spiderweb design won’t hold as well. If you’re short on time, try a simple glaze made from powdered sugar and milk instead.
Pin This Recipe!

Classic Halloween Sugar Cookies Easy Royal Icing Spiderwebs

Buttery, soft sugar cookies with a crisp royal icing that cracks just right when you bite into it. The spiderwebs are easier than you think, and once you get the hang of it, you won’t want to stop.
- Prep Time: 15 minutes
- Cook Time: 10 minutes
- Total Time: 45 minutes
- Yield: 24-30 cookies 1x
- Category: Dessert
- Cuisine: American
Ingredients
- 1 cup (226g) unsalted butter, softened
- 1 cup (200g) granulated sugar
- 1 large egg, room temperature
- 2 teaspoons vanilla extract
- 2 tablespoons cream cheese, softened
- 2 ½ cups (315g) all-purpose flour
- ½ teaspoon baking powder
- ¼ teaspoon salt
- 3 cups (360g) powdered sugar
- 3 tablespoons meringue powder
- 4–5 tablespoons water, plus more as needed
- 1 teaspoon vanilla extract (optional)
- Black gel food coloring
- White royal icing (base coat)
- Black royal icing (for webs)
- Piping bags or zip-top bags
- Toothpicks or scribe tool
Instructions
- In the bowl of a stand mixer fitted with the paddle attachment, cream the softened butter and granulated sugar together on medium speed until light and fluffy — about 3 to 4 minutes. Scrape down the sides of the bowl halfway through.
- Add the room-temperature egg, vanilla extract, and softened cream cheese. Mix on low until just combined.
- In a separate bowl, whisk together the all-purpose flour, baking powder, and salt. With the mixer on low, gradually add the dry ingredients to the wet mixture. Mix until the dough just comes together.
- Divide the dough in half and flatten each half into a disc about 1-inch thick. Wrap tightly in plastic wrap and refrigerate for at least 30 minutes.
- Preheat your oven to 375°F (190°C). Line two baking sheets with parchment paper or silicone mats.
- Lightly flour your work surface and rolling pin. Roll one disc of dough to about ¼-inch thickness. Use your cookie cutter to cut out shapes, and transfer them to the prepared baking sheets, spacing them about 2 inches apart. Gather the scraps, re-roll, and cut again.
- Bake for 8 to 10 minutes, rotating the sheets halfway through. Let the cookies cool on the baking sheets for 5 minutes, then transfer them to a wire rack to cool completely.
- In the bowl of a stand mixer fitted with the whisk attachment, combine the powdered sugar and meringue powder. Add 4 tablespoons of water and the vanilla extract. Beat on low until combined, then increase to medium-high and whip for 5 to 7 minutes. For the base coat (flood consistency), add water one teaspoon at a time until the icing flows like honey. For the black spiderweb lines, leave the icing at stiff peak consistency. Divide the icing into two bowls. Leave one white. Tint the other bowl w…
- Fit a piping bag with a #2 tip and fill it with the white flood-consistency icing. Pipe an outline around the edge of each cookie, then fill in the center with a zigzag motion. Use a toothpick to gently spread the icing into the corners and pop any air bubbles. Let the base coat dry for at least 1 hour.
- Once the base coat is dry, switch to the black stiff-consistency icing in a piping bag with a #2 tip. Pipe a small dot in the center of each cookie. Then pipe 4 to 6 straight lines radiating outward from the dot to the edge of the cookie. Immediately use a toothpick to drag from the center outward through each line, creating a curved web effect. Wipe the toothpick clean between each drag. Let the cookies dry completely, about 2 to 4 hours.
Notes
Chill the dough for at least 30 minutes to prevent spreading. For the royal icing, add water drop by drop to avoid thinning too much. Drag the toothpick through the black lines while they are still wet but after the white base has set. Practice on a paper towel first to get the technique right.
Nutrition
- Serving Size: 1 cookie
- Calories: 180
- Sugar: 15
- Sodium: 80
- Fat: 8
- Saturated Fat: 5
- Carbohydrates: 26
- Protein: 2
Keywords: Halloween sugar cookies, royal icing spiderwebs, classic sugar cookies, Halloween baking, easy sugar cookies


