The last slice disappeared before I even offered it. My husband had snuck back into the kitchen for a second piece, then a third, and by the time I looked over, the cake stand was empty. He just shrugged and said, “You might want to make another one.” That was the first time I made this Ultimate Reese’s Peanut Butter Chocolate Chip Cake, and honestly, I wasn’t even sure it was going to work.
I had this idea floating around in my head for weeks—a cake that wasn’t just chocolate, wasn’t just peanut butter, but something that actually did justice to a Reese’s cup. You know how sometimes you bite into a “Reese’s” dessert and it’s just chocolate cake with a few peanut butter chips thrown in? That wasn’t what I was after. I wanted layers of rich chocolate, creamy peanut butter frosting, and chunks of actual Reese’s cups folded right into the batter. I wanted every single bite to taste like the center of a peanut butter cup.
So I spent a Sunday afternoon testing. There was a batch that came out too dry, one where the peanut butter flavor got completely lost, and one that sunk in the middle because I got too excited with the mix-ins. But this version? This one worked. The cake is incredibly moist, the frosting is dangerously good, and those chocolate chips and peanut butter cups scattered throughout make every slice feel like a treasure hunt. It’s the kind of cake that makes people close their eyes when they take a bite.
I’ve made it four times since that first test batch, and each time, someone asks for the recipe before they’ve even finished their slice. That’s how I knew this one was worth sharing.
Why You’ll Love This Recipe
This isn’t just another chocolate peanut butter cake. I’ve tested enough recipes to know the difference between “pretty good” and “I need this recipe in my life forever,” and trust me, this one falls firmly into the second category.
- Incredibly Moist: The combination of buttermilk, oil, and sour cream creates a tender crumb that stays soft for days. No dry cake here.
- Bursting with Reese’s Flavor: We’re using peanut butter in the cake and the frosting, plus chopped Reese’s cups and chocolate chips folded into the batter. Every bite delivers that iconic peanut butter and chocolate combo.
- Simple Ingredients: Nothing fancy or hard to find. You probably have most of these in your pantry right now.
- Perfect for Celebrations: Birthdays, holidays, or just a Tuesday that needs a little extra joy—this cake fits the bill.
- Better Than Box Mix: Once you taste homemade, you won’t go back. The depth of flavor is completely different.
- Crowd-Pleaser: I’ve served this to kids, adults, and serious dessert lovers, and every single person has gone back for seconds.
What really sets this cake apart is the balance. So many peanut butter chocolate cakes lean too heavy on one flavor, but this one hits that perfect middle ground where both flavors shine. The peanut butter frosting is creamy and rich without being overly sweet, and the chocolate cake base is deep and fudgy. It’s the kind of dessert that feels special without requiring a culinary degree to pull off.
What Ingredients You Will Need
This recipe relies on simple, pantry-friendly ingredients that work together to create something truly special. Here’s everything you’ll need and why each one matters.
For the Chocolate Cake
- All-Purpose Flour (2 ½ cups) – Provides structure without making the cake dense. Spoon and level your flour for best results.
- Unsweetened Cocoa Powder (¾ cup) – I prefer Dutch-process cocoa for a deeper, richer chocolate flavor, but natural cocoa works beautifully too.
- Granulated Sugar (2 cups) – Adds sweetness and helps create a tender crumb.
- Brown Sugar (½ cup, packed) – Adds moisture and a hint of molasses flavor that complements the peanut butter.
- Baking Powder (2 teaspoons) and Baking Soda (1 teaspoon) – The double leavening gives the cake a perfect rise.
- Salt (1 teaspoon) – Balances the sweetness and enhances the chocolate flavor.
- Buttermilk (1 ½ cups) – Keeps the cake incredibly tender. No buttermilk? Add 1 ½ tablespoons of lemon juice or vinegar to regular milk and let it sit for 5 minutes.
- Vegetable Oil (½ cup) – Adds moisture that butter alone can’t provide. The cake stays soft even after refrigeration.
- Large Eggs (2) – Room temperature eggs incorporate better and create a smoother batter.
- Vanilla Extract (2 teaspoons) – Enhances both the chocolate and peanut butter flavors.
- Hot Coffee (1 cup) – Don’t skip this! Coffee doesn’t make the cake taste like coffee; it deepens the chocolate flavor and makes the cake incredibly moist.
- Reese’s Peanut Butter Cups (1 cup, chopped) – I use mini cups and give them a rough chop. They melt slightly into the batter, creating pockets of peanut butter goodness.
- Semi-Sweet Chocolate Chips (½ cup) – Adds extra chocolate throughout the cake.
For the Peanut Butter Frosting
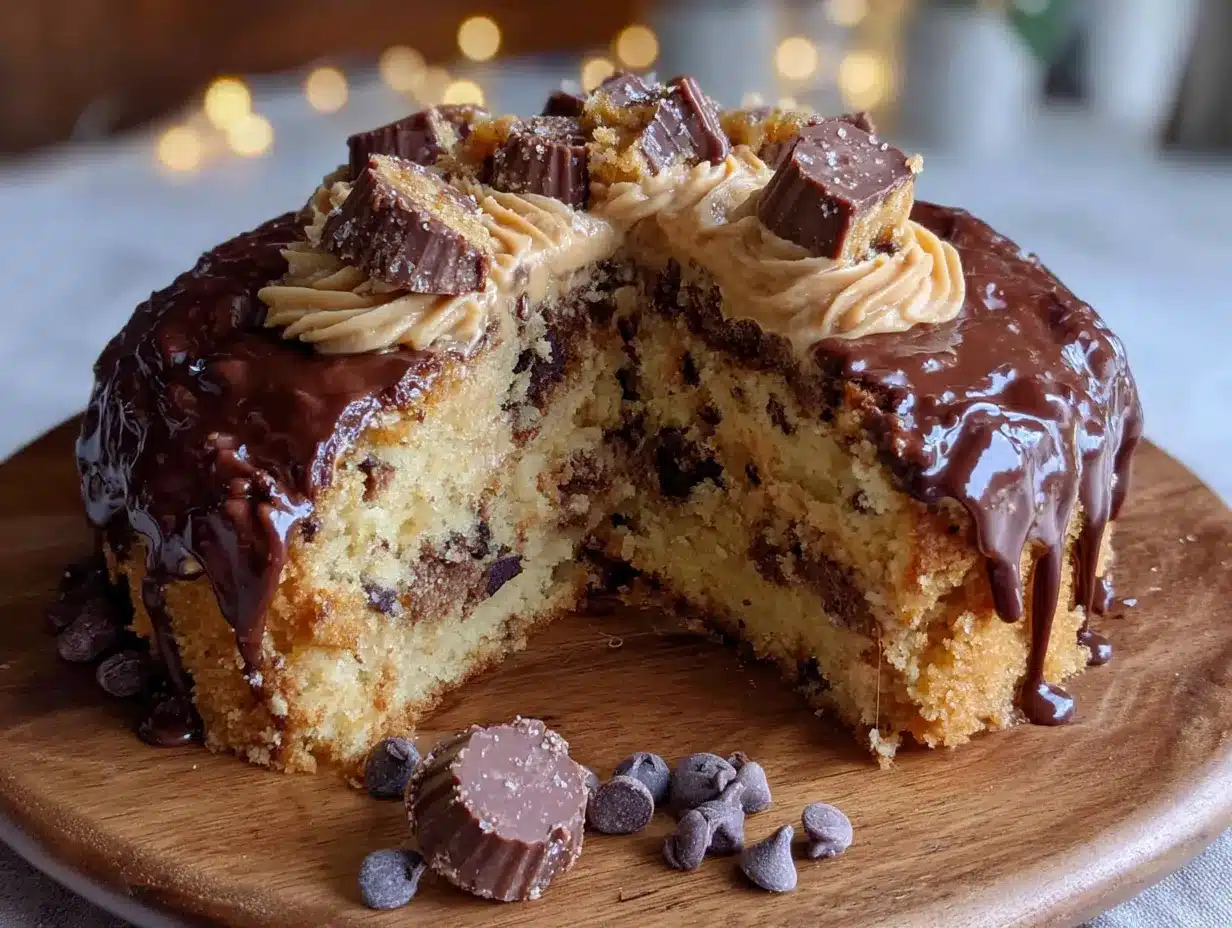
- Unsalted Butter (1 cup, softened) – Room temperature butter creates a smooth, fluffy frosting.
- Creamy Peanut Butter (1 cup) – I recommend Skippy or Jif for the best texture. Natural peanut butter that separates can make the frosting grainy.
- Powdered Sugar (3 cups) – Sift it to avoid lumps.
- Heavy Cream (3-4 tablespoons) – Adjust the amount to reach your desired consistency.
- Vanilla Extract (1 teaspoon) – A little goes a long way.
- Salt (¼ teaspoon) – A pinch of salt takes the peanut butter flavor to another level.
For the Topping (Optional but Recommended)
- Mini Reese’s Cups (½ cup) – For decorating the top.
- Chocolate Chips (¼ cup) – A final sprinkle adds visual appeal.
- Chocolate Ganache Drizzle (optional) – Because why not? Heat ¼ cup heavy cream and pour over ½ cup chocolate chips until smooth.
Equipment Needed
You don’t need a fancy bakery setup for this cake, but having the right tools makes the process smoother and the results more consistent.
- Two 9-Inch Round Cake Pans – I love my Fat Daddio’s pans for even baking. Dark non-stick pans can cause the edges to brown too quickly.
- Stand Mixer or Hand Mixer – A stand mixer makes the frosting come together effortlessly, but a hand mixer works great too.
- Parchment Paper – Cut circles for the bottom of your pans. This guarantees your cakes release without sticking.
- Cooling Rack – Essential for cooling cakes evenly and preventing soggy bottoms.
- Offset Spatula – Not required, but it makes frosting the cake look professional. A butter knife works in a pinch.
- Mixing Bowls – At least two large bowls for the dry and wet ingredients.
- Whisk and Rubber Spatula – For mixing and folding.
- Measuring Cups and Spoons – Accuracy matters in baking, so use proper measuring tools.
Preparation Method
Let’s walk through this step by step. I’ve made this cake enough times to know where things can go wrong, so I’ll point out the tricky parts along the way.
Step 1: Preheat and Prep Your Pans
Preheat your oven to 350°F (175°C). Grease two 9-inch round cake pans with butter or non-stick spray, then line the bottoms with parchment paper circles. Grease the parchment too. This extra step guarantees your cakes will release cleanly. I learned this the hard way after losing half a cake to a stuck pan.
Step 2: Mix the Dry Ingredients
In a large bowl, whisk together the all-purpose flour, cocoa powder, granulated sugar, brown sugar, baking powder, baking soda, and salt. Make sure everything is evenly combined. If you see lumps of brown sugar, break them up with your fingers.
Step 3: Combine the Wet Ingredients
In a separate bowl, whisk together the buttermilk, vegetable oil, eggs, and vanilla extract until smooth. The mixture should look pale and slightly thickened.
Step 4: Bring It All Together
Pour the wet ingredients into the dry ingredients and mix on low speed until just combined. The batter will be thick at this point. Scrape down the sides and bottom of the bowl to make sure everything is incorporated.
Step 5: Add the Hot Coffee
With the mixer running on low, slowly pour in the hot coffee. The batter will become very thin and liquidy—that’s exactly what you want. Don’t panic! This thin batter is what creates that incredibly moist, tender crumb. Mix until smooth, about 30 seconds.
Step 6: Fold in the Mix-Ins
Using a rubber spatula, gently fold in the chopped Reese’s cups and chocolate chips. Reserve a small handful of each for sprinkling on top of the batter after it’s in the pans. Be careful not to overmix at this stage, or the cake can become tough.
Step 7: Bake the Cakes
Divide the batter evenly between the two prepared pans. Sprinkle the reserved Reese’s pieces and chocolate chips over the top of the batter. Bake for 30-35 minutes, or until a toothpick inserted into the center comes out with a few moist crumbs (not wet batter). The cakes should spring back lightly when touched.
Let the cakes cool in the pans for 15 minutes, then run a knife around the edges and turn them out onto a cooling rack. Remove the parchment paper and let them cool completely. This is important—frosting a warm cake is a recipe for a melty mess.
Step 8: Make the Peanut Butter Frosting
While the cakes cool, make the frosting. In a large bowl, beat the softened butter and peanut butter together until smooth and creamy, about 2 minutes. Add the powdered sugar one cup at a time, beating on low speed. Add the heavy cream, vanilla extract, and salt, then increase the speed to medium-high and beat for 2-3 minutes until light and fluffy. If the frosting is too thick, add more cream a tablespoon at a time. If it’s too thin, add more powdered sugar.
Step 9: Assemble the Cake
Place one cake layer on your serving plate or cake stand. Spread a generous layer of peanut butter frosting on top (about ¾ cup). Place the second cake layer on top, then frost the entire cake with the remaining frosting. Don’t worry about making it perfect—a rustic swirl look is beautiful and way less stressful than trying to get perfectly smooth sides.
Step 10: Decorate
Press mini Reese’s cups and extra chocolate chips around the bottom edge of the cake for a finished look. If you’re feeling fancy, drizzle chocolate ganache over the top. Let the cake set for at least 30 minutes before slicing.
Cooking Tips & Techniques
After testing this recipe multiple times, I’ve picked up a few tricks that make a real difference. Here’s what I wish I’d known from the start.
Room Temperature Ingredients Matter. I know it’s annoying to wait for eggs and buttermilk to come to room temperature, but it genuinely affects the texture of your cake. Cold ingredients don’t emulsify properly, which can lead to a dense, uneven crumb. Set everything out 30 minutes before you start mixing.
Don’t Overmix the Batter. Once you add the flour mixture, mix just until you don’t see streaks of flour anymore. Overmixing develops gluten, which makes cakes tough and rubbery. The same goes for folding in the mix-ins—gentle is the name of the game.
Use a Kitchen Scale for Accuracy. If you have one, weighing your flour (about 125 grams per cup) is the most reliable way to measure. Scooping flour directly from the bag can add up to 20% more flour than intended, leading to a dry cake.
Check for Doneness Early. Every oven runs a little differently. Start checking your cakes at the 28-minute mark. If the top springs back when lightly pressed and a toothpick comes out clean (or with just a few moist crumbs), they’re done.
Chill the Cake Before Slicing. This is my favorite tip. After frosting, pop the cake in the fridge for 20-30 minutes before slicing. The frosting sets up, and you’ll get much cleaner slices. Plus, the cold cake tastes even more fudgy.
Toast Your Peanut Butter. For an even deeper flavor, spread your peanut butter on a baking sheet and bake at 350°F for 5-7 minutes until it’s slightly darkened and fragrant. Let it cool before using it in the frosting. This is a game-changer if you have the time.
Variations & Adaptations
One of the things I love about this cake is how adaptable it is. Here are some of my favorite variations.
Peanut Butter Lover’s Dream: Add ½ cup of creamy peanut butter to the cake batter along with the wet ingredients. This makes the cake itself peanut butter flavored, with chocolate chips and Reese’s cups folded in. It’s intense in the best way.
Gluten-Free Version: Substitute the all-purpose flour with a 1:1 gluten-free baking flour blend (I like Bob’s Red Mill). Make sure your cocoa powder and chocolate chips are certified gluten-free as well. The texture will be slightly different, but still delicious.
Chocolate Peanut Butter Cupcakes: This batter makes about 24 cupcakes. Bake at 350°F for 18-22 minutes. The frosting recipe will generously top all of them, with maybe a little left over for sneaking.
Lower Sugar Option: Reduce the granulated sugar to 1 ½ cups and use sugar-free chocolate chips. The cake will be slightly less sweet, but the peanut butter frosting provides plenty of sweetness to balance it out.
Add a Layer of Ganache: For a truly decadent version, spread a layer of chocolate ganache between the cake layers before adding the peanut butter frosting. It takes the chocolate factor to 11.
Make It a Sheet Cake: Pour the batter into a greased 9×13-inch pan and bake for 35-40 minutes. Let it cool completely, then spread the peanut butter frosting over the top. This is my go-to for potlucks and bake sales.
Serving & Storage Suggestions
This cake is best served at room temperature, which brings out the full flavor and gives the frosting that perfectly creamy texture. If you’ve refrigerated it, let it sit on the counter for about 30 minutes before serving.
For presentation, I love serving this cake on a simple white cake stand to let the colors pop. A drizzle of chocolate ganache and a handful of mini Reese’s cups on top makes it look like it came from a bakery. Pair it with a cold glass of milk, a scoop of vanilla ice cream, or even a hot cup of coffee for the ultimate dessert experience.
Storage Instructions: Store the cake in an airtight container at room temperature for up to 3 days. If your kitchen is warm, refrigerate it to keep the frosting from getting too soft. The cake actually tastes even better on day two—the flavors meld together and the texture becomes even more moist.
Freezing Instructions: This cake freezes beautifully. Wrap unfrosted cake layers tightly in plastic wrap, then in aluminum foil, and freeze for up to 3 months. Thaw at room temperature before frosting. You can also freeze the frosted cake whole or in slices. Just place it in the freezer unwrapped for an hour (this sets the frosting), then wrap it tightly and freeze.
Reheating Tip: If you like your cake slightly warm (I do!), microwave individual slices for about 10-15 seconds. It softens the chocolate chips and makes the whole thing taste freshly baked.
If you’re looking for another indulgent treat, you might also love this brown butter banana bread for a completely different but equally satisfying dessert experience. And for a fun snack that pairs perfectly with a slice of this cake, these homemade freezer-friendly Uncrustables are a great make-ahead option.
Nutritional Information & Benefits
Let’s be real—this is a celebration cake, not a health food. But that doesn’t mean it can’t have some redeeming qualities. Here’s an estimated breakdown per slice (based on 12 servings).
| Nutrient | Amount Per Slice |
|---|---|
| Calories | 580 |
| Total Fat | 32g |
| Saturated Fat | 14g |
| Cholesterol | 65mg |
| Sodium | 420mg |
| Total Carbohydrates | 68g |
| Dietary Fiber | 3g |
| Sugars | 48g |
| Protein | 9g |
On the plus side, peanut butter provides a decent amount of protein and healthy fats, while dark chocolate (if you use semi-sweet or dark chocolate chips) contains antioxidants. The buttermilk adds calcium and probiotics. Is it a health food? No. But it’s made with real ingredients, and sometimes that’s enough.
Dietary Considerations: This recipe contains dairy, eggs, peanuts, and gluten. For a dairy-free version, use plant-based butter, dairy-free milk with lemon juice (for buttermilk), and dairy-free chocolate chips. For a nut-free version, use sunflower seed butter instead of peanut butter.
Potential Allergens: Peanuts, dairy, eggs, gluten, and soy (in some chocolate chips). Always check your ingredient labels if you’re serving someone with allergies.
Conclusion
This Ultimate Reese’s Peanut Butter Chocolate Chip Cake is the kind of dessert that makes people stop mid-conversation and just enjoy what they’re eating. It’s rich without being overwhelming, sweet without being cloying, and the combination of fudgy chocolate cake with creamy peanut butter frosting is honestly unbeatable.
What I love most about this recipe is how forgiving it is. You don’t need to be a professional baker to pull it off. The batter comes together in minutes, the frosting is practically foolproof, and even if your layers aren’t perfectly level, the taste will make up for it. I’ve made this for birthday parties, holiday dinners, and random Sunday afternoons, and it never fails to get the same reaction: silence, then a request for the recipe.
I’d love to hear how yours turns out! Did you add the ganache drizzle? Try the peanut butter lover’s version? Or maybe you came up with your own twist? Drop a comment below and let me know. And if you share a photo on social media, tag me—I love seeing these cakes in the wild. Happy baking, friends!
Frequently Asked Questions
Can I use natural peanut butter in the frosting?
I don’t recommend it. Natural peanut butter that separates can make the frosting grainy and oily. Stick with a processed brand like Jif or Skippy for the smoothest, creamiest results. If you only have natural peanut butter, stir it very well and add an extra tablespoon of powdered sugar to help stabilize the frosting.
Can I make this cake ahead of time?
Absolutely. You can bake the cake layers up to two days in advance. Wrap them tightly in plastic wrap and store them at room temperature. The frosting can also be made ahead and refrigerated for up to a week—just let it come to room temperature and re-whip it before using. The assembled cake stays fresh for 3-4 days.
Why did my cake sink in the middle?
This usually happens for one of three reasons: the oven wasn’t hot enough, you opened the oven door too early, or you overmixed the batter. Make sure your oven is fully preheated, avoid opening the door for the first 25 minutes of baking, and mix the batter just until combined. Also, make sure your baking powder and baking soda are fresh.
Can I skip the coffee in the cake?
You can, but I really don’t recommend it. The coffee doesn’t make the cake taste like coffee—it enhances the chocolate flavor and makes the cake incredibly moist. If you’re truly opposed to using coffee, substitute with hot water and add an extra teaspoon of vanilla extract. The cake won’t be quite as rich, but it will still be delicious.
How do I get clean slices of cake?
Use a long, sharp knife and wipe it clean between each cut. For the cleanest slices, chill the cake in the refrigerator for 20-30 minutes before cutting. The frosting will be firmer, and you’ll get much neater slices. A serrated knife also works well for cutting through the cake without squishing it.
Pin This Recipe!
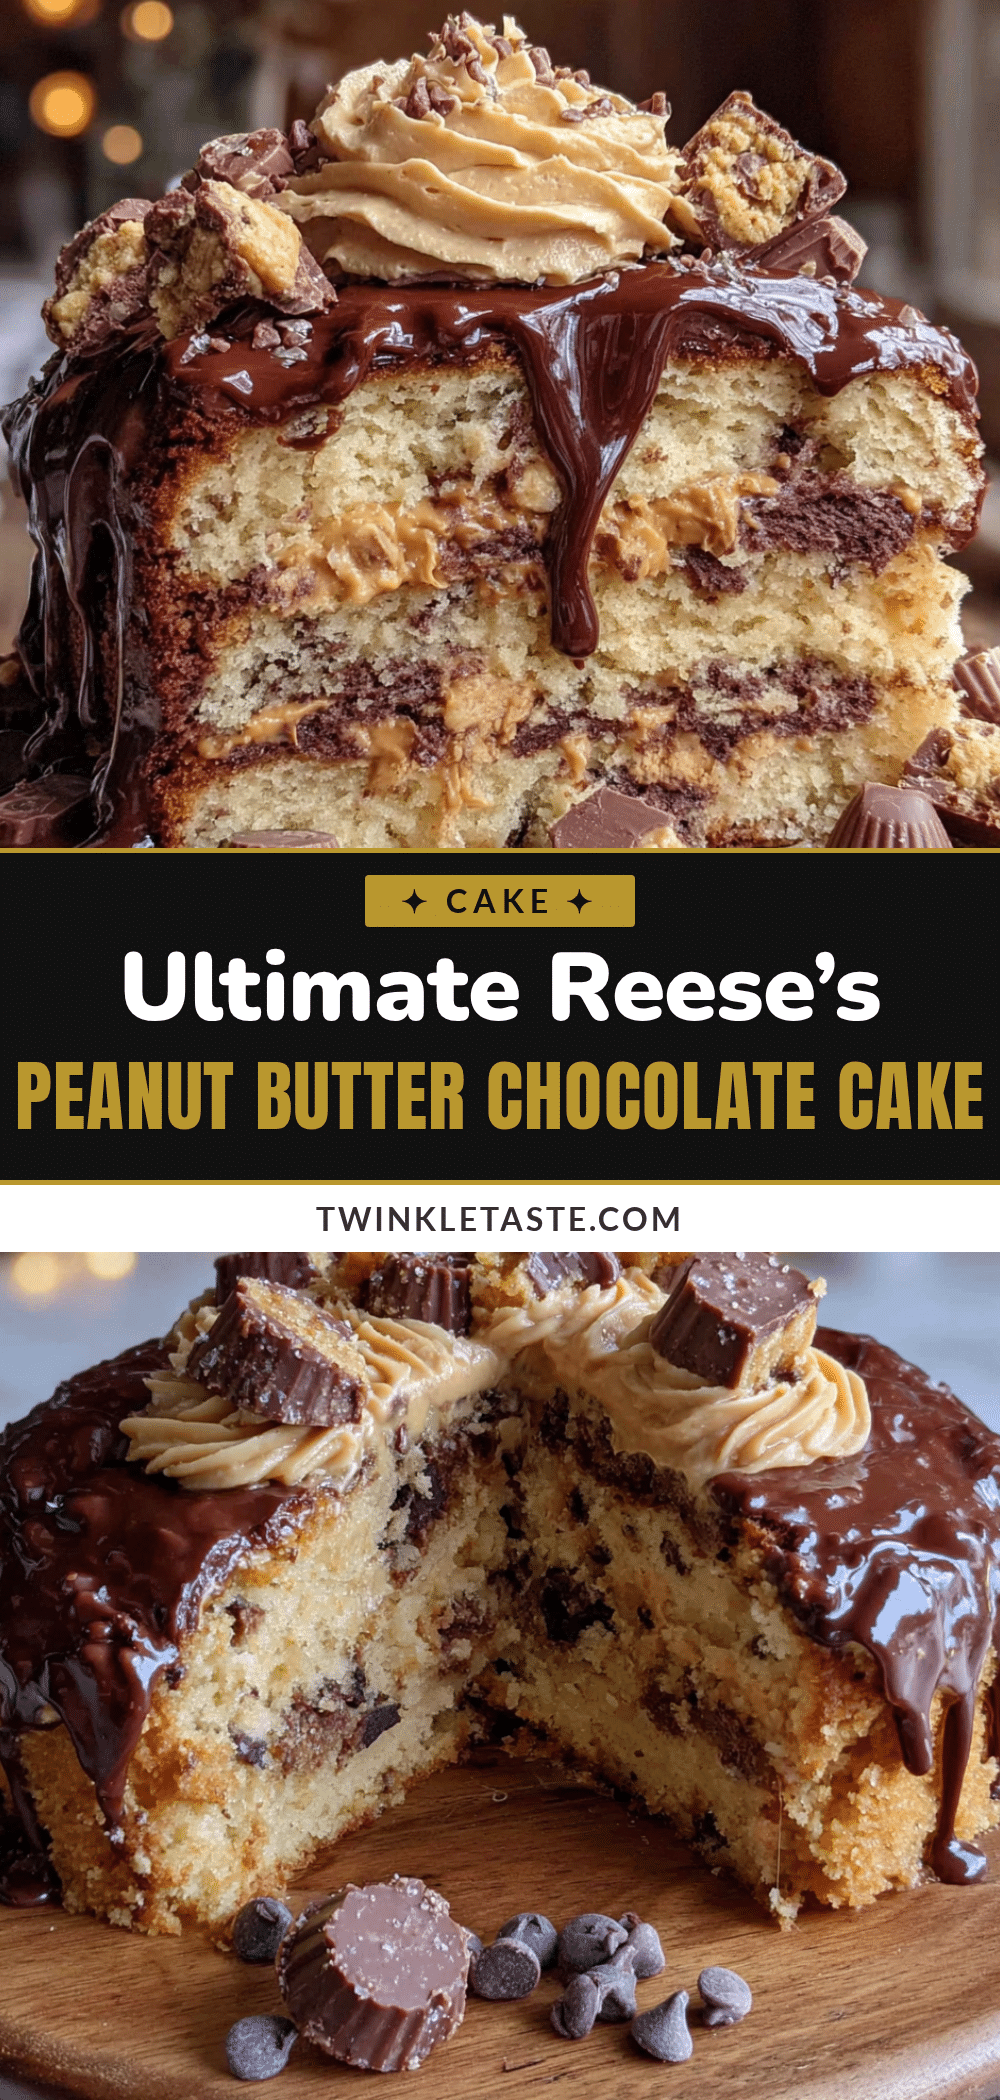
Best Ultimate Reese’s Peanut Butter Chocolate Chip Cake Recipe
This Ultimate Reese’s Peanut Butter Chocolate Chip Cake features layers of rich chocolate cake, creamy peanut butter frosting, and chunks of Reese’s cups and chocolate chips folded into the batter. It’s incredibly moist, bursting with peanut butter and chocolate flavor, and perfect for celebrations or any day that needs a little extra joy.
- Prep Time: 30 minutes
- Cook Time: 30-35 minutes
- Total Time: 1 hour 5 minutes
- Yield: 12 servings 1x
- Category: Dessert
- Cuisine: American
Ingredients
- 2 ½ cups all-purpose flour
- ¾ cup unsweetened cocoa powder (Dutch-process preferred)
- 2 cups granulated sugar
- ½ cup brown sugar, packed
- 2 teaspoons baking powder
- 1 teaspoon baking soda
- 1 teaspoon salt
- 1 ½ cups buttermilk
- ½ cup vegetable oil
- 2 large eggs, room temperature
- 2 teaspoons vanilla extract
- 1 cup hot coffee
- 1 cup chopped Reese’s peanut butter cups (mini cups, roughly chopped)
- ½ cup semi-sweet chocolate chips
- 1 cup unsalted butter, softened
- 1 cup creamy peanut butter (e.g., Skippy or Jif)
- 3 cups powdered sugar, sifted
- 3–4 tablespoons heavy cream
- 1 teaspoon vanilla extract
- ¼ teaspoon salt
- ½ cup mini Reese’s cups (for topping)
- ¼ cup chocolate chips (for topping)
- Optional: ¼ cup heavy cream + ½ cup chocolate chips (for chocolate ganache drizzle)
Instructions
- Preheat oven to 350°F (175°C). Grease two 9-inch round cake pans with butter or non-stick spray, line bottoms with parchment paper circles, and grease the parchment.
- In a large bowl, whisk together flour, cocoa powder, granulated sugar, brown sugar, baking powder, baking soda, and salt until evenly combined.
- In a separate bowl, whisk together buttermilk, vegetable oil, eggs, and vanilla extract until smooth and slightly thickened.
- Pour wet ingredients into dry ingredients and mix on low speed until just combined. Scrape down sides and bottom of bowl.
- With mixer on low, slowly pour in hot coffee. Mix until smooth, about 30 seconds. Batter will be thin.
- Using a rubber spatula, gently fold in chopped Reese’s cups and chocolate chips. Reserve a small handful of each for sprinkling on top of batter in pans.
- Divide batter evenly between prepared pans. Sprinkle reserved Reese’s pieces and chocolate chips over the top of the batter.
- Bake for 30-35 minutes, until a toothpick inserted into the center comes out with a few moist crumbs. Let cakes cool in pans for 15 minutes, then run a knife around edges and turn out onto a cooling rack. Remove parchment and cool completely.
- While cakes cool, make frosting: In a large bowl, beat softened butter and peanut butter together until smooth and creamy, about 2 minutes. Add powdered sugar one cup at a time, beating on low. Add heavy cream, vanilla extract, and salt, then increase speed to medium-high and beat for 2-3 minutes until light and fluffy. Adjust consistency with more cream or powdered sugar as needed.
- Place one cake layer on serving plate. Spread about ¾ cup frosting on top. Place second cake layer on top, then frost entire cake with remaining frosting. Decorate with mini Reese’s cups and chocolate chips around bottom edge. Optionally drizzle with chocolate ganache. Let cake set for at least 30 minutes before slicing.
Notes
Room temperature ingredients matter for best texture. Don’t overmix the batter. Use a kitchen scale for accurate flour measurement. Check for doneness early (around 28 minutes). Chill the cake before slicing for cleaner cuts. For deeper peanut butter flavor, toast peanut butter at 350°F for 5-7 minutes before using in frosting. Store in an airtight container at room temperature for up to 3 days or refrigerate. Freezes well.
Nutrition
- Serving Size: 1 slice
- Calories: 580
- Sugar: 48
- Sodium: 420
- Fat: 32
- Saturated Fat: 14
- Carbohydrates: 68
- Fiber: 3
- Protein: 9
Keywords: Reese's cake, peanut butter chocolate chip cake, chocolate peanut butter cake, Reese's dessert, chocolate cake with peanut butter frosting, ultimate Reese's cake


