This was supposed to be the year I finally made a perfectly clear, elegant gravy. You know, the kind that looks like it belongs in a magazine spread, with nary a speck in sight. I had my turkey neck and giblets simmering, my stock was homemade, and I was feeling, honestly, a little too confident. Then the power flickered. Just once, but it was enough to throw my whole meticulously timed plan into chaos. I grabbed the wrong measuring cup, poured a torrent of cold stock into my hot roux, and ended up with a lumpy, terrifying mess. I was already running late, the turkey was resting, and I could hear my family starting to gather. In a moment of pure desperation, I threw the whole sad pot into the blender — lumps, seasonings, and all — and prayed. What came out wasn’t the clear, elegant gravy I had planned. It was something better. It was velvety, impossibly rich, and deeply flavorful. It was the moment I stopped panicking and started making the best gravy of my life.
Maybe you’ve been there — standing over a hot stove, the pressure of the perfect meal on your shoulders, and everything that can go wrong does. That’s the thing about this make-ahead turkey gravy. It forgives your mistakes. It laughs in the face of lumps. It’s the one thing you can cross off your list days before the big feast, and that, my friend, is a kind of culinary freedom. This recipe became my Thanksgiving anchor, the one constant in a day full of variables. It’s the reason I can actually enjoy a glass of wine with my guests instead of sweating over a last-minute slurry. I keep making it because it works, every single time, and it lets me be a guest at my own party.
Why You’ll Love This Recipe
Let’s be honest, the holidays are a marathon, not a sprint. The last thing you need is another thing to do while the turkey rests and your guests are eyeing the dining room. This recipe is your secret weapon. It’s designed to take the stress out of the big day, delivering a restaurant-quality gravy that tastes like it simmered for hours, all from a simple, five-ingredient base you can prep well in advance.
- Truly Make-Ahead: This is the star of the show. Make this gravy up to three days before your feast. No last-minute whisking, no frantic flavor adjustments. Just reheat and serve.
- Five Simple Ingredients: You don’t need a specialty store or a dozen exotic spices. Turkey parts, butter, flour, stock, and a little time. That’s it. You probably already have most of this in your kitchen.
- Perfect for Hosting: When you’re juggling a turkey, side dishes, and a table full of people, this is a lifesaver. It frees up your stove and your brain space so you can actually enjoy the party you’ve worked so hard to create.
- Crowd-Pleaser: This gravy is the glue that holds a Thanksgiving plate together. It’s rich, savory, and silky smooth. Kids love it, adults ask for seconds, and no one ever guesses it was made days before.
- Unbelievably Delicious: The secret is in the deeply browned turkey stock. We’re not just making gravy; we’re building a flavor foundation that tastes like a whole turkey condensed into a single, glorious sauce. It’s next-level comfort.
What makes this recipe different from the rest is the technique. We’re not just dumping stock into a roux. We’re roasting the turkey parts first to get that deep, caramelized flavor. It’s a simple step that makes a world of difference. This isn’t just another version of turkey gravy; it’s the best version. It’s the kind that makes you close your eyes after that first bite on your perfectly piled plate. It’s comfort food, perfected and simplified, so you can be the host with the most without all the stress.
What Ingredients You Will Need
This recipe uses simple, humble ingredients to build a flavor that tastes anything but simple. The magic is in the method, not a long list of hard-to-find items. You’ll likely find everything you need on a single trip to the grocery store.
- For the Deeply Roasted Turkey Stock:
- Turkey Wings or Drumsticks (2-3 pounds): These are the workhorses of this gravy. They are packed with collagen and dark meat, which gives the stock a rich body and deep, savory flavor. I prefer wings for the higher skin-to-meat ratio, which means more browning and more flavor. (Look for meaty wings at your butcher counter).
- Onion (1 large, quartered): Adds a sweet, savory base note. Don’t even bother peeling it all the way; the skin adds color to the stock.
- Carrots (2 large, roughly chopped): For a touch of sweetness and depth. They also help season the stock as they roast.
- Celery (2 stalks, roughly chopped): The classic aromatic that rounds out the flavor profile. It adds a subtle earthiness.
- Chicken or Turkey Stock (8 cups, low-sodium): Use a good quality store-bought stock to start. I recommend Kitchen Basics or Swanson for a reliable, consistent flavor. Homemade is great, but not necessary for this recipe to shine.
- Fresh Thyme (4-5 sprigs): A classic poultry herb that infuses the stock with a warm, aromatic flavor.
- Black Peppercorns (1 teaspoon): For a subtle, peppery warmth that builds during the simmer.
- Bay Leaves (2): Adds a subtle, floral complexity that you can’t quite name but would miss if it were gone.
- For the Gravy:
- Unsalted Butter (1/2 cup / 1 stick): The foundation of our roux. Using unsalted butter lets you control the final salt level of the gravy.
- All-Purpose Flour (1/2 cup): The thickening agent. For a gluten-free option, you can use a 1:1 gluten-free all-purpose flour blend, but the texture will be slightly different.
- Your Homemade Turkey Stock (All of it, about 6-7 cups after simmering): This is the heart and soul of the gravy. All that roasted flavor is now concentrated in this liquid gold.
- Salt and Freshly Ground Black Pepper (To taste): The final seasoning is crucial. Taste as you go!
Ingredient Selection Tips: When choosing your turkey parts, look for pieces with a good amount of skin and fat. This is where the flavor lives. Don’t be afraid to ask your butcher to cut a few wings in half at the joint. For the stock, I always use low-sodium so I have complete control over the salt. A pinch too much salt at the end can be fixed; a salty stock cannot.
Equipment Needed
You don’t need a professional kitchen to make this gravy. A few basic tools will do the trick. Here’s what you’ll need:
- Large Roasting Pan or Rimmed Baking Sheet: For roasting the turkey parts and vegetables. Having a rim is essential to catch all the flavorful juices.
- Large Stockpot or Dutch Oven (6-8 quarts): This is for simmering your stock. A heavy-bottomed pot is ideal for even heat distribution.
- Fine-Mesh Strainer or Cheesecloth: For straining the stock to get that perfectly smooth, lump-free gravy. A fine-mesh strainer is a worthwhile investment.
- Large Bowl or Pitcher: To catch the strained stock.
- Medium Saucepan or Skillet: For making the roux and finishing the gravy. A wide skillet gives you more surface area for whisking.
- Whisk: Your best friend for a lump-free gravy. A good, sturdy whisk is non-negotiable.
- Fat Separator (Optional but helpful): If you want to remove excess fat from the stock before making the gravy, this is the easiest tool. A large spoon works too.
- Measuring Cups and Spoons: For accuracy.
- Sharp Knife and Cutting Board: For prepping your vegetables.
Budget-Friendly Options: Don’t have a fine-mesh strainer? You can line a colander with a clean kitchen towel or a few layers of cheesecloth. It works just as well. A fat separator is a nice-to-have, but you can simply spoon the fat off the top of the stock after it chills in the fridge.
Preparation Method
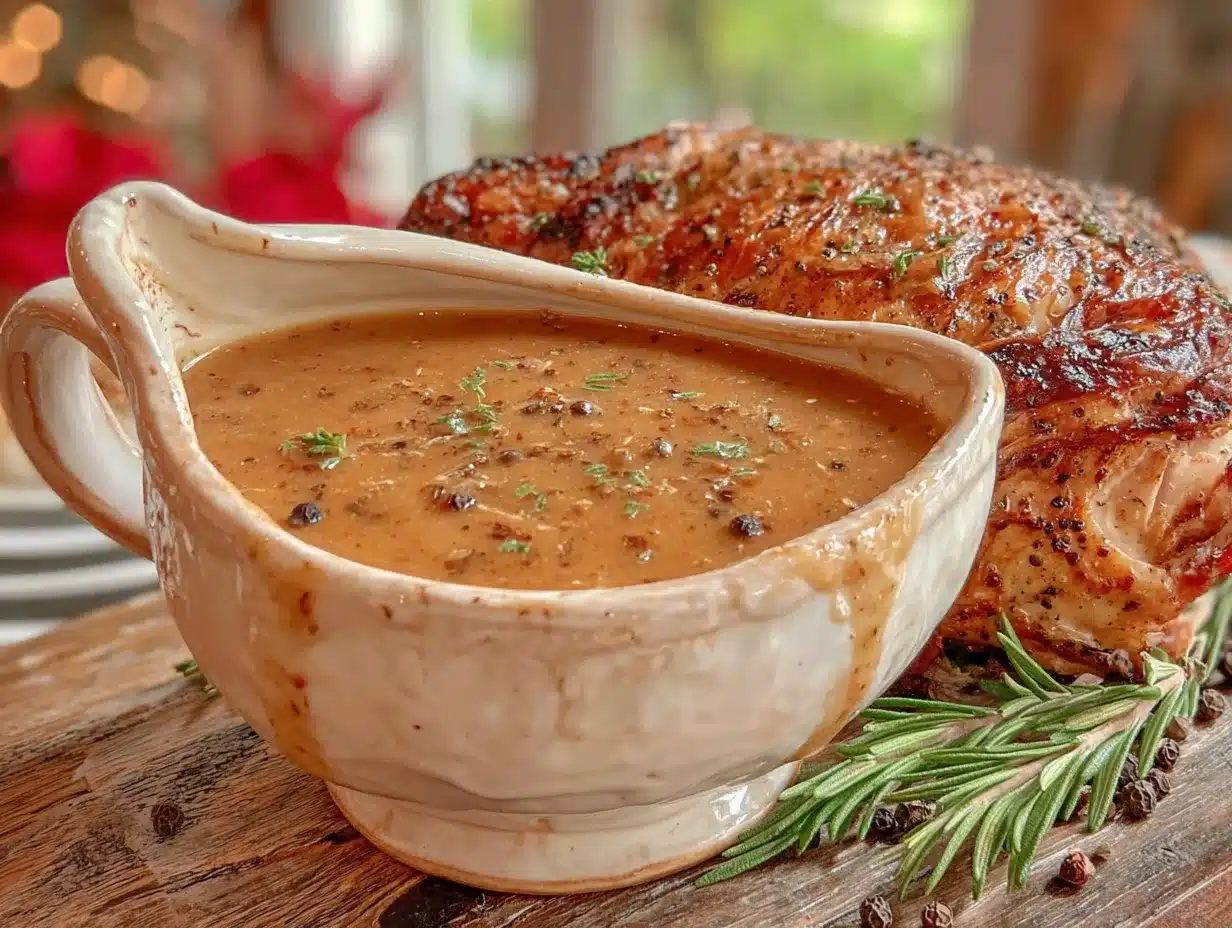
This process is broken into two easy parts: making the stock and making the gravy. The best part? You can do the stock up to three days ahead.
Part 1: The Deeply Roasted Turkey Stock (Day Before or Up to 3 Days Ahead)
- Preheat and Prep: Preheat your oven to 425°F (220°C). Arrange the turkey wings (or drumsticks) and the quartered onion, chopped carrots, and celery in a single layer in your large roasting pan. Drizzle with a tablespoon of olive oil and toss to coat. Season generously with salt and pepper.
- Roast for Deep Flavor: Roast for 45-60 minutes, flipping the pieces halfway through. You want the turkey skin to be deeply golden brown and the vegetables to have nice, dark caramelized spots. This browning is the flavor foundation of your entire gravy, so don’t rush it. (Look for the smell of roasted turkey and caramelized onions filling your kitchen).
- Deglaze the Pan: Carefully remove the hot roasting pan from the oven and place it on your stovetop over two burners. Pour about 1 cup of your chicken or turkey stock into the hot pan. Using a wooden spoon or spatula, scrape up all the browned bits from the bottom of the pan. This is called deglazing, and those bits are pure flavor.
- Simmer the Stock: Transfer the roasted turkey, vegetables, and all the deglazing liquid to your large stockpot. Add the remaining 7 cups of stock, the fresh thyme sprigs, black peppercorns, and bay leaves. Pour in enough cold water to just cover everything by about an inch. Bring to a gentle boil over medium-high heat, then immediately reduce the heat to low to maintain a very gentle simmer.
- Skim and Simmer: As the stock simmers, a foam and scum will rise to the surface. Use a large spoon to skim this off and discard it. This will give you a clearer, cleaner-tasting stock. Let it simmer gently, partially covered, for 2 to 2 1/2 hours. The liquid should reduce slightly and become deeply flavorful. (The stock should smell intensely of turkey, herbs, and roast vegetables).
- Strain and Cool: Set your fine-mesh strainer over a large bowl or pitcher. Carefully pour the stock through the strainer, pressing on the solids with the back of a spoon to extract every last drop of liquid. Discard the solids. Let the stock cool to room temperature, then cover and refrigerate. As it chills, the fat will rise to the top and solidify, making it incredibly easy to remove the next day.
Part 2: The Silky Smooth Gravy (Day of or Day Before)
- Remove the Fat: Take your chilled stock out of the fridge. Spoon off and discard the solid layer of fat from the top. (This is where a fat separator is handy, but a spoon works great). You should have about 6-7 cups of defatted stock.
- Make the Roux: In your medium saucepan or skillet, melt the 1/2 cup of unsalted butter over medium heat. Once melted and bubbling, add the 1/2 cup of all-purpose flour. Whisk constantly to combine. Cook the roux, whisking continuously, for about 2-3 minutes. You want it to be a pale, golden blonde color. You are cooking out the raw flour taste, not browning it for a darker gravy. (The roux will smell nutty and look like wet sand).
- Whisk in the Stock: This is the moment that used to terrify me, but now it’s a breeze. Slowly pour in your defatted turkey stock, about 1 cup at a time, while whisking constantly. Keep the heat at medium. The mixture will seize up and become very thick at first, but keep whisking and adding stock. It will loosen and become beautifully smooth. (The gravy will go from a thick paste to a silky liquid).
- Simmer to Thicken: Once all the stock is incorporated, bring the gravy to a gentle simmer. Let it cook for 5-10 minutes, whisking occasionally, until it has thickened to your desired consistency. It should coat the back of a spoon. If it’s too thick, whisk in a splash of stock or water. If it’s too thin, let it simmer a few minutes longer.
- Season and Finish: Remove the gravy from the heat. Season generously with salt and freshly ground black pepper. Taste it. This is the most important step. You might need a surprising amount of salt to wake up all those deep flavors. If you want an even richer color, you can whisk in a teaspoon of Kitchen Bouquet or a splash of dark soy sauce at this point, but it’s not necessary.
- Strain (Optional but Recommended): For the absolute silkiest, most lump-free gravy, pour it through a fine-mesh strainer one last time into a serving boat or storage container. This catches any tiny bits of cooked flour or rogue peppercorns.
Cooking Tips & Techniques
I’ve made every mistake in the book with gravy, so let me save you the trouble. Here are the lessons I learned the hard way.
- The Biggest Mistake: Cold Stock into Hot Roux. This is the #1 cause of lumpy gravy. Your stock must be warm or at room temperature when you add it to the roux. Cold liquid shocks the hot roux and causes it to seize, creating lumps that are very hard to whisk out. I always warm my defatted stock in the microwave for a minute or two before I start the roux.
- Don’t Rush the Roast: That deep, dark color on the turkey parts is non-negotiable. It’s the difference between a gravy that tastes like “brown” and a gravy that tastes like “turkey.” Don’t pull the pan out of the oven until the skin is a deep mahogany.
- The “Blender Emergency Fix”: If you do end up with lumps, don’t panic. Pour the entire batch of gravy into a blender (in batches if necessary) and blend on high for 30 seconds. It will be perfectly smooth. This is my secret weapon and the reason I’m never afraid of a lumpy roux anymore.
- Timing is Everything for a Host: Make the stock on Tuesday or Wednesday. Defat and make the gravy on Thursday morning. Reheat it gently on the stovetop on Thursday right before serving. If it’s too thick after reheating, just whisk in a splash of hot water or stock. This schedule leaves you completely free on the big day.
- Consistency Check: Gravy will continue to thicken as it cools. When you make it ahead, it will be very thick out of the fridge. Don’t worry. It will loosen up as you reheat it. I always aim for a consistency that’s slightly thinner than my final goal, knowing it will thicken up again as it sits on the table in a warm boat.
Variations & Adaptations
This recipe is a fantastic base, and it’s easy to adapt to your needs. Here are a few ways I’ve played with it over the years.
- Herb-Infused Gravy: Add a few sprigs of fresh rosemary, sage, and parsley to the stock while it simmers. Strain them out with the other solids. You’ll get a beautifully aromatic gravy that screams “Thanksgiving.” This is my personal favorite variation.
- Mushroom Turkey Gravy: For an even deeper, earthier flavor, sauté 8 ounces of sliced cremini mushrooms in a little butter until deeply browned. Add them to the stockpot when you start simmering the stock. When you strain the stock, press firmly on the mushrooms to extract their flavor. The result is a gravy with an incredible umami punch.
- Gluten-Free Gravy: Substitute the all-purpose flour with a good quality gluten-free all-purpose flour blend (like Cup4Cup or Bob’s Red Mill 1-to-1). The roux will look a little different, but it will thicken beautifully. You may need to let it simmer an extra 5 minutes to reach the right consistency.
- Giblet Gravy: While the stock is simmering, you can add the turkey giblets (neck, heart, gizzard) to the pot. After straining, pick the meat off the neck and finely chop the cooked giblets. Stir them back into the finished gravy for a classic, rustic giblet gravy that has amazing texture and flavor.
Serving & Storage Suggestions
This gravy is designed to be a workhorse for your hosting needs. Here’s how to serve and store it like a pro.
- Serving Temperature: Serve the gravy piping hot in a warmed gravy boat or a small, heatproof bowl. A cold gravy boat will cool your beautiful sauce down in seconds. I always run mine under hot water for a minute before filling it.
- Presentation Tips for Hosts: Place the gravy boat on a small saucer to catch any drips. If you want to be extra fancy, you can garnish the top of the gravy with a tiny sprig of fresh thyme or a few cracks of black pepper. It’s a small touch that shows you care.
- What to Serve Alongside: This gravy is the star of the show, but it plays beautifully with others. It’s a must with creamy mashed potatoes, and it’s divine over a slice of savory herb stuffing. Don’t be shy about drizzling it over your turkey, of course, and even your warm dinner rolls won’t be safe.
- Storage Instructions: Store leftover gravy in an airtight container in the refrigerator for up to 4 days. The flavors will actually meld and deepen overnight, making it taste even better the next day. For longer storage, you can freeze the gravy for up to 3 months. Freeze it in a freezer-safe bag or container.
- Reheating Methods: The best way to reheat is in a small saucepan over low heat, whisking occasionally. If it seems too thick, whisk in a tablespoon of water or stock at a time until it reaches the desired consistency. You can also reheat it in the microwave in 30-second bursts, whisking between each, but be careful not to overheat it or it can separate.
Nutritional Information & Benefits
While gravy is a treat, it’s not without its redeeming qualities. Here’s a quick look at what you’re getting in a standard 1/4 cup serving.
- Estimated Nutritional Values (per 1/4 cup serving): Calories: 80-100, Fat: 6-8g, Carbohydrates: 5-6g, Protein: 2-3g. (This will vary based on the amount of fat removed from the stock).
- Health Benefits of Key Ingredients: The turkey stock is rich in collagen and gelatin, which is great for joint health and skin elasticity. The carrots and celery provide a small dose of vitamins and antioxidants. By making it from scratch, you control the sodium, making it a healthier option than most store-bought packets or canned gravies.
- Dietary Considerations: This recipe is naturally low-carb and can be made gluten-free with a simple flour swap. It is not dairy-free due to the butter, but you can substitute a high-quality vegan butter or even a neutral oil like avocado oil for the roux.
- Potential Allergens: This recipe contains dairy (butter) and gluten (flour). As mentioned, both can be substituted.
- Personal Wellness Perspective: For me, this gravy is about more than just numbers. It’s about feeling good about what I’m serving my family. Knowing it’s made from real, whole ingredients — not preservatives and mystery powders — makes that first bite even more satisfying. It’s a small, intentional choice in a day full of indulgence.
Conclusion
This make-ahead turkey gravy is more than just a recipe; it’s a permission slip. It’s permission to stop stressing, to enjoy your own party, and to serve something truly spectacular without breaking a sweat. It started as a happy accident born from a power outage and a moment of panic, and it has become the cornerstone of my holiday hosting strategy. The deep, savory flavor from the roasted turkey stock is simply unmatched, and the ability to make it days in advance is a game-changer for any host.
I encourage you to make this recipe your own. Add your favorite herbs, throw in some mushrooms, or keep it perfectly simple. Whatever you do, don’t be afraid of the lumps — you have a blender for that! I promise you, the first time you watch your guests pour this velvety, golden gravy over their plates, you’ll wonder why you ever did it any other way. Now go on, get that stock simmering, and give yourself the gift of a stress-free feast.
Frequently Asked Questions
Can I use chicken instead of turkey wings for the stock?
Absolutely! If you can’t find turkey wings, chicken wings or drumsticks are a perfect substitute. They will still provide plenty of flavor and gelatin for a rich, silky gravy. The flavor will be slightly less “turkey-forward,” but still delicious.
My gravy is too thin. How do I fix it?
Don’t worry, this is an easy fix! Simply let the gravy simmer for a few more minutes over medium-low heat. The longer it simmers, the more the liquid will evaporate and the thicker it will become. You can also whisk together a slurry of 1 tablespoon of cornstarch and 2 tablespoons of cold water, then whisk it into the simmering gravy until it thickens.
My gravy is too thick. How do I thin it out?
This is even easier to fix! Simply whisk in a splash of warm chicken or turkey stock, or even a little warm water, until it reaches your desired consistency. Do this slowly, adding a tablespoon at a time, until it’s just right.
Can I make this gravy completely vegetarian?
Yes, you can make a fantastic vegetarian version. Substitute the turkey wings with a few large portobello mushrooms and an extra onion, all roasted in the same way. Use a high-quality vegetable stock as the base. The roasted mushrooms will provide a deep, savory umami flavor that mimics the richness of the turkey stock.
How far in advance can I make the gravy?
You can make the turkey stock up to 3 days in advance and keep it covered in the refrigerator. Once you make the gravy from that stock, it will keep for another 3-4 days in the fridge. You can also freeze the finished gravy for up to 3 months. This recipe is designed for maximum flexibility!
Pin This Recipe!

Best Make-Ahead Turkey Gravy from Scratch (Easy, 5-Ingredient Recipe)

This make-ahead turkey gravy is a game-changer for holiday hosting. Made with just five simple ingredients, it delivers a velvety, impossibly rich, and deeply flavorful gravy that you can prepare days in advance, freeing you to enjoy your own party.
- Prep Time: 15 minutes
- Cook Time: 3 hours 30 minutes
- Total Time: 3 hours 45 minutes
- Yield: 6-7 cups (approximately 24-28 servings of 1/4 cup each)
- Category: Sauce, Condiment
- Cuisine: American
Ingredients
- For the Deeply Roasted Turkey Stock:
- Turkey Wings or Drumsticks (2-3 pounds)
- Onion (1 large, quartered)
- Carrots (2 large, roughly chopped)
- Celery (2 stalks, roughly chopped)
- Chicken or Turkey Stock (8 cups, low-sodium)
- Fresh Thyme (4-5 sprigs)
- Black Peppercorns (1 teaspoon)
- Bay Leaves (2)
- For the Gravy:
- Unsalted Butter (1/2 cup / 1 stick)
- All-Purpose Flour (1/2 cup)
- Your Homemade Turkey Stock (All of it, about 6-7 cups after simmering)
- Salt and Freshly Ground Black Pepper (To taste)
Instructions
- Part 1: The Deeply Roasted Turkey Stock (Day Before or Up to 3 Days Ahead)
- Preheat your oven to 425°F (220°C). Arrange the turkey wings (or drumsticks) and the quartered onion, chopped carrots, and celery in a single layer in your large roasting pan. Drizzle with a tablespoon of olive oil and toss to coat. Season generously with salt and pepper.
- Roast for 45-60 minutes, flipping the pieces halfway through. You want the turkey skin to be deeply golden brown and the vegetables to have nice, dark caramelized spots.
- Carefully remove the hot roasting pan from the oven and place it on your stovetop over two burners. Pour about 1 cup of your chicken or turkey stock into the hot pan. Using a wooden spoon or spatula, scrape up all the browned bits from the bottom of the pan.
- Transfer the roasted turkey, vegetables, and all the deglazing liquid to your large stockpot. Add the remaining 7 cups of stock, the fresh thyme sprigs, black peppercorns, and bay leaves. Pour in enough cold water to just cover everything by about an inch. Bring to a gentle boil over medium-high heat, then immediately reduce the heat to low to maintain a very gentle simmer.
- As the stock simmers, a foam and scum will rise to the surface. Use a large spoon to skim this off and discard it. Let it simmer gently, partially covered, for 2 to 2 1/2 hours.
- Set your fine-mesh strainer over a large bowl or pitcher. Carefully pour the stock through the strainer, pressing on the solids with the back of a spoon to extract every last drop of liquid. Discard the solids. Let the stock cool to room temperature, then cover and refrigerate.
- Part 2: The Silky Smooth Gravy (Day of or Day Before)
- Take your chilled stock out of the fridge. Spoon off and discard the solid layer of fat from the top. You should have about 6-7 cups of defatted stock.
- In your medium saucepan or skillet, melt the 1/2 cup of unsalted butter over medium heat. Once melted and bubbling, add the 1/2 cup of all-purpose flour. Whisk constantly to combine. Cook the roux, whisking continuously, for about 2-3 minutes. You want it to be a pale, golden blonde color.
- Slowly pour in your defatted turkey stock, about 1 cup at a time, while whisking constantly. Keep the heat at medium. The mixture will seize up and become very thick at first, but keep whisking and adding stock.
- Once all the stock is incorporated, bring the gravy to a gentle simmer. Let it cook for 5-10 minutes, whisking occasionally, until it has thickened to your desired consistency. It should coat the back of a spoon.
- Remove the gravy from the heat. Season generously with salt and freshly ground black pepper. Taste it.
- For the absolute silkiest, most lump-free gravy, pour it through a fine-mesh strainer one last time into a serving boat or storage container.
Notes
The biggest mistake is adding cold stock to hot roux, which causes lumps. Always warm your stock before adding. If you do get lumps, blend the gravy in a blender for 30 seconds. Make the stock up to 3 days ahead. The gravy will thicken as it cools; thin with a splash of stock or water when reheating.
Nutrition
- Serving Size: 1/4 cup
- Calories: 90
- Sugar: 1
- Sodium: 250
- Fat: 7
- Saturated Fat: 4
- Carbohydrates: 5
- Protein: 2
Keywords: make-ahead turkey gravy, easy turkey gravy, 5-ingredient gravy, Thanksgiving gravy, holiday gravy, from scratch gravy, turkey stock, roux gravy


