Three-time-in-a-week and the creamy layers still never get boring—honestly, it’s borderline ridiculous how often I’ve made these Easy No-Bake Red White and Blue Cheesecake Jars lately. I caught myself tweaking the berry-to-cheesecake ratio mid-pour, but the texture stayed that silky-smooth dream I crave. This obsession spiraled after a spontaneous Fourth of July picnic where I needed something quick, festive, and fuss-free. The jars were the answer—portable, colorful, and surprisingly indulgent without firing up the oven. The vibrant reds and blues against the stark white cheesecake gave me this burst of seasonal nostalgia, and I couldn’t help but make them every Friday leading up to the holiday (and a few times after).
The layering process feels oddly therapeutic, too. Smoothing the cream cheese mix only to top it with juicy berries and crumbly graham cracker crust—it’s simple, but there’s this quiet satisfaction in seeing those colors stack so perfectly. Plus, no baking means no waiting around, no oven heat, and no chance of a dry crust ruining the vibe. I’m always tweaking the berry combo, sometimes throwing in a handful of fresh blueberries from the farmer’s market or swapping in strawberry slices when they’re at their peak. Each time, it’s like a little victory.
What’s stuck with me is how effortlessly this recipe turns a casual gathering into something charming without the usual kitchen chaos. It’s the kind of dessert that feels like a secret weapon for impressing guests without breaking a sweat. And honestly, that’s why it’s become my go-to for summer celebrations—especially when paired with other crowd-pleasers like juicy lucy burgers or a refreshing cucumber tomato salad. This recipe isn’t just dessert; it’s a little jar of summer joy that keeps pulling me back.
Why You’ll Love This Recipe
Honestly, this Easy No-Bake Red White and Blue Cheesecake Jars recipe has become a staple in my summer repertoire for so many reasons. It’s like the sweet spot between fuss-free and festive, perfect when you want to impress but not stress.
- Quick & Easy: Comes together in under 20 minutes, making it a lifesaver for last-minute parties or spontaneous get-togethers.
- Simple Ingredients: Uses pantry staples you probably already have, plus fresh berries that scream summer.
- Perfect for Fourth of July: The red, white, and blue theme is spot on for patriotic celebrations, and the jars are super portable for picnics or BBQs.
- Crowd-Pleaser: Kids love the creamy sweetness, adults appreciate the fresh berry tang, and everyone digs the cute presentation.
- Unbelievably Delicious: The texture is silky and light, thanks to blending cream cheese and whipped cream just right, with a crumbly, buttery crust that adds the perfect crunch.
What really sets this cheesecake apart is the no-bake magic. No oven means no worries about burnt edges or dry filling. The layering technique gives you that classic cheesecake feel but in a totally accessible, handheld form. Plus, swapping out berries or adding a splash of lemon zest can tweak the flavors subtly, creating something uniquely yours each time. It’s not just a dessert; it’s a little celebration-in-a-jar, perfect for making summer memories without the stress.
What Ingredients You Will Need
This recipe uses simple, wholesome ingredients to deliver bold flavor and satisfying texture without the fuss. Most are pantry basics, with fresh berries to make those patriotic colors pop.
- For the Crust:
- Graham cracker crumbs – About 1 ½ cups (150g), finely crushed (I prefer Honey Maid for the right sweetness)
- Unsalted butter – 5 tablespoons (70g), melted (adds that rich, buttery crunch)
- Granulated sugar – 2 tablespoons (25g)
- For the Cheesecake Filling:
- Cream cheese – 8 oz (225g), softened (room temperature is key for smoothness)
- Powdered sugar – ¾ cup (90g), sifted
- Vanilla extract – 1 teaspoon (I like Nielsen-Massey for pure flavor)
- Heavy whipping cream – 1 cup (240ml), chilled (helps create that airy texture)
- Fresh lemon juice – 1 tablespoon (about half a lemon, brightens the flavor)
- For the Toppings:
- Fresh strawberries – 1 cup (about 150g), hulled and sliced (or substitute with raspberries for a twist)
- Fresh blueberries – 1 cup (150g), washed and drained
- Fresh raspberries – ½ cup (optional, for extra red pop)
Seasonal substitutions are easy here — if fresh berries are scarce, frozen ones work fine after thawing and draining. For a dairy-free option, swap the cream cheese and heavy cream with coconut-based alternatives, though texture will shift slightly. The graham cracker crust is forgiving; crushed digestive biscuits make a fine substitute if you’re in a pinch.
Equipment Needed
- Mixing bowls – One medium and one large for combining crust and filling separately
- Electric mixer or stand mixer – Essential to whip the cream and smooth out the cream cheese filling effortlessly
- Measuring cups and spoons – For precise ingredient amounts
- Spatula – Flexible for folding the whipped cream into the cream cheese mixture
- Small jars or clear dessert cups – About 8 to 10, 6-ounce (180ml) size works perfectly for layering and serving
- Food processor or plastic bag and rolling pin – To crush graham crackers finely (if you don’t have a food processor)
For budget-friendly options, a hand mixer works great in place of a stand mixer, and you can improvise jars with clean mason jars or even small glass tumblers. Keeping your cream cheese at room temperature is crucial, so a simple tip: take it out 30 minutes before starting. Also, if you don’t have a food processor, tossing graham crackers in a sealed bag and crushing them with a rolling pin gives that perfect crumb texture.
Preparation Method
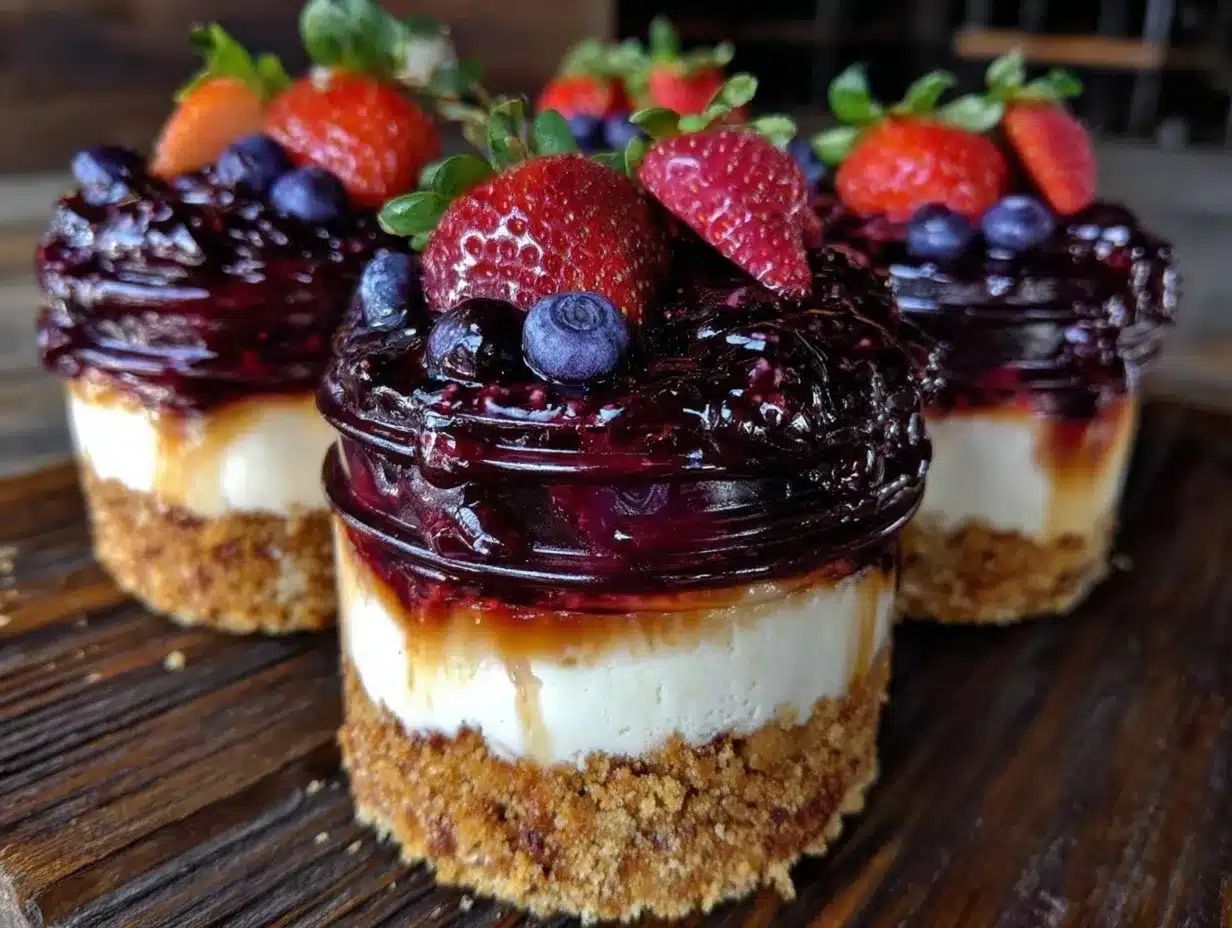
- Prepare the crust: In a medium bowl, combine 1 ½ cups (150g) graham cracker crumbs, 5 tablespoons (70g) melted unsalted butter, and 2 tablespoons (25g) granulated sugar. Mix until the crumbs are evenly coated and look like wet sand. This mixture should hold together when pressed—if too dry, add a teaspoon more melted butter. Set aside.
- Make the cheesecake filling: Using a stand or electric mixer, beat 8 oz (225g) softened cream cheese on medium speed until smooth and creamy, about 2 minutes. Gradually add ¾ cup (90g) powdered sugar and 1 teaspoon vanilla extract. Beat until fully combined and no lumps remain.
- Whip the cream: In a separate chilled bowl, whip 1 cup (240ml) heavy whipping cream on high speed until soft peaks form, about 3-4 minutes. Be careful not to overwhip—it should be smooth and billowy, not grainy.
- Combine filling and cream: Add 1 tablespoon fresh lemon juice to the cream cheese mixture and mix briefly. Then gently fold the whipped cream into the cream cheese mixture using a spatula. Folding, not stirring, preserves the airy texture. The filling should be light, fluffy, and creamy.
- Assemble the jars: Spoon about 2 tablespoons of the graham cracker crust into the bottom of each jar and gently press down with the back of the spoon to form a compact base. Next, add a generous layer (about ¼ cup or 60ml) of cheesecake filling on top of the crust.
- Layer the berries: Add a layer of sliced strawberries (about 2 tablespoons), followed by another ¼ cup (60ml) of cheesecake filling. Then top with fresh blueberries (about 2 tablespoons). Repeat layering if jars are tall enough, finishing with berries on top for that iconic red, white, and blue look.
- Chill and serve: Refrigerate the jars for at least 2 hours to allow the cheesecake filling to set properly. For best flavor, let them chill overnight. Serve cold straight from the fridge for that perfect creamy texture.
Quick tip: If the cheesecake filling feels too stiff after chilling, a few seconds at room temperature will soften it just enough without melting the layers. And if you want to prep ahead for a party, these jars hold up beautifully for up to 3 days refrigerated.
Cooking Tips & Techniques
Getting this no-bake cheesecake just right is all about balance. One common mistake I’ve learned to dodge is overwhipping the cream—if it turns grainy, the filling loses that silky texture that makes these jars so dreamy. Soft peaks are your friend here, so keep a close eye as you whip.
Another trick is making sure your cream cheese is fully softened before mixing. Cold cream cheese will create lumps and a dense filling, which nobody wants. I usually let it sit out for at least 30 minutes, sometimes giving it a quick zap in the microwave for 5 seconds if I’m in a rush.
Pressing the graham cracker crust firmly into the jars helps avoid a crumbly mess when eating. If you like a crunchier bite, you can toast the crumbs lightly in a pan before mixing with butter—just keep an eye to prevent burning.
Timing-wise, assemble the jars close to serving time when possible. The berries release juices over time, and while that’s tasty, it can make the layers a little soggy if left too long. These jars also make great make-ahead desserts if you want to prep the filling and crust separately, then layer everything fresh on the day of your event.
For multitasking at parties, these jars pair well with grilled favorites like savory baked pork chops or light summer salads. You can whip up a batch while the main course cooks, making dessert a breeze.
Variations & Adaptations
- Berry swaps: Use blackberries, raspberries, or even diced peaches for different seasonal spins. Frozen berries work fine too; just thaw and drain before layering.
- Flavor twists: Add a teaspoon of almond extract or a tablespoon of orange zest to the filling for a subtle flavor boost. A swirl of strawberry or blueberry jam between layers creates a jammy surprise.
- Dietary adjustments: For a gluten-free crust, swap graham cracker crumbs with almond flour or gluten-free cookie crumbs. Use coconut cream and dairy-free cream cheese for a vegan alternative, though texture and flavor will differ slightly.
- Presentation alternatives: Instead of jars, try layering in a trifle bowl for a family-style dessert or mini tart shells for individual handheld treats.
- Personal try: Once, I added crushed pistachios between layers for a nutty crunch that surprised everyone. It’s a fun way to mix textures without losing the patriotic vibe.
Serving & Storage Suggestions
Serve these cheesecake jars chilled—straight from the fridge is ideal to keep the filling firm and the berries fresh. I like to garnish with a sprig of fresh mint or a light dusting of powdered sugar for a little extra flair. They’re perfect finger-friendly desserts for outdoor parties or picnic tables where plates and forks can be a hassle.
These jars store well covered in the refrigerator for up to 3 days. The flavors actually mellow and blend beautifully overnight, but the crust can soften a bit as it absorbs moisture from the berries. If you want to keep the crust crispier, store the crumb base separately and assemble the jars just before serving.
For reheating, honestly, it’s best enjoyed cold. If the texture firms up too much after refrigeration, letting the jars sit at room temperature for 10 minutes softens the cheesecake filling to that perfect creamy consistency again.
Pair your jars with iced tea, lemonade, or a light sparkling wine to complement the fresh berry flavors. And if you’re putting together a summer spread, consider adding a crunchy side like crispy firework popcorn for a fun, festive touch.
Nutritional Information & Benefits
Each jar (about 6 oz / 180 ml) contains roughly 300-350 calories, depending on berry quantity. The cream cheese and heavy cream provide a good source of calcium and healthy fats for sustained energy, while fresh berries contribute antioxidants, vitamins C and K, and fiber.
This dessert is gluten-containing due to the graham cracker crust, but swapping to gluten-free crumbs makes it suitable for gluten sensitivities. It’s moderate in sugar, but you can reduce powdered sugar or use a sugar substitute if desired.
From my wellness perspective, it’s a treat that balances indulgence with fresh fruit nutrition—perfect when you want something special without feeling weighed down. The portion-controlled jars help keep servings reasonable, which is great for mindful eating.
Conclusion
This Easy No-Bake Red White and Blue Cheesecake Jars recipe is a summer win for anyone who loves fuss-free, visually stunning desserts. It’s one of those recipes you can customize endlessly but still rely on for consistent, crowd-pleasing results. Whether you’re planning a Fourth of July bash or just craving a sweet berry treat, these jars make dessert simple and festive.
I love this recipe because it feels like a mini celebration in every bite—and the fact that it comes together so quickly means I make it more often than I probably should. Give it a try, play around with your favorite berries or flavors, and make it your own. And if you do, I’d love to hear how you changed it up or what occasion you served it for!
Happy layering and berry stacking! Your summer dessert game just got a whole lot easier.
FAQs
Can I prepare these cheesecake jars ahead of time?
Absolutely! You can make the crust and filling up to a day in advance, but for the freshest texture, assemble the jars with berries on the day you plan to serve.
What if I don’t have graham crackers for the crust?
You can use digestive biscuits, vanilla wafers, or even crushed pretzels for a salty-sweet twist. Just adjust the sugar accordingly.
How do I keep the berries from making the cheesecake soggy?
Drain any excess berry juice before layering and add berries just before serving or chilling. You can also toss berries in a little cornstarch to absorb moisture.
Can I freeze these cheesecake jars?
Freezing isn’t recommended as the texture of the cream cheese filling and berries may change upon thawing.
Is there a vegan version of this recipe?
Yes! Use vegan cream cheese and coconut cream whipped until fluffy, and substitute the crust with vegan-friendly cookie crumbs. Keep in mind, texture and flavor will be a bit different but still delicious.
Pin This Recipe!
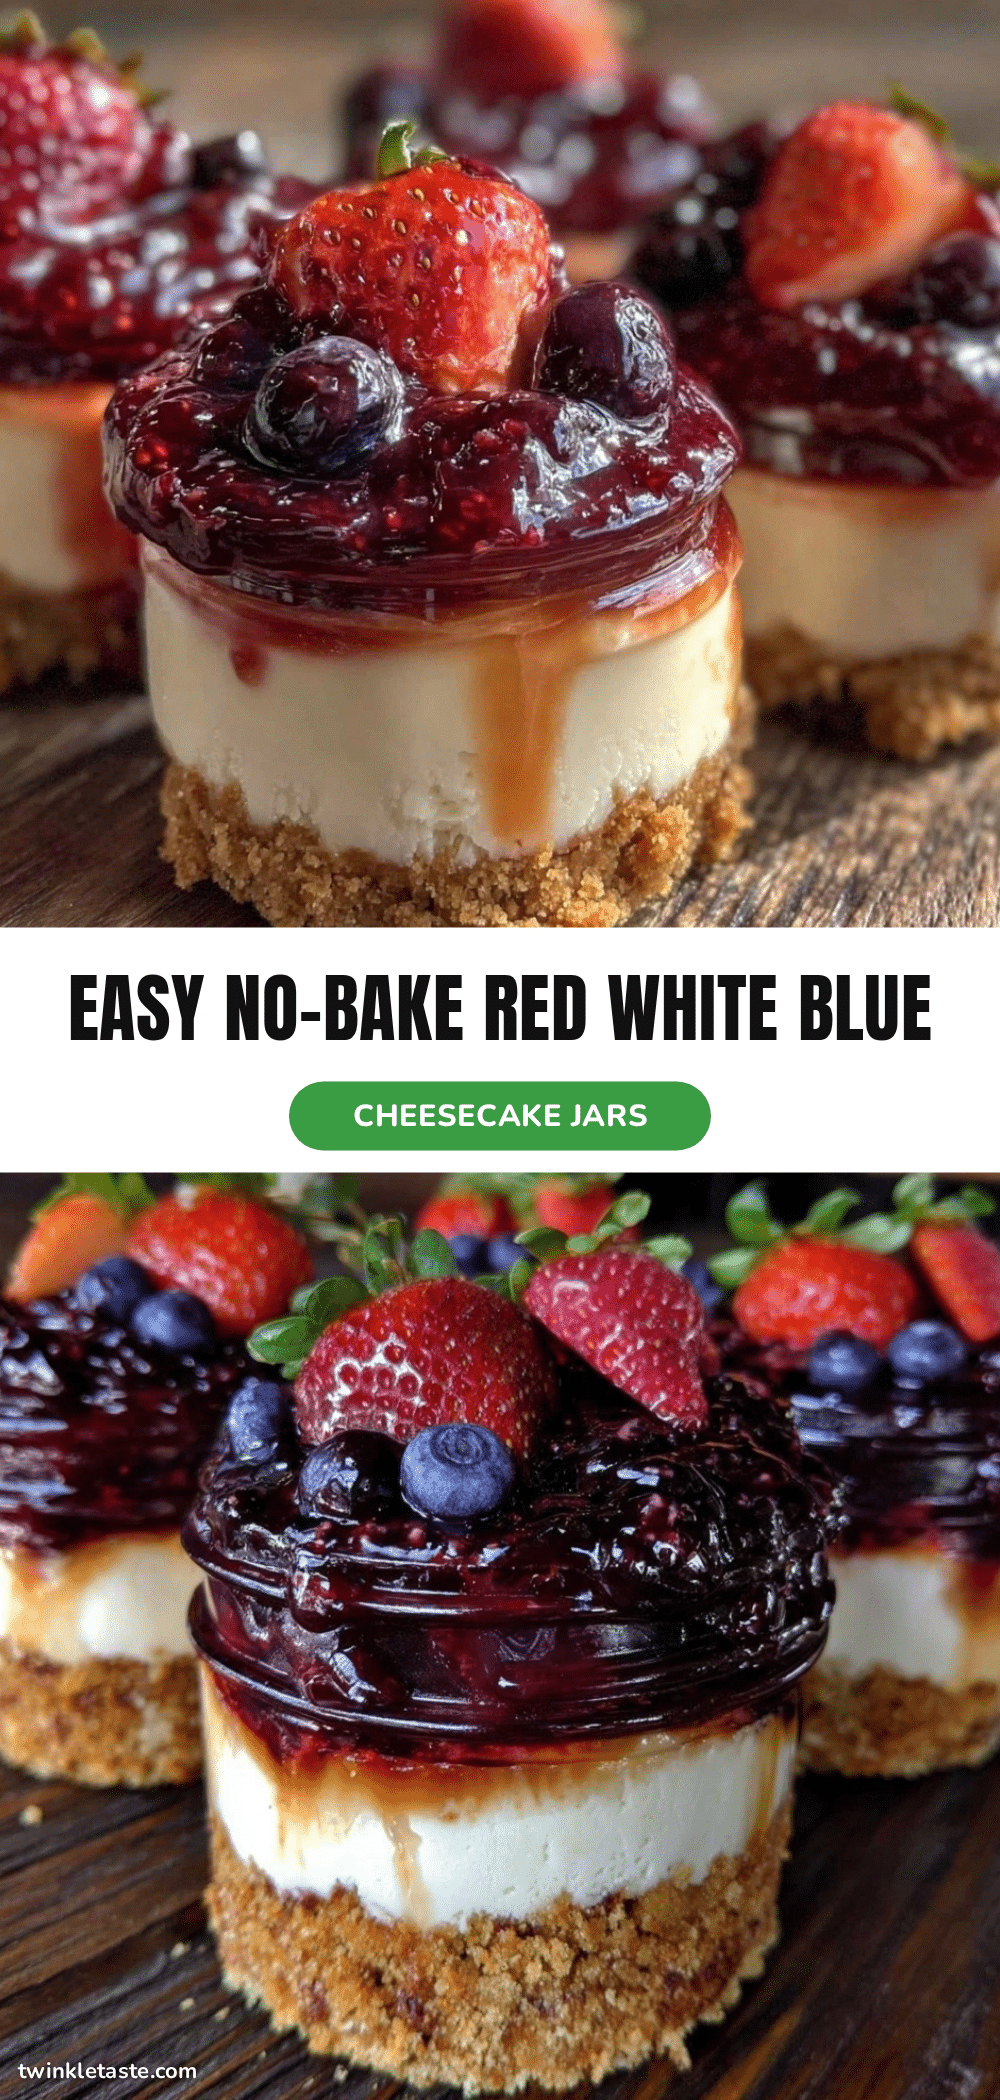
Easy No-Bake Red White and Blue Cheesecake Jars Recipe for Fourth of July Parties
A quick, festive, and fuss-free no-bake cheesecake layered with fresh red, white, and blue berries in portable jars, perfect for summer celebrations and Fourth of July parties.
- Prep Time: 15 minutes
- Cook Time: 0 minutes
- Total Time: 2 hours 15 minutes
- Yield: 8 to 10 servings 1x
- Category: Dessert
- Cuisine: American
Ingredients
- 1 ½ cups (150g) graham cracker crumbs
- 5 tablespoons (70g) unsalted butter, melted
- 2 tablespoons (25g) granulated sugar
- 8 oz (225g) cream cheese, softened
- ¾ cup (90g) powdered sugar, sifted
- 1 teaspoon vanilla extract
- 1 cup (240ml) heavy whipping cream, chilled
- 1 tablespoon fresh lemon juice
- 1 cup (about 150g) fresh strawberries, hulled and sliced
- 1 cup (150g) fresh blueberries, washed and drained
- ½ cup fresh raspberries (optional)
Instructions
- Prepare the crust: In a medium bowl, combine graham cracker crumbs, melted unsalted butter, and granulated sugar. Mix until crumbs are evenly coated and look like wet sand. Add more melted butter if too dry. Set aside.
- Make the cheesecake filling: Beat softened cream cheese on medium speed until smooth and creamy, about 2 minutes. Gradually add powdered sugar and vanilla extract. Beat until fully combined and no lumps remain.
- Whip the cream: In a separate chilled bowl, whip heavy whipping cream on high speed until soft peaks form, about 3-4 minutes. Avoid overwhipping.
- Combine filling and cream: Add fresh lemon juice to the cream cheese mixture and mix briefly. Gently fold whipped cream into the cream cheese mixture using a spatula to preserve airy texture.
- Assemble the jars: Spoon about 2 tablespoons of graham cracker crust into the bottom of each jar and press down to form a compact base. Add about ¼ cup (60ml) cheesecake filling on top.
- Layer the berries: Add a layer of sliced strawberries (about 2 tablespoons), followed by another ¼ cup (60ml) cheesecake filling. Top with fresh blueberries (about 2 tablespoons). Repeat layering if jars are tall enough, finishing with berries on top.
- Chill and serve: Refrigerate jars for at least 2 hours to set. For best flavor, chill overnight. Serve cold straight from the fridge.
Notes
Keep cream cheese at room temperature for smooth mixing. Avoid overwhipping cream to maintain silky texture. Press crust firmly into jars to avoid crumbling. Assemble jars close to serving time to prevent sogginess. Can store refrigerated up to 3 days. For dairy-free, use coconut-based cream cheese and cream. For gluten-free, substitute crust with almond flour or gluten-free crumbs.
Nutrition
- Serving Size: 1 jar (6 oz / 180 ml
- Calories: 325
- Sugar: 16
- Sodium: 180
- Fat: 24
- Saturated Fat: 14
- Carbohydrates: 22
- Fiber: 2
- Protein: 5
Keywords: no-bake cheesecake, red white and blue dessert, Fourth of July dessert, patriotic dessert, cheesecake jars, summer dessert, berry cheesecake, easy cheesecake recipe