Tuesday morning, 8:47 AM. My phone buzzed with a text from my friend Mariana: “Day of the Dead altar potluck is THIS Saturday. I’m bringing tamales. You’re bringing pan de muerto, right?” I stared at the screen for a solid ten seconds. Saturday. That was four days away. I’d never made pan de muerto in my life. I mean, I’d eaten it—plenty of times, at the little panadería on Cesar Chavez Street. But actually making it? The thought had never even crossed my mind. I typed back a confident “Of course!” and immediately started googling recipes with the frantic energy of someone who had just volunteered for something they had no business volunteering for.
Everyone else was bringing these elaborate, multi-day preparations. Mariana’s tamales alone took her two full days. I had a job, a dog, and honestly, a pretty shaky track record with yeasted doughs. But I’d read somewhere that pan de muerto was actually one of the simpler enriched breads—less fussy than brioche, more forgiving than croissants. I figured, how hard could it be? Famous last words, right? I mean, maybe you’ve been there—that moment when you commit to something way beyond your current skill level, and then you have to figure it out really fast. Let me tell you, that panic is a powerful motivator.
So I cleared my Thursday evening, bought way too much butter, and got to work. My kitchen looked like a flour bomb had gone off. I forgot to set a timer and let the first proof go way too long. I got dough stuck in my hair somehow. But when those golden, orange-scented loaves came out of the oven, glistening with melted butter and dusted with sugar? Honestly, I almost cried. And when I brought them to the potluck on Saturday, Mariana took one bite and said, “Wait, you made these? They’re better than the bakery’s.” That moment—that sheepish, amazed feeling—is why I’ve been making this bread every single Día de Muertos since. It’s the recipe that taught me I could actually do this.
Why You’ll Love This Recipe
This pan de muerto isn’t just a holiday bread—it’s the kind of recipe that makes you feel like a baking wizard even if you’ve never touched yeast before. I’ve tested this version at least a dozen times, tweaking the hydration, the proofing times, the amount of orange zest. What I landed on is a dough that’s forgiving enough for beginners but produces results that impress even the most seasoned bakers. My friend’s abuela tried it and asked for the recipe, which I’m pretty sure is the highest honor a bread can receive.
- Surprisingly Simple : Despite its beautiful, bakery-worthy appearance, this dough comes together in about 30 minutes of active work. The rest is just waiting—and trust me, the waiting is worth it.
- Pantry-Friendly Ingredients : You probably already have flour, sugar, butter, eggs, and yeast in your kitchen. The only special addition is orange blossom water or fresh orange zest, both of which are easy to find.
- Perfect for Día de Muertos : Whether you’re building an ofrenda, hosting a gathering, or just want to honor the tradition, this bread is the centerpiece of the celebration.
- Crowd-Pleaser : The soft, pillowy texture and subtle orange flavor win over everyone—kids, adults, even people who swear they don’t like sweet breads.
- Unbelievably Delicious : There’s something magical about the combination of warm yeast, butter, and orange. It’s comfort in bread form.
What makes this recipe different from all the others? It’s the technique. I use a tangzhong-style starter (borrowed from my soft milk bread recipe) that keeps the crumb incredibly tender for days. Plus, I’ve calibrated the sweetness so it’s present but not overwhelming—perfect alongside a cup of hot chocolate or coffee. This isn’t just another pan de muerto recipe; it’s the one you’ll come back to year after year.
This bread is the kind that makes you close your eyes after the first bite. It’s comfort food reimagined—traditional, but with a softness and flavor that feels like a warm hug. Perfect for impressing guests without stress, or turning a simple evening into something truly memorable.
What Ingredients You Will Need
This recipe uses simple, wholesome ingredients to deliver that signature soft, aromatic bread. Most are pantry staples, but a few special touches make all the difference. I’ve tested substitutions so you can adapt based on what you have.
- All-purpose flour (4 cups / 500g) – I use King Arthur Flour for consistent results, but any brand works. For a slightly chewier texture, you can substitute bread flour.
- Active dry yeast (2 ¼ teaspoons / 7g, or one packet) – Make sure it’s not expired! I keep mine in the fridge.
- Whole milk (¾ cup / 180ml, warm) – Warm to about 110°F (43°C). Too hot will kill the yeast; too cold won’t activate it.
- Granulated sugar (½ cup / 100g) – This provides sweetness and helps the yeast feed. You can reduce to ⅓ cup for a less sweet bread.
- Unsalted butter (½ cup / 113g, softened) – European-style butter like Plugrà adds extra richness, but regular unsalted works beautifully. Salted butter can be used if you reduce the added salt.
- Large eggs (3, room temperature) – Room temperature eggs incorporate better into the dough. If you’re in a hurry, place them in warm water for 5 minutes.
- Orange zest (2 tablespoons, from about 2 large oranges) – Fresh zest is non-negotiable here. Bottled zest won’t give you the same bright flavor.
- Orange blossom water (1 tablespoon) – This is the secret ingredient that gives pan de muerto its signature floral aroma. Find it at Latin markets, Middle Eastern grocers, or online. You can substitute 2 teaspoons of vanilla extract in a pinch, but it won’t be quite the same.
- Salt (1 teaspoon / 6g) – Fine sea salt is best. It balances the sweetness and strengthens the gluten structure.
- For the glaze and topping : ¼ cup (57g) melted butter and ¼ cup (50g) granulated sugar – You’ll brush the baked loaves with butter and roll them in sugar. Some recipes use a simple syrup, but I find the butter-sugar combo gives a better texture.
- Optional : 1 tablespoon of anise seed – Some traditional versions include a hint of anise. I skip it, but feel free to add it to the dough if you love that flavor.
Ingredient selection tip : Look for oranges with thin, fragrant skin—they have more oil in the zest. Navel oranges are perfect. For the orange blossom water, I recommend the Cortas brand; it’s widely available and has a pure, delicate flavor.
Substitution guidance : For a dairy-free version, use oat milk and vegan butter. The texture will be slightly less tender but still delicious. For a gluten-free option, use a 1:1 gluten-free flour blend with xanthan gum, and add an extra egg for structure.
Equipment Needed
You don’t need a professional bakery setup to make this bread. Here’s what I use:
- Stand mixer with dough hook – This is my preference because kneading by hand takes about 15 minutes of elbow grease. A KitchenAid or similar works perfectly.
- Large mixing bowl – For proofing the dough. Glass or ceramic is ideal because it retains warmth.
- Baking sheets – Two rimmed baking sheets lined with parchment paper. I use Nordic Ware because they don’t warp.
- Plastic wrap or a clean kitchen towel – For covering the dough during proofing. Reusable beeswax wrap works too.
- Pastry brush – For applying the butter glaze. A silicone brush is easier to clean than natural bristles.
- Microplane or fine grater – For zesting the oranges. A regular box grater works but gives coarser zest.
- Digital kitchen scale – I highly recommend weighing your flour. It’s more accurate than measuring cups and leads to consistent results. My Escali scale has lasted years.
- Instant-read thermometer – Not essential, but helpful for checking milk temperature and doneness. The bread is done when it reaches 190°F (88°C) internally.
- Cooling rack – For cooling the loaves properly so the bottoms don’t get soggy.
Budget-friendly tip : If you don’t have a stand mixer, you can absolutely knead by hand. It’s a great arm workout! Just use a large bowl and a sturdy wooden spoon to combine, then turn out onto a floured surface and knead until smooth and elastic.
Preparation Method
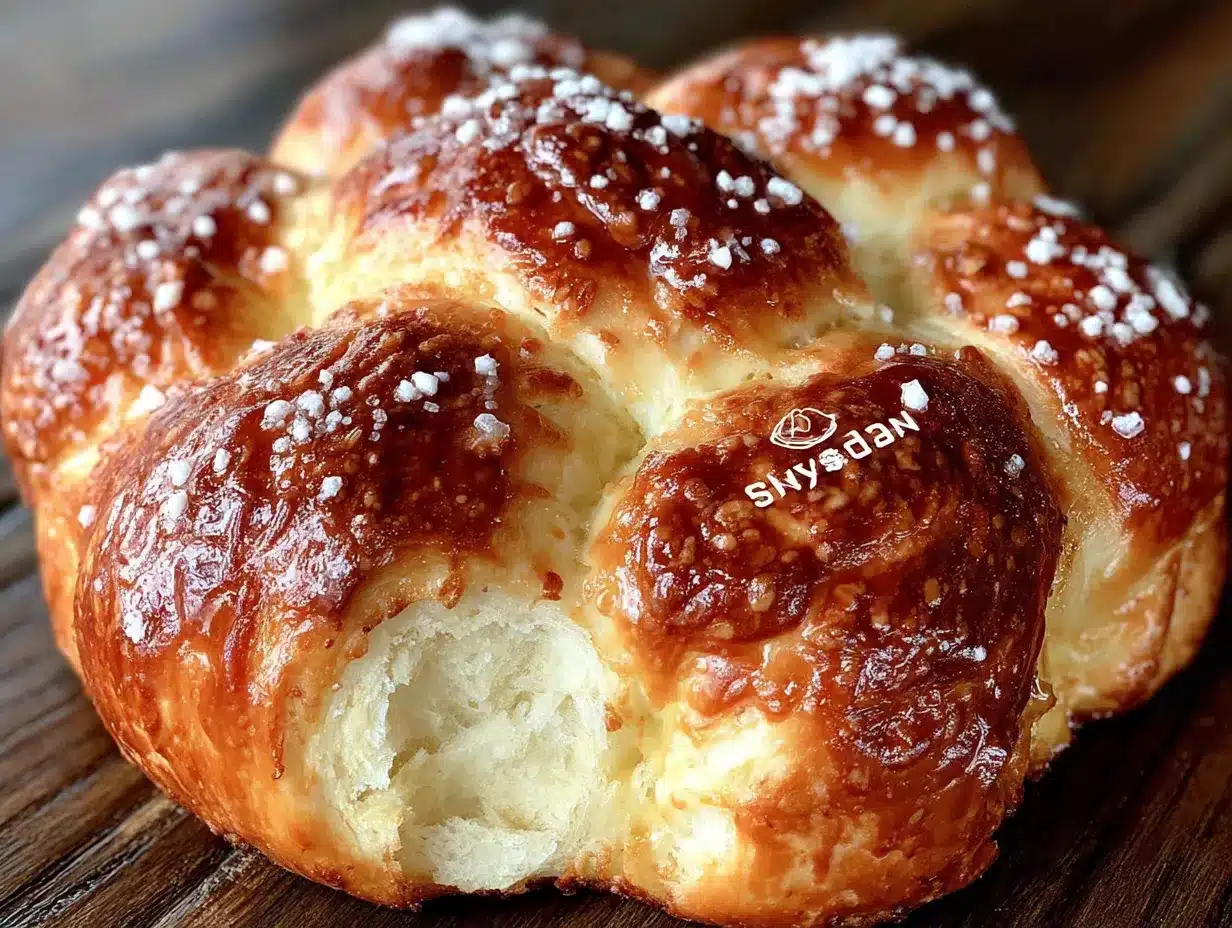
Let’s get baking. I’ll walk you through every step, including what to look for and what to avoid. Take your time—bread baking is a process, not a race.
Step 1: Activate the Yeast
In a small bowl, combine the warm milk (¾ cup / 180ml at 110°F/43°C) with 1 tablespoon of the sugar and the active dry yeast. Stir gently and let it sit for 5-10 minutes until it becomes frothy and smells like warm toast. If it doesn’t foam, your yeast is dead—start over with fresh yeast. I learned this the hard way after wasting an entire batch of ingredients.
Step 2: Mix the Dry Ingredients
In the bowl of your stand mixer, whisk together the remaining sugar (about 7 tablespoons), the all-purpose flour (4 cups / 500g), and salt (1 teaspoon). Make a well in the center. If you’re using anise seed, add it now.
Step 3: Combine Wet Ingredients
In a separate bowl, whisk together the room-temperature eggs (3), orange zest (2 tablespoons), and orange blossom water (1 tablespoon). Add the activated yeast mixture and stir to combine.
Step 4: Form the Dough
Pour the wet ingredients into the well of the dry ingredients. Using the dough hook attachment, mix on low speed until a shaggy dough forms, about 2 minutes. Scrape down the sides of the bowl. Add the softened butter (½ cup / 113g), one tablespoon at a time, mixing on medium-low until each piece is incorporated before adding the next. This takes about 5 minutes. The dough will look messy and maybe even greasy—that’s normal. Keep going.
Step 5: Knead Until Smooth
Increase the speed to medium and knead for 8-10 minutes. The dough should pull away from the sides of the bowl and become smooth, elastic, and slightly tacky to the touch. To test, stretch a small piece—if it forms a thin, translucent “windowpane” without tearing, it’s ready. If it tears, knead for another 2 minutes and test again.
Step 6: First Proof
Lightly oil a large bowl. Place the dough in the bowl, turning to coat all sides. Cover with plastic wrap or a damp kitchen towel. Let it rise in a warm, draft-free place for 1.5 to 2 hours, or until doubled in size. I often put it in my oven with the light on (but the oven off). The dough should feel puffy and airy when you poke it gently.
Step 7: Shape the Loaves
Punch down the dough to release the gas. Turn it out onto a lightly floured surface. Divide the dough into two equal pieces (about 500g each). Set aside a small piece from each half—about 50g—for the decorative bone shapes.
Shape each main piece into a smooth round ball by tucking the edges underneath and rotating it on the counter. Place each ball on a parchment-lined baking sheet, leaving plenty of space between them.
Step 8: Make the Decorative Bones
Take the reserved dough pieces. Roll each into a long rope about 12 inches long. Cut each rope into 4 equal pieces. Roll each piece into a smaller rope, then shape into a bone shape: make two small balls on each end, leaving a thinner section in the middle. Place two “bones” on top of each loaf in an X shape. Press gently to adhere.
Form a small round ball from any remaining dough and place it in the center of the X. This represents the skull. Don’t stress about perfection—rustic shapes look more authentic.
Step 9: Second Proof
Cover the shaped loaves loosely with plastic wrap or a towel. Let them rise for another 45-60 minutes, until puffy and nearly doubled. They should feel springy when gently poked.
Step 10: Bake
Preheat your oven to 350°F (175°C) during the last 20 minutes of the second proof. Bake the loaves for 20-25 minutes, rotating the pans halfway through. They should be deep golden brown on top and sound hollow when tapped on the bottom. If the tops are browning too quickly, tent loosely with foil after 15 minutes.
Step 11: Glaze and Sugar
While the loaves are still warm (but not hot), brush generously with the melted butter. Sprinkle or roll in the granulated sugar until fully coated. The butter will soak in slightly, creating a soft, tender crust. Let cool completely on a wire rack before serving.
Cooking Tips & Techniques
I’ve made this bread more times than I can count, and I’ve messed up plenty along the way. Here are the lessons I learned so you don’t have to repeat my mistakes.
Don’t skip the tangzhong. I know it’s not traditional, but adding a small amount of cooked flour paste (mix 2 tablespoons flour with ¼ cup water, cook until thick, then cool) makes the bread stay soft for days. It’s a game-changer I discovered from my Japanese milk bread basics guide.
Temperature matters. Cold ingredients will make your dough take forever to rise. If your kitchen is chilly, proof the dough in a slightly warm oven (turn it on to the lowest setting for 2 minutes, then turn it off and place the dough inside).
Watch the butter. Adding cold butter to the dough will break the emulsion and leave you with a greasy mess. Make sure your butter is truly softened—pressing it with your finger should leave an indent without resistance.
Don’t over-flour. When shaping, use the bare minimum of flour on your surface. Too much flour will make the bread dense. If the dough sticks slightly, that’s okay—it means a tender crumb.
Timing strategy. This bread is perfect for making ahead. Do the first proof overnight in the fridge (covered tightly). The next day, shape, proof, and bake. The cold fermentation actually improves the flavor. I do this every year for the potluck and it’s never failed me.
My biggest failure: The first time I made this, I forgot the sugar. Yes, the entire half cup. The bread was edible but tasted like a sad dinner roll. Always double-check your ingredients before you start mixing.
Variations & Adaptations
Once you’ve mastered the basic recipe, feel free to experiment. Here are some variations I’ve tried and loved:
- Chocolate Pan de Muerto : Replace ¼ cup of the flour with unsweetened cocoa powder. Add ½ cup dark chocolate chips to the dough at the end of kneading. The orange and chocolate combination is incredible—like a Mexican hot chocolate in bread form.
- Vegan Version : Substitute the milk with oat milk, the butter with vegan butter (I like Miyoko’s), and the eggs with a flax egg (1 tablespoon ground flaxseed + 3 tablespoons water per egg, let sit for 5 minutes). The texture will be slightly denser but still delicious.
- Gluten-Free Adaptation : Use a high-quality 1:1 gluten-free flour blend with xanthan gum. Add an extra egg and reduce the milk by 2 tablespoons. The dough will be stickier, so use wet hands for shaping. Bake at 325°F for 25-30 minutes.
- Spiced Version : Add 1 teaspoon of ground cinnamon, ½ teaspoon of ground star anise, and a pinch of ground cloves to the dry ingredients. This gives the bread a warm, holiday-spice flavor that’s perfect for winter celebrations.
- Individual Buns : Instead of two large loaves, divide the dough into 12 equal pieces. Shape into rounds, skip the bone decorations, and bake for 15-18 minutes. Perfect for gifting or freezing.
I once made a lavender-orange version by adding dried culinary lavender to the dough. It was lovely, but my family preferred the classic. Sometimes the simplest version really is the best.
Serving & Storage Suggestions
Pan de muerto is best served the day it’s made, still slightly warm from the oven. The butter-sugar crust is at its peak when fresh. I like to serve it alongside a steaming cup of Mexican hot chocolate or a strong café de olla. For a Day of the Dead gathering, arrange the loaves on your ofrenda with marigolds and photos of loved ones.
Storage : Store leftover bread in an airtight container at room temperature for up to 3 days. Do not refrigerate—it will dry out the bread. To refresh, wrap in foil and warm in a 300°F oven for 5-7 minutes.
Freezing : This bread freezes beautifully. Wrap completely cooled loaves tightly in plastic wrap, then in aluminum foil. Freeze for up to 3 months. To thaw, leave at room temperature for 2-3 hours, then warm in the oven as above.
Flavor development : Honestly, I think the bread tastes even better on day two. The orange and orange blossom flavors meld together, and the texture becomes even softer. If you can resist eating it all on day one, you’re in for a treat.
Presentation tip : For a beautiful display, place the bread on a wooden board or a woven basket lined with a colorful cloth. Sprinkle with extra orange zest and edible marigold petals if you’re feeling fancy.
Nutritional Information & Benefits
Per serving (1/8 of a loaf): approximately 320 calories, 12g fat, 47g carbohydrates, 7g protein, 3g fiber, 18g sugar. These values are estimates and will vary based on specific ingredients used.
While pan de muerto is certainly a treat, it does offer some nutritional benefits. The eggs provide high-quality protein and choline, which supports brain health. Oranges are rich in vitamin C and antioxidants, and the zest contains essential oils with anti-inflammatory properties. The butter, in moderation, provides fat-soluble vitamins A, D, E, and K.
Dietary considerations : This recipe contains gluten, dairy, and eggs. For allergen-friendly versions, see the variations section above. If you’re watching your sugar intake, you can reduce the sugar to ⅓ cup without significantly affecting the texture.
I believe in balance. This bread is made with love and intention, shared with people we care about. That, to me, is the most nourishing thing of all.
Conclusion
Making pan de muerto from scratch is one of those things that seems intimidating until you actually do it. Then you realize it’s just flour, butter, eggs, and a little patience—transformed into something beautiful and meaningful. This recipe is my go-to for Día de Muertos, but honestly, I make it year-round whenever I need a little comfort.
I hope you’ll try it. Don’t worry if your first loaf isn’t perfect—mine certainly wasn’t. The decorative bones might look more like sad worms, and the glaze might be a little uneven. That’s okay. The people eating it will taste the love you put into it, not the imperfections. And if you mess up like I did and forget the sugar? Well, you’ll have a funny story to tell next year.
I’d love to hear how your pan de muerto turns out. Leave a comment below and let me know—did you add any twists? Did your family love it? Share a photo on Pinterest and tag me so I can see your beautiful creations. Until next time, happy baking, and remember: the best recipes are the ones we share.
Frequently Asked Questions
Can I make pan de muerto without a stand mixer?
Absolutely! You can knead the dough by hand. It will take about 15-20 minutes of steady kneading. The dough should become smooth, elastic, and slightly tacky. It’s a great arm workout, and honestly, there’s something meditative about hand-kneading bread dough.
Why didn’t my pan de muerto rise?
This usually happens for one of three reasons: your yeast was expired or killed by liquid that was too hot (above 130°F), your kitchen was too cold for proofing, or you added too much salt which can inhibit yeast activity. Always check your yeast by proofing it in warm milk with a little sugar first.
Can I freeze the dough instead of the baked bread?
Yes! After the first proof, punch down the dough, wrap it tightly in plastic wrap, and freeze for up to 1 month. Thaw overnight in the refrigerator, then proceed with shaping and the second proof. The flavor actually improves with this method.
What can I use instead of orange blossom water?
Orange blossom water has a unique floral flavor, but you can substitute with 2 teaspoons of vanilla extract or 1 tablespoon of fresh orange juice plus 1 teaspoon of orange zest. The bread won’t have the same floral notes, but it will still be delicious.
How do I get the decorative bone shapes to stay on during baking?
Make sure you press the bone shapes firmly onto the dough before the second proof. If they still fall off, you can brush the base of each bone with a little water or egg wash before placing it on the loaf. This acts like glue and helps them adhere during baking.
Pin This Recipe!
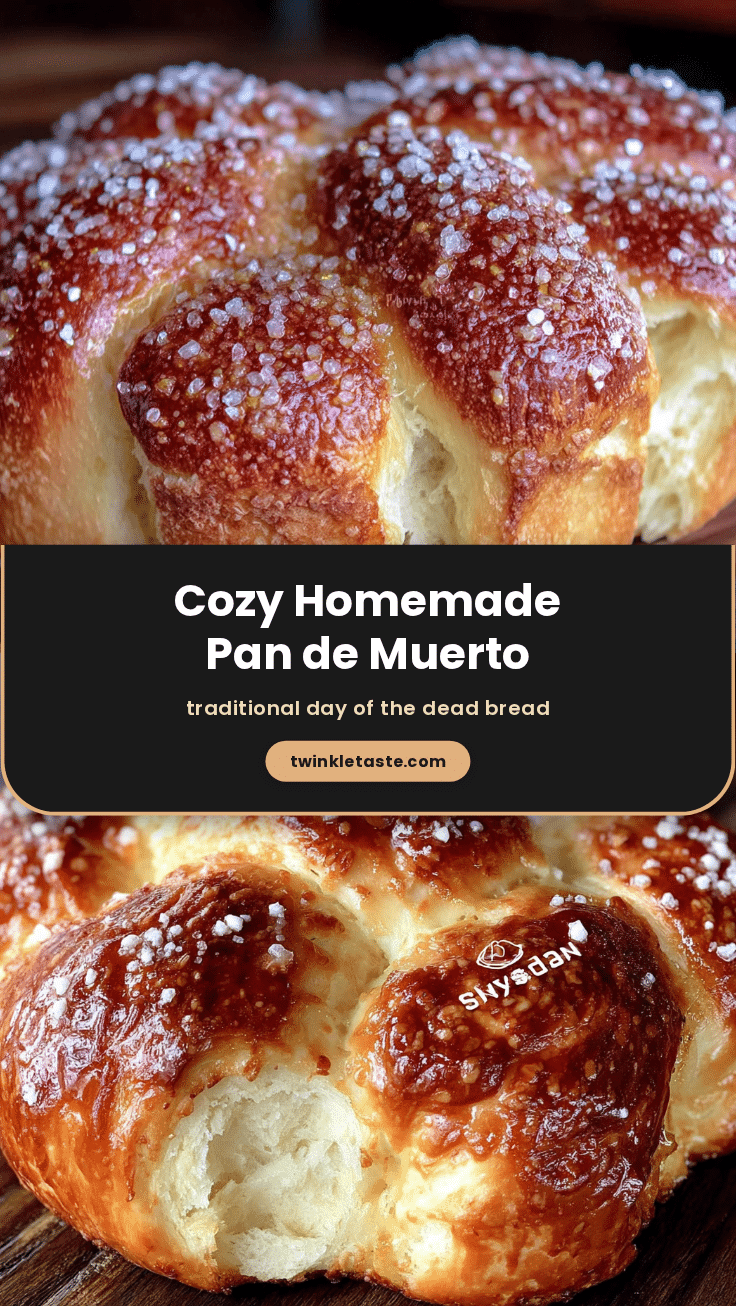
Easy Homemade Pan de Muerto Recipe
This pan de muerto is a forgiving, beginner-friendly enriched bread with a soft, pillowy texture and subtle orange flavor. It’s the perfect centerpiece for Día de Muertos celebrations, impressing even seasoned bakers with its bakery-worthy appearance.
- Prep Time: 30 minutes
- Cook Time: 25 minutes
- Total Time: 3 hours 25 minutes (including proofing)
- Yield: 2 loaves (16 servings) 1x
- Category: Bread
- Cuisine: Mexican
Ingredients
- 4 cups (500g) all-purpose flour
- 2 ¼ teaspoons (7g) active dry yeast (one packet)
- ¾ cup (180ml) whole milk, warm (110°F/43°C)
- ½ cup (100g) granulated sugar
- ½ cup (113g) unsalted butter, softened
- 3 large eggs, room temperature
- 2 tablespoons orange zest (from about 2 large oranges)
- 1 tablespoon orange blossom water
- 1 teaspoon (6g) fine sea salt
- ¼ cup (57g) melted butter (for glaze)
- ¼ cup (50g) granulated sugar (for topping)
- 1 tablespoon anise seed (optional)
Instructions
- Activate the yeast: In a small bowl, combine warm milk (¾ cup/180ml at 110°F/43°C) with 1 tablespoon of the sugar and the active dry yeast. Stir gently and let sit for 5-10 minutes until frothy and smells like warm toast. If it doesn’t foam, start over with fresh yeast.
- Mix dry ingredients: In the bowl of a stand mixer, whisk together the remaining sugar (about 7 tablespoons), all-purpose flour (4 cups/500g), and salt (1 teaspoon). Make a well in the center. If using anise seed, add it now.
- Combine wet ingredients: In a separate bowl, whisk together room-temperature eggs (3), orange zest (2 tablespoons), and orange blossom water (1 tablespoon). Add the activated yeast mixture and stir to combine.
- Form the dough: Pour the wet ingredients into the well of the dry ingredients. Using the dough hook attachment, mix on low speed until a shaggy dough forms, about 2 minutes. Scrape down the sides. Add softened butter (½ cup/113g), one tablespoon at a time, mixing on medium-low until each piece is incorporated before adding the next (about 5 minutes). The dough will look messy—that’s normal.
- Knead until smooth: Increase speed to medium and knead for 8-10 minutes. The dough should pull away from the sides, become smooth, elastic, and slightly tacky. Test by stretching a small piece—if it forms a thin, translucent ‘windowpane’ without tearing, it’s ready.
- First proof: Lightly oil a large bowl. Place the dough in the bowl, turning to coat all sides. Cover with plastic wrap or a damp kitchen towel. Let rise in a warm, draft-free place for 1.5 to 2 hours, or until doubled in size.
- Shape the loaves: Punch down the dough. Turn out onto a lightly floured surface. Divide into two equal pieces (about 500g each). Set aside a small piece from each half (about 50g) for decorative bone shapes. Shape each main piece into a smooth round ball by tucking edges underneath and rotating on the counter. Place each ball on a parchment-lined baking sheet, leaving space between them.
- Make decorative bones: Roll reserved dough pieces into long ropes about 12 inches long. Cut each rope into 4 equal pieces. Roll each piece into a smaller rope, then shape into a bone shape: make two small balls on each end with a thinner section in the middle. Place two ‘bones’ on top of each loaf in an X shape. Press gently to adhere. Form a small round ball from any remaining dough and place it in the center of the X (represents the skull).
- Second proof: Cover shaped loaves loosely with plastic wrap or a towel. Let rise for 45-60 minutes until puffy and nearly doubled. They should feel springy when gently poked.
- Bake: Preheat oven to 350°F (175°C) during the last 20 minutes of the second proof. Bake loaves for 20-25 minutes, rotating pans halfway through. They should be deep golden brown on top and sound hollow when tapped on the bottom. If browning too quickly, tent loosely with foil after 15 minutes.
- Glaze and sugar: While loaves are still warm (but not hot), brush generously with melted butter. Sprinkle or roll in granulated sugar until fully coated. Let cool completely on a wire rack before serving.
Notes
For a tangzhong-style starter (optional but recommended): mix 2 tablespoons flour with ¼ cup water, cook until thick, then cool before adding to dough. This keeps the bread soft for days. For make-ahead: do the first proof overnight in the fridge (covered tightly) to improve flavor. Do not refrigerate leftover bread—store in an airtight container at room temperature for up to 3 days. Freezes well for up to 3 months.
Nutrition
- Serving Size: 1/8 of a loaf
- Calories: 320
- Sugar: 18
- Sodium: 200
- Fat: 12
- Saturated Fat: 7
- Carbohydrates: 47
- Fiber: 3
- Protein: 7
Keywords: pan de muerto, day of the dead bread, mexican sweet bread, enriched bread, orange bread, holiday bread, dia de muertos


