I was standing in the cereal aisle last Tuesday afternoon when it hit me—that faint, sweet smell of overripe bananas mixed with something warm and nutty. Not from the store, obviously. It was a memory, sudden and sharp, and suddenly I was seven years old at my neighbor Mrs. Kowalski’s kitchen table, watching her mash bananas with a fork while she told me stories about her own kids who were all grown up and gone.
She’d let me help pour the walnuts in, even though I always put too many. She never once corrected me. She’d just say, “Well, that’s extra good for your brain then,” and slide the pan into the oven. I remember the way the loaf would crack across the top, golden and beautiful, and how she’d cut me a slice while it was still warm, butter melting into every bite. I haven’t thought about Mrs. Kowalski in years. But that smell in the cereal aisle? It brought her right back.
So I came home, grabbed the three brown bananas sitting on my counter—you know the ones, the ones nobody in the house will touch anymore—and I set out to make that bread. Not her exact recipe, because I never got it, but my own version that my kids would actually eat. Honestly, it took a few tries. The first loaf was too dry. The second one collapsed in the middle. But this one? This is the one. It’s soft, it’s sweet enough without being sugary, and the walnuts add that little crunch that makes it feel special. My youngest, who swears she hates nuts, ate three slices in one sitting. Let me tell you, that felt like winning the lottery.
Maybe you’ve been there too—standing in your kitchen with a bunch of sad bananas and no idea what to do with them. Or maybe you’re just looking for a snack that feels like a hug. Either way, this banana walnut bread is the answer. It’s simple, it’s forgiving, and it tastes like the kind of thing someone made just for you.
Why You’ll Love This Recipe
Let me be straight with you—I’ve tested this recipe more times than I care to admit. I’ve made it with different flours, different fats, different ratios of sugar. I’ve burned it, underbaked it, and dropped a loaf on the floor (the dog was very happy). What I’m saying is, this version is the one that works. Every single time.
- One Bowl, No Fuss : You don’t need a mixer. You don’t need a sifter. You need one bowl, a fork, and about ten minutes of active work. That’s it.
- Budget-Friendly Ingredients : Everything in this recipe is a pantry staple or a dollar-store find. No expensive extracts, no fancy flours. Just real food that won’t break the bank.
- Kid-Approved and Picky-Eater Tested : I’ve served this to my own kids, to neighbor kids, to the kid who only eats chicken nuggets. They all came back for seconds. The walnuts are small enough that even nut-skeptics don’t mind them.
- Perfect for Using Up Spotty Bananas : You know those bananas that sit on your counter until they’re practically crying to be used? This is their destiny. The riper, the better.
- Freezes Like a Dream : Make two loaves at once. Eat one now, freeze one for later. It thaws beautifully and tastes just as fresh.
What makes this recipe different from every other banana bread out there? It’s the texture. I use melted butter instead of softened, which gives the crumb a tenderness that store-bought loaves just can’t match. And I don’t overmix the batter—that’s the secret to keeping it light and fluffy instead of dense and gummy. Honestly, it’s the kind of bread that makes you close your eyes after the first bite. It’s comfort food, plain and simple, but it’s also the kind of thing you can feel good about feeding your family.
What Ingredients You Will Need
This recipe uses simple, everyday ingredients to deliver big flavor and a soft, tender crumb. Nothing fancy here—just stuff you probably already have in your kitchen.
For the Banana Walnut Bread
- 3 large ripe bananas, mashed (the spottier, the better—they’re sweeter and easier to mash)
- 1/3 cup unsalted butter, melted (I use salted butter in a pinch and just skip the added salt)
- 3/4 cup granulated sugar (you can reduce to 1/2 cup if your bananas are very ripe)
- 1 large egg, room temperature (cold eggs seize the butter, so let it sit out for 10 minutes)
- 1 teaspoon vanilla extract (pure vanilla is nice, but imitation works fine here)
- 1 teaspoon baking soda (make sure it’s fresh—stale baking soda ruins the rise)
- 1/4 teaspoon salt (just enough to balance the sweetness)
- 1 1/2 cups all-purpose flour (spooned and leveled—don’t scoop straight from the bag)
- 1/2 cup chopped walnuts (plus a handful for topping, if you want it pretty)
A few notes on ingredients: I’ve made this with whole wheat pastry flour and it works well, though the texture is slightly denser. If you’re out of walnuts, pecans are a great swap, or you can leave them out entirely for a nut-free version. For a dairy-free option, use coconut oil or a neutral vegetable oil instead of butter—just know the flavor will be a little different. And if you’re watching sugar, you can replace half the granulated sugar with coconut sugar or a monk fruit blend. The color will be darker, but the taste is still lovely.
One more thing—I always recommend using a kitchen scale if you have one. Flour is tricky to measure by volume, and too much flour is the number one reason banana bread turns out dry. 180 grams of flour is the sweet spot for this recipe.
Equipment Needed
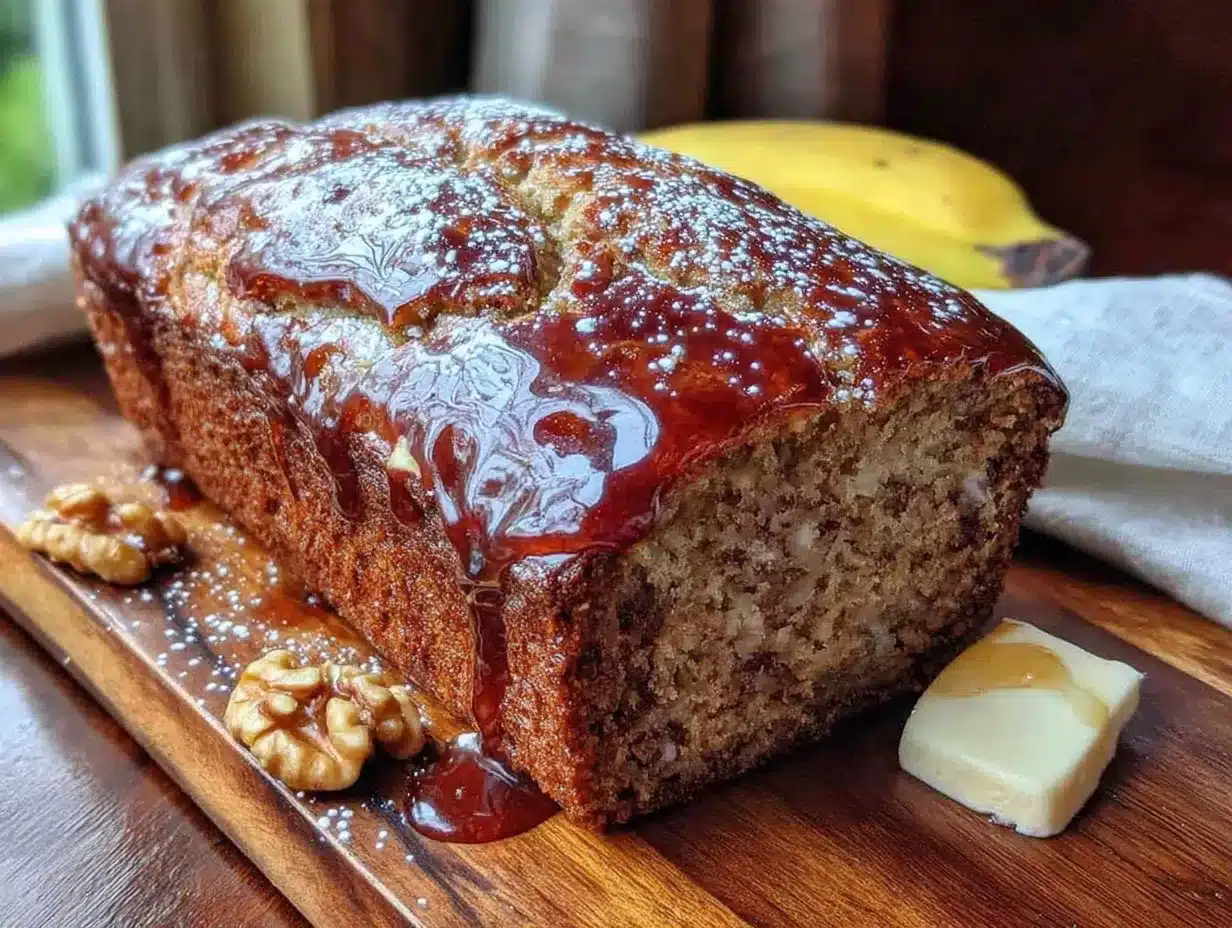
You don’t need a fancy kitchen to make this bread. Here’s what you’ll actually use:
- One large mixing bowl (any bowl will do—I use a ceramic one my mom gave me)
- A fork or potato masher for mashing the bananas
- A wooden spoon or rubber spatula for mixing
- A 9×5-inch loaf pan (if you only have an 8×4, just bake it a few minutes longer)
- Parchment paper (optional but helpful for easy removal—I never grease my pan without it)
- Cooling rack (a wire rack lets air circulate so the bottom doesn’t get soggy)
If you don’t have a loaf pan, you can bake this in a 8×8 square pan—just reduce the baking time to about 25-30 minutes. I’ve even made it as muffins before, and they turned out great. Bake muffins at 350°F for 18-20 minutes. Honestly, the equipment is flexible. What matters is the technique.
One tip: if you’re using a glass loaf pan, reduce the oven temperature by 25°F. Glass retains heat more than metal, and your bread might burn on the outside before it’s cooked through. Learned that one the hard way!
Preparation Method
Preheat your oven to 350°F (175°C). Grease your loaf pan with butter or cooking spray, then line it with a strip of parchment paper that hangs over the two long sides. This makes lifting the bread out so much easier—trust me on this.
-
Mash the bananas : Peel your three ripe bananas and drop them into your mixing bowl. Mash them with a fork until they’re mostly smooth, with just a few small lumps remaining. You want some texture, not baby food. This should take about a minute. If your bananas aren’t super ripe, you can warm them in the microwave for 30 seconds to soften them up.
-
Add the wet ingredients : Pour the melted butter over the mashed bananas and stir until combined. Add the sugar, egg, and vanilla extract, and mix until everything is smooth and glossy. Don’t worry if it looks a little separated at first—it will come together as you stir. This is where you want to make sure your egg is room temperature, or the butter might clump up.
-
Mix the dry ingredients : Sprinkle the baking soda and salt over the wet mixture, then add the flour all at once. Stir gently with your wooden spoon or spatula, just until you don’t see any more streaks of flour. Stop here. Overmixing develops gluten and makes your bread tough. A few lumps are totally fine—they’ll bake out.
-
Fold in the walnuts : Add the chopped walnuts and fold them in with just a few strokes. You want them evenly distributed, but don’t overdo it. If you’re adding extra walnuts for the top, set those aside for now.
-
Pour into the pan : Scrape the batter into your prepared loaf pan and spread it into an even layer. If you reserved some walnuts, sprinkle them over the top now. Give the pan a gentle tap on the counter to release any air bubbles.
-
Bake : Place the pan in the center of the oven and bake for 50-60 minutes. Check it at 50 minutes by inserting a toothpick into the center—if it comes out clean or with just a few moist crumbs, it’s done. If it’s still wet, give it another 5 minutes and check again. The top should be golden brown and cracked beautifully.
-
Cool : Let the bread cool in the pan for 10 minutes. Then lift it out using the parchment paper and transfer it to a wire rack to cool completely. I know it’s tempting to slice it right away, but warm banana bread is fragile. Give it at least 30 minutes before cutting, or it will crumble in your hands.
Here’s a little trick I learned from burning my fingers one too many times: let the bread cool on its side for the first 10 minutes. It helps the crumb set evenly and prevents a soggy bottom. Just rotate the loaf onto one of its sides, then flip it to the other side after 5 minutes. Works like magic.
Cooking Tips & Techniques
I’ve made this recipe more times than I can count, and I’ve made every mistake in the book. Here’s what I’ve learned so you don’t have to:
Don’t overmix the batter. This is the number one mistake people make. Stir just until the flour disappears. A few streaks are fine. Overmixing makes the bread dense and rubbery, and nobody wants that. I speak from experience—my first loaf was basically a brick.
Use really ripe bananas. I mean brown, spotty, almost embarrassing bananas. The kind you hide from guests. They’re sweeter, softer, and have more banana flavor. If your bananas aren’t ripe enough, your bread will be bland and less moist. You can speed up the ripening process by baking them at 300°F for 15 minutes, then cooling them completely before using.
Measure your flour correctly. Scooping flour directly from the bag packs it down, and you can end up with 20% more flour than you need. Instead, spoon the flour into your measuring cup and level it off with a knife. Or better yet, use a kitchen scale. 180 grams is the magic number.
Let it cool before slicing. I know, I know—the smell is torture. But cutting into warm banana bread is a recipe for disaster. It will crumble, it will stick to the knife, and you’ll be sad. Give it at least 30 minutes. I promise it’s worth the wait.
Bake two loaves at once. If you’re going to heat up the oven, you might as well make the most of it. This recipe doubles beautifully, and the second loaf freezes perfectly. Just wrap it tightly in plastic wrap and then foil, and it’ll keep for up to three months.
Check for doneness early. Every oven runs differently. Start checking at 50 minutes, even if your recipe says 60. A toothpick inserted in the center should come out clean or with just a few moist crumbs. If it’s wet, give it more time. If the top is browning too fast, tent it loosely with foil.
Variations & Adaptations
One of the best things about this banana walnut bread is how easy it is to change up. Here are some of my favorite variations:
Chocolate Chip Banana Bread : Swap the walnuts for 1/2 cup of chocolate chips. Mini chips work especially well because they distribute evenly. My kids beg for this version, and honestly, I don’t blame them.
Nut-Free Version : If you’re making this for a school lunch or a nut-sensitive household, simply leave out the walnuts. You can add 1/2 cup of raisins, dried cranberries, or even shredded coconut for texture instead. Or just leave it plain—it’s still delicious.
Whole Wheat Version : Replace half the all-purpose flour with whole wheat flour. The bread will be a little denser and nuttier, but it’s still soft and moist. I’ve also used spelt flour with great results.
Dairy-Free Version : Substitute the melted butter with coconut oil or a neutral vegetable oil like avocado oil. The flavor changes slightly, but the texture stays beautiful. You can also use dairy-free yogurt in place of the egg if you need it to be vegan.
Lower Sugar Version : Reduce the sugar to 1/2 cup if your bananas are very ripe and sweet. You can also use 1/4 cup of maple syrup or honey, but you’ll need to reduce the flour by about 2 tablespoons to balance the liquid. The texture will be a little different, but still good.
I once made a version with shredded zucchini added in (about 1/2 cup, squeezed dry) and it was surprisingly amazing. It added moisture without changing the flavor. My kids didn’t even notice they were eating vegetables. Sneaky mom win.
Serving & Storage Suggestions
This banana walnut bread is perfect at room temperature, but I love it warm with a pat of butter melting into the slice. It’s also fantastic toasted—just pop a slice in the toaster or under the broiler for a few minutes until the edges are crisp. Spread a little cream cheese on top if you’re feeling fancy.
For breakfast, serve it alongside a cup of coffee or a glass of milk. For a snack, it’s great on its own or with a smear of peanut butter for extra protein. And if you’re feeling indulgent, drizzle a little honey or maple syrup over the top. Honestly, there’s no wrong way to eat it.
Storage: Wrap the cooled loaf tightly in plastic wrap or aluminum foil and store it at room temperature for up to 4 days. I don’t recommend refrigerating it—the cold air dries out the bread and makes it stale faster.
Freezing: This bread freezes beautifully. Wrap the whole loaf or individual slices in plastic wrap, then in foil, and place them in a freezer bag. It’ll keep for up to 3 months. To thaw, leave it at room temperature for a few hours, or pop a frozen slice in the toaster for a quick treat.
Reheating: For that fresh-from-the-oven feeling, warm individual slices in the microwave for 10-15 seconds, or in a 300°F oven for about 5 minutes. The texture comes back beautifully, and the smell will fill your kitchen all over again.
One thing I love about this bread is that the flavors actually get better on the second day. The banana flavor deepens, the walnuts soften slightly, and the whole thing becomes even more moist. So don’t be afraid to make it a day ahead if you’re serving it for a special occasion.
Nutritional Information & Benefits
Here’s the approximate nutritional breakdown for one slice (based on 10 slices per loaf):
- Calories: 220
- Fat: 9g
- Carbohydrates: 32g
- Fiber: 2g
- Sugar: 16g
- Protein: 4g
This bread is a good source of potassium from the bananas, which is great for heart health and muscle function. Walnuts add omega-3 fatty acids, which are wonderful for brain health—perfect for growing kids (and forgetful parents like me).
If you’re watching your sugar intake, you can easily reduce the sugar to 1/2 cup without sacrificing much sweetness, especially if your bananas are very ripe. For a lower-fat option, you can replace half the butter with unsweetened applesauce—it works surprisingly well and keeps the bread moist.
This recipe is naturally vegetarian and can be made dairy-free and nut-free with simple substitutions. It’s not gluten-free as written, but you can use a 1:1 gluten-free flour blend if needed. Just note that the texture will be slightly different.
I’m not a nutritionist, but I’ve learned over the years that feeding my family real food—even if it includes sugar and butter—is better than feeding them processed snacks. This bread feels like a treat, but it’s made with ingredients I can feel good about.
Conclusion
This banana walnut bread is more than just a recipe to me. It’s the taste of a Tuesday afternoon in Mrs. Kowalski’s kitchen, of my own kids’ sticky fingers reaching for another slice, of those quiet moments when the house smells like warmth and comfort. It’s the kind of bread that doesn’t try to be fancy—it just tries to be good. And honestly, that’s enough.
I hope you’ll make it your own. Add chocolate chips if that’s what your family loves. Leave out the nuts if someone has allergies. Double the batch and freeze one for a rainy day. This recipe is forgiving, flexible, and always, always worth the effort. It’s the kind of thing that turns a handful of sad bananas into something worth celebrating.
If you try this recipe, I’d love to hear how it turned out. Did your kids eat it? Did you add your own twist? Drop a comment below or tag me in your photos—I’m always looking for new ideas. And if you loved it, share it with a friend who needs a little comfort in loaf form. Because honestly, isn’t that what food is for?
Happy baking, friends. Your kitchen is about to smell amazing.
Frequently Asked Questions
Can I make this banana walnut bread gluten-free?
Yes! You can substitute the all-purpose flour with a 1:1 gluten-free baking flour blend. I’ve tried it with both Bob’s Red Mill and King Arthur brands, and both worked well. Just be careful not to overmix, as gluten-free batters can get gummy if overworked.
Why did my banana bread turn out dry?
The most common reason is too much flour. Make sure you’re spooning the flour into your measuring cup and leveling it off, or use a kitchen scale for accuracy. Another culprit is overbaking—check your bread at 50 minutes and pull it out as soon as a toothpick comes out clean. Overripe bananas also help keep the bread moist, so don’t skimp on the spotty ones.
Can I use frozen bananas for this recipe?
Absolutely. Thaw them completely, then drain off any excess liquid before mashing. Frozen bananas actually break down beautifully and can make your bread even more moist. Just don’t use the liquid that pools when they thaw—it’s watery and can throw off the texture.
How do I know when the banana bread is fully baked?
Insert a toothpick or a thin knife into the center of the loaf. If it comes out clean or with just a few moist crumbs attached, it’s done. If it’s wet with batter, give it another 5-10 minutes. The top should be golden brown and cracked, and the edges should be pulling away from the pan slightly.
Can I make this into muffins instead of a loaf?
Yes! This recipe makes about 12 standard muffins. Grease a muffin tin or line it with paper liners, fill each cup about 2/3 full, and bake at 350°F for 18-20 minutes. Check them at 18 minutes—they’re done when a toothpick comes out clean and the tops spring back when lightly touched. Muffins are great for lunchboxes and freeze perfectly too.
Pin This Recipe!
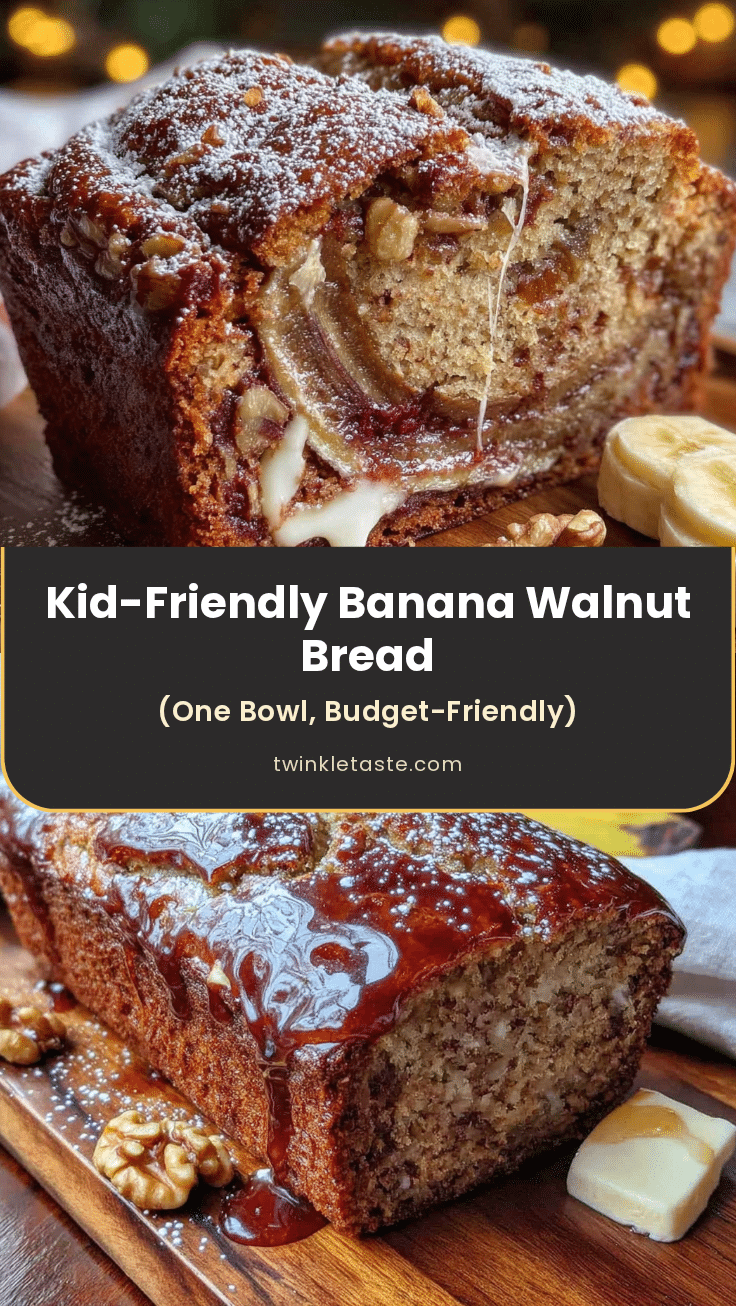
Best Kid-Friendly Banana Walnut Bread Recipe (One Bowl)
This soft, tender banana walnut bread is made in one bowl with simple pantry ingredients. It’s kid-approved, picky-eater tested, and perfect for using up overripe bananas.
- Prep Time: 10 minutes
- Cook Time: 55 minutes
- Total Time: 1 hour 5 minutes
- Yield: 10 servings 1x
- Category: Dessert
- Cuisine: American
Ingredients
- 3 large ripe bananas, mashed
- 1/3 cup unsalted butter, melted
- 3/4 cup granulated sugar
- 1 large egg, room temperature
- 1 teaspoon vanilla extract
- 1 teaspoon baking soda
- 1/4 teaspoon salt
- 1 1/2 cups all-purpose flour (spooned and leveled)
- 1/2 cup chopped walnuts (plus extra for topping)
Instructions
- Preheat oven to 350°F (175°C). Grease a 9×5-inch loaf pan and line with parchment paper, leaving overhang on the long sides.
- Mash the bananas in a large mixing bowl with a fork until mostly smooth with a few small lumps.
- Add melted butter, sugar, egg, and vanilla extract. Stir until smooth and glossy.
- Sprinkle baking soda and salt over the wet mixture, then add flour all at once. Stir gently with a wooden spoon or spatula just until no streaks of flour remain. Do not overmix.
- Fold in the chopped walnuts with a few strokes. If desired, reserve some walnuts for topping.
- Pour batter into prepared loaf pan and spread evenly. Sprinkle reserved walnuts on top if using. Tap pan gently on counter to release air bubbles.
- Bake for 50-60 minutes, until a toothpick inserted in the center comes out clean or with a few moist crumbs. If top browns too quickly, tent loosely with foil.
- Let bread cool in pan for 10 minutes, then lift out using parchment paper and transfer to a wire rack. Cool completely (at least 30 minutes) before slicing.
Notes
Use very ripe (brown, spotty) bananas for best sweetness and moisture. Measure flour by spooning into cup and leveling off, or use a kitchen scale (180g). Do not overmix batter. Let bread cool completely before slicing to prevent crumbling. Bread keeps at room temperature for up to 4 days, or freeze for up to 3 months.
Nutrition
- Serving Size: 1 slice
- Calories: 220
- Sugar: 16
- Sodium: 180
- Fat: 9
- Saturated Fat: 4
- Carbohydrates: 32
- Fiber: 2
- Protein: 4
Keywords: banana walnut bread, kid-friendly banana bread, one bowl banana bread, easy banana bread, moist banana bread


