I want caramelized squash right now. Not the kind that sits in a watery puddle on the sheet pan, but the kind where the edges are almost burnt and the flesh is so soft it collapses under its own weight. The problem is, regular butternut squash takes forever to roast, and by the time it’s done, I’ve usually lost interest and eaten a piece of cheese standing over the sink. Honeynut squash changed that for me. It’s smaller, sweeter, and roasts in half the time, which means I can actually follow through on the craving before it passes. (You know how that goes.)
I picked one up at the farmers’ market last October, mostly because it was cute and fit in my palm. I had no plan for it. I just threw it in the oven with butter and salt, hoping for the best. What came out was so buttery and concentrated that I actually stood there eating it with a spoon, burning my tongue because I couldn’t wait. That’s when I started messing around with brown butter and balsamic, trying to make it even better. This version is the one that stuck. It’s the side dish I make when I want something that feels special but takes almost zero effort.
Honestly, this recipe is just a few ingredients doing their best work. The brown butter gets nutty and deep, the balsamic turns syrupy and sweet, and the squash itself is already so naturally sugary that it caramelizes like candy. I don’t need to add much. Just a little patience and a good pan. That’s the whole secret.
Why You’ll Love This Recipe
I’ve made this squash more times than I can count, and every single time, someone asks for the recipe. It’s one of those rare dishes that looks impressive on a plate but takes about ten minutes of actual hands-on work. Let me tell you why it works.
- Fast and Easy: Honeynut squash roasts in about 25 minutes. No peeling wrestling matches, no 45-minute wait. You can have this on the table while your main dish is still resting.
- Simple Ingredients: You need squash, butter, balsamic vinegar, salt, and maybe some thyme if you’re feeling fancy. That’s it. No trips to the specialty store.
- Perfect for Fall Gatherings: Whether it’s Thanksgiving, a cozy dinner party, or just a Tuesday night when you want something warm, this dish fits. It’s elegant enough for company but easy enough for a weeknight.
- Crowd-Pleaser: I’ve served this to kids, picky eaters, and people who swear they don’t like squash. It disappears every time. The brown butter and balsamic combo is basically magic.
- Unbelievably Delicious: The squash gets tender and jammy on the inside while the edges crisp up into these little caramelized bits. The glaze adds a tangy-sweet finish that cuts through the richness. It’s the kind of side dish that steals the show.
What makes this recipe different from all the other roasted squash recipes out there? It’s the brown butter. Most recipes just drizzle oil and call it a day. Taking the extra five minutes to brown the butter transforms the whole dish. It adds a nutty, toasty depth that you can’t get any other way. And the balsamic glaze isn’t the watery store-bought kind. It’s reduced right in the same pan, picking up all those browned butter bits. Every drop of flavor gets used.
This is the recipe I turn to when I want to impress someone without breaking a sweat. It’s comfort food that feels elevated, but it’s really just squash, butter, and vinegar doing their thing. Trust me on this one.
What Ingredients You Will Need
This recipe uses simple, wholesome ingredients that come together to create something way bigger than the sum of their parts. Most of these are probably already in your kitchen, which is exactly how I like to cook.
- Honeynut squash (2-3 small squash, halved lengthwise and seeded) — These little guys are sweeter and creamier than butternut squash, with thinner skin that doesn’t need peeling. Look for ones that feel heavy for their size and have a deep orange color. If you can’t find honeynut, you can use small butternut squash or delicata squash instead.
- Unsalted butter (4 tablespoons, cut into pieces) — I use unsalted so I can control the salt level. The browning process is where the magic happens, so don’t skip it. I prefer Kerrygold for its higher butterfat content, which browns more evenly.
- Balsamic vinegar (3 tablespoons) — Use a good quality one here, but it doesn’t have to be the expensive aged stuff. You’re going to reduce it anyway, so the flavor will concentrate. I like the one from Trader Joe’s for everyday cooking.
- Maple syrup (1 tablespoon) — This adds a little extra sweetness and helps the glaze get thick and glossy. Pure maple syrup works best. Please don’t use pancake syrup here.
- Fresh thyme (4-5 sprigs, plus more for garnish) — Thyme and squash are best friends. The earthy, slightly floral notes balance the sweetness beautifully. If you only have dried thyme, use about 1 teaspoon.
- Flaky sea salt (such as Maldon, for finishing) — This is non-negotiable for me. The big, crunchy salt flakes add texture and make the sweetness pop. Regular table salt will work in a pinch, but flaky salt really elevates the dish.
- Black pepper (freshly ground, to taste) — Just a little crack of pepper adds a subtle warmth that rounds everything out.
- Olive oil (1 tablespoon) — A light coating helps the squash roast evenly and get those golden edges. Use a good extra virgin olive oil for flavor.
Ingredient Tips: When choosing honeynut squash, look for ones that are firm with no soft spots. The skin should be a deep tan-orange color. If the squash is still greenish, it’s not fully ripe and won’t be as sweet. Store them in a cool, dark place for up to a month. For the balsamic vinegar, I’ve found that the mid-range bottles (around $8-12) work perfectly for reducing. The super cheap stuff can be too sharp, and the expensive stuff is wasted when cooked down.
Substitutions: If you’re dairy-free, you can use a high-quality vegan butter or coconut oil for browning. Just watch it closely because it can burn faster than dairy butter. For a lower sugar option, you can skip the maple syrup and let the squash’s natural sweetness carry the dish. The balsamic reduction will still be plenty flavorful.
Equipment Needed
You don’t need a fancy kitchen to make this recipe. Here’s what you’ll need:
- Chef’s knife and cutting board — A sharp knife makes cutting through squash so much safer and easier. I learned this the hard way after a close call with a dull blade.
- Large rimmed baking sheet — Half-sheet pans are my go-to. They give the squash enough room to caramelize without steaming. If the pieces are crowded, they’ll steam instead of brown.
- Small saucepan — For browning the butter and making the glaze. A light-colored pan helps you see when the butter turns golden.
- Parchment paper or silicone baking mat — This makes cleanup a breeze and prevents the squash from sticking. I’m a big fan of parchment for easy cleanup.
- Whisk or wooden spoon — For stirring the brown butter and glaze.
- Pastry brush (optional) — For brushing the glaze onto the squash. You can also just drizzle it with a spoon.
Budget-friendly alternatives: If you don’t have a pastry brush, use a regular basting brush or just drizzle the glaze with a spoon. No silicone mat? Parchment paper works just as well and is cheaper. If you don’t have a rimmed baking sheet, any oven-safe pan with raised edges will work.
Preparation Method
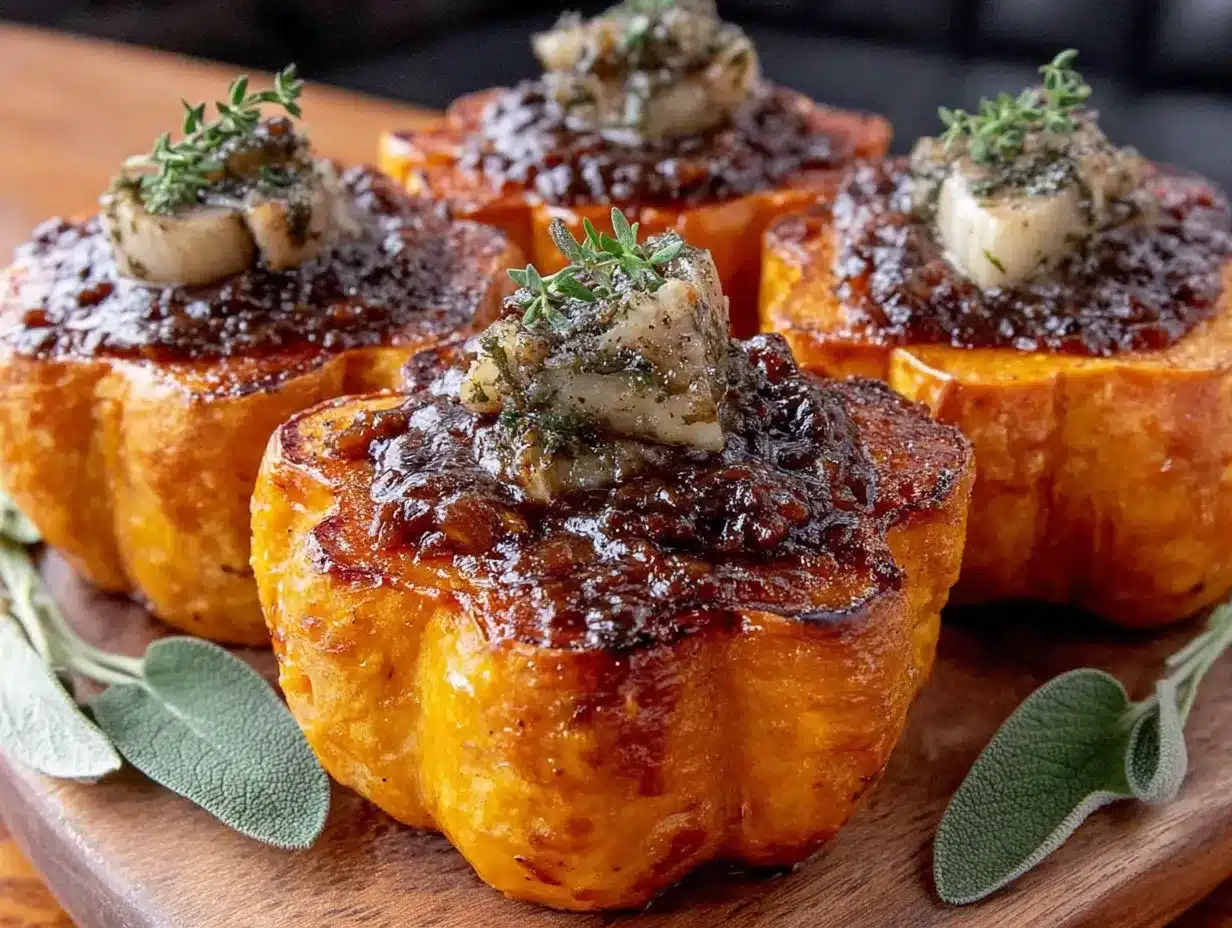
Let me walk you through this step by step. It’s easier than you think, and I’ll tell you exactly what to look for at each stage so you know you’re on the right track.
Step 1: Preheat and Prep (5 minutes)
Preheat your oven to 400°F (200°C). Line a large baking sheet with parchment paper or a silicone mat. While the oven heats up, wash your honeynut squash well. The skin is thin and edible, so you don’t need to peel it. Cut each squash in half lengthwise from stem to tip. Scoop out the seeds and stringy bits with a spoon. (Save the seeds to roast later if you’re feeling ambitious!)
Step 2: Season the Squash (2 minutes)
Place the squash halves cut-side up on the prepared baking sheet. Drizzle with the olive oil and use your hands or a brush to coat the cut surfaces evenly. Season lightly with salt and pepper. Don’t go heavy on the salt here because you’ll add flaky salt at the end. Flip the squash halves cut-side down onto the baking sheet. This is important — roasting them cut-side down creates steam inside the squash, making the flesh extra tender while the skin side gets golden.
Step 3: Roast the Squash (20-25 minutes)
Roast the squash for 20-25 minutes, depending on size. You’ll know they’re done when a fork slides easily into the thickest part of the flesh. The skin should be slightly wrinkled and the edges should look caramelized. If the squash is browning too quickly on the bottom, rotate the pan halfway through. While the squash roasts, start your brown butter and glaze.
Step 4: Brown the Butter (5-7 minutes)
In a small saucepan over medium heat, add the butter pieces. Let them melt completely, then continue cooking, swirling the pan occasionally. The butter will foam up, then subside. Watch carefully — you’ll see little brown specks start to form at the bottom. The butter will smell nutty and toasty. This usually takes about 5-7 minutes from when the butter melts. Remove it from the heat immediately when it turns a golden amber color. If it smells burnt, you’ve gone too far. (Trust me, I’ve ruined many batches. It happens. Just start over.)
Step 5: Make the Balsamic Glaze (3-4 minutes)
Add the balsamic vinegar and maple syrup to the saucepan with the brown butter. Whisk to combine. Return the pan to medium-low heat and let it simmer gently for 3-4 minutes, stirring occasionally. The glaze will thicken and become syrupy. You’re looking for it to coat the back of a spoon. Don’t walk away from it — balsamic vinegar can go from perfectly syrupy to burnt and bitter in about 30 seconds. When it’s done, remove from heat and stir in the fresh thyme sprigs.
Step 6: Glaze and Finish (2 minutes)
When the squash is done roasting, remove it from the oven. Carefully flip each piece cut-side up using tongs. Brush or drizzle the brown butter balsamic glaze generously over each squash half. Let the glaze soak in for a minute. Sprinkle with flaky sea salt and a few fresh thyme leaves. Serve immediately while the squash is still hot and the glaze is glossy.
Pro tip from my kitchen: If you want extra caramelization, after glazing, pop the squash back under the broiler for 1-2 minutes. Watch it like a hawk so the glaze doesn’t burn. The sugar in the balsamic will bubble and create these amazing sticky spots.
Cooking Tips & Techniques
I’ve made this recipe more times than I can count, and I’ve definitely had my share of failures. Here’s what I’ve learned so you can skip the mistakes.
Don’t overcrowd the pan. This is the number one mistake people make with roasted vegetables. If the squash halves are touching each other on the baking sheet, they’ll steam instead of caramelize. Give them space. If you need to, use two baking sheets. The dry heat of the oven needs to circulate around each piece to get those golden, crispy edges.
Brown butter patience. Browning butter feels scary the first few times, but it’s actually forgiving if you watch it carefully. The key is to use a light-colored pan so you can see the color change. Swirl the pan constantly once the butter starts foaming. The solids will go from pale yellow to golden to amber in seconds. As soon as you see that amber color and smell that nutty aroma, pull it off the heat. The residual heat will continue cooking it for a few more seconds.
Glaze consistency matters. When you’re reducing the balsamic glaze, remember that it will thicken more as it cools. So take it off the heat when it’s still slightly runnier than you want. If it gets too thick, just add a teaspoon of water and whisk it back to a pourable consistency. I’ve saved many a glaze this way.
Timing is everything. Start the brown butter and glaze about 10 minutes before the squash finishes roasting. That way everything comes together at the same time. The squash is best served hot, straight from the oven. If you’re making this for a dinner party, you can roast the squash ahead of time and reheat it in a 350°F oven for 5-7 minutes before glazing.
My biggest failure: I once tried to make this with regular butternut squash and didn’t adjust the cooking time. The outside was burnt and the inside was still hard. Honeynut squash is smaller and cooks much faster. If you’re substituting a larger squash, cut it into smaller pieces and increase the roasting time to 35-40 minutes. Check it at 25 minutes and go from there.
Variations & Adaptations
This recipe is a great base for experimentation. Here are some variations I’ve tried and loved.
Spicy Maple Version: Add a pinch of cayenne pepper or red pepper flakes to the brown butter while it’s browning. The heat cuts through the sweetness beautifully. I made this for a friend who loves spicy food, and she ate three squash halves by herself. The heat builds slowly and doesn’t overwhelm the squash flavor.
Herb-Infused Glaze: Swap the thyme for rosemary or sage. Rosemary adds a piney, aromatic quality that pairs wonderfully with brown butter. Sage gets crispy and delicious when fried in the butter. Just add the sage leaves to the butter while it browns and they’ll crisp up perfectly. This version is especially good with roasted chicken or pork.
Cheesy Finish: After glazing the squash, sprinkle with crumbled goat cheese or feta cheese. The tangy, salty cheese balances the sweet glaze. Pop it back in the oven for 2 minutes to soften the cheese. This turns the dish into something that could almost be a main course with a side salad.
Nutty Crunch: Toast some pecans or walnuts in a dry skillet and sprinkle them over the finished squash. The crunch adds texture and the nuts complement the brown butter flavor. I do this when I’m serving the squash for Thanksgiving, and it always gets compliments.
Dietary Adaptations: For a vegan version, use a high-quality vegan butter or coconut oil for browning. I’ve had good results with Miyoko’s European-style cultured vegan butter. For a lower sugar option, skip the maple syrup and reduce the balsamic a little longer. The squash is naturally sweet enough that you won’t miss it.
Different Cooking Methods: You can absolutely make this in an air fryer. Cut the squash into wedges instead of halves, toss with oil and salt, and air fry at 375°F for 12-15 minutes, shaking halfway through. Then toss with the glaze and air fry for another 2 minutes. It’s faster and gets even crispier edges.
Serving & Storage Suggestions
This squash is incredibly versatile and works with so many meals. Here’s how I like to serve and store it.
Serving Temperature: Serve this squash hot, straight from the oven. The glaze is at its glossiest and the squash is at its most tender right when it comes out. If you need to hold it for a bit, keep it in a warm oven (200°F) for up to 30 minutes, but don’t cover it or the crispy edges will soften.
Presentation: Arrange the squash halves on a platter cut-side up. Drizzle any remaining glaze from the pan over the top. Sprinkle with flaky salt and fresh thyme leaves. For a dinner party, I sometimes sprinkle pomegranate seeds over the top for a pop of color and tartness that cuts through the richness.
What to Serve With It: This squash is a natural side dish for roasted chicken, turkey, pork chops, or steak. It’s also wonderful alongside a hearty grain bowl with farro and roasted vegetables. For a vegetarian main, serve it with a creamy risotto or a lentil salad. I’ve even chopped up leftover squash and tossed it into a kale salad with a lemon vinaigrette.
Storage: Store any leftover squash in an airtight container in the refrigerator for up to 4 days. The glaze will thicken as it cools, but that’s fine. To reheat, place the squash on a baking sheet in a 350°F oven for 5-7 minutes. You can also microwave it, but the edges won’t be as crispy. I actually like the leftovers cold, chopped up and thrown into a lunch salad.
Freezing: You can freeze the roasted squash (without the glaze) for up to 3 months. Let it cool completely, then place on a baking sheet in the freezer until solid. Transfer to a freezer bag. To serve, thaw in the refrigerator overnight, then reheat and glaze as directed. The texture won’t be quite as perfect as fresh, but it’s still delicious.
Flavor Development: The flavors actually deepen and meld together after a day in the fridge. The squash absorbs more of the glaze, and the brown butter flavor becomes more pronounced. If you’re meal prepping for a holiday, you can roast the squash and make the glaze up to 2 days ahead. Just store them separately and combine when reheating.
Nutritional Information & Benefits
This dish is as nutritious as it is delicious. Here’s what you’re getting in each serving.
Estimated Nutritional Values (per serving, 1 squash half):
| Nutrient | Amount |
|---|---|
| Calories | 180-200 |
| Total Fat | 12g |
| Saturated Fat | 7g |
| Carbohydrates | 20g |
| Fiber | 3g |
| Sugar | 10g |
| Protein | 2g |
| Vitamin A | 200% DV |
| Vitamin C | 15% DV |
| Potassium | 10% DV |
Health Benefits: Honeynut squash is packed with beta-carotene, which your body converts into vitamin A. This is great for eye health, immune function, and healthy skin. The squash is also a good source of fiber, which helps with digestion and keeps you feeling full. The brown butter adds healthy fats that help your body absorb the fat-soluble vitamins in the squash.
Dietary Considerations: This recipe is naturally gluten-free and can be made vegan with a simple butter swap. It’s also relatively low in sugar compared to many fall side dishes. The sweetness comes mostly from the squash itself, with just a touch of maple syrup. If you’re watching your sugar intake, you can skip the maple syrup entirely.
Potential Allergens: This recipe contains dairy from the butter. For a dairy-free version, use vegan butter or coconut oil. The recipe is free from eggs, nuts (unless you add the nut topping), soy, and gluten.
My personal take: I love that this dish feels indulgent but is actually really good for you. It’s the kind of food that makes you feel satisfied and nourished without weighing you down. I serve it alongside a simple protein and a green salad for a balanced meal that tastes like a treat.
Conclusion
This brown butter honeynut squash with balsamic glaze has become my go-to fall side dish for good reason. It’s simple enough for a Tuesday night but impressive enough for Thanksgiving. The combination of nutty brown butter, sweet-tangy balsamic glaze, and tender caramelized squash is honestly hard to beat.
I love that this recipe lets the squash shine without covering it up. The ingredients are minimal, but each one does its job perfectly. The brown butter adds depth, the balsamic brings brightness, and the flaky salt ties it all together. It’s one of those dishes that tastes way more complicated than it actually is.
I encourage you to make this your own. Try it with different herbs, add some heat, or top it with cheese. The base recipe is forgiving and flexible. And if you make it, I’d love to hear how it turned out. Drop a comment below and let me know what variations you tried or how you served it. Your feedback helps other readers discover new ways to enjoy this dish.
If you’re looking for more fall recipes to round out your menu, you might enjoy my cozy pumpkin scones with maple glaze for a sweet breakfast treat, or these perfect pumpkin chocolate chip bread with cream cheese swirl for an indulgent snack. For a savory option that pairs beautifully with this squash, try my crispy baked parmesan pork chops for a complete meal that comes together in under 30 minutes.
Thank you for stopping by and giving this recipe a try. Happy cooking, and I hope this squash finds a permanent spot in your fall rotation like it has in mine.
Frequently Asked Questions
Can I use butternut squash instead of honeynut?
Yes, absolutely. Butternut squash is larger and takes longer to cook, so you’ll need to cut it into smaller pieces and increase the roasting time to 35-40 minutes. The flavor won’t be quite as sweet and concentrated, but it will still be delicious. Look for the smaller end of the butternut for the best results.
Do I have to peel honeynut squash?
Nope! The skin of honeynut squash is thin and tender enough to eat after roasting. It softens up beautifully and adds a little texture. If you prefer, you can peel it, but I never bother. Just wash it well before cutting.
Can I make the brown butter balsamic glaze ahead of time?
Yes, you can make the glaze up to 3 days ahead. Store it in an airtight container in the refrigerator. When you’re ready to use it, gently reheat it on the stovetop or in the microwave. It will thicken as it cools, so you may need to add a teaspoon of water to thin it out.
How do I know when the squash is fully cooked?
The easiest test is to insert a fork or knife into the thickest part of the squash. It should slide in easily with no resistance. The flesh should be tender and the edges should look caramelized and slightly browned. If the fork meets resistance, give it a few more minutes.
Can I double this recipe for a crowd?
Absolutely. Just make sure you don’t overcrowd the baking sheet. Use two pans if needed and rotate them halfway through cooking. The glaze recipe can easily be doubled or tripled. This dish is perfect for Thanksgiving or any large gathering because it’s so simple to scale up.
Pin This Recipe!
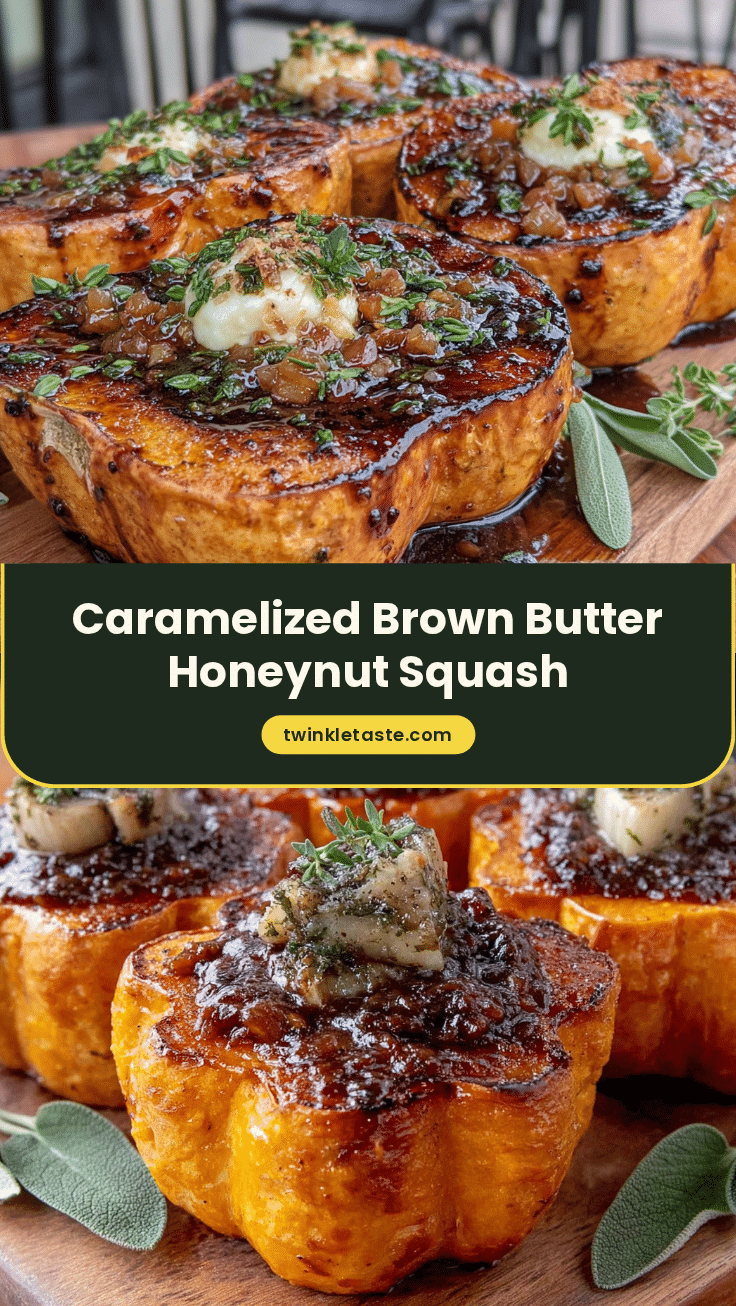
Perfect Brown Butter Honeynut Squash with Easy Balsamic Glaze
Tender, caramelized honeynut squash roasted to perfection and finished with a nutty brown butter and sweet-tangy balsamic glaze. This easy side dish comes together in about 30 minutes and is impressive enough for company yet simple enough for a weeknight.
- Prep Time: 10 minutes
- Cook Time: 25 minutes
- Total Time: 35 minutes
- Yield: 4 servings 1x
- Category: Side Dish
- Cuisine: American
Ingredients
- 2–3 small honeynut squash, halved lengthwise and seeded
- 4 tablespoons unsalted butter, cut into pieces
- 3 tablespoons balsamic vinegar
- 1 tablespoon maple syrup
- 4–5 sprigs fresh thyme, plus more for garnish
- Flaky sea salt (such as Maldon), for finishing
- Freshly ground black pepper, to taste
- 1 tablespoon olive oil
Instructions
- Preheat your oven to 400°F (200°C). Line a large baking sheet with parchment paper or a silicone mat.
- Wash the honeynut squash well. Cut each squash in half lengthwise from stem to tip. Scoop out the seeds and stringy bits with a spoon.
- Place the squash halves cut-side up on the prepared baking sheet. Drizzle with olive oil and use your hands or a brush to coat the cut surfaces evenly. Season lightly with salt and pepper. Flip the squash halves cut-side down onto the baking sheet.
- Roast the squash for 20-25 minutes, until a fork slides easily into the thickest part of the flesh. The skin should be slightly wrinkled and the edges caramelized. Rotate the pan halfway through if needed.
- While the squash roasts, make the brown butter and glaze. In a small saucepan over medium heat, add the butter pieces. Let them melt completely, then continue cooking, swirling the pan occasionally. The butter will foam, then subside. Watch for brown specks to form at the bottom and a nutty aroma. Remove from heat immediately when it turns a golden amber color (about 5-7 minutes from melting).
- Add the balsamic vinegar and maple syrup to the saucepan with the brown butter. Whisk to combine. Return the pan to medium-low heat and let it simmer gently for 3-4 minutes, stirring occasionally, until the glaze thickens and becomes syrupy (coats the back of a spoon). Remove from heat and stir in the fresh thyme sprigs.
- When the squash is done roasting, remove from the oven. Carefully flip each piece cut-side up using tongs. Brush or drizzle the brown butter balsamic glaze generously over each squash half. Let the glaze soak in for a minute.
- Sprinkle with flaky sea salt and a few fresh thyme leaves. Serve immediately while the squash is still hot and the glaze is glossy.
Notes
For extra caramelization, after glazing, pop the squash back under the broiler for 1-2 minutes. Watch carefully so the glaze doesn’t burn. The glaze will thicken as it cools; if it gets too thick, add a teaspoon of water and whisk. Leftover squash can be stored in an airtight container in the refrigerator for up to 4 days. Reheat in a 350°F oven for 5-7 minutes.
Nutrition
- Serving Size: 1 squash half
- Calories: 190
- Sugar: 10
- Sodium: 150
- Fat: 12
- Saturated Fat: 7
- Carbohydrates: 20
- Fiber: 3
- Protein: 2
Keywords: honeynut squash, brown butter, balsamic glaze, roasted squash, fall side dish, easy recipe, vegetarian, gluten-free


