My daughter came home from school last October clutching a crumpled flyer for the annual Halloween class party. The sign-up sheet was already filling up—cupcakes, cookies, the usual store-bought stuff. I stared at the blank line next to my name and felt that familiar knot of wanting to contribute something special without spending all night in the kitchen. For a while, I just accepted that festive treats meant either elaborate baking projects or sad packaged snacks from the drugstore. There had to be something in between.
I stood in my pantry that afternoon, staring at a box of Rice Krispies and a bag of marshmallows, and remembered the pumpkin-shaped treats my aunt used to make when I was a kid. Not the fancy decorated ones you see on Pinterest—just simple, buttery cereal clusters shaped into little pumpkins with a single green M&M stem on top. I hadn’t thought about them in years. But standing there with Halloween looming and zero energy for a complicated recipe, they felt like the answer I’d been looking for.
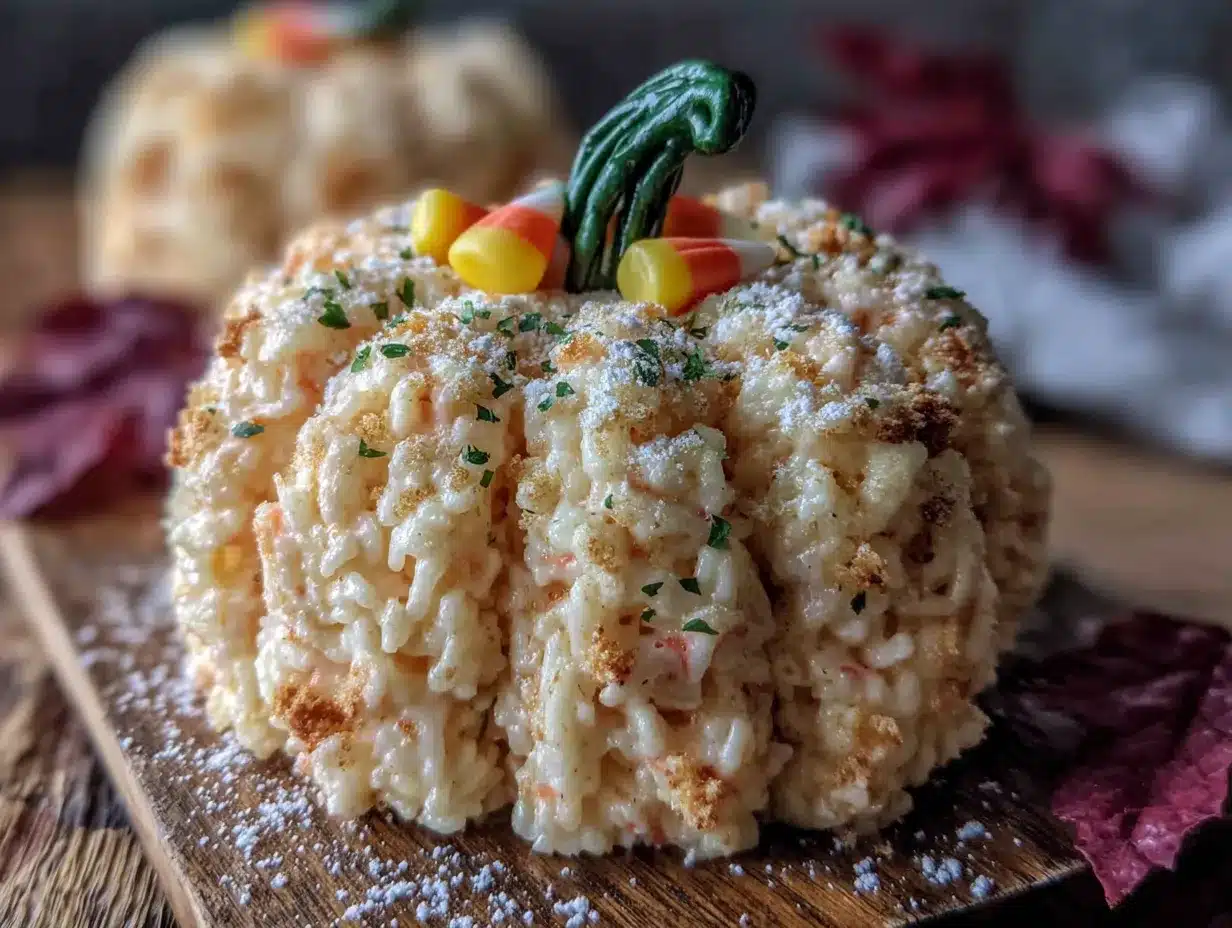
These Easy Halloween Rice Krispie Treat Pumpkins aren’t about perfection. They’re about giving yourself a break while still showing up with something homemade and adorable. No baking, no special equipment, and honestly—kids love making them just as much as eating them. I’ve been making these for five Halloweens now, and they never fail to disappear before the cupcakes do.
Why You’ll Love This Recipe
I’ve tested a lot of Halloween desserts over the years, and this one wins every time for a few specific reasons. Let me break it down for you.
- No Oven Required : You don’t need to turn on the oven for these. Just a stovetop or microwave, which means no heating up the kitchen and no worrying about baking times when you’re already juggling costumes and candy.
- 30 Minutes Start to Finish : From melting the butter to shaping the last pumpkin, you’re done in half an hour. I’ve made these during a toddler meltdown and still had time to clean up before the doorbell started ringing.
- Simple Ingredients : Butter, marshmallows, Rice Krispies cereal, orange food coloring, and green M&Ms. That’s it. No specialty baking aisle required.
- Perfect for Little Hands : My five-year-old can shape these by herself. The mixture is forgiving and doesn’t burn little fingers if you let it cool slightly. It’s the kind of kitchen project that actually works with kids helping.
- Always a Crowd-Pleaser : I’ve brought these to school parties, trunk-or-treat events, and family gatherings. Adults light up when they see them—there’s something about the combination of nostalgia and Halloween spirit that gets everyone.
- Freezer-Friendly : You can make these three days ahead and they stay perfectly fresh. Wrap them individually and pull them out when you need a quick contribution.
What makes these different from every other Rice Krispie treat recipe out there is the texture. I use a specific ratio of butter to marshmallows that keeps them soft and chewy instead of rock-hard by the next morning. Plus, the orange food coloring gets mixed in a particular way so you don’t end up with streaky treats that look more like tie-dye than pumpkins.
This recipe isn’t just good—it’s the kind that makes you close your eyes after the first bite. The buttery marshmallow flavor mixed with that satisfying cereal crunch hits exactly the right spot. And honestly, seeing a plate of little orange pumpkins on the dessert table just makes everyone smile.
What Ingredients You Will Need
This recipe uses simple, everyday ingredients to create something that looks way more impressive than the effort suggests. Most of these are probably already sitting in your pantry.
For the Rice Krispie Treat Base
- 6 tablespoons unsalted butter (I use Kerrygold for the richest flavor, but any brand works fine)
- 1 package (10 ounces) regular marshmallows (not mini—regular marshmallows melt more evenly and give a better texture. Jet-Puffed is my go-to)
- 6 cups Rice Krispies cereal (generic brands work, but the name brand holds its crunch better in my experience)
- 1/2 teaspoon vanilla extract (optional, but it rounds out the sweetness nicely)
- Orange gel food coloring (liquid food coloring works too, but you’ll need more drops and it can make the mixture stickier. I prefer Americolor or Wilton gel colors for vibrant results without altering the texture)
For Decorating
- 1 bag green M&Ms (you’ll need one per pumpkin. If you can’t find green, use green candy melts or even small pretzel sticks cut in half)
- Optional: black decorating gel (for drawing little jack-o-lantern faces if you want to get fancy)
- Optional: cinnamon sugar (for dusting—adds a subtle fall flavor that pairs beautifully with the marshmallow)
Ingredient Tips I’ve Learned the Hard Way
Don’t use marshmallow creme for this recipe. I tried it once thinking it would be easier, and the treats came out greasy and wouldn’t hold their shape. Stick with regular marshmallows.
If you’re using generic cereal, check the expiration date. Stale cereal makes sad, soft treats that don’t hold up when you’re shaping them into pumpkins. Fresh cereal gives that perfect snap when you bite into them.
The butter matters more than you think. I’ve made these with margarine and with salted butter, and unsalted butter gives the cleanest flavor. If you only have salted, reduce the added salt in the recipe by half.
Equipment Needed
You don’t need anything fancy for this recipe, which is part of the appeal. Here’s what you’ll need:
- Large pot or Dutch oven (at least 5-quart capacity—you need room to stir without flinging cereal everywhere)
- Silicone spatula (the flexible kind that won’t scratch your pot. I’ve broken two wooden spoons stirring Rice Krispie treats before switching to silicone)
- 9×13-inch baking dish (for setting the treats before cutting, though you can also shape them free-form)
- Parchment paper or wax paper (absolutely essential for pressing and shaping without everything sticking to your hands)
- Sharp knife or pizza cutter (for cutting into squares if you’re not shaping them by hand)
- Small bowl of water (keep this nearby—dipping your fingers in water prevents the marshmallow mixture from sticking to you)
- Cookie sheet lined with parchment (for placing the finished pumpkins)
If you don’t have a 9×13 dish, you can use a sheet pan or even a large casserole dish. The shape doesn’t matter since you’ll be cutting or shaping them anyway. I’ve used a cast iron skillet in a pinch and it worked fine.
Preparation Method
Let’s get into the actual making of these pumpkins. I’ve broken this down step by step so even first-timers can nail it.
- Prep your workspace — Before you start melting anything, line your 9×13 baking dish with parchment paper, leaving some overhang on the sides. Set aside a second sheet of parchment for pressing. Have your green M&Ms ready in a small bowl. This recipe moves fast once the marshmallows start melting, so you don’t want to be hunting for supplies mid-process.
- Melt the butter — Place your large pot over medium-low heat and add the 6 tablespoons of unsalted butter. Let it melt slowly, swirling the pan occasionally. You want the butter fully melted but not browning—if it starts to turn golden, you’ve gone too far and the treats will have a nutty flavor (which isn’t bad, but it’s not classic Rice Krispie treat territory).
- Add the marshmallows — Once the butter is melted, dump in the entire 10-ounce bag of marshmallows. Stir constantly with your silicone spatula. The marshmallows will puff up, then deflate, then start to melt into a gooey mass. Keep stirring—don’t walk away. This takes about 4-5 minutes on medium-low heat. You’ll know it’s ready when the mixture is completely smooth and there are no lumps of unmelted marshmallow.
- Add vanilla and food coloring — Remove the pot from heat. Stir in the 1/2 teaspoon vanilla extract. Now add your orange gel food coloring. Start with a small amount—about 1/4 teaspoon of gel—and stir well. The color will look pale at first, but it deepens as you mix. Add more gel a tiny bit at a time until you reach a pumpkin-orange shade. Remember: the color will lighten slightly when you add the cereal, so go a shade darker than you think you need.
- Fold in the cereal — Pour the 6 cups of Rice Krispies into the pot. Fold gently with your spatula, turning the mixture over from the bottom. Don’t stir aggressively—you’ll crush the cereal and end up with dense, hard treats. Fold just until every piece of cereal is coated in the marshmallow mixture. There should be no dry spots, but you should still see distinct cereal shapes.
- Press into the pan (or shape immediately) — Here’s where you have two options. Option A: Pour the mixture into your prepared 9×13 pan, place the second sheet of parchment on top, and press down firmly and evenly. Let it cool for 15 minutes, then cut into squares and shape each square into a rough pumpkin ball with your hands. Option B (my preferred method): Let the mixture cool in the pot for 3-4 minutes until it’s warm but not burning hot. Coat your hands with butter or water, grab a handful of mixture (about the size of a golf ball), and shape it into a pumpkin form—slightly flattened on top and bottom, with gentle indentations on the sides to mimic pumpkin ridges. Place each shaped pumpkin on your parchment-lined cookie sheet.
- Add the stem — While the treats are still warm and slightly sticky, press one green M&M into the top center of each pumpkin. Push it down gently so it stays put when the treat cools. If the M&M doesn’t stick, dab a tiny bit of leftover marshmallow mixture on the bottom first.
- Let them set — Allow the pumpkins to cool completely at room temperature, about 20 minutes. Don’t rush this—if you try to move them too early, they’ll lose their shape. Once fully set, they’ll hold their form perfectly and you can stack them on a platter.
Cooking Tips & Techniques
I’ve made these pumpkins more times than I can count, and I’ve definitely learned some things the hard way. Here are the tips that will save you from my mistakes.
Low and slow is the rule. I once cranked the heat to high thinking it would speed things up. The marshmallows scorched on the bottom while staying lumpy on top. Keep your heat at medium-low and be patient. The texture is worth it.
Wet hands are your best friend. The marshmallow mixture is sticky—like, really sticky. Keep a small bowl of cool water nearby and dip your fingers before touching the mixture. The water creates a barrier so nothing sticks to your skin. Re-wet between each pumpkin. This single tip changed everything for me.
Don’t overpress. When you’re shaping the pumpkins, you want them firm enough to hold together but not compacted. Overpressing makes them dense and hard—think hockey puck, not soft treat. Gentle pressure is all you need.
Work in batches. If the mixture starts to cool and stiffen while you’re shaping, pop the pot back on low heat for 30 seconds to soften it. Just don’t overheat or the marshmallow will break down and the treats will become greasy.
Make them ahead. These pumpkins actually taste better the next day. The flavors meld together and the texture softens slightly into that perfect chewy consistency. Store them in an airtight container at room temperature for up to three days.
Variations & Adaptations
One of the best things about this recipe is how easy it is to customize. Here are some variations I’ve tried and loved.
Chocolate-Dipped Pumpkins — After shaping and cooling, dip the bottoms of the pumpkins in melted dark chocolate and sprinkle with orange sprinkles. Let the chocolate set on parchment paper. The chocolate adds a rich contrast to the sweet marshmallow.
Gluten-Free Version — Rice Krispies are naturally gluten-free, but check the label because some brands add malt flavoring that contains gluten. Use a certified gluten-free cereal like Nature’s Path or One Degree Organics. Everything else in the recipe is already gluten-free.
Vegan Adaptation — Substitute the butter with vegan butter (I like Miyoko’s or Earth Balance) and use Dandies vegan marshmallows. The texture is slightly different—a bit softer—but the flavor is still fantastic. Use vegan-friendly candy for the stems.
Spiced Pumpkin Version — Add 1 teaspoon pumpkin pie spice to the marshmallow mixture along with the vanilla. This gives the treats a warm fall flavor that pairs beautifully with the orange color. I made these for a fall harvest party and they were gone in minutes.
Mini Pumpkin Bites — Instead of golf ball-sized pumpkins, shape teaspoon-sized mini pumpkins for a bite-sized treat. Perfect for classroom parties or snack tables where you want people to graze. Reduce the M&M stems to mini chocolate chips.
Jack-O-Lantern Faces — Once the pumpkins are set, use black decorating gel to draw simple jack-o-lantern faces on each one. Triangles for eyes and a little jagged smile. Kids go absolutely wild for these.
Serving & Storage Suggestions
These pumpkins are best served at room temperature, which is convenient because that’s exactly how they store. Arrange them on a platter in a pyramid or scatter them among fake autumn leaves for a festive look. I like to serve them alongside other Halloween treats like my Crispy Spiderweb Brown Butter Rice Krispie Treats for a whole spread of no-bake goodness.
Storage Instructions — Place the pumpkins in an airtight container, layering them between sheets of parchment paper so they don’t stick together. They’ll stay fresh at room temperature for up to 3 days. Do not refrigerate—the cold air makes them hard and stale.
Freezer Instructions — You can freeze these for up to 2 months. Place the shaped pumpkins on a cookie sheet and freeze until solid (about 1 hour), then transfer to a freezer-safe bag or container. To thaw, let them sit at room temperature for 30 minutes. The texture remains surprisingly good, though they’re slightly softer than fresh.
Reheating Tip — If your treats have been sitting out and gotten a bit firm, microwave them for 5-8 seconds. This brings back that fresh-from-the-pot softness. Don’t overshoot or they’ll collapse.
These pumpkins pair wonderfully with warm drinks. I love serving them alongside a mug of Homemade Pumpkin Spice Syrup stirred into coffee or hot chocolate. The combination of sweet treat and spiced drink is pure fall comfort.
Nutritional Information & Benefits
Let’s be real—these are a treat, not a health food. But here’s the nutritional breakdown so you know what you’re working with.
Per pumpkin (based on 18 pumpkins per batch):
- Calories: 145
- Fat: 5g
- Carbohydrates: 25g
- Sugar: 14g
- Protein: 1g
- Sodium: 115mg
Dietary Considerations: This recipe is nut-free, egg-free, and can be made gluten-free and vegan with the substitutions listed above. It contains dairy from the butter, but you can swap in vegan butter easily.
Health Perspective: While these aren’t going to win any nutrition awards, they’re a better option than many store-bought Halloween treats. You control the ingredients—no preservatives, no artificial flavors (beyond the food coloring), and no high-fructose corn syrup if you use name-brand marshmallows. Plus, making them yourself means you can portion control. One or two pumpkins feels satisfying in a way that mindlessly grabbing from a candy bowl doesn’t.
If you’re looking for a healthier Halloween option, try these alongside some Apple Slice Sandwiches with Almond Butter for a balanced snack plate that still feels festive.
Conclusion
These Easy Halloween Rice Krispie Treat Pumpkins have become a non-negotiable tradition in our house. They’re the recipe I turn to when I want to contribute something homemade without spending hours in the kitchen. They’re the project I pull out when my kids want to help but I don’t have the patience for a complicated bake. And honestly? They’re just fun.
The beauty of this recipe is how forgiving it is. Your first batch might not look perfect—mine certainly didn’t—but they’ll still taste amazing. And isn’t that the point? Halloween is supposed to be a little messy, a little imperfect, and a whole lot of fun.
I’d love to hear how yours turn out. Did you add jack-o-lantern faces? Dip them in chocolate? Let your kids go wild with sprinkles? Drop a comment below and tell me about your version. And if you’re looking for more easy Halloween treats, don’t miss my Black Sesame Latte with Caramel Drip for a spooky sipper that pairs perfectly with these pumpkins.
Happy Halloween, friends. Go make something that makes you smile.
Frequently Asked Questions
Can I use mini marshmallows instead of regular?
Yes, but you’ll need about 4 cups of mini marshmallows to equal one 10-ounce bag of regular marshmallows. Mini marshmallows melt faster, so watch them carefully and stir constantly to prevent scorching.
Why did my Rice Krispie treats turn out hard?
This usually happens from overpacking the mixture or using too much heat. Press the treats gently when shaping, and keep your heat on medium-low when melting the marshmallows. Also, make sure your marshmallows are fresh—stale marshmallows create hard treats.
Can I make these without food coloring?
Absolutely. The treats will be pale golden from the butter and marshmallows. You can leave them plain, dust them with cinnamon, or dip them in orange-colored candy melts instead. They’ll still look adorable without the orange coloring.
How far in advance can I make these?
You can make them up to 3 days ahead if stored in an airtight container at room temperature. For longer storage, freeze them for up to 2 months. Just thaw at room temperature for 30 minutes before serving.
My marshmallow mixture is too sticky to shape. What do I do?
Let it cool for 5 more minutes. The mixture becomes easier to handle as it cools. Also, make sure your hands are wet with cool water before touching the mixture—this is the most effective trick for preventing stickiness. Re-wet your hands between each pumpkin.
Pin This Recipe!
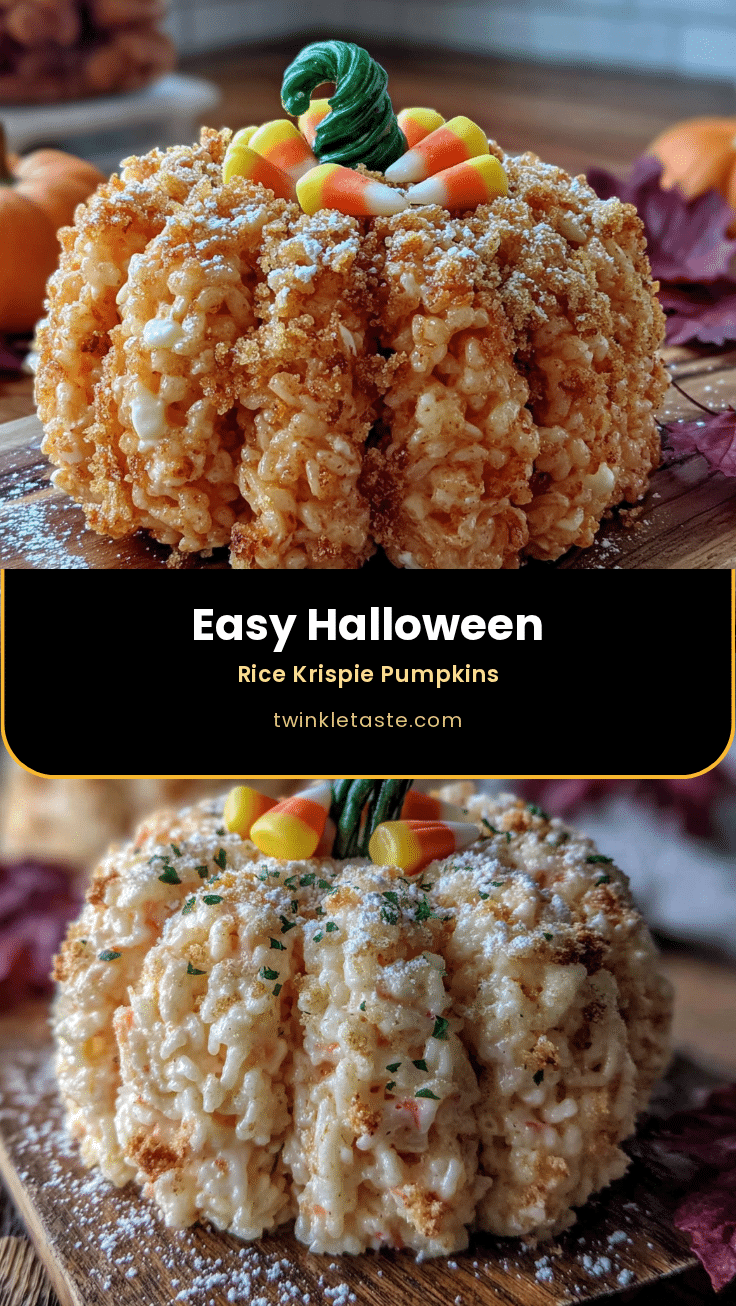
Easy Halloween Rice Krispie Treat Pumpkins: Best Fun Dessert
These no-bake Halloween Rice Krispie Treat Pumpkins are soft, chewy, and made with simple ingredients. Perfect for parties, they come together in 30 minutes and are a hit with kids and adults alike.
- Prep Time: 15 minutes
- Cook Time: 10 minutes
- Total Time: 30 minutes
- Yield: 18 pumpkins 1x
- Category: Dessert
- Cuisine: American
Ingredients
- 6 tablespoons unsalted butter
- 1 package (10 ounces) regular marshmallows
- 6 cups Rice Krispies cereal
- 1/2 teaspoon vanilla extract (optional)
- Orange gel food coloring
- 1 bag green M&Ms
- Optional: black decorating gel
- Optional: cinnamon sugar
Instructions
- Prep your workspace: Line a 9×13-inch baking dish with parchment paper, leaving overhang. Set aside a second sheet of parchment for pressing. Have green M&Ms ready in a small bowl.
- Melt the butter: Place a large pot over medium-low heat and add 6 tablespoons unsalted butter. Melt slowly, swirling occasionally, until fully melted but not browning.
- Add the marshmallows: Dump in the entire 10-ounce bag of marshmallows. Stir constantly with a silicone spatula until completely smooth and no lumps remain, about 4-5 minutes.
- Add vanilla and food coloring: Remove pot from heat. Stir in 1/2 teaspoon vanilla extract. Add orange gel food coloring starting with 1/4 teaspoon, stirring well. Add more until you reach a pumpkin-orange shade (go a shade darker than desired, as color lightens with cereal).
- Fold in the cereal: Pour 6 cups Rice Krispies into the pot. Fold gently with a spatula until every piece is coated, being careful not to crush the cereal.
- Press into the pan or shape immediately: Option A: Pour mixture into prepared pan, press down firmly with parchment, cool 15 minutes, cut into squares, and shape each into a pumpkin ball. Option B (preferred): Let mixture cool in pot 3-4 minutes, then with wet hands, shape golf ball-sized portions into pumpkin forms with gentle indentations. Place on parchment-lined cookie sheet.
- Add the stem: While treats are still warm, press one green M&M into the top center of each pumpkin. If it doesn’t stick, dab a bit of leftover marshmallow mixture on the bottom first.
- Let them set: Cool completely at room temperature, about 20 minutes, before moving or stacking.
Notes
Keep heat on medium-low to avoid scorching. Wet hands with cool water to prevent sticking. Don’t overpress the mixture. These taste even better the next day. Store in an airtight container at room temperature for up to 3 days. Freeze for up to 2 months.
Nutrition
- Serving Size: 1 pumpkin
- Calories: 145
- Sugar: 14
- Sodium: 115
- Fat: 5
- Saturated Fat: 3
- Carbohydrates: 25
- Protein: 1
Keywords: Halloween, Rice Krispie treats, pumpkins, no-bake, easy dessert, kid-friendly, fall, party treat


