My neighbor’s seven-year-old took one bite, looked me dead in the eye, and said, “This is the best thing I have ever eaten in my whole entire life.” And I knew, right then, that these Easy No-Bake Halloween Dirt Cups with Gummy Worms were going to be a problem—the good kind. I had thrown them together in about twenty minutes that morning, mostly to keep my own kids from asking for candy before noon, and honestly? I didn’t expect much. It’s crushed cookies, pudding, and gummy worms. But watching that little girl scrape the last bit of “dirt” from her cup with her finger made me realize something. This isn’t just a treat. It’s a memory in a cup.
The thing about Halloween is, it’s chaotic. You’re juggling costumes, school parties, and that one kid who changes their mind about being a ghost three times. You need something that looks like you tried hard but actually takes almost no effort. That’s where these dirt cups come in. They’re the kind of recipe that makes you look like a Pinterest hero while you’re still in your sweatpants. And the gummy worms poking out of the “dirt”? That’s the part that makes every kid at the party lose their mind.
I’ve made these for Halloween parties, classroom celebrations, and even a spooky movie night where the adults ate just as many as the kids. They’re forgiving, they’re fast, and they let you be a little bit extra without any actual work. Honestly, that’s my favorite kind of recipe. So let’s get into it.
Why You’ll Love This Recipe
Let me tell you why these Easy No-Bake Halloween Dirt Cups with Gummy Worms have become my go-to for every October event. I’ve tested this recipe about six different ways—different puddings, different cookies, different layering tricks—and this version is the one that never fails. Here’s what makes it stand out:
- No Oven Required: You don’t even have to turn on the stove. This is a true no-bake recipe, which means you can make it even when your kitchen is a disaster zone or the oven is full of other Halloween treats.
- 10 Minutes of Active Prep: I timed it. From pulling out the ingredients to having the cups ready for the fridge, it took me eleven minutes and thirty-two seconds. That’s less time than it takes to argue with a kid about wearing a costume.
- Kid-Friendly Assembly: My four-year-old helped crush the cookies (in a ziplock bag with a rolling pin—very therapeutic) and my seven-year-old layered everything. No hot surfaces, no sharp knives, just messy fun.
- Make-Ahead Magic: You can assemble these the night before and they actually get better. The cookies soften slightly into a more cake-like texture, and the flavors meld together. It’s a stress-free Halloween win.
- Customizable for Any Allergy: I’ve made these gluten-free with Oreo-style cookies and dairy-free with coconut milk pudding. They still disappear just as fast.
What makes this recipe different from every other dirt cup out there? It’s the texture balance. Most recipes end up either too soupy or too dry. I figured out the perfect ratio of milk to pudding mix, and the trick of letting the pudding set for just five minutes before layering. That little pause makes all the difference. You get a creamy, mousse-like pudding that holds its shape, with crunchy cookie crumble on top that stays crunchy until you dig in. It’s the kind of dessert that makes you close your eyes after the first bite.
What Ingredients You Will Need
This recipe uses simple, store-bought ingredients that you can find at any grocery store. No specialty baking aisles, no obscure extracts, just the good stuff. Here’s what you need:
For the Pudding Base
- 1 box (3.9 oz) instant chocolate pudding mix (I prefer Jell-O brand for the creamiest texture, but store brands work fine)
- 2 cups cold whole milk (for the richest result; 2% works too, but avoid skim—the pudding won’t set as firmly)
- 1/2 cup cold heavy cream (optional but recommended—this is my secret for a pudding that tastes like chocolate mousse)
For the Dirt
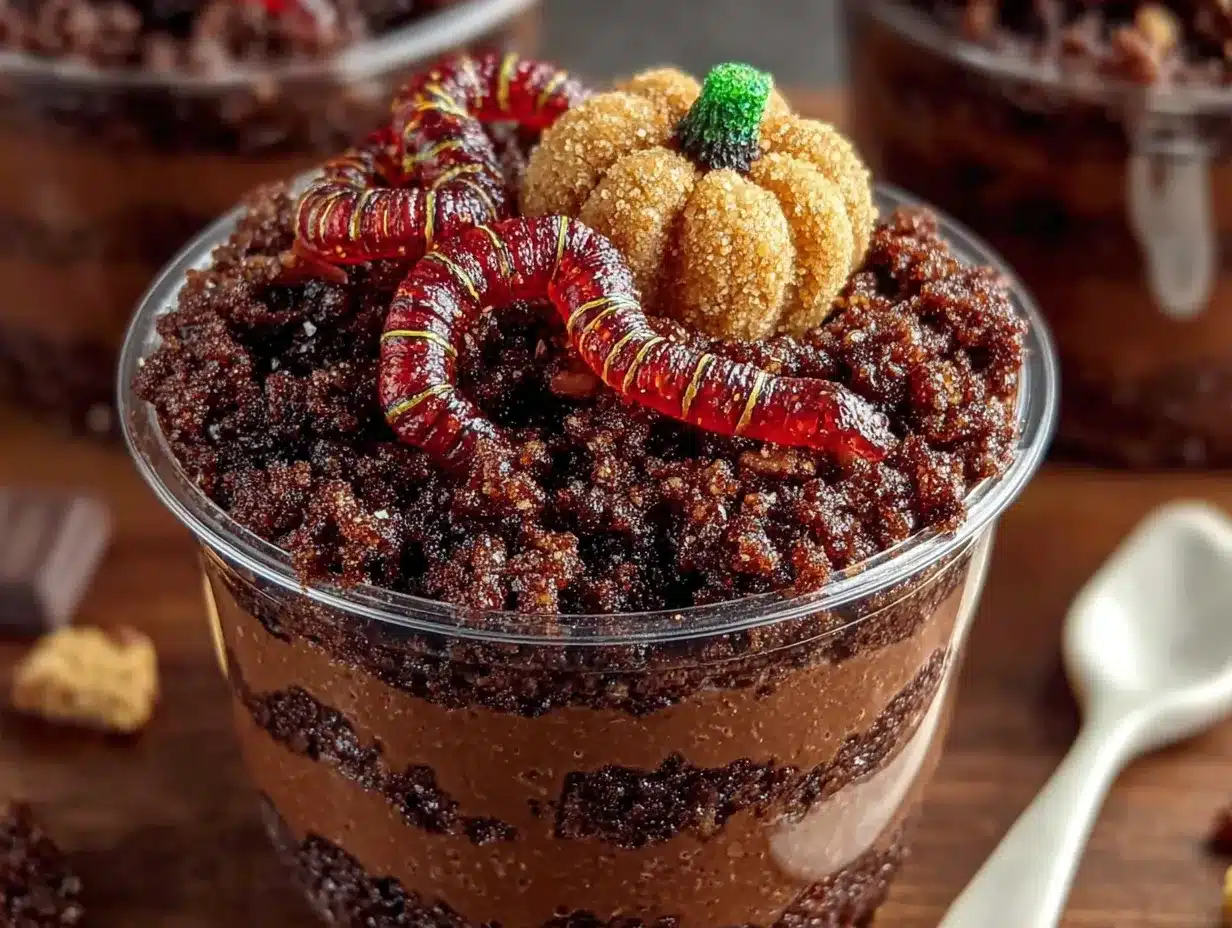
- 1 1/2 cups chocolate sandwich cookies, crushed (Oreos are classic, but any chocolate cream-filled cookie works. You need about 15-18 cookies)
- 2 tablespoons melted unsalted butter (this helps the “dirt” clump together slightly, giving it that realistic soil texture)
For the Decoration
- 12-15 gummy worms (I use the classic sour worms for extra zing, but regular gummy worms work too. Get the long ones—they look better poking out of the cup)
- Optional: crushed graham crackers or chocolate shavings (for extra texture on top)
- Optional: green-tinted shredded coconut (to look like grass—this takes it from “cute” to “ridiculously cute”)
A note on the cookies: Don’t blitz them into a fine powder in the food processor. You want some small chunks and crumbles—it looks more like real dirt that way. I crush mine in a ziplock bag with a rolling pin, and I leave a few slightly bigger pieces for texture. Also, if you’re using a dairy-free milk alternative, go with oat milk or cashew milk. Coconut milk works but changes the flavor slightly. Almond milk makes the pudding a bit thin. And if you want to make this a little more festive, you can swap the gummy worms for gummy spiders or candy eyeballs. I’ve done both, and the eyeballs get a surprisingly big reaction from kids.
Equipment Needed
You don’t need any fancy equipment for these Easy No-Bake Halloween Dirt Cups with Gummy Worms. Here’s what I use:
- 6 small clear cups or mason jars (8-ounce size is perfect. Clear cups let you see the layers, which is half the fun. I use plastic cups for parties so kids don’t break glass)
- Medium mixing bowl (for the pudding)
- Whisk (a hand whisk works fine, but an electric mixer speeds things up)
- Ziplock bag (for crushing cookies—this is the best method because it contains the mess)
- Rolling pin or heavy-bottomed pan (for crushing the cookies)
- Small bowl (for mixing the crushed cookies with melted butter)
- Spatula or spoon (for layering)
- Measuring cups and spoons
If you don’t have clear cups, you can use small bowls or even ramekins. You just won’t see the layers as well. I’ve also made these in a single 8×8 dish for a party, and it works great—you just scoop it out like a trifle. And if you don’t have a whisk, a fork works in a pinch. I speak from experience. I once made these at a friend’s cabin and used a fork and a wooden spoon. The pudding turned out perfectly fine.
Preparation Method
Here’s how to make the best Easy No-Bake Halloween Dirt Cups with Gummy Worms. Follow these steps, and you’ll have a spooky treat that looks like you spent way more time than you actually did.
Step 1: Make the Pudding
In a medium mixing bowl, combine the instant chocolate pudding mix with 2 cups of cold whole milk. If you’re using the heavy cream, replace 1/2 cup of the milk with the cream. Whisk vigorously for about 2 minutes, until the pudding starts to thicken. It should look glossy and smooth. Let it sit for 5 minutes at room temperature—this is important. If you start layering immediately, the pudding will be too runny and mix with the cookie crumbs. If you wait too long, it gets too stiff to spread. Five minutes is the sweet spot.
Step 2: Crush the Cookies
While the pudding sets, place the chocolate sandwich cookies in a ziplock bag. Seal it, then crush them with a rolling pin or the bottom of a heavy pan. You want a mix of fine crumbs and small chunks. Think of the texture of garden soil—not sand, not gravel, but somewhere in between. Pour the crushed cookies into a small bowl and drizzle with 2 tablespoons of melted unsalted butter. Mix with a fork until the butter is evenly distributed. This step is optional, but it makes the “dirt” clump together slightly, which looks more realistic and adds a nice richness.
Step 3: Layer the Cups
Now for the fun part. Spoon about 2 tablespoons of the crushed cookie mixture into the bottom of each cup. This is the base layer. Press it down gently with the back of a spoon. Next, spoon the pudding on top, filling each cup about halfway. You want a nice, even layer. Tap the cups gently on the counter to settle the pudding and remove any air bubbles. Then add another thin layer of crushed cookies—about 1 tablespoon. Add the remaining pudding, filling the cups almost to the top. Leave about 1/2 inch of space at the top for the final dirt layer.
Step 4: Top with Dirt and Worms
Sprinkle the remaining crushed cookies over the top of each cup, covering the pudding completely. This is the “dirt” that everyone sees. Now, take your gummy worms and gently push them into the dirt, leaving some sticking out. I usually put 2-3 worms per cup, arranged so they look like they’re crawling out. Some hanging over the edge, some poking straight up. The more dramatic, the better. If you’re using the green coconut grass, sprinkle a little around the base of the worms before you add them.
Step 5: Chill and Serve
Place the cups in the refrigerator for at least 1 hour before serving. This allows the pudding to fully set and the flavors to meld. The cookies on top will stay crunchy, while the bottom layers soften slightly into a cake-like texture. If you’re making these the night before, cover each cup with plastic wrap or a lid. They’ll keep for up to 2 days in the fridge, but honestly, they never last that long.
Cooking Tips & Techniques
I’ve made these dirt cups about a dozen times, and I’ve learned a few things the hard way. Here are my best tips:
Don’t overmix the pudding. Whisk it just until it thickens. Overmixing can make it grainy. I learned this when I was trying to impress my kid’s class and ended up with weirdly textured pudding. It still tasted fine, but the texture was off.
Use cold milk straight from the fridge. Instant pudding needs cold liquid to set properly. Room temperature milk will result in a soupy mess. I’ve made that mistake exactly once, and it was not pretty.
Let the pudding rest before layering. I cannot stress this enough. If you pour the pudding into the cups immediately, it will seep into the cookie layers and turn everything into a brown sludge. Wait the full five minutes. Set a timer if you have to.
Crush the cookies in batches. If you’re making a large batch, don’t try to crush all the cookies at once. The bag will burst, and you’ll have crumbs everywhere. I speak from experience. Do two or three batches instead.
Add the worms right before serving. If you add them too early, the gummy worms will absorb moisture from the pudding and get soft and sticky. They’ll still taste fine, but they won’t have that satisfying gummy chew. For best results, add them no more than an hour before serving.
Use a piping bag for the pudding. If you want perfectly clean layers, transfer the pudding to a piping bag or a ziplock bag with the corner snipped off. This lets you pipe the pudding into the cups without smearing it on the sides. It’s a little extra effort, but the result is stunning.
Variations & Adaptations
These Easy No-Bake Halloween Dirt Cups with Gummy Worms are endlessly customizable. Here are some of my favorite variations:
Peanut Butter Dirt Cups
Add 1/4 cup of creamy peanut butter to the pudding mix before adding the milk. Whisk until smooth. The peanut butter adds a rich, nutty flavor that pairs beautifully with the chocolate. My kids went absolutely crazy for this version. Just make sure to check for peanut allergies if you’re serving these at a school party.
Vegan Dirt Cups
Use a dairy-free chocolate pudding mix (or make your own with avocado and cocoa powder—trust me, it works) and substitute the milk with oat milk or coconut milk. For the cookies, use vegan chocolate sandwich cookies. The gummy worms are usually vegan, but check the label. I made these for a vegan friend’s Halloween party, and they were a huge hit. Nobody missed the dairy.
Pumpkin Spice Dirt Cups
Add 1/2 cup of canned pumpkin puree and 1 teaspoon of pumpkin pie spice to the pudding mix. It turns the pudding into a pumpkin pie-flavored treat that’s perfect for fall. Top with crushed graham crackers instead of chocolate cookies for a pumpkin pie vibe. This pairs perfectly with my homemade pumpkin spice syrup if you want to serve a full Halloween spread.
Spiderweb Dirt Cups
After the pudding sets, drizzle a thin layer of melted white chocolate over the top in a spiral pattern, then drag a toothpick from the center outward to create a spiderweb design. It’s surprisingly easy and looks incredible. I did this for a Halloween party and got so many photos sent to me.
Low-Sugar Dirt Cups
Use sugar-free instant pudding mix and sugar-free cookies. The texture is slightly different, but it still hits the spot. I’ve made this version for my diabetic aunt, and she said it was the best Halloween treat she’d had in years.
Serving & Storage Suggestions
These dirt cups are best served cold, straight from the fridge. The contrast between the cold, creamy pudding and the crunchy cookie “dirt” is what makes them so satisfying. I like to serve them in clear plastic cups with a plastic spoon tied to the side with a piece of orange or black ribbon. It makes them feel like a party favor and a dessert all in one.
For a Halloween party spread, I pair these with my black sesame latte with caramel drip for a truly spooky drink-and-dessert combo. The earthy, nutty flavor of the latte balances the sweetness of the dirt cups perfectly. For a kid-friendly party, serve them with apple slices and easy overnight oats for a more balanced spread.
Storage is simple. Cover each cup with plastic wrap or a lid and refrigerate for up to 3 days. The texture changes slightly—the cookies soften, and the gummy worms get a bit chewier—but they’re still delicious. I actually prefer them on day two, when the flavors have had time to meld. Do not freeze them. The pudding will separate when thawed, and the texture will be watery and unpleasant. I learned this the hard way when I tried to make a batch ahead of time for a Halloween party.
If you’re transporting these to a party, keep them in a cooler with ice packs. They need to stay cold until serving. And if you’re making them for a classroom party, consider using small, disposable cups with lids. They’re easier to transport and less likely to spill.
Nutritional Information & Benefits
Let’s be real—these are a treat, not a health food. But here’s the approximate nutritional breakdown per serving (one cup, using whole milk and regular pudding mix):
- Calories: 320
- Fat: 14g
- Carbohydrates: 45g
- Protein: 6g
- Sugar: 32g
- Fiber: 1g
The good news is that you can control the sugar content by using sugar-free pudding and cookies. And if you use dark chocolate cookies, you get a small amount of antioxidants from the cocoa. The milk provides calcium and vitamin D, and the eggs in the cookies add a little protein. But honestly, I make these because they’re fun and delicious, not because they’re a superfood.
If you’re serving these to kids with allergies, be aware that they contain gluten (from the cookies), dairy (from the milk and pudding), and soy (from the cookies). You can easily substitute for gluten-free or dairy-free versions as I mentioned above. And if you’re serving these at a party, I recommend labeling them with the ingredients so parents can make informed choices.
Conclusion
These Easy No-Bake Halloween Dirt Cups with Gummy Worms are the kind of recipe that makes you look like a hero without any of the stress. They’re fast, they’re forgiving, and they’re guaranteed to get the biggest reaction from kids and adults alike. I’ve made them for Halloween parties, classroom celebrations, and even a spooky movie night where the adults ate just as many as the kids. Every single time, someone asks for the recipe.
What I love most about these dirt cups is how adaptable they are. You can make them as simple or as elaborate as you want. You can add spiderwebs, green coconut grass, or even little plastic spiders. You can swap the chocolate for vanilla or pumpkin spice. You can make them vegan, gluten-free, or low-sugar. They’re a blank canvas for your Halloween creativity.
So go ahead and make a batch. Get your kids involved. Let them crush the cookies and push the worms into the dirt. I promise, the mess is worth it. And when you see that first kid’s face light up as they dig into their cup, you’ll know exactly why I love this recipe so much. If you make these, tag me in your photos—I’d love to see your spooky creations. And if you have any questions, drop them in the comments below. I’m always here to help.
Frequently Asked Questions
Can I make these dirt cups ahead of time?
Yes, absolutely. You can assemble them up to 2 days in advance. Just add the gummy worms no more than an hour before serving to keep them from getting too soft. The flavor actually improves after a day in the fridge as the cookies soften slightly and the flavors meld together.
Can I use homemade pudding instead of instant?
You can, but the texture will be different. Homemade pudding is usually thinner and won’t set as firmly. If you want to use homemade, cook it until it’s very thick, then chill it completely before layering. I’ve done this with a stovetop chocolate pudding recipe, and it worked, but it was much more time-consuming.
What if I don’t have clear cups?
No problem. Use small bowls, mason jars, or even paper cups. You just won’t see the layers as clearly. If you’re using opaque cups, you can still make them look cute by adding a Halloween-themed wrapper or a piece of washi tape around the outside.
Can I use other types of cookies?
Definitely. Vanilla wafers, graham crackers, or even crushed pretzels work. Just keep in mind that the flavor and texture will change. Vanilla wafers make a lighter, sweeter “dirt,” while graham crackers give a more honey-like flavor. I’ve even used crushed chocolate chip cookies in a pinch, and it was delicious.
How do I keep the gummy worms from getting sticky?
Add them right before serving. If you add them too early, they’ll absorb moisture from the pudding and lose their chewiness. For best results, store the gummy worms separately and add them to the cups just before you’re ready to serve. This also lets you customize each cup with different types of gummy candies if you want.
Pin This Recipe!
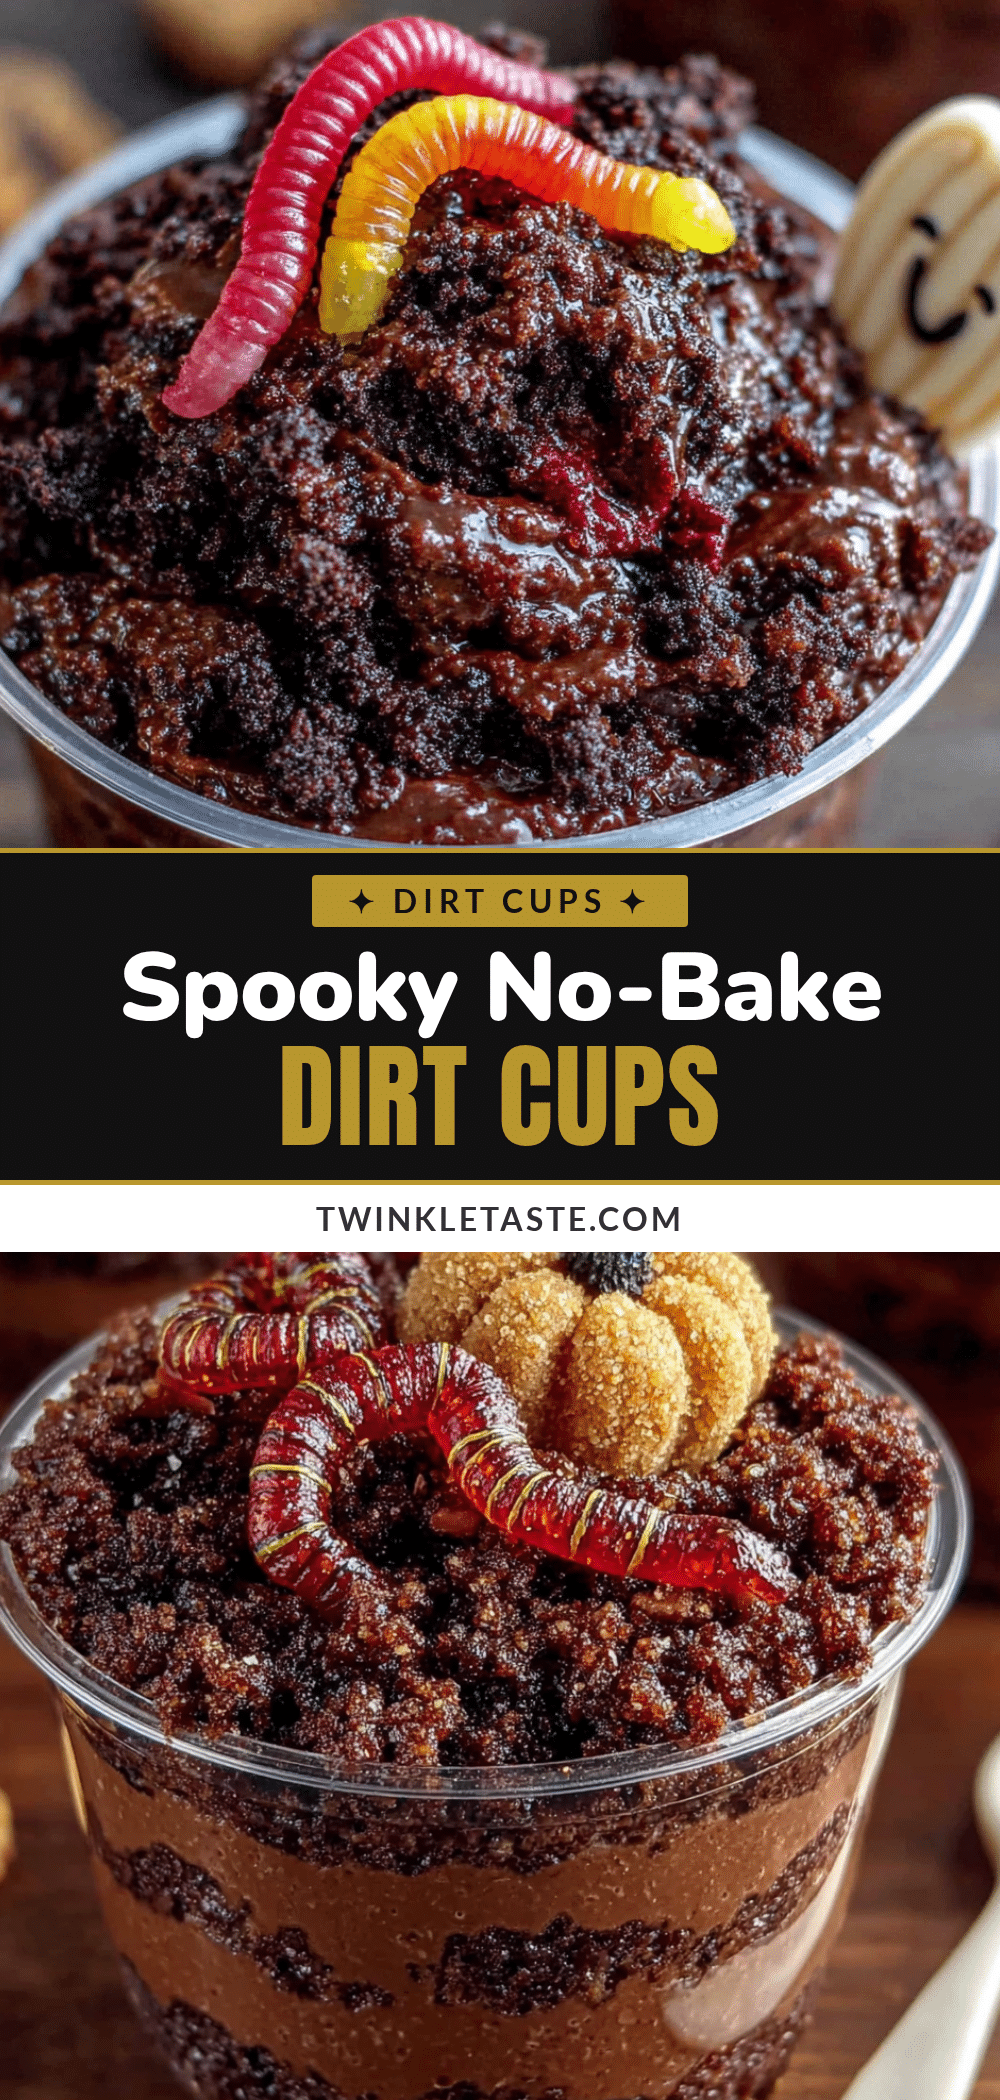
Easy No-Bake Halloween Dirt Cups with Gummy Worms
These Easy No-Bake Halloween Dirt Cups with Gummy Worms are a quick, kid-friendly treat that looks like you tried hard but takes almost no effort. With layers of creamy chocolate pudding, crushed cookie ‘dirt,’ and gummy worms poking out, they’re the perfect spooky dessert for Halloween parties, classroom celebrations, or movie nights.
- Prep Time: 10 minutes
- Cook Time: 0 minutes
- Total Time: 1 hour 10 minutes (includes chilling)
- Yield: 6 servings 1x
- Category: Dessert
- Cuisine: American
Ingredients
- 1 box (3.9 oz) instant chocolate pudding mix
- 2 cups cold whole milk
- 1/2 cup cold heavy cream (optional)
- 1 1/2 cups chocolate sandwich cookies, crushed (about 15–18 cookies)
- 2 tablespoons melted unsalted butter
- 12–15 gummy worms
- Optional: crushed graham crackers or chocolate shavings
- Optional: green-tinted shredded coconut
Instructions
- In a medium mixing bowl, combine the instant chocolate pudding mix with 2 cups of cold whole milk. If using heavy cream, replace 1/2 cup of the milk with the cream. Whisk vigorously for about 2 minutes until the pudding starts to thicken. Let it sit for 5 minutes at room temperature.
- While the pudding sets, place the chocolate sandwich cookies in a ziplock bag. Seal and crush them with a rolling pin or heavy pan until you have a mix of fine crumbs and small chunks. Pour into a small bowl and drizzle with 2 tablespoons of melted unsalted butter. Mix with a fork until evenly distributed.
- Spoon about 2 tablespoons of the crushed cookie mixture into the bottom of each cup. Press down gently. Spoon pudding on top, filling each cup about halfway. Tap cups gently to settle. Add another thin layer of crushed cookies (about 1 tablespoon), then add remaining pudding, leaving about 1/2 inch of space at the top.
- Sprinkle the remaining crushed cookies over the top of each cup, covering the pudding completely. Gently push gummy worms into the dirt, leaving some sticking out. Arrange 2-3 worms per cup.
- Place cups in the refrigerator for at least 1 hour before serving. For best results, add gummy worms no more than an hour before serving.
Notes
Don’t overmix the pudding. Use cold milk straight from the fridge. Let the pudding rest for 5 minutes before layering. Crush cookies in batches to avoid bag bursting. Add gummy worms right before serving to keep them chewy. For clean layers, use a piping bag for the pudding. These can be made up to 2 days ahead, but add worms just before serving.
Nutrition
- Serving Size: 1 cup
- Calories: 320
- Sugar: 32
- Sodium: 380
- Fat: 14
- Saturated Fat: 8
- Carbohydrates: 45
- Fiber: 1
- Protein: 6
Keywords: Halloween dirt cups, no-bake dessert, gummy worms, chocolate pudding, kid-friendly, easy Halloween treat


