The bag of candy eyes arrived three days early, and my six-year-old found it before I could hide it. She dumped them all over the kitchen table—little white and black dots rolling everywhere like a tiny eyeball explosion. I was supposed to be making something simple for her class Halloween party, but I had zero plan and a half-full jar of Nutella staring at me from the pantry. That’s how these spider cookie cups were born, honestly—out of chaos and a desperate need to use up those eyes before I found them in my coffee the next morning.
I grabbed my go-to sugar cookie dough, pressed it into a mini muffin tin, and figured I’d just fill them with something sweet. The Nutella was right there, so in it went. And then I thought—spiders need legs, right? So I snapped some pretzel sticks in half, stuck them in the warm chocolate-hazelnut filling, and topped each one with a few candy eyes. My daughter watched the whole thing like I was performing kitchen magic. Honestly, I was just trying not to burn anything.
These easy spider cookie cups with Nutella filling turned out way cuter than I expected. They looked like they took hours, but they took maybe twenty minutes of actual work. The kids at the party devoured them, and three parents asked for the recipe. I told them the truth—it was an accident. But sometimes accidents taste better than plans, you know?
Why You’ll Love This Recipe
Let me tell you why these little guys have become my go-to Halloween treat. I’ve tested this recipe four times now (purely for quality control, obviously), and every single batch disappeared faster than I could blink.
- Super Quick & Easy: From start to finish, you’re looking at about 25 minutes. The cookie cups bake in 10-12 minutes, and assembly takes maybe five. Perfect for those last-minute party invites or when your kid announces at 8 PM that they need treats for school tomorrow.
- Simple Ingredients: You probably have most of this stuff already. Flour, butter, sugar, eggs, Nutella, pretzels, and candy eyes. No weird specialty items or expensive baking supplies.
- Perfect for Halloween Parties: These are the kind of treats that steal the show. They’re spooky without being gross, cute without being complicated. Kids go nuts for them, and adults sneak them when nobody’s looking.
- Crowd-Pleaser: I brought these to a Halloween potluck last week, and they were gone in fifteen minutes. Someone actually asked if I’d made them from a bakery. I laughed and said yes, the bakery in my kitchen.
- Unbelievably Delicious: The combination of buttery cookie cup, creamy Nutella filling, and salty pretzel legs is honestly addictive. The textures work together perfectly—soft, crunchy, smooth, and crisp all in one bite.
What makes these different from other Halloween treats? It’s the balance. So many spooky desserts are either all sugar or all effort. These are actually fun to make, they taste genuinely good (not just cute), and they don’t require any special skills. I’ve made them with my daughter, with a friend who claims she can’t bake, and solo while watching Hocus Pocus. They work every single time.
What Ingredients You Will Need
This recipe uses simple, pantry-friendly ingredients that come together to create something way more impressive than the sum of their parts. Here’s what you’ll need and why each one matters.
For the Cookie Cups
- All-purpose flour (1 ¾ cups / 220g) – The foundation of your cookie cups. I use Gold Medal or King Arthur, but any standard brand works fine. Don’t scoop directly from the bag—spoon it into your measuring cup and level it off for accuracy.
- Unsalted butter (½ cup / 113g, softened to room temperature) – Butter gives these cups their rich flavor and tender texture. Make sure it’s truly softened, not melted. Leave it out for about an hour before you start, or give it 15-second bursts in the microwave if you’re impatient like me.
- Granulated sugar (¾ cup / 150g) – Adds sweetness and helps create that slightly crisp edge on the cups. Regular white sugar is perfect here.
- Egg (1 large, room temperature) – Binds everything together and adds structure. If you forgot to take it out of the fridge, place it in a bowl of warm water for 5 minutes.
- Vanilla extract (1 teaspoon) – Enhances the overall flavor. Pure vanilla is best, but imitation works fine for this recipe.
- Baking powder (1 teaspoon) – Gives the cookie cups a little lift so they’re not too dense. Make sure yours isn’t expired—test it by dropping a bit in hot water; it should bubble immediately.
- Salt (¼ teaspoon) – Balances the sweetness and brings out all the other flavors. Don’t skip it, even if you’re using salted butter (just reduce the added salt to a pinch).
For the Filling & Decoration
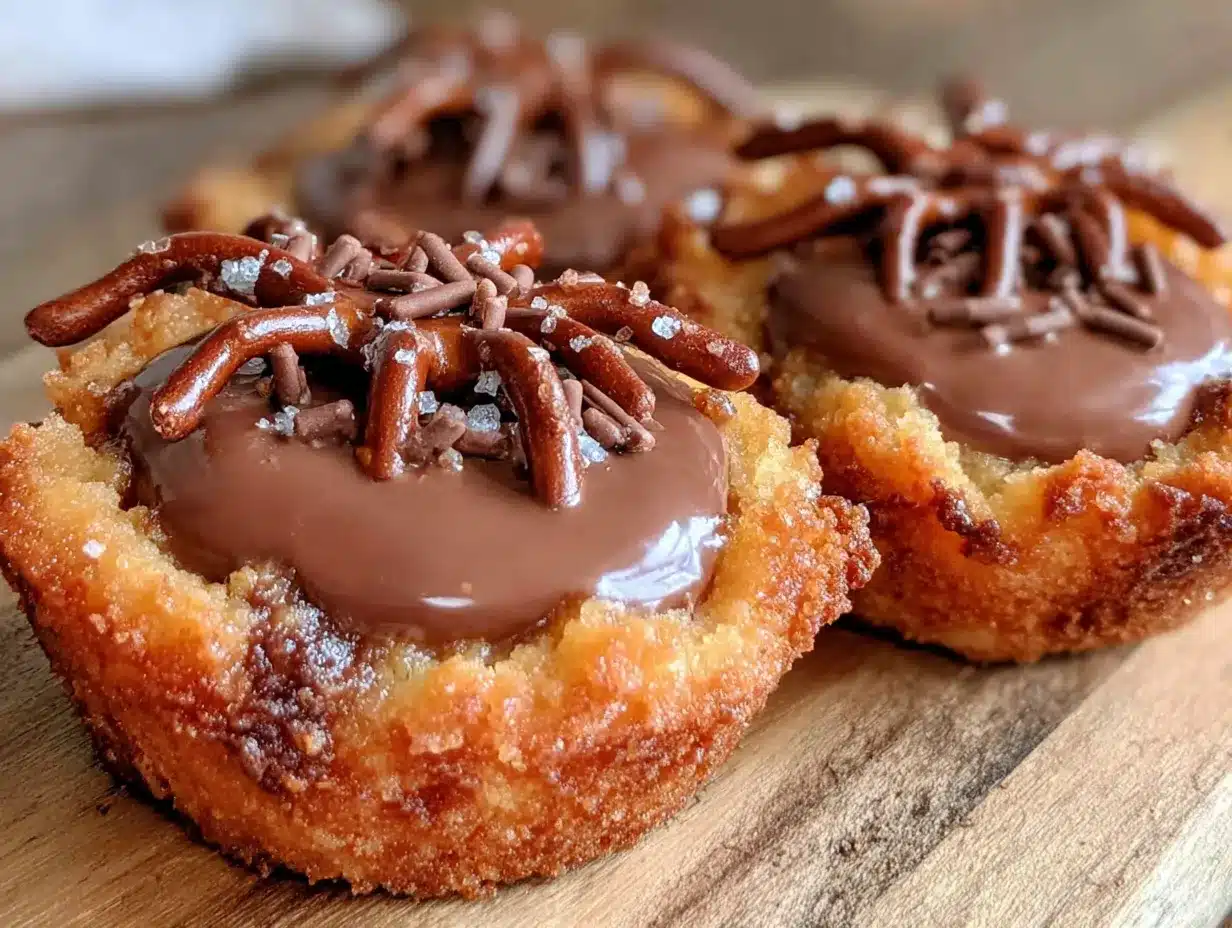
- Nutella (about ¾ cup / 225g) – The star of the show. You can use any chocolate-hazelnut spread, but Nutella has that perfect consistency for filling these cups. If your jar has been sitting in a cold pantry, microwave it for 10-15 seconds to make it easier to work with.
- Pretzel sticks (about 24, broken in half) – These become the spider legs. I use Snyder’s or the store brand—both work great. Break them carefully so you get clean halves. You’ll need 8 half-sticks per spider, so plan accordingly.
- Candy eyes (about 24-36, depending on how many eyes you want per spider) – Wilton makes good ones, but any brand works. You can find them at craft stores, grocery stores, or online. I usually buy the big bag because my kids eat them like candy.
Substitution Notes: If you need a Nutella alternative, try any chocolate-hazelnut spread or even peanut butter for a different flavor. For gluten-free, use a 1:1 gluten-free flour blend—I’ve had good luck with Bob’s Red Mill. The texture will be slightly different but still delicious. Dairy-free? Use plant-based butter sticks (not the spreadable kind in a tub).
Equipment Needed
You don’t need a fancy kitchen to make these spider cookie cups. Here’s what you’ll actually use:
- Mini muffin tin (24-cup) – This is non-negotiable. Regular muffin tins are too big and the cookie cups won’t hold their shape properly. I have a cheap non-stick one from Target that’s lasted me years.
- Mixing bowls – One medium, one large. Nothing fancy needed.
- Electric mixer – Hand or stand mixer works. You can do this by hand with a wooden spoon, but your arm will thank you for using a mixer.
- Measuring cups and spoons – For accurate ingredient amounts. Dry measuring cups for flour and sugar, liquid measuring cup for nothing here actually—everything is dry or spoon-measured.
- Small cookie scoop or teaspoon – For portioning the dough evenly. A #60 scoop (about 1 tablespoon) is perfect.
- Small spoon or piping bag – For filling the baked cups with Nutella. A piping bag gives cleaner results, but a small spoon works just fine.
- Cooling rack – Lets air circulate around the cups so they cool evenly. If you don’t have one, a cutting board works in a pinch.
- Spatula – For removing the cups from the pan. A silicone one won’t scratch your non-stick coating.
Budget tip: Don’t have a mini muffin tin? Borrow one from a neighbor or friend. I’ve loaned mine out at least six times. Most people have one gathering dust in their cabinet.
Preparation Method
Let me walk you through this step by step. I’ve made these so many times I could do it in my sleep, but I’ll share all the little tricks I’ve learned along the way.
- Preheat your oven to 350°F (175°C). Give it a full 15-20 minutes to come to temperature. A properly preheated oven makes a huge difference in how evenly your cookie cups bake.
- Cream the butter and sugar. In a large mixing bowl, beat the softened butter and granulated sugar together until light and fluffy, about 2-3 minutes. You’ll know it’s ready when it looks pale and slightly increased in volume. Scrape down the sides of the bowl halfway through. This step is important—proper creaming creates air pockets that help your cookies rise.
- Add the egg and vanilla. Crack in the egg and add the vanilla extract. Beat until just combined, about 30 seconds. Don’t overmix here, or your cookies might turn out tough. The mixture might look slightly separated at this point—that’s normal.
- Mix the dry ingredients separately. In a medium bowl, whisk together the flour, baking powder, and salt. This ensures the leavening agent is evenly distributed. I learned this the hard way after biting into a cookie cup that tasted like a salt lick.
- Combine wet and dry ingredients. Gradually add the flour mixture to the butter mixture, mixing on low speed or stirring by hand. Stop as soon as the flour disappears. Overmixing develops gluten, which makes cookies tough. A few streaks of flour are better than overmixed dough.
- Chill the dough (optional but recommended). Pop the dough in the fridge for 15-20 minutes. This makes it easier to handle and helps the cups hold their shape better during baking. If you’re in a rush, you can skip this step—the cups will just spread a little more.
- Portion the dough. Using your cookie scoop or a teaspoon, scoop out rounded tablespoons of dough and roll them into balls. You should get about 24 balls. Place each ball into an ungreased mini muffin tin cup. Don’t press them down yet.
- Press the dough into cups. Use your thumb or the back of a small spoon to press each dough ball into the bottom and up the sides of the muffin cup, forming a small well in the center. The dough should be about ¼-inch thick on the bottom and sides. Make sure there are no thin spots or holes, or the Nutella might leak through later.
- Bake for 10-12 minutes. The edges should be lightly golden brown, and the centers will look slightly underdone. That’s perfect—they’ll continue cooking from residual heat. Don’t overbake, or the cups will be hard instead of tender.
- Create the well (this is crucial). As soon as the pan comes out of the oven, use the back of a small spoon or a shot glass to gently press down the center of each cup again. The cups will have puffed up during baking, so you need to re-create that well while they’re still hot. Work quickly—they firm up fast.
- Cool in the pan for 5 minutes. Let the cups sit in the pan for exactly 5 minutes. If you try to remove them too soon, they’ll fall apart. If you wait too long, they’ll stick.
- Transfer to a cooling rack. Gently run a small spatula or knife around the edges of each cup to loosen them, then lift them out carefully. Place them on a cooling rack and let them cool completely, about 15-20 minutes. They need to be fully cool before you add the Nutella, or it will melt and run everywhere.
- Fill with Nutella. Once the cups are completely cool, spoon or pipe about 1-2 teaspoons of Nutella into each well. Don’t overfill—leave a little room for the pretzel legs. If the Nutella is too thick to work with, microwave it for 10 seconds and stir.
- Add the spider legs. Break your pretzel sticks in half. You’ll need 8 half-sticks per spider cup. Gently press 4 half-sticks into each side of the Nutella-filled cup, angling them slightly outward so they look like spider legs. The Nutella acts as glue, so make sure they’re securely embedded.
- Attach the candy eyes. Press 2-3 candy eyes into the Nutella on top of each cup, near the front. The eyes should stick out slightly so people can see them. I usually do two eyes per spider, but three looks hilariously creepy.
- Let them set. Allow the finished spider cups to sit for about 10 minutes so everything firms up. Then serve immediately or store as directed below.
Sensory cues to watch for: When you press the dough into the muffin cups, it should feel smooth and pliable, not sticky. When the cups come out of the oven, they should smell buttery and vanilla-sweet. The Nutella should be glossy and smooth when you pipe it in. And when you bite into one, you should get that perfect crunch of pretzel, creaminess of Nutella, and tenderness of cookie all at once.
Cooking Tips & Techniques
I’ve made these spider cookie cups maybe a dozen times now, and I’ve messed up enough to know what works and what doesn’t. Here are my best tips so you don’t repeat my mistakes.
Don’t skip the second pressing. The first time I made these, I pressed the dough into the cups, baked them, and thought the well would stay. It didn’t. The cups puffed up into little domes, and I had to smash them down after baking anyway. Save yourself the trouble—press them once before baking and again immediately after. That second press while they’re hot is what creates the perfect little bowl for your Nutella.
Watch your bake time carefully. Every oven runs differently. My old oven would overbrown these at 11 minutes, but my current one needs the full 12. Start checking at 10 minutes. The edges should be golden but the centers should still look slightly soft. If you wait until the centers look done, you’ve gone too far and the cups will be crunchy instead of tender.
Let them cool completely before filling. I know you’re excited. I get it. But if you add Nutella to warm cookie cups, it turns into a runny mess that drips down the sides and makes your spiders look like they’re melting. Patience pays off here. Give them the full 15-20 minutes on the cooling rack.
Break pretzels strategically. Pretzel sticks break unevenly sometimes. Instead of snapping them randomly, hold the pretzel with both hands close to the middle and apply quick, even pressure. You’ll get cleaner breaks. Save the shorter pieces for the front legs and longer ones for the back—it makes the spiders look more realistic.
Work in an assembly line. When you’re adding the legs and eyes, fill all the cups with Nutella first, then add all the legs, then add all the eyes. Moving in stages is way more efficient than doing one spider at a time. The Nutella also starts to set after a few minutes, so working quickly gives you more time to adjust the legs if needed.
My biggest failure: I once used crunchy peanut butter instead of Nutella because I thought it would be a fun twist. It was not. The texture was weird, the flavor clashed with the cookie, and nobody ate them. Stick with the Nutella—it’s the perfect partner for these cups.
Variations & Adaptations
One of the best things about this recipe is how easy it is to change up. Here are some variations I’ve tried and loved.
Peanut Butter Spider Cups: Swap the Nutella for creamy peanut butter. The salty-sweet combo with the pretzel legs is amazing. Just warm the peanut butter slightly so it’s spreadable. My husband actually prefers these over the original.
White Chocolate Spiders: Use melted white chocolate instead of Nutella. The white color makes the candy eyes really pop. You can also add a drop of black food coloring to create a gray web pattern on top before the chocolate sets. I did this for a Halloween party and they looked incredible.
Gluten-Free Version: Substitute the all-purpose flour with a 1:1 gluten-free baking flour. I’ve tested this with Bob’s Red Mill and King Arthur Measure for Measure, and both worked well. The texture is slightly more crumbly, so handle the cups gently when removing them from the pan.
Vegan Option: Use plant-based butter and a flax egg (1 tablespoon ground flaxseed mixed with 3 tablespoons water, let sit for 5 minutes). The texture will be a bit denser, but the flavor is still great. Make sure your sugar is vegan-friendly too.
Different Cookie Base: Try using chocolate cookie dough instead of vanilla. Just add ¼ cup cocoa powder to the flour mixture and reduce the flour by 2 tablespoons. The dark cookie cups look extra spooky against the Nutella filling.
Seasonal Twist: For fall, add ½ teaspoon of pumpkin pie spice to the cookie dough. The warm spices pair beautifully with the chocolate-hazelnut filling. If you love pumpkin treats, you should also try my iced pumpkin sugar cookie bars for another easy fall dessert.
Serving & Storage Suggestions
These spider cookie cups are best served at room temperature, which lets the cookie soften slightly and the Nutella stay creamy. I usually arrange them on a platter with the spider legs facing outward for maximum creepiness. A dark plate or black serving tray makes the colors pop.
For Halloween parties: Place them on a bed of green-tinted coconut “grass” or black decorating sugar. You can also add a few gummy worms around the platter for extra spooky effect. Kids absolutely lose their minds over this presentation.
Storage: Keep them in an airtight container at room temperature for up to 3 days. Don’t refrigerate them—the cold makes the cookie cups hard and the Nutella turns stiff. If you need to stack them, place a sheet of wax paper between layers to protect the legs and eyes.
Freezing: You can freeze the unfilled cookie cups for up to 2 months. Bake and cool them completely, then store in a freezer bag. When you’re ready to serve, thaw them at room temperature, then fill with Nutella and decorate. The pretzels won’t stay crispy if you freeze the finished spiders, so always add those fresh.
Reheating: Honestly, these don’t need reheating. But if you want a warm treat, pop them in a 300°F oven for 3-4 minutes. The Nutella will get slightly melty and the cookie will soften. Just know the pretzels might lose some crunch.
Flavor development: These are actually best the day you make them. The cookie is perfectly tender, the Nutella is smooth, and the pretzels are crunchy. By day two, the pretzels start to soften from the moisture in the Nutella. They’re still delicious, but the texture contrast isn’t as dramatic.
If you’re planning a Halloween party spread, these spider cups pair perfectly with my witch finger pretzel rods for a full spooky snack table. And for a savory option to balance all the sugar, try my mummy sausage bites—they’re always a hit.
Nutritional Information & Benefits
Let’s be real—these are a treat, not a health food. But here’s what you’re looking at per spider cup (based on 24 servings):
| Nutrient | Amount Per Serving |
|---|---|
| Calories | 145 |
| Total Fat | 7g |
| Saturated Fat | 3.5g |
| Carbohydrates | 19g |
| Sugar | 11g |
| Protein | 2g |
| Sodium | 95mg |
On the bright side, the Nutella does contain a small amount of hazelnuts, which provide healthy fats and vitamin E. The pretzels add a bit of iron from enriched flour. And the cookie dough uses real butter and eggs, so you’re getting some protein and calcium. But honestly? These are about fun and flavor, not nutrition. They’re a once-in-a-while Halloween treat, and that’s perfectly fine.
Allergen note: This recipe contains wheat (gluten), dairy, eggs, and tree nuts (hazelnuts). The pretzels may also contain traces of soy. If you’re serving these at a party, label them clearly so guests with allergies know what’s in them.
For a healthier Halloween option that still feels festive, check out my nut-free preschool snack box—it’s perfect for school parties where allergies are a concern.
Conclusion
These easy spider cookie cups with Nutella filling have become my absolute favorite Halloween treat, and I think they’ll become yours too. They’re simple enough to make with kids, impressive enough to bring to parties, and delicious enough that nobody believes they only took 25 minutes.
The best part? You can customize them however you want. More eyes, fewer legs, different fillings—make them your own. That’s what cooking is all about, right? Taking a basic idea and twisting it until it feels like yours.
I’d love to see how your spiders turn out. Leave a comment below and tell me about your Halloween party, your kids’ reactions, or any fun variations you tried. Did you use peanut butter instead of Nutella? Add sprinkles? Make them with chocolate dough? I want to hear about it all.
Happy Halloween, and happy baking. May your cookie cups be perfectly tender, your Nutella perfectly smooth, and your spiders perfectly creepy-cute. 🕷️
Frequently Asked Questions
Can I make these spider cookie cups ahead of time?
Yes! You can bake the cookie cups up to 2 days in advance and store them unfilled in an airtight container. Add the Nutella, pretzel legs, and candy eyes on the day you plan to serve them for the best texture and appearance.
My cookie cups spread too much in the oven. What went wrong?
This usually happens if the dough wasn’t chilled enough or the butter was too soft. Next time, chill the dough for at least 20 minutes before pressing it into the muffin tin. You can also pop the filled muffin pan in the fridge for 10 minutes before baking to help the cups hold their shape.
Can I use a regular muffin tin instead of a mini one?
I don’t recommend it. Regular muffin cups are too big, and the cookie dough will spread into a flat disc instead of forming a cup shape. The mini muffin tin is essential for getting that perfect bite-sized cookie cup. They’re inexpensive and worth picking up if you don’t have one.
How do I keep the pretzel legs from falling off?
Make sure you press the pretzel halves firmly into the Nutella while it’s still soft. The Nutella acts as glue once it sets. If you’re having trouble, you can also dab a tiny bit of melted chocolate on the end of each pretzel before inserting it for extra hold.
Can I use homemade chocolate-hazelnut spread instead of Nutella?
Absolutely! Homemade spread works great, though it might be slightly thinner than store-bought. If your homemade version is runny, chill it for 10-15 minutes before filling the cups so it doesn’t seep out the sides. The flavor will be even better than Nutella, if I’m being honest.
Pin This Recipe!
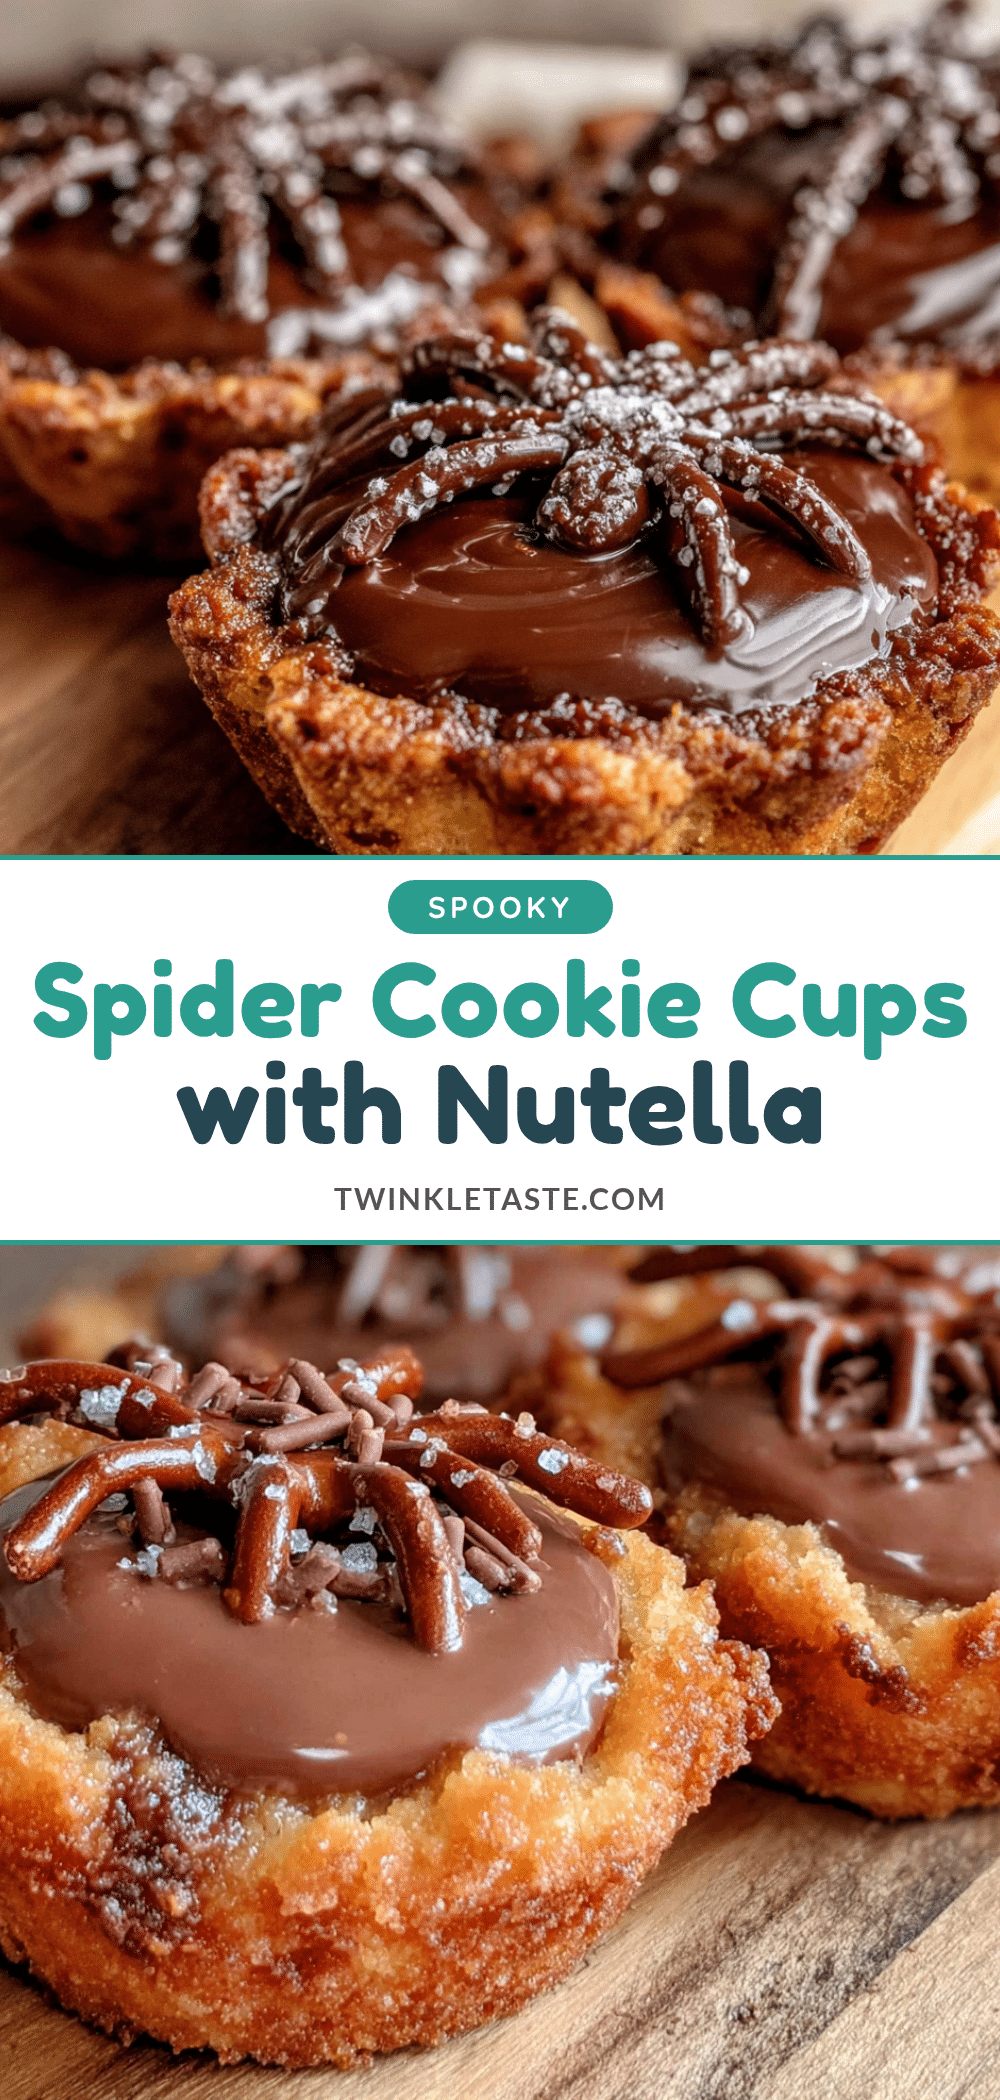
Easy Spider Cookie Cups with Nutella Filling
These easy spider cookie cups with Nutella filling are a quick and fun Halloween treat made with simple ingredients. They look impressive but take only about 25 minutes to make, featuring buttery cookie cups, creamy Nutella, pretzel legs, and candy eyes.
- Prep Time: 15 minutes
- Cook Time: 10-12 minutes
- Total Time: 25 minutes
- Yield: 24 servings 1x
- Category: Dessert
- Cuisine: American
Ingredients
- 1 ¾ cups (220g) all-purpose flour
- ½ cup (113g) unsalted butter, softened
- ¾ cup (150g) granulated sugar
- 1 large egg, room temperature
- 1 teaspoon vanilla extract
- 1 teaspoon baking powder
- ¼ teaspoon salt
- ¾ cup (225g) Nutella (or chocolate-hazelnut spread)
- 24 pretzel sticks, broken in half
- 24–36 candy eyes
Instructions
- Preheat oven to 350°F (175°C).
- In a large bowl, cream softened butter and sugar until light and fluffy, about 2-3 minutes.
- Add egg and vanilla; beat until just combined, about 30 seconds.
- In a medium bowl, whisk together flour, baking powder, and salt.
- Gradually add dry ingredients to wet mixture, mixing on low until just combined. Do not overmix.
- Chill dough for 15-20 minutes (optional but recommended).
- Scoop rounded tablespoons of dough and roll into balls. Place each ball into an ungreased mini muffin tin cup (24 cups).
- Press each dough ball into the bottom and up the sides of the cup to form a well, about ¼-inch thick.
- Bake for 10-12 minutes until edges are lightly golden and centers look slightly underdone.
- Immediately after baking, use the back of a small spoon to press down the center of each cup again to re-create the well.
- Cool in the pan for 5 minutes, then transfer to a cooling rack and cool completely (15-20 minutes).
- Once cool, spoon or pipe 1-2 teaspoons of Nutella into each well.
- Break pretzel sticks in half. Press 4 half-sticks into each side of the Nutella-filled cup, angling outward like spider legs.
- Press 2-3 candy eyes into the Nutella on top of each cup near the front.
- Let set for 10 minutes before serving.
Notes
For best results, chill the dough before baking to prevent spreading. Press the centers again immediately after baking to create a well. Let cups cool completely before adding Nutella to prevent melting. Break pretzels carefully for clean halves. Work in an assembly line for efficiency. Store in an airtight container at room temperature for up to 3 days; do not refrigerate. Freeze unfilled cups for up to 2 months.
Nutrition
- Serving Size: 1 spider cookie cup
- Calories: 145
- Sugar: 11
- Sodium: 95
- Fat: 7
- Saturated Fat: 3.5
- Carbohydrates: 19
- Protein: 2
Keywords: Halloween, spider cookies, Nutella, cookie cups, easy, kid-friendly, party treat