Introduction
“You brought dessert again?” my friend asked, raising an eyebrow as if I’d just pulled a rabbit out of a hat. That night, I was scrambling—no oven, no time, and a craving for something that screamed celebration without the fuss. Honestly, I wasn’t sure if a no-bake cheesecake bar could hit that festive note, especially one with red velvet flair. But as I mixed the cream cheese and cocoa, a familiar tang of nostalgia crept in. The velvety red hue reminded me of holiday parties past, where the kitchen buzzed with laughter and the air smelled like cinnamon and sugar.
Something about this recipe felt like a happy accident. I was skeptical at first—no baking? Really? But the way the creamy filling set just right atop a crunchy base, with a topping that looked like it belonged on a fancy holiday table, changed my mind completely. It wasn’t just dessert; it was a moment of calm joy wrapped in every bite. That night, the bars vanished so fast I barely had a taste, but the recipe stuck around in my mind long after.
These red velvet no-bake cheesecake bars aren’t just for special occasions, though. They’ve become my go-to treat when the oven is off-limits or when I need a quick festive fix. And honestly, if you enjoy a good no-fuss dessert that feels indulgent without the stress, you’re going to appreciate the way these bars come together—and how they disappear just as quickly.
Why You’ll Love This Recipe
From countless kitchen trials (and more than a few eager taste testers), these creamy red velvet no-bake cheesecake bars have earned their spot as a crowd favorite. You’ll find they check all the boxes for a holiday dessert that’s both effortless and memorable.
- Quick & Easy: Ready in under 30 minutes, perfect for last-minute gatherings or when your schedule’s packed.
- Simple Ingredients: Most are pantry staples or easy to find, making this recipe wallet-friendly and fuss-free.
- Perfect for Festive Occasions: The rich red color and creamy texture make it a showstopper for holiday parties or cozy winter nights.
- Crowd-Pleaser: Kids and adults alike can’t get enough, making it an ideal choice for family dinners or potlucks.
- Unbelievably Delicious: The smooth cheesecake filling contrasts beautifully with the crunchy crust and the festive topping adds just the right touch.
What sets this recipe apart is the balance it strikes: the red velvet flavor is subtle yet unmistakable, blending cocoa and a hint of tang without overpowering the creamy base. Plus, skipping the oven means the texture stays silky smooth, not cracked or overbaked. I’ve also played with swapping traditional ingredients—like using almond flour in the crust for a gluten-free twist or adding a splash of vanilla bean paste for extra depth—which makes this recipe adaptable and forgiving.
Honestly, it’s the kind of dessert that makes you pause for a second after the first bite—comfort food with a touch of elegance, without all the hassle. If you’ve ever loved a classic red velvet cake but wished for a simpler way, this is pretty close to that sweet spot.
What Ingredients You Will Need
This recipe uses straightforward, wholesome ingredients that come together to deliver creamy texture and festive flavor, without complicated steps or hard-to-find items. Most of these items are pantry staples or common dairy products, so you probably have what you need already.
- For the Crust:
- 1 ½ cups graham cracker crumbs (about 12 full sheets) – I recommend Honey Maid for best texture
- 6 tablespoons unsalted butter, melted (adds richness and helps bind the crust)
- 2 tablespoons granulated sugar (balances the buttery crust)
- For the Cheesecake Filling:
- 16 ounces (450g) cream cheese, softened (room temperature for smooth mixing)
- 1 cup powdered sugar (for sweetness and smoothness)
- 1 teaspoon pure vanilla extract (or vanilla bean paste for extra aroma)
- 1 cup heavy whipping cream, chilled (whipped to soft peaks for lightness)
- 2 tablespoons unsweetened cocoa powder (for subtle chocolate notes)
- 1 tablespoon red food coloring (gel works best for vibrant color without adding liquid)
- ½ teaspoon white vinegar (to enhance the tang and red velvet flavor)
- For the Festive Topping:
- 1 cup heavy cream, whipped (to dollop or pipe on top)
- Red velvet cake crumbs or crushed freeze-dried raspberries (for color and texture contrast)
- Optional: white chocolate shavings or sprinkles (for extra festive flair)
For a seasonal twist, feel free to swap the cake crumbs with crushed peppermint candies during winter or toasted coconut flakes in summer. And if dairy is a concern, using coconut cream instead of heavy cream offers a nice alternative, though the texture will be a bit different.
Equipment Needed
To bring these creamy red velvet no-bake cheesecake bars to life, you won’t need much beyond the basics. Here’s what I used and recommend:
- 8×8 inch (20×20 cm) square baking pan – glass or metal both work fine
- Mixing bowls – one medium for the crust, one large for the filling
- Electric mixer or stand mixer with whisk attachment – essential for whipping cream and smooth filling
- Rubber spatula – for folding whipped cream gently into the cream cheese mixture
- Measuring cups and spoons – to nail down precise amounts
- Food processor or rolling pin – to crush graham crackers finely (a zip-top bag and a rolling pin can do the job)
If you don’t have an electric mixer, a hand whisk will work but expect to spend more time whipping the cream to the right consistency. For budget-friendly options, silicone spatulas and glass pans are widely available and easy to clean.
Personally, I like using a stand mixer because it frees my hands for multitasking—like prepping the crispy tonkatsu pork cutlet while the cream whips itself!
Preparation Method
- Prepare the crust: Preheat your oven to 350°F (175°C) just for toasting the crumbs if you prefer (optional). Crush graham crackers finely using a food processor or place them in a zip-top bag and crush with a rolling pin. Mix crumbs with melted butter and sugar until evenly coated. Press this mixture firmly into the bottom of the 8×8 inch pan. Chill in the refrigerator for at least 10 minutes to set.
- Make the cheesecake filling: In a large bowl, beat the softened cream cheese with powdered sugar and vanilla extract until smooth and fluffy, about 2-3 minutes. Add the cocoa powder and white vinegar, mixing until combined. Stir in the red food coloring gradually until you get that signature red velvet shade. Set aside.
- Whip the cream: In a separate chilled bowl, whip the heavy cream to soft peaks using an electric mixer (about 3-4 minutes). Be careful not to overwhip or it’ll turn grainy—stop as soon as the cream holds a gentle peak.
- Combine mixtures: Gently fold the whipped cream into the cream cheese mixture using a rubber spatula. Do this slowly to keep the filling light and airy. The texture should be smooth, creamy, and spreadable.
- Assemble the bars: Pour the cheesecake filling over the chilled crust, spreading evenly with an offset spatula or back of a spoon. Smooth the surface and cover with plastic wrap. Refrigerate for at least 4 hours or overnight to let the filling set properly.
- Add festive topping: Before serving, whip additional heavy cream to stiff peaks and dollop or pipe over the cheesecake bars. Sprinkle generously with red velvet cake crumbs, crushed freeze-dried raspberries, or white chocolate shavings for that extra wow factor.
- Slice and serve: Use a sharp knife warmed in hot water to cut clean bars. Wipe the knife between cuts for neat edges. Serve chilled and enjoy the creamy, vibrant layers.
If your filling seems too soft after chilling, a little extra refrigeration time usually helps firm it up. Also, don’t skip softening the cream cheese beforehand—it really makes a difference in texture.
Cooking Tips & Techniques
Making no-bake cheesecake bars might sound straightforward, but a few tricks can make your dessert stand out every time:
- Softening the Cream Cheese: Let it sit at room temperature for at least 30 minutes. Cold cream cheese leads to lumps and uneven mixing, which nobody wants.
- Whipping Cream to Soft Peaks: Stop whipping as soon as the cream holds shape but still looks smooth. Overwhipping can cause the cream to separate and become grainy.
- Folding Technique: Fold whipped cream into the cream cheese mixture gently using a spatula. Stirring too aggressively knocks out air and makes the filling dense.
- Food Coloring: Use gel-based colors for vibrant hues without adding extra liquid, which could affect texture.
- Crust Pressing: Press the crust mixture firmly and evenly to avoid crumbling when you cut the bars.
- Chilling Time: The longer you chill, the better the bars set. Overnight is best if you can plan ahead.
Early on, I learned the hard way that rushing the chilling step leads to a filling that’s too soft and messy to slice. Patience really pays off here. Also, using a warm knife for slicing is a game-changer for clean edges without cracking.
When I’m pressed for time, I multitask by prepping these bars while simmering something hearty like butter chicken in the Instant Pot. It’s all about timing and keeping the kitchen flow smooth!
Variations & Adaptations
This recipe is pretty flexible, so you can easily tailor it to your preferences or dietary needs:
- Gluten-Free: Swap graham crackers for gluten-free cookies or almond flour mixed with a bit of melted butter to create the crust.
- Vegan Version: Use vegan cream cheese and coconut cream whipped to stiff peaks. Replace butter with coconut oil and use vegan-friendly cookie crumbs for the crust.
- Flavor Twists: Add a teaspoon of espresso powder to the filling for a mocha red velvet vibe, or a hint of orange zest for a citrusy surprise.
- Festive Toppings: Try crushed pistachios and dried cherries for a green-and-red holiday theme, or drizzle with dark chocolate ganache for extra decadence.
- No Food Coloring: If you prefer to skip artificial colors, use beetroot powder for a natural red tint—though it may slightly alter the flavor.
Once, I swapped the traditional crust for a thin layer of crushed peppermint cookies topped with crushed candy canes. It was a hit at a Christmas party and added a refreshing crunch. Feel free to experiment with different toppings and crusts to suit your occasion!
Serving & Storage Suggestions
Serve these creamy red velvet no-bake cheesecake bars chilled for the best texture and flavor. They look beautiful plated with a dollop of whipped cream and a sprinkle of festive crumbs or sprinkles.
Pair them with a hot cup of coffee or a glass of cold milk for a classic combo. For a more grown-up touch, a drizzle of raspberry coulis or a splash of dessert wine complements the rich flavors nicely.
Store leftovers in an airtight container in the refrigerator for up to 4 days. For longer storage, wrap the bars tightly and freeze for up to 2 months. Thaw overnight in the fridge before serving.
When reheating, it’s best to avoid the microwave, as it can affect the texture. Instead, let the bars come to room temperature naturally or enjoy them straight from the fridge for that refreshing creaminess. Over time, the flavors meld and intensify, making them even better a day or two later.
Nutritional Information & Benefits
Each serving of these cheesecake bars provides a comforting balance of fats and sugars typical of desserts, but also includes some nutritional perks from the quality ingredients used. Here’s an estimate for one bar (assuming 12 bars total):
| Calories | 280-320 kcal |
|---|---|
| Fat | 20g (mostly from cream cheese and butter) |
| Carbohydrates | 22g (including sugar and crust carbs) |
| Protein | 4g |
| Sugar | 16g |
The cream cheese provides calcium and protein, while cocoa powder adds antioxidants. Choosing organic or grass-fed dairy can boost the quality further. If you’re mindful of sugar, you can reduce the powdered sugar slightly or use a sugar substitute that measures cup-for-cup.
Those with gluten sensitivity can easily adapt this recipe by swapping the crust. The dessert is naturally vegetarian, and with a few tweaks, vegan-friendly as well.
Conclusion
These creamy red velvet no-bake cheesecake bars blend festive charm with ease and flavor, making them a staple for anyone who loves fuss-free desserts that impress. The balance of creamy texture, subtle cocoa, and that signature red hue creates a treat that’s memorable without demanding hours in the kitchen.
Feel free to make this recipe your own—swap toppings, adjust sweetness, or try different crusts. I’ve lost count of how many times I’ve made these, and each batch feels like a little celebration. Plus, they’re a perfect way to finish a meal alongside dishes like the creamy tomato pasta e fagioli or even a spicy dakgalbi stir-fried chicken—a sweet contrast that keeps guests talking.
Give these bars a try, and don’t hesitate to share how you made them your own. I’d love to hear your twists and tips!
FAQs
Can I make these cheesecake bars without food coloring?
Yes! You can skip the red food coloring or substitute it with natural options like beetroot powder. Just keep in mind that the color will be less vibrant and might slightly change the flavor.
How long do these no-bake cheesecake bars need to chill?
They should chill for at least 4 hours to set properly, but overnight chilling gives the best texture and flavor.
Can I freeze the cheesecake bars?
Absolutely. Wrap them tightly and freeze for up to 2 months. Thaw overnight in the fridge before serving for best results.
What can I use instead of graham crackers for the crust?
You can substitute with digestive biscuits, gluten-free cookies, crushed almonds, or almond flour mixed with butter for a different flavor and texture.
Is it possible to make these bars vegan?
Yes, by using vegan cream cheese, coconut cream whipped to stiff peaks, vegan butter or coconut oil for the crust, and vegan-friendly cookie crumbs, you can create a delicious vegan version of these bars.
Pin This Recipe!
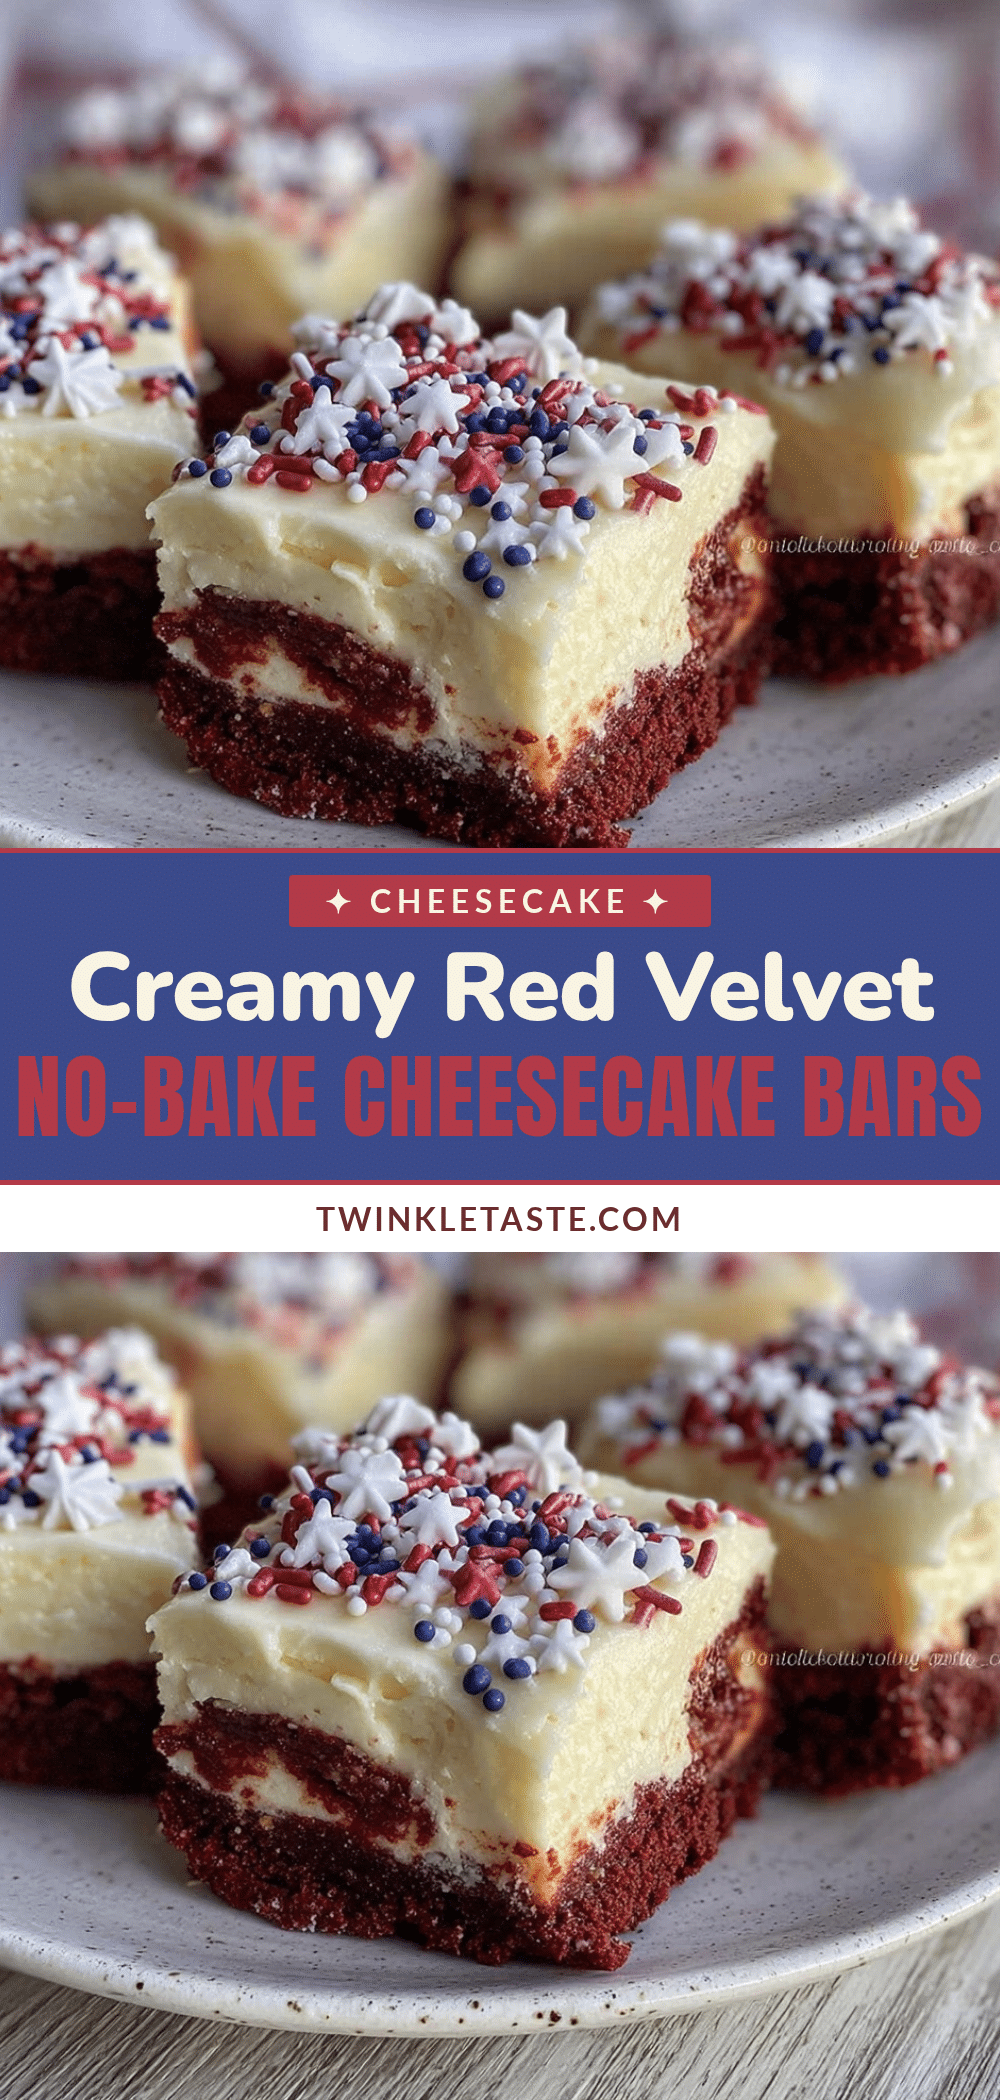
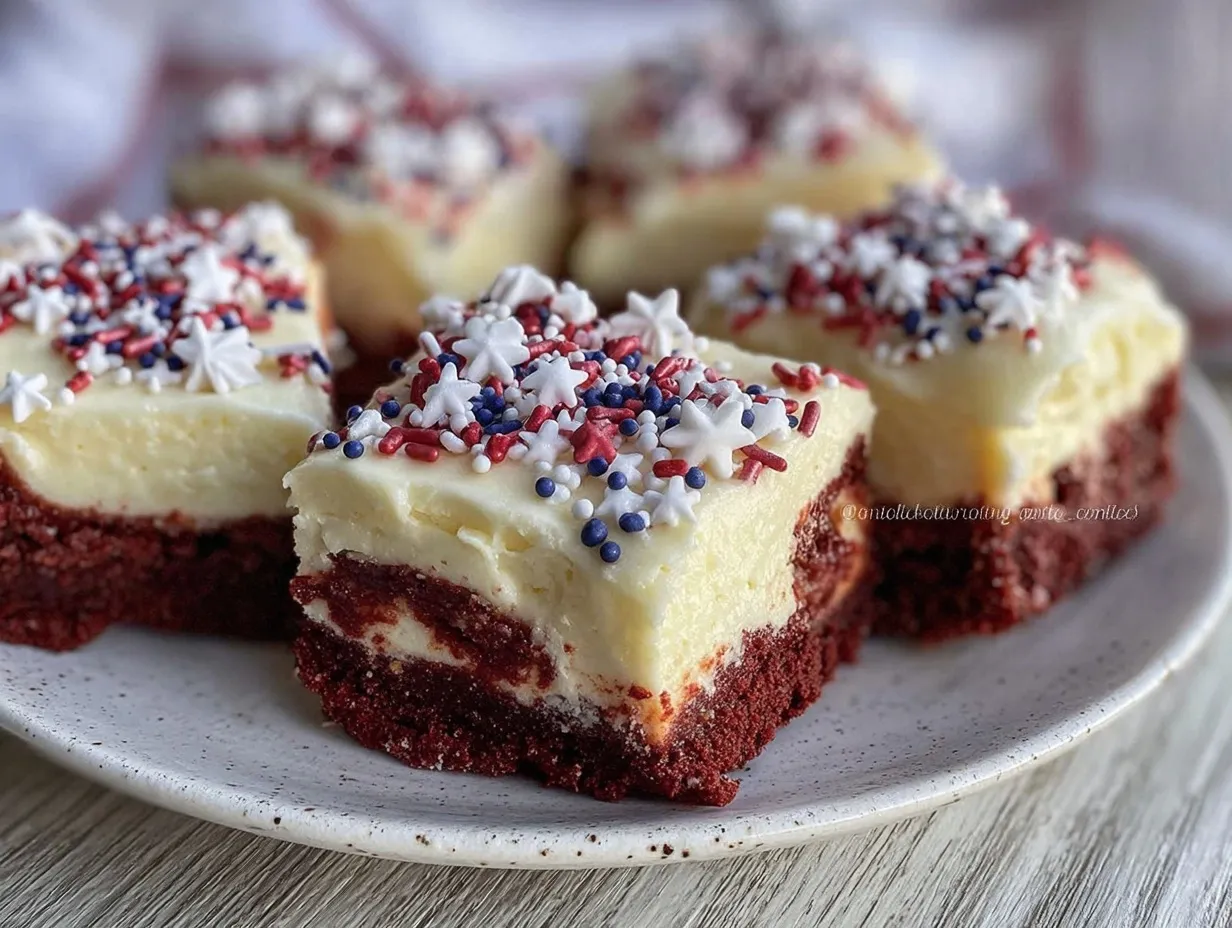
Creamy Red Velvet No-Bake Cheesecake Bars
These creamy red velvet no-bake cheesecake bars are a quick and festive dessert with a smooth cheesecake filling atop a crunchy crust, perfect for holiday parties or any occasion when you want an easy, indulgent treat.
- Prep Time: 15 minutes
- Cook Time: 0 minutes
- Total Time: 4 hours 15 minutes
- Yield: 12 bars 1x
- Category: Dessert
- Cuisine: American
Ingredients
- 1 ½ cups graham cracker crumbs (about 12 full sheets)
- 6 tablespoons unsalted butter, melted
- 2 tablespoons granulated sugar
- 16 ounces (450g) cream cheese, softened
- 1 cup powdered sugar
- 1 teaspoon pure vanilla extract or vanilla bean paste
- 1 cup heavy whipping cream, chilled
- 2 tablespoons unsweetened cocoa powder
- 1 tablespoon red food coloring (gel)
- ½ teaspoon white vinegar
- 1 cup heavy cream, whipped (for topping)
- Red velvet cake crumbs or crushed freeze-dried raspberries (for topping)
- Optional: white chocolate shavings or sprinkles
Instructions
- Prepare the crust: Crush graham crackers finely using a food processor or rolling pin. Mix crumbs with melted butter and sugar until evenly coated. Press firmly into the bottom of an 8×8 inch pan. Chill in the refrigerator for at least 10 minutes.
- Make the cheesecake filling: Beat softened cream cheese with powdered sugar and vanilla extract until smooth and fluffy. Add cocoa powder and white vinegar, mixing until combined. Stir in red food coloring gradually until the desired red velvet shade is achieved.
- Whip the cream: In a separate chilled bowl, whip the heavy cream to soft peaks using an electric mixer (about 3-4 minutes).
- Combine mixtures: Gently fold the whipped cream into the cream cheese mixture using a rubber spatula until smooth and creamy.
- Assemble the bars: Pour the cheesecake filling over the chilled crust, spreading evenly. Cover with plastic wrap and refrigerate for at least 4 hours or overnight.
- Add festive topping: Whip additional heavy cream to stiff peaks and dollop or pipe over the cheesecake bars. Sprinkle with red velvet cake crumbs, crushed freeze-dried raspberries, or white chocolate shavings.
- Slice and serve: Use a sharp knife warmed in hot water to cut clean bars. Serve chilled.
Notes
Soften cream cheese at room temperature for at least 30 minutes for smooth mixing. Whip cream to soft peaks without overwhipping to avoid grainy texture. Use gel-based food coloring for vibrant color without adding liquid. Press crust firmly to avoid crumbling. Chill bars overnight for best texture. Use a warm knife for clean slicing.
Nutrition
- Serving Size: 1 bar
- Calories: 300
- Sugar: 16
- Sodium: 150
- Fat: 20
- Saturated Fat: 12
- Carbohydrates: 22
- Fiber: 1
- Protein: 4
Keywords: red velvet, no-bake, cheesecake bars, holiday dessert, easy dessert, festive dessert, creamy cheesecake, no oven dessert