“Mom, why can’t you just put the chicken in that little oven thing and skip the oil?” my twelve-year-old asked, pointing at my brand-new air fryer still sitting in its box. I started to explain why that wouldn’t work — something about the Maillard reaction needing fat, about how crispy skin requires traditional roasting methods, about how I’d been cooking chicken since before she was born. Then I stopped.
Honestly, I was tired. It was a Tuesday in late October, the kind where the sky goes gray at four o’clock and you can smell wood smoke from the neighbor’s fireplace. I had a sink full of dishes, a half-finished work email, and a kid who was genuinely curious about cooking. So I shrugged and said, “Fine. Show me what you’ve got.”
She pulled out the chicken thighs, patted them dry with paper towels (I’ll admit, I cringed at the mess), and started seasoning them with garlic powder and Parmesan — way more cheese than I’d ever use, I thought. She tossed them in the air fryer basket like she’d been doing it for years, set the timer, and looked at me with this little smirk. “See? Easy.”
Twenty-two minutes later, I was eating my words — literally. Those chicken thighs came out with skin so crispy it shattered when I bit into it, meat so tender it practically fell off the bone, and a garlic-Parmesan crust that made me close my eyes after the first bite. I mean, seriously? I’d been roasting chicken for twenty years, and my kid figured out a better method in thirty seconds. Maybe you’ve been there — that moment when someone younger, less experienced, shows you something so simple you can’t believe you missed it.
That’s the thing about these cozy crispy air fryer chicken thighs with garlic Parmesan. They’re not fancy. They’re not complicated. They’re just… right. The kind of dinner that makes a gray Tuesday feel warm and golden. The kind that reminds you why you love cooking in the first place. And honestly? I’m not too proud to admit my daughter was right.
Why You’ll Love This Recipe
Let me tell you why these chicken thighs have become my go-to for busy weeknights and lazy Sundays alike. I’ve tested this recipe at least a dozen times — tweaking temperatures, trying different cheese ratios, even experimenting with bone-in versus boneless. What I’m sharing today is the version that works every single time.
- Quick & Easy: From fridge to table in under 30 minutes. No marinating, no complicated steps, no waiting around. Just season, air fry, and eat.
- Simple Ingredients: You probably have everything in your kitchen right now. Chicken thighs, garlic, Parmesan cheese, olive oil, and basic seasonings. That’s it.
- Perfect for Cozy Nights: This is the meal you want when the weather turns cold and you need something warm, comforting, and satisfying without spending hours in the kitchen.
- Crowd-Pleaser: I’ve served these to picky kids, skeptical in-laws, and foodie friends. Every single person goes back for seconds. The crispy Parmesan crust is basically magic.
- Unbelievably Delicious: The texture is what gets me every time — shatteringly crispy on the outside, juicy and tender on the inside, with that nutty, salty, garlicky flavor that makes you want to lick the bone clean.
What makes this recipe different from every other air fryer chicken recipe out there? It’s the technique. Most recipes tell you to just toss everything together and cook. But I learned through trial and error (and a few sad, soggy batches) that the secret is in how you prep the chicken and layer the seasoning. Pat the thighs dry. Use freshly grated Parmesan — the pre-shredded stuff doesn’t melt the same way. And here’s the trick nobody talks about: let the chicken sit in the seasoning for just five minutes before cooking. It makes a world of difference.
This isn’t just another chicken recipe. It’s the one that makes you feel like you’ve hacked the system — getting restaurant-quality crispy skin at home in less time than it takes to order takeout. And on a cold night when all you want is something cozy and delicious? That’s everything.
What Ingredients You Will Need
This recipe uses simple, wholesome ingredients to deliver bold flavor and satisfying texture without the fuss. Most of these are pantry staples, but I’ll share a few tips I’ve picked up along the way to help you get the best results.
For the Chicken
- 4 bone-in, skin-on chicken thighs (about 1.5 pounds total) — Bone-in keeps the meat juicier, and the skin is essential for that crispy texture. If you only have boneless, reduce cooking time by about 5 minutes.
- 1 tablespoon olive oil — Just enough to help the seasoning stick and encourage browning. Don’t use too much, or the skin won’t get crispy.
- 1 teaspoon salt — I use fine sea salt. Kosher salt works too, but you might need a bit more.
- 1/2 teaspoon black pepper — Freshly ground is always better, but pre-ground works in a pinch.
- 1 teaspoon garlic powder — Not garlic salt! Garlic powder gives you that pure garlic flavor without extra salt. I prefer the brand Simply Organic for its consistent quality.
- 1/2 teaspoon onion powder — Adds depth without being overpowering. Trust me on this one.
- 1/2 teaspoon paprika — Regular or smoked, depending on your mood. Smoked paprika adds a lovely warmth that’s perfect for cozy fall and winter meals.
For the Garlic Parmesan Coating
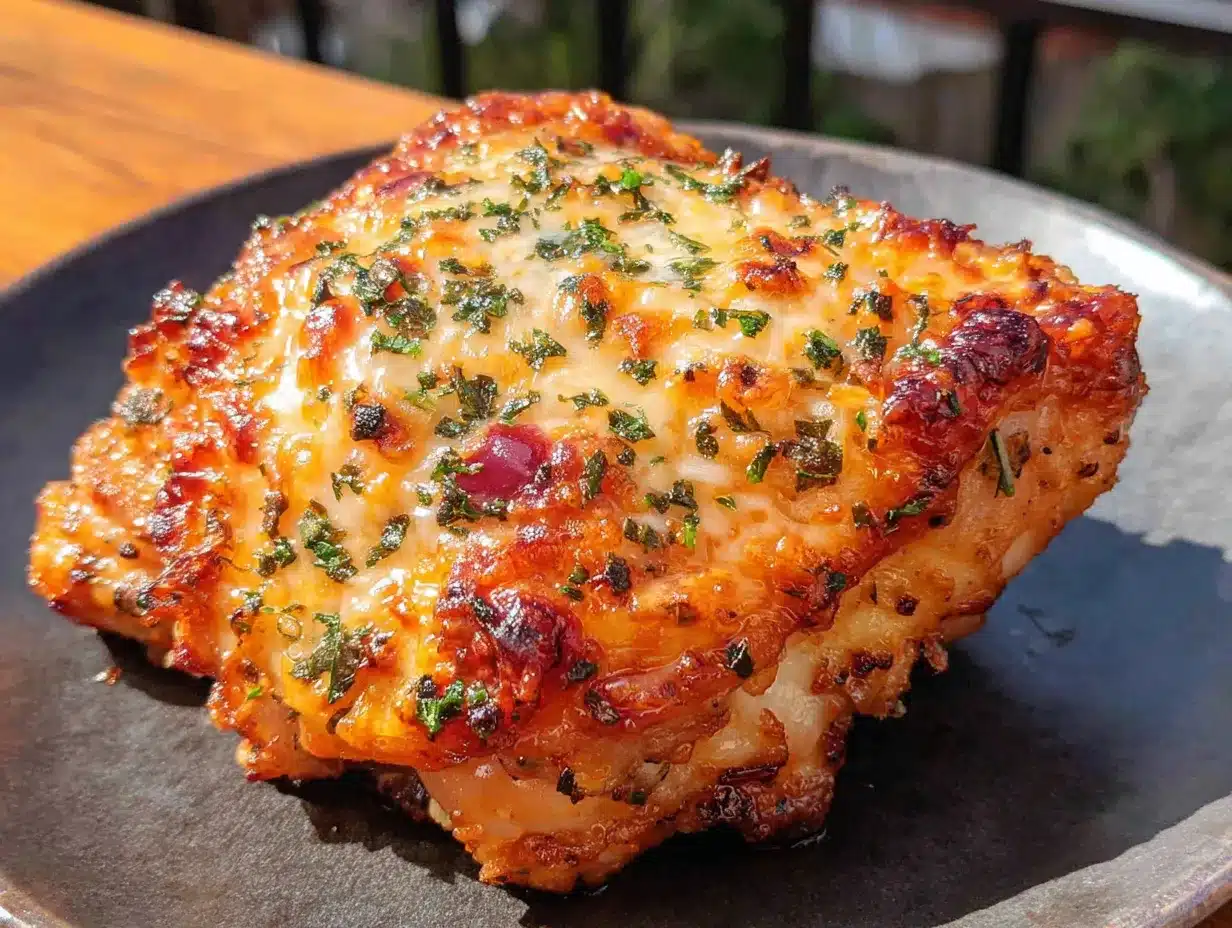
- 1/3 cup freshly grated Parmesan cheese — This is non-negotiable. The pre-shredded stuff has anti-caking agents that prevent it from melting properly. Grate it yourself from a block of Parmigiano-Reggiano if you can. It makes a huge difference in texture and flavor.
- 3 cloves garlic, minced — Fresh garlic is key here. Garlic powder in the coating won’t give you the same punch. I use a microplane for super-fine mincing, but a sharp knife works fine.
- 2 tablespoons unsalted butter, melted — This is my secret weapon. Brushing the butter over the chicken halfway through cooking adds richness and helps the Parmesan crust get extra golden.
- 1 tablespoon fresh parsley, chopped (optional) — For color and a fresh finish. Not essential, but nice if you have it.
Substitution Notes
If you’re dairy-free, you can skip the Parmesan and butter — the chicken will still be crispy and delicious, just without that cheesy flavor. Try adding an extra teaspoon of garlic powder and a pinch of nutritional yeast for a similar savory kick. For a gluten-free version, this recipe is naturally gluten-free as written. Just double-check your Parmesan doesn’t have any added starches.
Equipment Needed
You don’t need much for this recipe, which is part of the beauty. Here’s what you’ll need:
- Air fryer — Any size works, but a 5- to 6-quart basket-style air fryer is ideal for fitting four chicken thighs without overcrowding. I use the Cosori Pro II and love it, but I’ve also had great results with the Ninja Foodi and Instant Vortex.
- Tongs — For flipping the chicken halfway through. Silicone-tipped tongs won’t scratch the air fryer basket.
- Small bowl — For mixing the seasoning blend.
- Pastry brush — For brushing the melted butter on the chicken. If you don’t have one, a spoon works in a pinch.
- Paper towels — Essential for drying the chicken skin. Don’t skip this step!
- Cutting board and knife — For mincing the garlic and chopping parsley.
- Microplane or grater — For grating the Parmesan. A box grater works too, but a microplane gives you that fine, fluffy texture that melts beautifully.
If you don’t have an air fryer yet, honestly, this recipe is worth buying one for. But you can also make these chicken thighs in a convection oven at 400°F for about 35-40 minutes, flipping halfway through. The skin won’t be quite as crispy, but it’ll still be delicious.
Preparation Method
Alright, let’s get cooking. I’ve broken this down step by step so you can follow along easily. The total active time is about 10 minutes, and the air fryer does the rest.
- Prep the chicken (5 minutes). Take the chicken thighs out of the refrigerator and pat them completely dry with paper towels. This is the most important step for crispy skin — moisture is the enemy of crispiness. Really get in there and blot every surface. Let them sit on a plate while you prepare the seasoning.
- Make the seasoning blend (2 minutes). In a small bowl, combine the salt, black pepper, garlic powder, onion powder, and paprika. Stir with a fork to break up any clumps. This is your basic seasoning — simple but perfectly balanced.
- Season the chicken (3 minutes). Drizzle the olive oil over the chicken thighs and rub it in with your hands, making sure every surface gets a thin coating. Then sprinkle the seasoning blend evenly over both sides of each thigh. Don’t forget the underside! Let the seasoned chicken sit for 5 minutes at room temperature. I know it’s tempting to rush, but this short rest lets the seasoning penetrate the meat a bit.
- Preheat the air fryer (3 minutes). Set your air fryer to 380°F and let it preheat for 3 minutes. Some air fryers don’t require preheating, but I’ve found it helps the chicken start crisping immediately. If your air fryer doesn’t have a preheat function, just run it empty for 3 minutes.
- Arrange the chicken in the basket (2 minutes). Place the chicken thighs skin-side down in the air fryer basket. Make sure they’re in a single layer with space between each piece. Overcrowding will trap steam and prevent crisping. If your air fryer is small, cook in batches — it’s worth the extra time.
- First cook (12 minutes). Air fry at 380°F for 12 minutes. The skin should be starting to turn golden and crispy. Don’t open the basket during this time — let the air fryer do its thing.
- Flip and add the Parmesan coating (3 minutes). Carefully flip each chicken thigh using tongs. Now it’s time for the good stuff. Sprinkle the grated Parmesan evenly over the skin side of each thigh. It’ll look like a lot, but it melts down beautifully. Then brush the melted butter over the Parmesan. This step is what creates that incredible golden, crispy crust.
- Second cook (8-10 minutes). Return the basket to the air fryer and cook at 380°F for another 8-10 minutes. The chicken is done when the internal temperature reaches 165°F in the thickest part (not touching the bone). The skin should be deeply golden and crispy, and the Parmesan should be bubbly and slightly browned in spots.
- Rest and garnish (5 minutes). Remove the chicken thighs from the air fryer and let them rest on a plate for 5 minutes. This lets the juices redistribute so the meat stays tender. Sprinkle with fresh parsley if you’re using it. And that’s it — you’re ready to eat.
A quick note: air fryer temperatures can vary. My first batch came out slightly underdone at 370°F, so I bumped it up to 380°F and that was the sweet spot. If your air fryer runs hot, check the chicken at the 18-minute mark. You’re looking for that gorgeous golden-brown color and an internal temp of 165°F.
Cooking Tips & Techniques
I’ve made this recipe enough times to know exactly what can go wrong — and how to fix it. Here’s everything I’ve learned, including the mistakes I made so you don’t have to.
Dry the chicken like it’s your job. I cannot emphasize this enough. The first time I made these, I was in a hurry and barely patted the chicken dry. The skin came out chewy and pale instead of crispy and golden. Now I use three or four paper towels and really press down to absorb every bit of moisture. It takes an extra 30 seconds and makes all the difference.
Don’t skip the rest step. Letting the seasoned chicken sit for 5 minutes before cooking isn’t just about flavor — it helps the skin dry out even more. I learned this from a chef friend who told me that air-drying chicken in the refrigerator overnight is the gold standard for crispy skin. Five minutes at room temperature isn’t as good, but it’s a solid compromise for a weeknight dinner.
Fresh Parmesan is a game-changer. I know, I know — it’s easier to grab the pre-shredded bag. But here’s the thing: pre-shredded Parmesan is coated in cellulose (wood pulp, essentially) to prevent clumping. That coating keeps it from melting properly, so you end up with dry, powdery bits instead of a cohesive, crispy crust. Grate your own. It takes two minutes and the results are night and day.
Watch the garlic. Fresh garlic burns faster than you think, especially in an air fryer. That’s why I add it in the second half of cooking, mixed with the Parmesan. If you add it at the beginning, it’ll be bitter and acrid by the time the chicken is done. Trust me on this — I made that mistake exactly once.
Batch cooking is your friend. If you’re cooking for more than two people, you’ll probably need to work in batches. Don’t be tempted to cram all the chicken in at once. The air fryer needs hot air to circulate around each piece, and overcrowding creates steam instead of crispiness. Keep the first batch warm in a 200°F oven while you cook the second batch.
Use a meat thermometer. Chicken thighs are forgiving — they stay juicy even if you overcook them a bit — but for perfect results, use an instant-read thermometer. 165°F is the magic number. I use the Thermapen ONE and it’s worth every penny.
Variations & Adaptations
One of the best things about this recipe is how adaptable it is. Here are a few variations I’ve tried and loved:
Spicy Buffalo Version: Toss the cooked chicken thighs in your favorite buffalo sauce (I like Frank’s RedHot mixed with a little melted butter) and serve with blue cheese or ranch dressing. It’s a totally different vibe — spicy, tangy, and perfect for game day or a casual dinner with friends.
Herb and Lemon Twist: Add the zest of one lemon and a teaspoon of dried oregano to the seasoning blend. After cooking, squeeze fresh lemon juice over the chicken and sprinkle with extra parsley. This version is bright and fresh, ideal for spring or summer when you want something lighter.
Low-Carb/Keto Friendly: This recipe is already low-carb as written, but you can boost the fat content by adding an extra tablespoon of butter and using full-fat Parmesan. Serve with roasted broccoli or cauliflower rice for a satisfying keto meal.
Dairy-Free Adaptation: Skip the Parmesan and butter entirely. Instead, use a dairy-free butter substitute (I like Miyoko’s) and increase the garlic powder and paprika for extra flavor. The chicken will still be crispy and delicious — just not cheesy.
Extra Crispy Hack: For the crispiest skin imaginable, try this trick I stumbled upon by accident: after the first 12 minutes of cooking, remove the chicken, flip it, and let it sit uncovered in the refrigerator for 10 minutes while the air fryer reheats. Then add the Parmesan and butter and finish cooking. The brief chill helps the skin dry out even more, resulting in an almost shatteringly crisp crust. It’s a bit more work, but for a special dinner, it’s worth it.
Serving & Storage Suggestions
These chicken thighs are incredibly versatile when it comes to serving. Here’s how I like to enjoy them:
Serving Temperature: Serve the chicken hot, straight from the air fryer. That crispy Parmesan crust is at its absolute best within the first 15 minutes of cooking. If you’re serving a crowd, keep the cooked chicken on a wire rack in a 200°F oven (not on a plate, or the bottom will steam and get soggy).
What to Serve With: These thighs pair beautifully with so many sides. For a cozy fall or winter meal, I love them with creamy mashed potatoes and roasted Brussels sprouts. In warmer months, a simple arugula salad with lemon vinaigrette and some crusty bread is perfect. For a low-carb option, try cauliflower mash or roasted asparagus. And honestly? Sometimes I just eat them with a fork and a side of roasted vegetables — they’re that good on their own.
Storage: Leftover chicken thighs keep well in an airtight container in the refrigerator for up to 4 days. The skin will lose some of its crispiness, but the flavor will still be fantastic. I often make extra on purpose so I have leftovers for lunch the next day.
Reheating: The air fryer is actually the best way to reheat these. Pop them back in at 350°F for 4-5 minutes, and they’ll crisp right back up. The microwave works in a pinch, but the skin will be soft. If you’re reheating in the oven, 350°F for 10 minutes on a wire rack is your best bet.
Freezing: You can freeze cooked chicken thighs for up to 3 months. Let them cool completely, then wrap individually in plastic wrap and place in a freezer bag. To reheat, thaw overnight in the refrigerator and then crisp up in the air fryer at 350°F for 5-6 minutes.
One thing I’ve noticed: the flavors actually deepen overnight. The garlic and Parmesan meld together, and the chicken becomes even more flavorful. So don’t be sad if you have leftovers — tomorrow’s lunch is going to be amazing.
Nutritional Information & Benefits
Here’s the approximate nutritional breakdown for one serving (one chicken thigh with coating):
| Nutrient | Amount |
|---|---|
| Calories | 320 |
| Protein | 28g |
| Fat | 22g |
| Saturated Fat | 8g |
| Carbohydrates | 2g |
| Fiber | 0g |
| Sugar | 0g |
| Sodium | 680mg |
Chicken thighs are a fantastic source of high-quality protein, iron, and B vitamins, especially B12 and niacin, which support energy metabolism and brain function. The skin provides healthy fats that help keep you full and satisfied. Parmesan cheese adds calcium and a boost of umami flavor with minimal carbs.
This recipe is naturally low-carb, gluten-free, and keto-friendly. The main allergens are dairy (from the Parmesan and butter) and chicken itself. If you’re watching your sodium, you can reduce the salt to 1/2 teaspoon — the Parmesan is already quite salty.
I love that this recipe feels indulgent but is actually quite balanced. You’re getting a solid serving of protein with minimal processed ingredients. It’s the kind of meal that makes you feel good about what you’re eating — and even better about how it tastes.
Frequently Asked Questions
Can I use boneless, skinless chicken thighs?
Yes, but the cooking time will be shorter — about 15-18 minutes total at 380°F. The skin is what gets super crispy, so boneless skinless thighs won’t have that same texture. They’ll still be juicy and flavorful, just different. I recommend checking the internal temperature at the 15-minute mark.
Do I need to flip the chicken halfway through?
Yes, flipping is important for even cooking and crispiness. The first side gets a head start, then flipping allows the other side to crisp up while the Parmesan coating melts and browns on top. Don’t skip this step!
Can I make this recipe in a conventional oven?
Absolutely. Preheat your oven to 400°F and place the seasoned chicken thighs on a wire rack set over a baking sheet. Bake for 25-30 minutes, then add the Parmesan and butter and bake for another 10-15 minutes until the internal temperature reaches 165°F. The skin won’t be quite as crispy as the air fryer version, but it’ll still be delicious.
Why is my chicken skin not getting crispy?
This usually happens for one of three reasons: the chicken wasn’t dried thoroughly before seasoning, the air fryer basket was overcrowded, or the temperature was too low. Make sure you pat the chicken completely dry with paper towels, leave space between each piece in the basket, and cook at 380°F. If you’re still having trouble, try increasing the temperature to 400°F for the last 5 minutes of cooking.
Can I prep this recipe ahead of time?
Yes! You can season the chicken up to 24 hours in advance and keep it covered in the refrigerator. Let it sit at room temperature for 15 minutes before cooking to take the chill off. You can also grate the Parmesan and mince the garlic ahead of time. Just don’t combine the Parmesan and butter until you’re ready to use them, or the mixture will clump.
Conclusion
These cozy crispy air fryer chicken thighs with garlic Parmesan have become a staple in my kitchen for good reason. They’re quick enough for a busy weeknight, impressive enough for company, and comforting enough to make any gray day feel a little brighter. The crispy Parmesan crust, the juicy meat, the way the garlic melts into everything — it’s the kind of meal that reminds you why home cooking is worth the effort.
What I love most about this recipe is how adaptable it is. Maybe you’ll add extra garlic like I do when I’m feeling bold. Maybe you’ll go the spicy buffalo route for game day. Or maybe you’ll keep it exactly as written and discover your new favorite weeknight dinner. That’s the beauty of cooking — you make it your own.
I’d love to hear how these turn out for you. Did you try a variation? Did your kids love them as much as mine did? Drop a comment below and let me know. And if you’re looking for more cozy dinner ideas, you might also enjoy my creamy garlic mushroom chicken or these honey garlic salmon foil packets for another quick and delicious meal.
Until next time, happy cooking — and don’t be afraid to let someone else take the lead in the kitchen. You never know what you might learn.
Pin This Recipe!
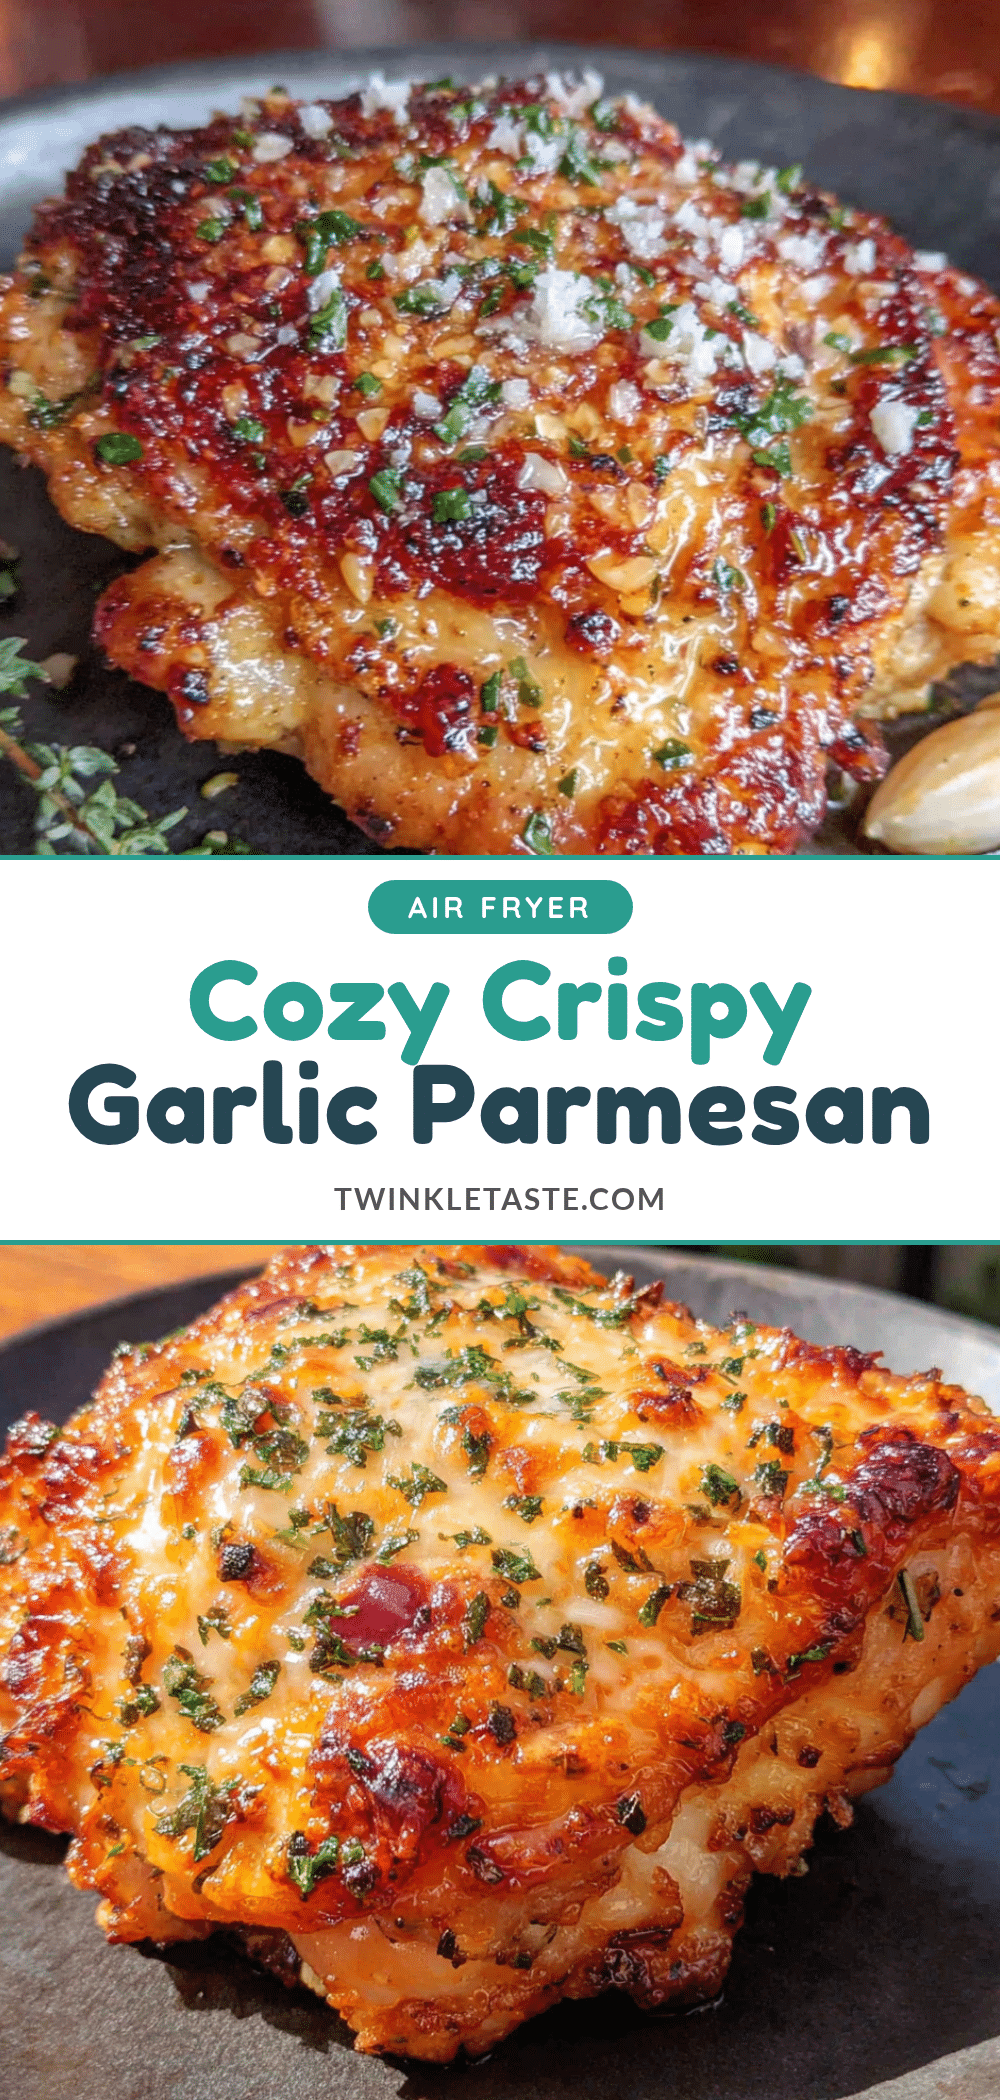
Cozy Crispy Air Fryer Chicken Thighs with Garlic Parmesan

These air fryer chicken thighs come out with shatteringly crispy skin, juicy meat, and a garlic-Parmesan crust that makes them perfect for cozy weeknight dinners. Ready in under 30 minutes with simple ingredients.
- Prep Time: 10 minutes
- Cook Time: 22 minutes
- Total Time: 32 minutes
- Yield: 4 servings 1x
- Category: Main Course
- Cuisine: American
Ingredients
- 4 bone-in, skin-on chicken thighs (about 1.5 pounds total)
- 1 tablespoon olive oil
- 1 teaspoon fine sea salt
- 1/2 teaspoon black pepper, freshly ground
- 1 teaspoon garlic powder
- 1/2 teaspoon onion powder
- 1/2 teaspoon paprika (regular or smoked)
- 1/3 cup freshly grated Parmesan cheese
- 3 cloves garlic, minced
- 2 tablespoons unsalted butter, melted
- 1 tablespoon fresh parsley, chopped (optional)
Instructions
- Prep the chicken: Pat chicken thighs completely dry with paper towels. Let them sit on a plate while preparing seasoning.
- Make the seasoning blend: In a small bowl, combine salt, black pepper, garlic powder, onion powder, and paprika. Stir to break up clumps.
- Season the chicken: Drizzle olive oil over chicken and rub in. Sprinkle seasoning blend evenly over both sides. Let sit for 5 minutes at room temperature.
- Preheat the air fryer to 380°F for 3 minutes.
- Arrange chicken skin-side down in a single layer in the air fryer basket, leaving space between pieces.
- Air fry at 380°F for 12 minutes. Do not open the basket.
- Flip chicken using tongs. Sprinkle grated Parmesan evenly over the skin side, then brush with melted butter.
- Return to air fryer and cook at 380°F for another 8-10 minutes, until internal temperature reaches 165°F and skin is deeply golden and crispy.
- Remove chicken and let rest for 5 minutes. Sprinkle with fresh parsley if desired.
Notes
For extra crispy skin, after the first 12 minutes of cooking, remove chicken, flip, and let sit uncovered in the refrigerator for 10 minutes before adding Parmesan and butter. Freshly grated Parmesan is essential; pre-shredded contains anti-caking agents that prevent proper melting. If using boneless skinless thighs, reduce total cooking time to 15-18 minutes. For dairy-free, omit Parmesan and butter and increase garlic powder and paprika.
Nutrition
- Serving Size: 1 chicken thigh with
- Calories: 320
- Sodium: 680
- Fat: 22
- Saturated Fat: 8
- Carbohydrates: 2
- Protein: 28
Keywords: air fryer chicken thighs, crispy chicken thighs, garlic parmesan chicken, easy weeknight dinner, low carb chicken, keto chicken recipe