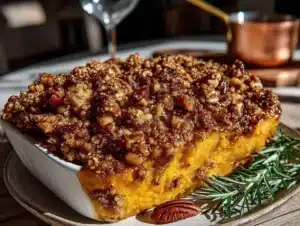
I want a dessert that tastes like a caramel apple had a baby with a New York cheesecake, and I want it right now. The problem is I have zero patience for complicated layers, multiple bowls, or anything that requires me to dirty my stand mixer. That’s the exact moment this recipe was born—out of a craving that refused to be ignored and a fridge full of apples that were starting to look at me with judgment.
Standing there in my kitchen, I grabbed a bag of Honeycrisps (the good ones, because life’s too short for mealy apples) and started thinking about what I actually had on hand. Cream cheese? Check. Butter? Always. A bag of Kraft caramels leftover from some long-forgotten baking project? You bet. That’s when it clicked—I could make a cheesecake bar that skipped the water bath, the springform pan, and most of the fuss, but kept all the flavor.
The first batch came out of the oven looking a little rough around the edges, honestly. The caramel sank, the apples floated, and the crust was more crumbly than I wanted. But the taste? Let’s just say I ate three of them standing over the counter before they even cooled completely. I tweaked the method a few times, learned that pressing the crust down with the bottom of a measuring cup makes all the difference, and that you absolutely have to let the caramel set before you cut into them.
These bars are the kind of dessert that makes people close their eyes on the first bite. And that’s not something I say lightly.
Why You’ll Love This Recipe
These aren’t just another dessert bar. They’re the result of several test batches, a few happy accidents, and a whole lot of cream cheese. Here’s what makes them different from everything else out there.
- No Water Bath Required : Traditional cheesecake can be intimidating with its fussy water bath and cracked tops. These bars bake up perfectly smooth without any of that drama. The shortbread crust handles the moisture beautifully.
- Simple Ingredients : You probably have most of these in your kitchen right now. No fancy extracts, no hard-to-find specialty items. Just good butter, cream cheese, apples, and caramel.
- Perfect for Fall Gatherings : Whether it’s a Thanksgiving dessert table, a cozy Friendsgiving, or just a Tuesday night that needs something special, these bars fit right in. They travel well, slice cleanly, and everyone always asks for the recipe.
- Crowd-Pleaser : I’ve brought these to potlucks, family dinners, and even a book club meeting. They disappear fast. Kids love the caramel and apple combo, and adults appreciate the sophisticated balance of sweet and salty.
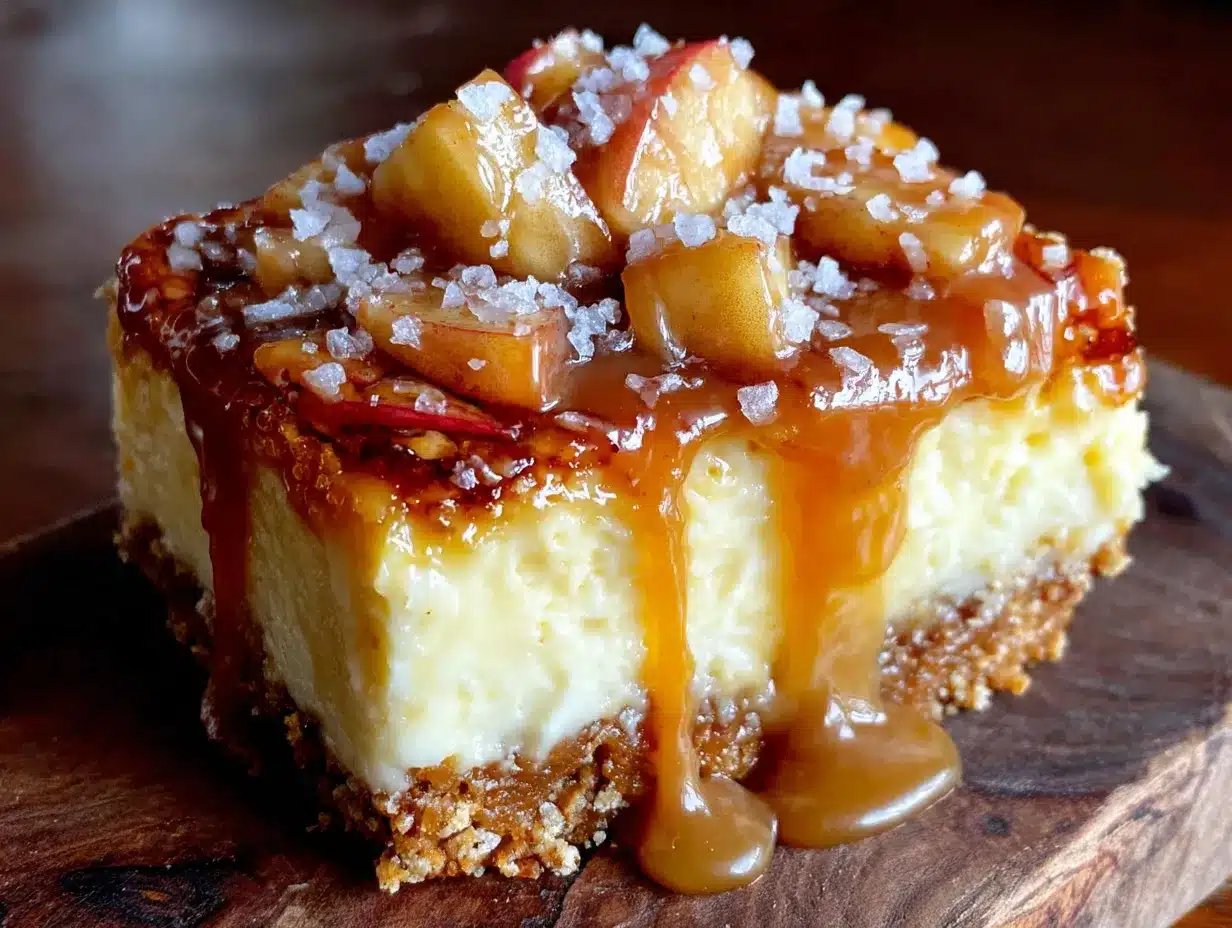
- Unbelievably Delicious : The texture is what gets me every time. That buttery shortbread crust, the creamy cheesecake layer, the tender apple pieces, and that ribbon of salted caramel running through everything—it’s a textural masterpiece.
What really sets this recipe apart is the technique. Instead of just dumping caramel on top, I layer it in the middle and on top, so every bite gets that gooey, salty-sweet hit. And the apple layer? I cook them down just enough to concentrate the flavor without turning them into applesauce. It’s the little things that make a big difference.
What Ingredients You Will Need
This recipe uses simple, wholesome ingredients that come together to create something truly special. Most of these are pantry staples, which makes this a great last-minute dessert option when you need to impress.
For the Shortbread Crust
- 1 ½ cups all-purpose flour (spooned and leveled for accuracy)
- ½ cup granulated sugar
- ¼ teaspoon salt (fine sea salt works best)
- ½ cup unsalted butter, cold and cut into small cubes (I use Kerrygold for its rich flavor)
For the Apple Layer
- 2 medium apples, peeled, cored, and diced into ¼-inch pieces (Honeycrisp or Granny Smith are my go-to choices)
- 2 tablespoons unsalted butter
- 2 tablespoons brown sugar, packed
- ½ teaspoon ground cinnamon
- ¼ teaspoon ground nutmeg (freshly grated if you have it)
- 1 tablespoon lemon juice (keeps the apples from browning and adds brightness)
For the Cheesecake Filling
- 16 ounces cream cheese, softened to room temperature (full-fat is non-negotiable here for the best texture)
- ½ cup granulated sugar
- 2 large eggs, room temperature
- 1 teaspoon vanilla extract
- 2 tablespoons sour cream (adds tanginess and makes the filling extra creamy)
For the Salted Caramel
- 1 cup caramel candies, unwrapped (Kraft works perfectly)
- ¼ cup heavy cream
- ½ teaspoon flaky sea salt (Maldon is my favorite for that perfect crunch)
Ingredient Note: I’ve tested this with low-fat cream cheese and it just doesn’t set up the same way. The texture gets grainy and the bars don’t slice cleanly. Trust me on this one—go full-fat. And for the apples, avoid Red Delicious or Gala as they tend to get mushy when cooked. You want something that holds its shape.
Substitution Option: If you’re dairy-free, you can use a plant-based cream cheese and butter alternative, but the texture will be slightly different. I’d recommend adding an extra tablespoon of cornstarch to help with setting.
Equipment Needed
You don’t need a professional bakery setup for these bars, but having the right tools makes the process smoother. Here’s what I use every time.
- 9×9-inch baking pan (metal works better than glass for even baking)
- Parchment paper (for easy removal—trust me, don’t skip this)
- Food processor or pastry cutter (for the crust; your fingers work too if you don’t mind getting messy)
- Electric hand mixer or stand mixer (for the cheesecake filling)
- Medium saucepan (for cooking the apples and melting the caramel)
- Rubber spatula
- Sharp knife and cutting board
- Measuring cups and spoons
I’ve made the crust by hand before when my food processor was in the dishwasher, and honestly, it works just fine. The key is keeping the butter cold. If the butter melts before it goes in the oven, you’ll end up with a tough crust instead of a tender, crumbly one.
Preparation Method
Let’s walk through this step by step. I’ve included all the little details I wish someone had told me the first time.
Step 1: Make the Shortbread Crust
Preheat your oven to 350°F (175°C). Line your 9×9-inch pan with parchment paper, leaving some overhang on two sides for easy lifting later. In a food processor, pulse the flour, sugar, and salt together. Add the cold butter cubes and pulse until the mixture looks like coarse sand with some pea-sized butter pieces remaining. If you’re doing this by hand, use a pastry cutter or your fingertips to work the butter into the flour mixture. Press the mixture firmly into the bottom of your prepared pan. I use the bottom of a measuring cup to get it really compact and even. Bake for 18-20 minutes, until the edges are just starting to turn golden. Set aside to cool slightly while you work on the filling.
Step 2: Cook the Apple Layer
While the crust bakes, melt the 2 tablespoons of butter in a medium saucepan over medium heat. Add the diced apples, brown sugar, cinnamon, nutmeg, and lemon juice. Cook for 5-7 minutes, stirring occasionally, until the apples are tender but still hold their shape. You want them soft enough to bite through easily but not mushy. The liquid should have mostly evaporated. Remove from heat and let cool completely. If you add warm apples to the cheesecake layer, they’ll melt the cream cheese and create a mess.
Step 3: Make the Cheesecake Filling
In a large bowl, beat the softened cream cheese with an electric mixer on medium speed until smooth and creamy, about 2 minutes. Add the sugar and beat for another minute until well combined. Add the eggs one at a time, beating on low speed after each addition until just incorporated. You don’t want to whip too much air into the mixture—that can cause cracks later. Mix in the vanilla extract and sour cream until smooth. The mixture should be thick, creamy, and completely lump-free.
Step 4: Prepare the Salted Caramel
In a small saucepan over low heat, combine the caramel candies and heavy cream. Stir constantly until the caramels are completely melted and the mixture is smooth. This takes about 5-7 minutes. Remove from heat and stir in the flaky sea salt. Let it cool for 5 minutes—it should still be pourable but not hot enough to melt the cheesecake mixture.
Step 5: Assemble the Bars
Pour the cheesecake filling over the cooled crust and spread it evenly. Drop the cooled apples in spoonfuls over the cheesecake layer, then gently swirl them in with a knife—don’t overmix, you want pockets of apple throughout. Drizzle about half of the salted caramel over the top and swirl it in gently. Reserve the remaining caramel for later.
Step 6: Bake
Place the pan in the oven and bake at 350°F (175°C) for 35-40 minutes. The edges should be set and slightly puffed, but the center should still jiggle just a little when you gently shake the pan. That jiggle is your friend—it means the center will stay creamy and not overbake. Remove from the oven and let cool completely on a wire rack. This takes about 1-2 hours.
Step 7: Chill and Finish
Once cooled to room temperature, refrigerate the bars for at least 4 hours, preferably overnight. This is crucial for clean slices. After chilling, warm up the remaining caramel slightly and drizzle it over the top. Sprinkle with a little extra flaky sea salt for that final touch. Lift the bars out using the parchment paper overhang and cut into 16 squares. A sharp knife wiped clean between cuts gives you the prettiest slices.
Cooking Tips & Techniques
I’ve made these bars more times than I can count, and I’ve learned a few things the hard way. Here’s what I wish I’d known from the start.
Room Temperature Ingredients Matter : Cold cream cheese will leave you with lumpy filling no matter how long you beat it. Let it sit on the counter for at least an hour before you start. Same goes for the eggs—drop them in a bowl of warm water for 5 minutes if you’re short on time.
Don’t Overbake : This is the number one mistake I see people make. Cheesecake continues to cook after it comes out of the oven, so pulling it when the center still has a slight wobble is exactly right. Overbaked cheesecake gets dry and cracks.
Patience with Chilling : I know it’s hard to wait, but cutting into these bars while they’re still warm is a recipe for disaster. The caramel will run, the cheesecake will smear, and you’ll end up with a delicious but ugly mess. Overnight chilling is ideal.
Sharp Knife Trick : For the cleanest cuts, run your knife under hot water and dry it off between each slice. This prevents the cheesecake from sticking to the blade and gives you those beautiful, Instagram-worthy edges.
Caramel Consistency : If your caramel seems too thick after melting, add another tablespoon of heavy cream. If it’s too thin, let it cool for a few more minutes—it will thicken as it cools. The perfect consistency is pourable but not runny, like warm honey.
Variations & Adaptations
One of the best things about this recipe is how flexible it is. Here are some variations I’ve tried and loved.
Gluten-Free Version
Swap the all-purpose flour for a 1:1 gluten-free baking flour blend. I’ve used Bob’s Red Mill with great results. The crust will be slightly more crumbly, so press it down extra firmly. No one will notice the difference.
Dairy-Free Version
Use plant-based cream cheese (Miyoko’s is my favorite) and vegan butter. For the caramel, look for dairy-free caramel candies or make your own with coconut cream. The texture won’t be quite as rich, but it’s still delicious.
Spiced Apple Version
Add ¼ teaspoon of ground ginger and a pinch of cloves to the apple layer for a more complex fall flavor. This is my go-to for Thanksgiving—it pairs beautifully with the creamy cheesecake.
Caramel Apple Pie Bars
Add a crumble topping made from ½ cup flour, ¼ cup brown sugar, and ¼ cup cold butter cut into small pieces. Sprinkle it over the top before baking for a pie-like crust. Bake for an extra 5-7 minutes.
Low-Sugar Option
Use a sugar substitute like monk fruit sweetener in the crust and cheesecake filling. The caramel will still need sugar, but you can use a sugar-free caramel sauce. The texture will be slightly different, but the flavor is still fantastic.
One of my favorite variations came from a friend who swapped the apples for pears and added a pinch of cardamom. It was absolutely incredible. Don’t be afraid to experiment—that’s how the best recipes are born.
Serving & Storage Suggestions
These bars are versatile enough for almost any occasion. Here’s how to serve and store them for the best experience.
Serving Temperature: I prefer these bars straight from the fridge—they slice cleaner and the flavors are more pronounced. But if you like a softer texture, let them sit at room temperature for 15-20 minutes before serving. A dollop of whipped cream on top never hurts.
Presentation Ideas: For a beautiful dessert board, arrange the bars on a wooden platter with fresh apple slices, a sprinkle of cinnamon, and a small bowl of extra caramel for dipping. They also look stunning on a cake stand dusted with powdered sugar.
Perfect Pairings: These bars are amazing with a hot cup of coffee or a warm mug of chai latte. For a truly indulgent dessert, serve them alongside a scoop of vanilla bean ice cream or a drizzle of warm pumpkin spice syrup over the top.
Storage Instructions: Store the bars in an airtight container in the refrigerator for up to 5 days. Place a sheet of parchment paper between layers if stacking to prevent sticking. The caramel may soften slightly over time, but the flavor only gets better.
Freezing Instructions: These bars freeze beautifully. Wrap individual slices tightly in plastic wrap, then place them in a freezer-safe bag or container. They’ll keep for up to 3 months. To thaw, transfer to the refrigerator overnight. The texture remains remarkably close to fresh.
Flavor Development: Honestly, these bars taste even better on day two. The flavors meld together overnight, and the crust softens just slightly to become perfectly tender. If you can resist eating them all on day one, you’re in for a treat.
Nutritional Information & Benefits
Let’s be real—this is a dessert, not a health food. But that doesn’t mean it can’t have some redeeming qualities. Here’s the estimated nutritional breakdown per bar (based on 16 servings).
- Calories: 320
- Total Fat: 18g
- Saturated Fat: 11g
- Cholesterol: 75mg
- Sodium: 210mg
- Total Carbohydrates: 36g
- Dietary Fiber: 1g
- Sugars: 24g
- Protein: 5g
Health Highlights: Apples are a good source of fiber and vitamin C, and they contain antioxidants that support heart health. Cinnamon has anti-inflammatory properties and can help regulate blood sugar. And while cream cheese isn’t exactly a superfood, it does provide calcium and protein. Everything in moderation, right?
Dietary Considerations: This recipe contains gluten, dairy, and eggs. It can be adapted for gluten-free and dairy-free diets as mentioned in the variations section. Not suitable for vegan diets without significant modifications.
Personal Perspective: I believe dessert should be enjoyed without guilt. These bars are a treat, and they’re meant to be savored. Pair them with a healthy meal and a walk outside, and you’ve got balance. Life’s too short to skip the caramel.
Conclusion
These Salted Caramel Apple Cheesecake Bars are everything I want in a fall dessert—comforting, impressive, and completely irresistible. They’ve become my go-to for every gathering, from casual weeknight dinners to holiday celebrations. The combination of buttery shortbread, creamy cheesecake, tender apples, and that luscious salted caramel is pure magic.
What I love most about this recipe is how forgiving it is. You don’t need to be a pastry chef to nail it. The steps are straightforward, the ingredients are simple, and the result is always stunning. Whether you’re a seasoned baker or someone who’s never made cheesecake before, these bars will make you look like a pro.
I’d love to hear how yours turn out. Did you try a variation? Did you add extra caramel? Did you eat three before they cooled completely? (No judgment here.) Drop a comment below and let me know. And if you’re looking for more fall-inspired treats, don’t miss my brown sugar pumpkin coffee cake or these copycat Starbucks pumpkin cream cheese muffins—they’re both absolute winners.
Happy baking, friends. And remember—always save the last bar for yourself.
Frequently Asked Questions
Can I use store-bought caramel sauce instead of making my own?
Absolutely. If you’re short on time, a good quality jarred caramel sauce works perfectly. Just warm it up slightly before drizzling. The homemade version with caramel candies gives you a thicker, more decadent texture, but store-bought is a perfectly fine shortcut.
Why did my cheesecake layer crack?
Cracks usually happen from overbaking or overmixing. Make sure you pull the bars when the center still has a slight jiggle. Also, avoid beating too much air into the cream cheese mixture—mix on low speed and just until ingredients are combined. A water bath isn’t necessary for bars, but if you’re worried, place a pan of hot water on the oven rack below.
Can I make these bars ahead of time?
Yes, and I actually recommend it. These bars taste even better the next day after the flavors have had time to meld. You can make them up to 2 days in advance and store them in the refrigerator. Add the final caramel drizzle and sea salt just before serving for the prettiest presentation.
What kind of apples work best for this recipe?
Honeycrisp and Granny Smith are my top choices. Honeycrisp adds natural sweetness and holds its shape beautifully. Granny Smith provides a nice tart contrast to the sweet caramel and cheesecake. Avoid Red Delicious or Gala as they tend to break down into mush when cooked.
Can I double this recipe for a larger pan?
Definitely. Double all the ingredients and use a 9×13-inch pan. You’ll need to increase the baking time by about 10-15 minutes. Keep an eye on the edges—they should be set and slightly golden while the center still jiggles. The chilling time remains the same.
Pin This Recipe!
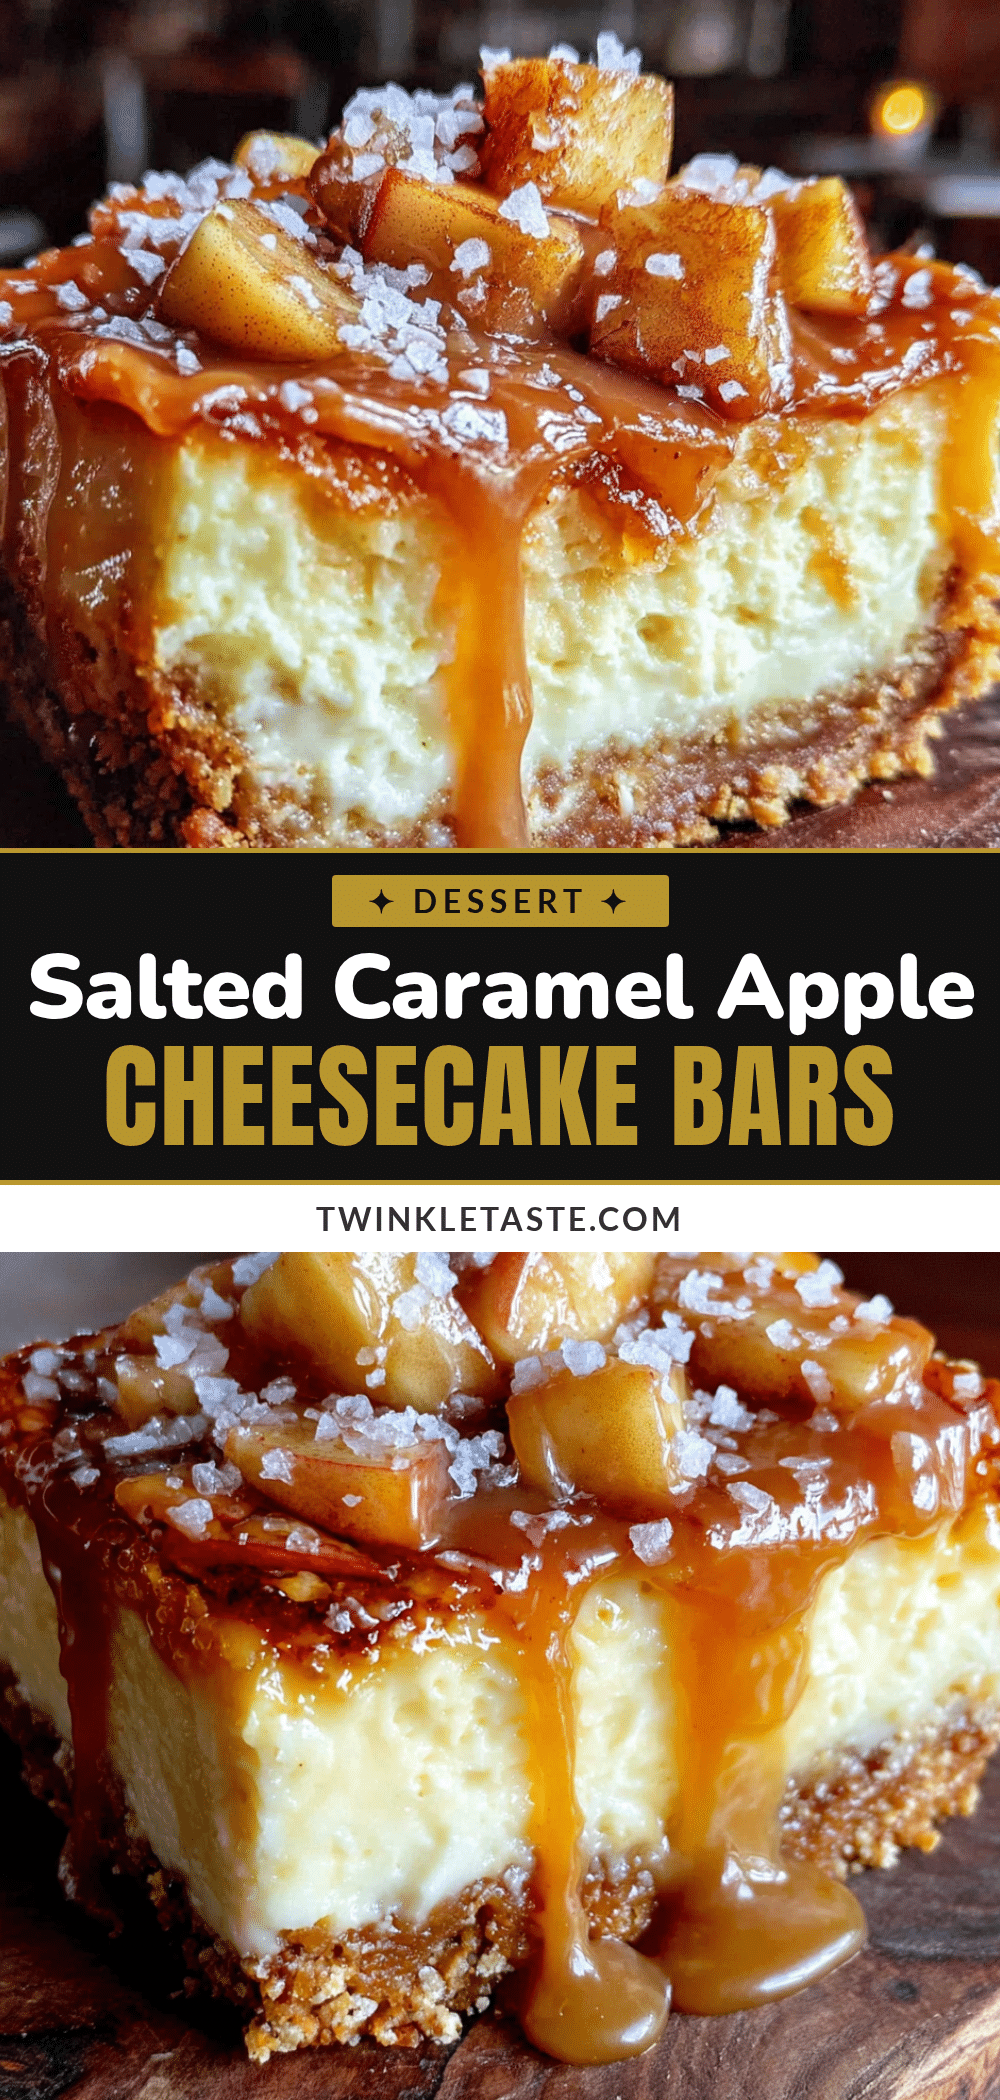
Best Salted Caramel Apple Cheesecake Bars (Easy Fall Dessert Recipe)
These Salted Caramel Apple Cheesecake Bars combine a buttery shortbread crust, creamy cheesecake filling, tender spiced apples, and a ribbon of salted caramel for an irresistible fall dessert. No water bath required, and they slice beautifully for any gathering.
- Prep Time: 30 minutes
- Cook Time: 35-40 minutes
- Total Time: 5 hours (including chilling)
- Yield: 16 bars 1x
- Category: Dessert
- Cuisine: American
Ingredients
- 1 ½ cups all-purpose flour
- ½ cup granulated sugar
- ¼ teaspoon fine sea salt
- ½ cup unsalted butter, cold and cut into small cubes
- 2 medium apples (Honeycrisp or Granny Smith), peeled, cored, and diced into ¼-inch pieces
- 2 tablespoons unsalted butter
- 2 tablespoons brown sugar, packed
- ½ teaspoon ground cinnamon
- ¼ teaspoon ground nutmeg
- 1 tablespoon lemon juice
- 16 ounces cream cheese, softened to room temperature
- ½ cup granulated sugar
- 2 large eggs, room temperature
- 1 teaspoon vanilla extract
- 2 tablespoons sour cream
- 1 cup caramel candies, unwrapped
- ¼ cup heavy cream
- ½ teaspoon flaky sea salt
Instructions
- Preheat oven to 350°F (175°C). Line a 9×9-inch baking pan with parchment paper, leaving overhang on two sides.
- Make the shortbread crust: In a food processor, pulse flour, ½ cup sugar, and ¼ teaspoon salt. Add cold butter cubes and pulse until mixture resembles coarse sand with some pea-sized butter pieces. Press firmly into the bottom of the prepared pan using the bottom of a measuring cup. Bake for 18-20 minutes until edges are just golden. Set aside to cool slightly.
- Cook the apple layer: In a medium saucepan over medium heat, melt 2 tablespoons butter. Add diced apples, brown sugar, cinnamon, nutmeg, and lemon juice. Cook for 5-7 minutes, stirring occasionally, until apples are tender but still hold their shape and liquid has mostly evaporated. Remove from heat and let cool completely.
- Make the cheesecake filling: In a large bowl, beat softened cream cheese with an electric mixer on medium speed until smooth, about 2 minutes. Add ½ cup sugar and beat for 1 minute. Add eggs one at a time, beating on low speed after each addition until just incorporated. Mix in vanilla extract and sour cream until smooth and lump-free.
- Prepare the salted caramel: In a small saucepan over low heat, combine caramel candies and heavy cream. Stir constantly until completely melted and smooth, about 5-7 minutes. Remove from heat and stir in flaky sea salt. Let cool for 5 minutes.
- Assemble the bars: Pour cheesecake filling over cooled crust and spread evenly. Drop cooled apples in spoonfuls over the cheesecake layer, then gently swirl with a knife. Drizzle about half of the salted caramel over the top and swirl gently. Reserve remaining caramel.
- Bake at 350°F (175°C) for 35-40 minutes, until edges are set and slightly puffed but center still jiggles slightly. Cool completely on a wire rack (1-2 hours).
- Refrigerate for at least 4 hours, preferably overnight. Warm remaining caramel slightly and drizzle over the top. Sprinkle with extra flaky sea salt. Lift bars out using parchment overhang and cut into 16 squares with a sharp knife wiped clean between cuts.
Notes
Room temperature ingredients are crucial for a smooth filling. Don’t overbake—the center should still jiggle slightly. Chill overnight for cleanest slices. For gluten-free, use a 1:1 gluten-free flour blend. For dairy-free, use plant-based cream cheese and butter.
Nutrition
- Serving Size: 1 bar
- Calories: 320
- Sugar: 24
- Sodium: 210
- Fat: 18
- Saturated Fat: 11
- Carbohydrates: 36
- Fiber: 1
- Protein: 5
Keywords: salted caramel apple cheesecake bars, apple cheesecake bars, fall dessert, cheesecake bars, caramel apple bars, easy cheesecake recipe