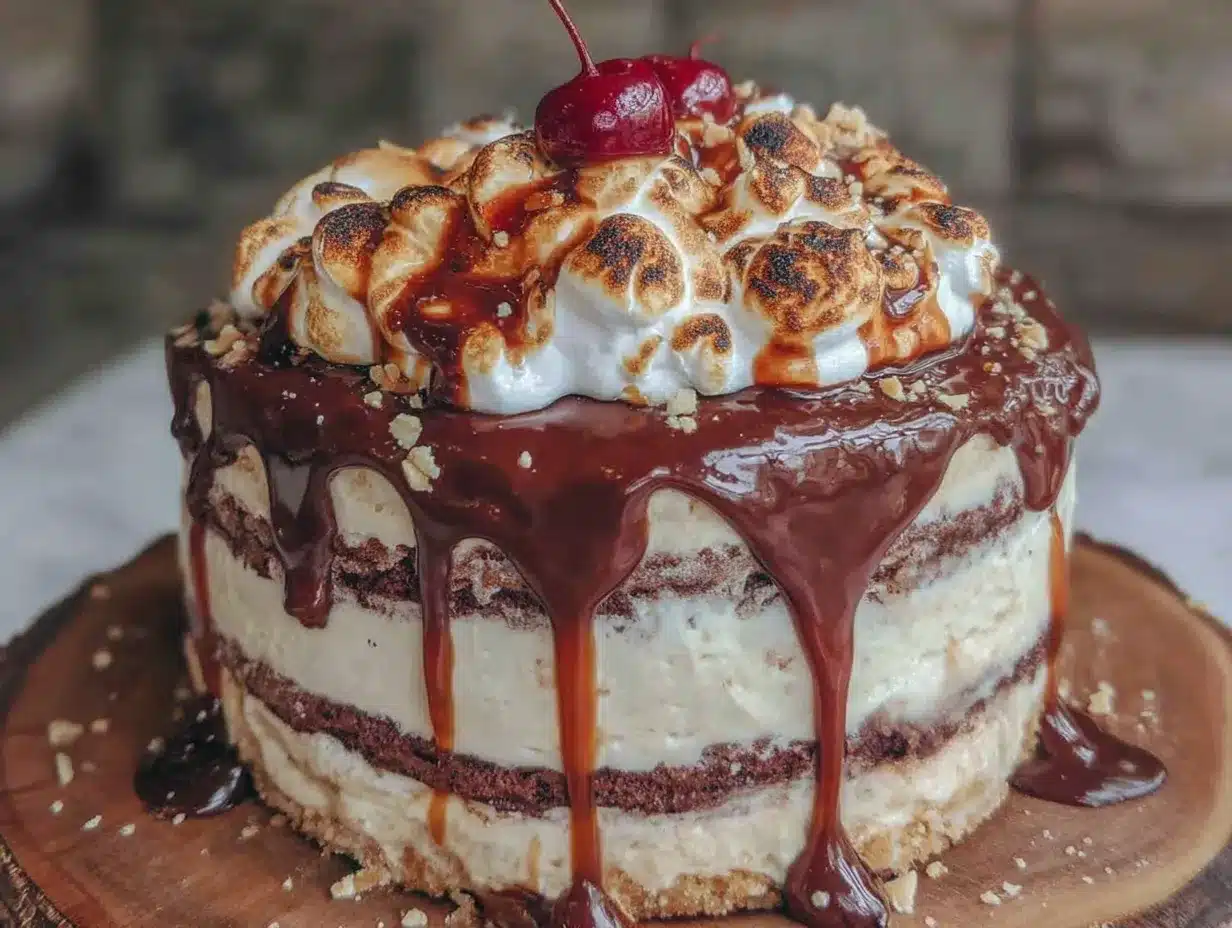
I figured a Neapolitan cake would be a nostalgic throwback—pink, brown, and white layers stacked like something from a retro bakery case. It took about one bite of this version to realize I was wrong. This isn’t the dry, artificially flavored sheet cake from childhood birthday parties. This is a three-flavor powerhouse that actually tastes like real strawberry, real chocolate, and real vanilla, all wrapped up in one ridiculously moist layer cake.
I developed this recipe last October when my daughter announced she wanted a “rainbow cake that isn’t rainbow” for her fall birthday. She wanted pink and brown together, and honestly, I was stumped until I remembered those tri-colored ice cream cups from the school cafeteria. Neapolitan. Of course. But turning a nostalgic ice cream flavor into a proper layer cake that works for a November birthday? That took some trial and error—and a few sunken middles I’d rather forget.
The trick, I found, was treating each layer like its own little cake rather than trying to swirl everything into one pan. Separate batters, separate bowls, separate love for each flavor. The strawberry layer gets real freeze-dried berries (not syrup, which makes things soggy), the chocolate layer gets a hit of coffee to deepen things, and the vanilla layer? It’s anything but plain. Together, they create something that feels both familiar and completely new.
This cake has become our family’s official fall birthday tradition. It’s showy enough for a party but forgiving enough for a home baker who’s still learning. And honestly? It tastes better than the sum of its parts—which is really the whole point of Neapolitan anything.
Why You’ll Love This Recipe
This isn’t just another layer cake recipe. Here’s why it stands out from the crowd:
- Three Flavors, One Showstopper : Each layer delivers a distinct, authentic taste—real strawberry, rich chocolate, and creamy vanilla. No artificial flavors here.
- Perfect for Fall Birthdays : The pink and brown color palette feels surprisingly seasonal when paired with autumn decorations. It’s unexpected and gorgeous.
- Moist for Days : Thanks to buttermilk and oil in the batter, this cake stays tender even after a day or two on the counter.
- Make-Ahead Friendly : You can bake the layers up to two days in advance and frost the day of. Total stress-saver for party prep.
- Beginner-Approved : No complicated techniques. If you can mix batter and level a cake, you can pull this off.
What makes this recipe different from the dozens of Neapolitan cakes out there is the attention to each flavor. The strawberry layer uses pulverized freeze-dried berries for concentrated flavor without extra liquid. The chocolate layer gets a tablespoon of espresso powder that doesn’t make it taste like coffee—it just makes the chocolate taste more like itself. And the vanilla layer uses real vanilla bean paste, so those tiny specks tell you this isn’t your average white cake.
This is the kind of cake that makes people close their eyes after the first bite. It’s nostalgic but elevated, familiar but surprising. Exactly what a birthday cake should be.
What Ingredients You Will Need
This recipe uses mostly pantry staples with a few special additions that make each layer shine. Here’s what you’ll need, broken down by component.
For the Strawberry Layer
- 1.5 cups (180g) all-purpose flour — Spoon and level for accuracy.
- 1 cup (200g) granulated sugar
- 1 teaspoon baking powder
- 1/2 teaspoon baking soda
- 1/4 teaspoon salt
- 1/2 cup (120ml) buttermilk — Room temperature. Adds tenderness and tang.
- 1/3 cup (80ml) vegetable oil — Keeps the cake moist without butter’s density.
- 1 large egg — Room temperature.
- 1 teaspoon vanilla extract
- 1/2 cup (60g) freeze-dried strawberries — Pulverized into a fine powder in a food processor. This is the key to real strawberry flavor without extra moisture.
- 2-3 drops pink gel food coloring — Optional, but helps the layer look pink rather than beige.
For the Chocolate Layer
- 1.25 cups (150g) all-purpose flour
- 1/2 cup (40g) unsweetened cocoa powder — I prefer Dutch-process for richness.
- 1 cup (200g) granulated sugar
- 1 teaspoon baking powder
- 1/2 teaspoon baking soda
- 1/4 teaspoon salt
- 1 tablespoon instant espresso powder — Deepens chocolate flavor without making it taste like coffee.
- 1/2 cup (120ml) buttermilk — Room temperature.
- 1/3 cup (80ml) vegetable oil
- 1 large egg — Room temperature.
- 1 teaspoon vanilla extract
For the Vanilla Layer
- 1.5 cups (180g) all-purpose flour
- 1 cup (200g) granulated sugar
- 1 teaspoon baking powder
- 1/2 teaspoon baking soda
- 1/4 teaspoon salt
- 1/2 cup (120ml) buttermilk — Room temperature.
- 1/3 cup (80ml) vegetable oil
- 1 large egg — Room temperature.
- 1 tablespoon vanilla bean paste — Or the seeds from one vanilla bean. Extract works too, but paste gives those beautiful speckles.
For the Vanilla Buttercream Frosting
- 2 cups (4 sticks, 452g) unsalted butter — Softened to room temperature.
- 6 cups (720g) powdered sugar — Sifted if lumpy.
- 1/4 cup (60ml) heavy cream — Or whole milk.
- 2 teaspoons vanilla extract
- 1/4 teaspoon salt
For Decoration (Optional)
- Chocolate shavings — Made by running a vegetable peeler along a chocolate bar.
- Fresh strawberries — Halved, for the top.
- Gold sprinkles — For that fall birthday touch.
Equipment Needed
You don’t need a professional bakery setup for this cake, but a few key tools make the process smoother:
- Three 8-inch round cake pans — If you only have two, bake the vanilla layer separately and let the pans cool completely between batches.
- Stand mixer or hand mixer — Either works. I’ve made this with both and honestly prefer the hand mixer for easier cleanup.
- Food processor or blender — For pulverizing the freeze-dried strawberries into powder.
- Kitchen scale — Not required, but highly recommended for consistent results. Cake flour measurements can be finicky with cups.
- Offset spatula — Makes frosting layers so much easier. A butter knife works in a pinch but expect rustic results.
- Cake turntable — A game-changer for smooth frosting. You can find inexpensive plastic ones online for under $15.
- Parchment paper rounds — Cut circles to line the bottom of each pan. Prevents sticking without greasing the sides (which can cause sinking).
- Cooling racks — Essential for even cooling. Stacking hot cake layers traps steam and makes them soggy.
Preparation Method
Step 1: Prep Your Pans and Oven
Preheat your oven to 350°F (175°C). Grease three 8-inch round cake pans with butter or baking spray, then line the bottoms with parchment paper circles. Do NOT grease the sides of the pans—this helps the batter cling to the sides as it rises, giving you flatter tops. Set the pans aside.
Step 2: Make the Strawberry Layer
In a small food processor, pulse the freeze-dried strawberries until they become a fine pink powder. You should have about 1/4 cup of powder. Set aside.
In a medium bowl, whisk together the flour, sugar, baking powder, baking soda, and salt. In a separate bowl, whisk the buttermilk, oil, egg, vanilla, and strawberry powder until smooth. Pour the wet ingredients into the dry and stir with a rubber spatula until just combined—a few lumps are fine. Add pink gel food coloring one drop at a time until you reach a shade you like. Pour the batter into one prepared pan and spread evenly.
Step 3: Make the Chocolate Layer
In a medium bowl, whisk together the flour, cocoa powder, sugar, baking powder, baking soda, salt, and espresso powder. In a separate bowl, whisk the buttermilk, oil, egg, and vanilla. Pour the wet into the dry and stir until just combined. The batter will be slightly thicker than the strawberry batter—that’s normal. Pour into the second prepared pan.
Step 4: Make the Vanilla Layer
In a medium bowl, whisk together the flour, sugar, baking powder, baking soda, and salt. In a separate bowl, whisk the buttermilk, oil, egg, and vanilla bean paste. Stir wet into dry until just combined. Pour into the third prepared pan.
Step 5: Bake the Layers
Place all three pans in the oven, spacing them evenly. Bake for 22-26 minutes, rotating the pans halfway through. The cakes are done when a toothpick inserted in the center comes out clean or with a few moist crumbs. The chocolate layer may take a minute or two longer than the others—check it separately.
Let the cakes cool in their pans on wire racks for 10 minutes. Then run a knife around the edges (if needed) and invert onto the racks to cool completely. Remove the parchment paper. Cooling completely is crucial—warm cake will melt your frosting into a puddle.
Step 6: Make the Frosting
In a large bowl with a hand mixer or the bowl of a stand mixer with the paddle attachment, beat the softened butter on medium speed until smooth and creamy, about 2 minutes. Add the powdered sugar one cup at a time, beating on low after each addition to avoid a sugar cloud. Add the heavy cream, vanilla, and salt. Increase speed to medium-high and beat for 3-4 minutes until light, fluffy, and spreadable. If the frosting seems too thick, add another tablespoon of cream. Too thin? Add another 1/4 cup of powdered sugar.
Step 7: Assemble the Cake
Once the cakes are completely cool, use a serrated knife to level the tops if they domed during baking. Place the strawberry layer on your cake board or serving plate. Spread about 1/2 cup of frosting evenly on top. Place the vanilla layer on top of that, pressing gently to adhere. Add another 1/2 cup of frosting. Finally, place the chocolate layer on top, cut-side down (so the flat top is facing up).
Step 8: Crumb Coat and Final Frosting
Spread a thin layer of frosting over the entire cake—this is the crumb coat. It doesn’t need to be pretty; it just traps loose crumbs. Refrigerate the cake for 20 minutes to set the crumb coat. Then apply the remaining frosting in a thicker, even layer. Use an offset spatula for smooth sides and a turntable for best results. If you want a naked cake look, use less frosting and leave some cake peeking through.
Step 9: Decorate
Press chocolate shavings onto the bottom edge of the cake. Arrange fresh strawberry halves on top in a ring. Sprinkle gold sprinkles over the top for that fall birthday sparkle. Refrigerate for at least 30 minutes before slicing to let the frosting set.
Cooking Tips & Techniques
Here are the lessons I learned the hard way so you don’t have to:
- Room temperature ingredients matter. Cold buttermilk and eggs can seize the batter and give you a denser cake. Set everything out 30 minutes before you start mixing.
- Don’t overmix. Stir until the flour just disappears. Overmixing develops gluten and makes cake tough. Lumps are your friends here.
- Weigh your flour. If you don’t have a scale, fluff the flour in its bag, spoon it into your measuring cup, and level with a knife. Scooping directly compacts the flour and adds extra.
- Use freeze-dried strawberries, not fresh. Fresh strawberries add too much moisture and will make your cake layer dense and soggy. Freeze-dried berries give concentrated flavor without the liquid.
- Chill between layers. That 20-minute fridge rest after the crumb coat is non-negotiable. Skipping it means crumbs in your final frosting layer.
- Warm your knife for clean slices. Run a sharp knife under hot water, wipe it dry, then slice. Repeat between each cut. You’ll get bakery-worthy slices every time.
- If your cake domes badly, you can wrap the cooled layers in plastic wrap and freeze them for 20 minutes before leveling. Frozen cake cuts cleaner and produces less crumbs.
Variations & Adaptations
This cake is surprisingly flexible. Here are a few ways to make it your own:
- Gluten-Free Version: Substitute the all-purpose flour with a 1:1 gluten-free baking flour blend. I’ve tested this with Bob’s Red Mill and King Arthur’s measure-for-measure blends, and both worked beautifully. Add an extra tablespoon of buttermilk to each batter since gluten-free flours absorb more liquid.
- Dairy-Free Adaptation: Use full-fat oat milk or unsweetened almond milk mixed with 1 teaspoon of lemon juice per 1/2 cup to replace the buttermilk. Use vegan butter sticks (like Country Crock Plant Butter) for the frosting. The texture will be slightly less tender but still delicious.
- Different Frosting Options: Swap the vanilla buttercream for cream cheese frosting for a tangier finish. Or try a Swiss meringue buttercream if you want something less sweet—it pairs beautifully with the cake’s richness.
- Seasonal Twist: For a fall-forward version, add 1 teaspoon of cinnamon to the vanilla layer and use apple butter instead of strawberry. The chocolate layer stays the same. It’s like a caramel apple meets chocolate cake situation—and it works.
- Cupcake Version: This batter makes about 24 cupcakes (8 of each flavor). Bake at 350°F (175°C) for 16-18 minutes. Frost each with a swirl of vanilla buttercream and top with a mini chocolate curl, a strawberry slice, or a sprinkle of gold sugar.
Serving & Storage Suggestions
This cake is best served at room temperature. Pull it from the fridge about 30 minutes before you plan to slice it. The buttercream softens slightly and the cake layers become more tender.
Presentation: Place the cake on a simple white cake stand to let the pink, brown, and white layers shine. If you’re serving at a fall birthday party, surround the base with mini pumpkins or cinnamon sticks for a seasonal tablescape. Slice with a warm knife as described above for clean, photogenic pieces.
Storage: Leftover cake keeps in an airtight container in the refrigerator for up to 5 days. The flavors actually meld and improve after day one—the strawberry and chocolate layers start to harmonize in a way that feels even more Neapolitan.
Freezing: You can freeze the unfrosted cake layers for up to 3 months. Wrap each cooled layer tightly in plastic wrap, then foil. Thaw at room temperature before frosting. The frosted cake can also be frozen (unwrapped first to harden the frosting, then wrapped in plastic and foil) for up to 2 months. Thaw overnight in the fridge, then bring to room temperature before serving.
Reheating: If you prefer your cake slightly warm (I do, especially with the chocolate layer), microwave individual slices for 10-15 seconds. Add a scoop of vanilla ice cream and you’ve got a deconstructed Neapolitan sundae situation.
Nutritional Information & Benefits
Here are approximate values per slice (based on 12 servings):
- Calories: 520
- Fat: 28g
- Carbohydrates: 66g
- Protein: 5g
- Fiber: 2g
- Sugar: 48g
While this is definitely a celebration cake, there are a few nutritional bright spots. The freeze-dried strawberries retain most of their vitamin C and antioxidants since they’re not cooked with sugar. The cocoa powder in the chocolate layer provides flavonoids that support heart health. And the buttermilk adds calcium and probiotics (in small amounts).
For anyone watching their sugar intake, you can reduce the sugar in each layer by 1/4 cup without significantly affecting texture—though the frosting will still need its full amount for structure. This cake is not gluten-free or low-carb as written, but see the variations section for adaptations. It contains dairy, eggs, and gluten.
Conclusion
This Best Neapolitan Layer Cake is more than just a pretty dessert—it’s a conversation starter, a crowd-pleaser, and honestly, the most fun I’ve ever had developing a cake recipe. The way the strawberry, vanilla, and chocolate layers play off each other is pure magic, and the fall birthday theme gives it a warmth that feels right for the season.
I love that this cake doesn’t take itself too seriously. It’s nostalgic without being dated, impressive without being fussy. Whether you’re baking for a November birthday, a Thanksgiving gathering, or just because you want three cakes in one (no judgment), this recipe delivers every time.
If you make this cake, I’d love to hear how it turned out. Leave a comment below with your favorite layer, or tag me in your photos—I genuinely get excited seeing your versions. And if you come up with a seasonal twist I haven’t tried, definitely share that too. Happy fall baking!
Frequently Asked Questions
Can I use a boxed cake mix for this recipe?
Technically yes, but the results won’t be as good. Boxed mixes have different moisture levels and artificial flavors that won’t give you the same authentic strawberry and chocolate taste. If you’re short on time, use a white cake mix for the vanilla and strawberry layers and a chocolate mix for the chocolate layer, then add freeze-dried strawberry powder to the white mix for the strawberry layer.
Why did my cake layers sink in the middle?
This usually happens for one of three reasons: the oven door was opened too early (wait until the 20-minute mark to check), the batter was overmixed, or the leavening agents (baking powder and soda) were expired. Check your dates and be gentle with mixing next time.
Can I make this cake a day ahead?
Absolutely. In fact, I prefer it. Bake and cool the layers, wrap them tightly in plastic wrap, and store at room temperature overnight. Frost the next day. The layers settle and become even more moist. You can also fully assemble and frost the cake a day ahead—just refrigerate and bring to room temperature before serving.
How do I get clean, even layers when slicing?
Use a long serrated knife and a gentle sawing motion. Don’t press down—let the knife do the work. If you’re nervous, you can use a cake leveler tool (about $10 online) for perfectly even layers every time. Chilling the cake for 20 minutes before leveling also helps.
Can I use fresh strawberries instead of freeze-dried?
I don’t recommend it. Fresh strawberries release moisture during baking, which makes the cake layer dense and gummy. They also don’t provide enough flavor on their own—you’d need strawberry extract to boost it, which tastes artificial. Freeze-dried strawberries are the only way to get real, concentrated strawberry flavor without compromising texture. You can find them in the dried fruit aisle or online.
Pin This Recipe!
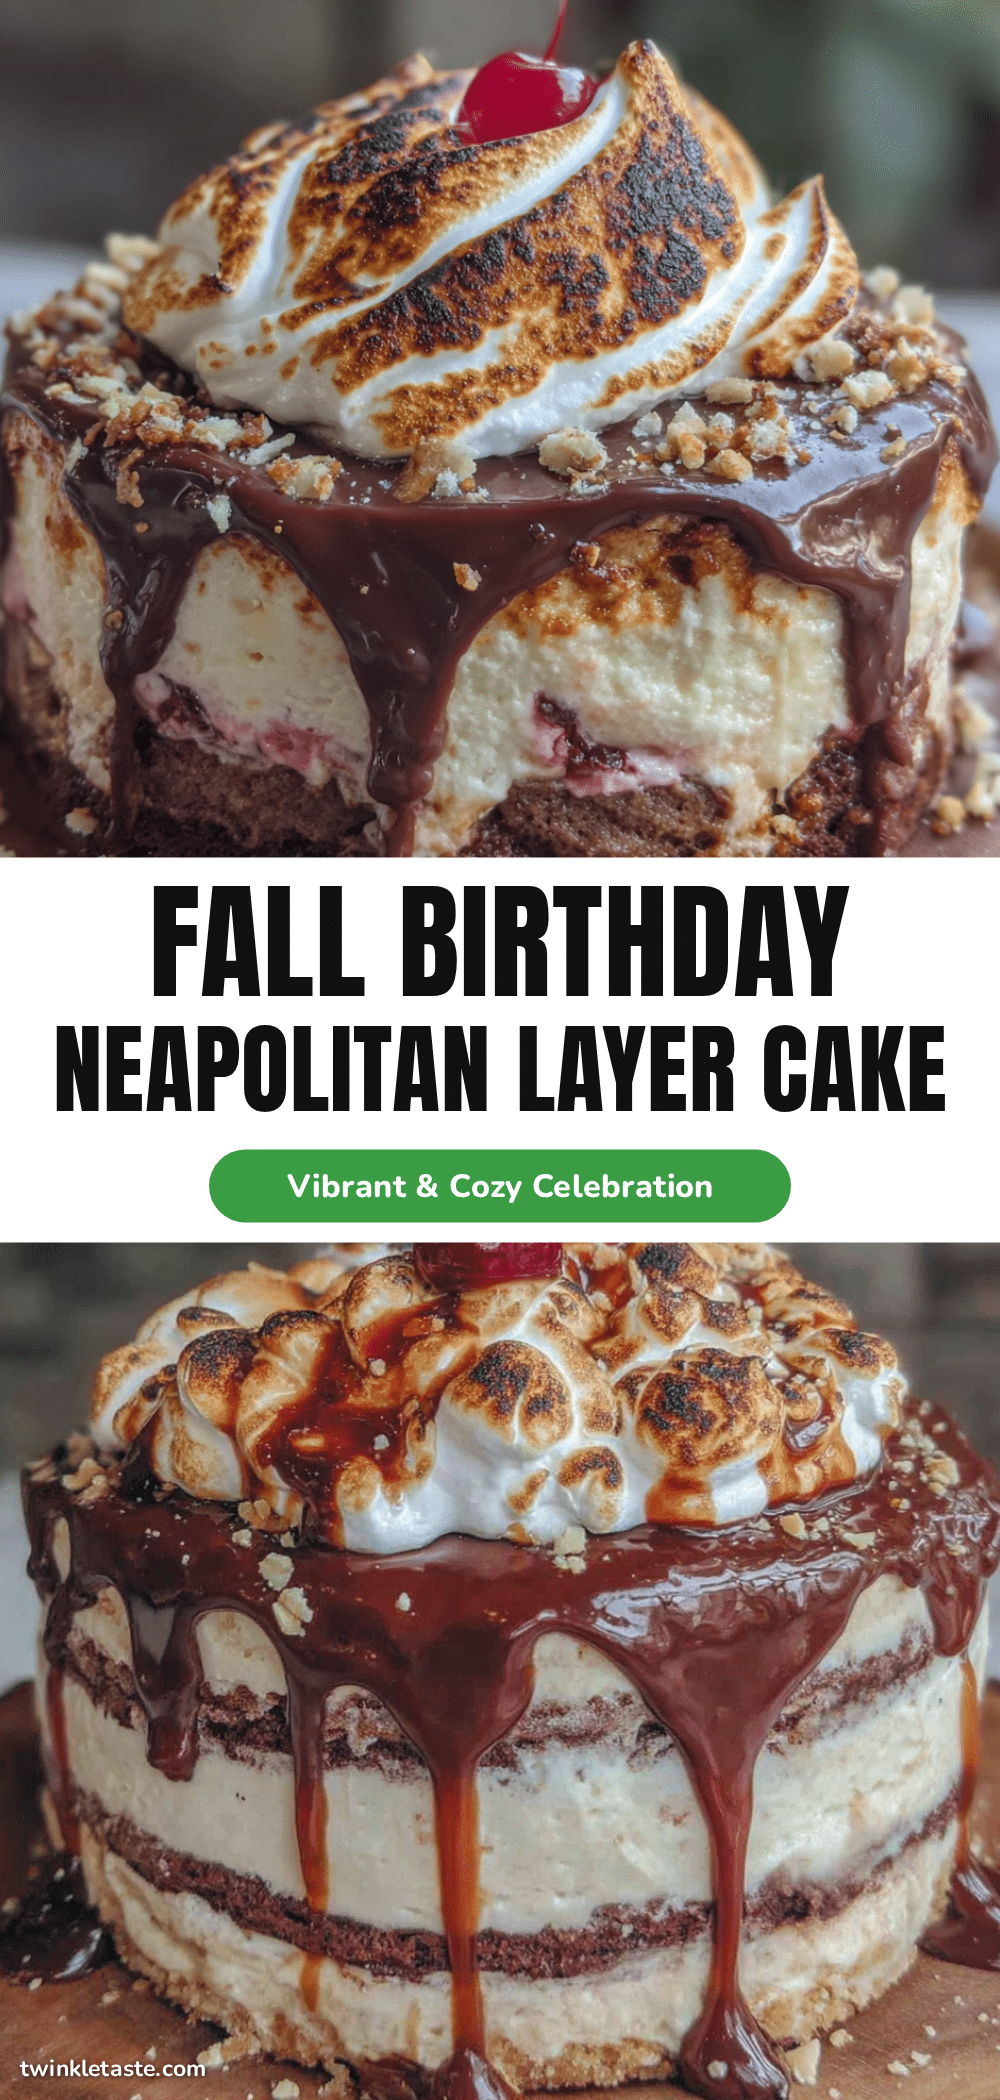
Best Neapolitan Layer Cake: Perfect Fall Birthday Dessert
A nostalgic Neapolitan layer cake with real strawberry, rich chocolate, and creamy vanilla layers, topped with vanilla buttercream. Perfect for fall birthdays and special occasions.
- Prep Time: 30 minutes
- Cook Time: 26 minutes
- Total Time: 1 hour 56 minutes
- Yield: 12 servings 1x
- Category: Dessert
- Cuisine: American
Ingredients
- 1.5 cups (180g) all-purpose flour
- 1 cup (200g) granulated sugar
- 1 teaspoon baking powder
- 1/2 teaspoon baking soda
- 1/4 teaspoon salt
- 1/2 cup (120ml) buttermilk, room temperature
- 1/3 cup (80ml) vegetable oil
- 1 large egg, room temperature
- 1 teaspoon vanilla extract
- 1/2 cup (60g) freeze-dried strawberries, pulverized
- 2–3 drops pink gel food coloring (optional)
- 1.25 cups (150g) all-purpose flour
- 1/2 cup (40g) unsweetened cocoa powder (Dutch-process preferred)
- 1 cup (200g) granulated sugar
- 1 teaspoon baking powder
- 1/2 teaspoon baking soda
- 1/4 teaspoon salt
- 1 tablespoon instant espresso powder
- 1/2 cup (120ml) buttermilk, room temperature
- 1/3 cup (80ml) vegetable oil
- 1 large egg, room temperature
- 1 teaspoon vanilla extract
- 1.5 cups (180g) all-purpose flour
- 1 cup (200g) granulated sugar
- 1 teaspoon baking powder
- 1/2 teaspoon baking soda
- 1/4 teaspoon salt
- 1/2 cup (120ml) buttermilk, room temperature
- 1/3 cup (80ml) vegetable oil
- 1 large egg, room temperature
- 1 tablespoon vanilla bean paste (or seeds from one vanilla bean)
- 2 cups (4 sticks, 452g) unsalted butter, softened
- 6 cups (720g) powdered sugar, sifted if lumpy
- 1/4 cup (60ml) heavy cream (or whole milk)
- 2 teaspoons vanilla extract
- 1/4 teaspoon salt
- Chocolate shavings (for decoration, optional)
- Fresh strawberries, halved (for decoration, optional)
- Gold sprinkles (for decoration, optional)
Instructions
- Preheat oven to 350°F (175°C). Grease three 8-inch round cake pans with butter or baking spray, line bottoms with parchment paper circles. Do NOT grease sides.
- Make strawberry layer: Pulse freeze-dried strawberries in a food processor until fine powder. In a bowl, whisk flour, sugar, baking powder, baking soda, salt. In another bowl, whisk buttermilk, oil, egg, vanilla, strawberry powder. Combine wet and dry until just mixed. Add pink food coloring if desired. Pour into one prepared pan.
- Make chocolate layer: Whisk flour, cocoa powder, sugar, baking powder, baking soda, salt, espresso powder. In another bowl, whisk buttermilk, oil, egg, vanilla. Combine until just mixed. Pour into second pan.
- Make vanilla layer: Whisk flour, sugar, baking powder, baking soda, salt. In another bowl, whisk buttermilk, oil, egg, vanilla bean paste. Combine until just mixed. Pour into third pan.
- Bake all three pans for 22-26 minutes, rotating halfway. Cakes are done when toothpick inserted comes out clean or with few moist crumbs. Cool in pans on wire racks for 10 minutes, then invert onto racks to cool completely. Remove parchment.
- Make frosting: Beat softened butter on medium speed until creamy (2 minutes). Add powdered sugar one cup at a time, beating on low. Add heavy cream, vanilla, salt. Beat on medium-high for 3-4 minutes until light and fluffy. Adjust consistency with extra cream or powdered sugar if needed.
- Level cake tops with a serrated knife if domed. Place strawberry layer on cake board, spread 1/2 cup frosting. Top with vanilla layer, another 1/2 cup frosting. Top with chocolate layer, cut-side down.
- Spread a thin crumb coat over entire cake. Refrigerate 20 minutes. Apply remaining frosting in a thicker, even layer using offset spatula and turntable if available.
- Decorate with chocolate shavings, fresh strawberries, and gold sprinkles. Refrigerate at least 30 minutes before slicing.
Notes
Room temperature ingredients matter. Don’t overmix. Weigh flour for accuracy. Use freeze-dried strawberries, not fresh. Chill between layers for clean frosting. Warm knife for clean slices. If cake domes, freeze layers 20 minutes before leveling.
Nutrition
- Serving Size: 1 slice
- Calories: 520
- Sugar: 48
- Sodium: 320
- Fat: 28
- Saturated Fat: 16
- Carbohydrates: 66
- Fiber: 2
- Protein: 5
Keywords: Neapolitan cake, layer cake, birthday cake, strawberry cake, chocolate cake, vanilla cake, fall dessert, homemade cake