I wasn’t expecting baking advice from a seven-year-old dressed as a tiny vampire, but there I was, at a Halloween block party, watching him explain the exact science of pressing Rice Krispie treats into a pumpkin-shaped mold. “You gotta butter your hands first,” he said, absolutely serious, “or it sticks to your soul.” His mom shrugged at me from behind a bowl of punch. “He watched a YouTube video. That’s all he talks about now.” Honestly, I had been planning to make something much more complicated for my own kids’ Halloween party—something with layers and fancy frosting. But this kid, with his plastic fangs slipping every other word, made me rethink everything. He was right. Sometimes the simplest thing is the best thing. So I went home, grabbed a box of cereal, and made these Kid-Approved Rice Krispie Jack-O-Lantern Treats with my own crew. And you know what? They were perfect. No fuss, no stress, and the mess was mostly contained to their sticky little fingers. This recipe stayed with me because it proved that Halloween magic doesn’t come from a complicated bakery—it comes from a kitchen counter covered in melted marshmallow and a kid who just wants to help.
Why You’ll Love This Recipe
Let me tell you, I have tested a lot of Halloween treats over the years. Some were gorgeous but took three hours. Others were fast but tasted like cardboard. These Kid-Approved Rice Krispie Jack-O-Lantern Treats hit the sweet spot every single time. They are quick, they are easy, and they actually taste amazing.
- Quick & Easy: From start to finish, you are looking at about 20 minutes of active time. No baking, no complicated steps. Just melt, mix, and press.
- Simple Ingredients: You probably already have everything in your pantry. Rice Krispies cereal, marshmallows, butter, and a little orange food coloring. That is it.
- Perfect for Halloween Parties: Whether you are hosting a classroom celebration, a neighborhood get-together, or just a cozy night at home, these treats are a guaranteed hit.
- Crowd-Pleaser: Kids absolutely love them. And honestly, adults do too. I have seen grown-ups sneak three of these before the party even started.
- Unbelievably Delicious: The combination of crispy cereal and gooey marshmallow is pure comfort. The orange color and jack-o-lantern face just make them more fun.
What makes this recipe different from all the other versions out there? It is the texture. I have perfected the ratio of marshmallow to cereal so that every bite is soft, chewy, and just the right amount of crunchy. No rock-hard treats here. Plus, I have a trick for getting that bright orange color without it looking artificial. It is the little things, you know?
This recipe isn’t just good—it is the kind that makes you close your eyes after the first bite. It is Halloween comfort food reimagined: faster, simpler, but with the same soul-soothing satisfaction. Perfect for impressing your kids without stressing yourself out.
What Ingredients You Will Need
This recipe uses simple, everyday ingredients to deliver big flavor and fun texture without any fuss. Most of these are pantry staples, so you probably already have them on hand.
- 3 tablespoons unsalted butter, plus more for greasing (I use salted butter in a pinch, just skip the extra salt)
- 1 package (10 ounces) regular marshmallows, or about 40 large marshmallows (Jet-Puffed works great)
- 6 cups Rice Krispies cereal, or any crispy rice cereal (store brands work fine too)
- Orange gel food coloring, about 1/2 teaspoon (gel gives a brighter color than liquid; I prefer Wilton brand)
- Black decorating gel, for drawing jack-o-lantern faces (or melted chocolate chips in a piping bag)
- Nonstick cooking spray, for easy cleanup
Ingredient Tips: For the best texture, use fresh marshmallows. Stale ones won’t melt as smoothly. If you are making these for a school party, check for nut-free labels on your cereal. Most are, but it never hurts to double-check. For a dairy-free version, use vegan butter and vegan marshmallows—they work surprisingly well. The orange gel food coloring is key here. Liquid coloring can make the mixture too wet and dull the color. Trust me on this one. I learned the hard way.
Equipment Needed
You don’t need any fancy gadgets for these treats. Just a few basic tools you probably already have in your kitchen.
- Large saucepan (at least 4-quart size, so you have room to stir)
- Wooden spoon or silicone spatula (silicone is easier to clean, honestly)
- 9×13-inch baking pan (or a rimmed baking sheet if you want thinner treats)
- Parchment paper or wax paper (for pressing and for lining the pan)
- Small round cookie cutter (about 2.5 inches in diameter, or a drinking glass works in a pinch)
- Sharp knife or pizza cutter (for cutting shapes if you don’t have a cookie cutter)
- Measuring cups and spoons
If you don’t have a pumpkin-shaped cookie cutter, no worries. A simple round cutter works perfectly, and you can draw the jack-o-lantern face on top. I have even used the rim of a mason jar in a pinch. It is all about making it work with what you have. Budget-friendly tip: check your local dollar store for Halloween-themed cookie cutters. They are usually a buck or two.
Preparation Method
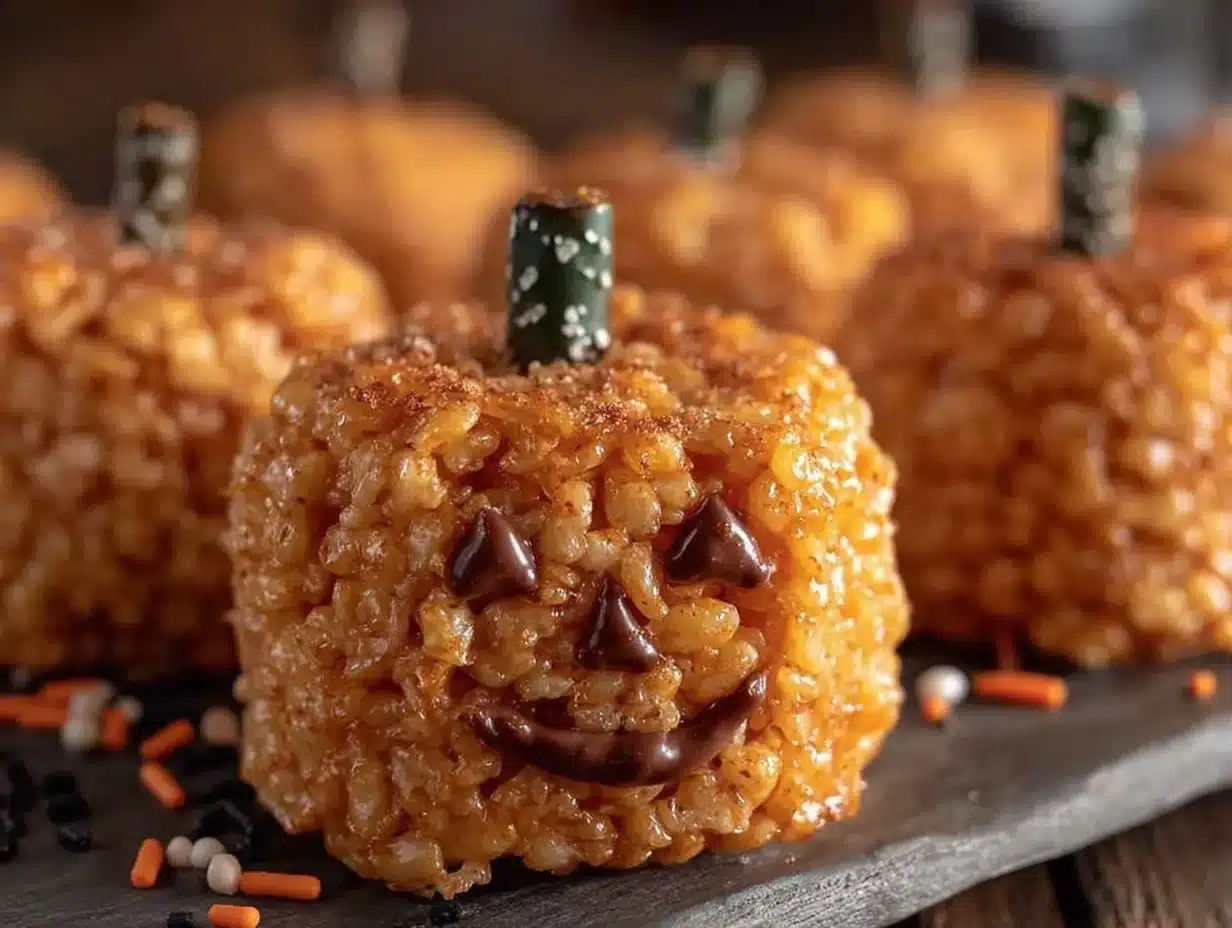
Alright, let’s get to the fun part. Follow these steps carefully, and you will have perfect jack-o-lantern treats every time.
- Prep your pan. Line a 9×13-inch baking pan with parchment paper, leaving some overhang on the sides. Lightly grease the parchment with butter or nonstick spray. This makes lifting the treats out super easy later.
- Melt the butter. In a large saucepan over medium-low heat, melt the 3 tablespoons of butter. Stir occasionally so it doesn’t burn. This takes about 2 minutes. You will know it is ready when it is fully liquid and starting to bubble gently.
- Add the marshmallows. Pour the entire bag of marshmallows into the saucepan. Stir constantly with your wooden spoon or spatula until they are completely melted and smooth. This takes about 4 to 5 minutes. Do not walk away here—marshmallows can scorch quickly. The mixture should be thick and glossy.
- Add the orange color. Remove the saucepan from the heat. Stir in the orange gel food coloring until the color is evenly distributed. Start with 1/4 teaspoon, then add more if you want a deeper orange. Remember, the color will lighten a bit when you add the cereal. I usually use about 1/2 teaspoon total.
- Mix in the cereal. Add the 6 cups of Rice Krispies cereal all at once. Fold gently until the cereal is evenly coated with the marshmallow mixture. Be careful not to crush the cereal—you want those crispy bits intact. This takes about 1 to 2 minutes of gentle folding.
- Press into the pan. Transfer the mixture to your prepared pan. Lightly grease your hands with butter or nonstick spray. Press the mixture evenly into the pan. Do not press too hard or the treats will be dense. You want them thick but not compacted. This is where that kid’s advice about buttering your hands really comes in handy.
- Let them set. Allow the treats to cool at room temperature for about 30 minutes. Do not refrigerate them—that can make them too hard. They should be firm but still slightly warm to the touch.
- Cut into shapes. Once set, lift the treats out of the pan using the parchment overhang. Use your round cookie cutter to cut out circles. If you are using a knife, cut into squares or rectangles. You should get about 12 to 15 shapes depending on the size of your cutter.
- Draw the faces. Use the black decorating gel to draw jack-o-lantern faces on each treat. Classic triangle eyes and a jagged smile work best. Get creative—you can do silly faces, scary faces, or even let the kids design their own.
- Let the faces set. Allow the decorating gel to dry for about 10 minutes before serving or stacking. This keeps the faces from smudging.
Sensory Cues: When the marshmallows are melting, you will smell that sweet, toasty aroma. The mixture should look thick and stretchy when you lift the spoon. When you press the treats into the pan, they should feel warm and slightly sticky but not wet. The finished treats should have a slight give when you press them—not rock hard.
Cooking Tips & Techniques
I have made these treats probably twenty times now, and I have learned a few things along the way. Let me share the hard-won wisdom so you don’t make the same mistakes I did.
Low and slow is the way to go. When melting the butter and marshmallows, keep the heat on medium-low. High heat will scorch the marshmallows and give you a burnt, bitter taste. I learned this the hard way when I tried to rush things for a school party. The treats were edible, but barely. Take your time.
Don’t overmix the cereal. Once you add the cereal, fold gently until just combined. Overmixing crushes the cereal and gives you dense, hard treats. You want those airy pockets. Think of it like folding chocolate chips into cookie dough—gentle and patient.
Butter your hands generously. This is not optional. The marshmallow mixture is incredibly sticky. A light coat of butter on your hands makes pressing the mixture into the pan so much easier. Some people use water, but I find butter works better and adds a tiny bit of flavor.
Use gel food coloring, not liquid. Liquid food coloring adds extra moisture to the mixture, which can make the treats soggy. Gel coloring gives you a vibrant orange without the water. Plus, a little goes a long way. I have been using the same little bottle for two Halloweens now.
Timing matters. These treats are best made the day you plan to serve them. They stay fresh for about 2 days in an airtight container, but the texture is best on day one. If you are making them for a party, prep the treats the night before but wait to draw the faces until right before serving. The faces stay sharper that way.
Variations & Adaptations
One of the best things about this recipe is how easy it is to customize. Here are some variations I have tried and loved.
Chocolate Drizzle Jack-O-Lanterns: After drawing the faces, drizzle melted white or dark chocolate over the tops. It adds a fancy touch that looks like you spent way more effort than you actually did. My kids love the chocolate version best.
Gluten-Free Version: Rice Krispies are naturally gluten-free, but double-check the label to be sure. Some store brands may have cross-contamination. Use gluten-free marshmallows (most are, but again, check). This version tastes exactly the same, so no one will know the difference.
Spiced Pumpkin Treats: Add 1/2 teaspoon of pumpkin pie spice to the marshmallow mixture along with the orange coloring. It gives a subtle fall flavor that pairs beautifully with the crispy cereal. I tried this last year and it was a hit with the adults at the party.
Mini Treats for Lunchboxes: Instead of cutting large circles, use a small cookie cutter (about 1.5 inches) to make mini jack-o-lanterns. They are perfect for school lunchboxes or Halloween goody bags. Just reduce the face-drawing time—those tiny smiles are fiddly.
Nut-Free and Allergy-Friendly: This recipe is naturally nut-free if you use safe cereal. For a vegan version, use vegan butter and vegan marshmallows. Dandies brand works really well. The texture is slightly different—a bit chewier—but still delicious.
Serving & Storage Suggestions
These treats are best served at room temperature. The texture is perfect—soft, chewy, and slightly crispy. If you have refrigerated them, let them sit out for about 15 minutes before serving to soften up.
Presentation Ideas: Arrange the jack-o-lantern treats on a platter lined with orange or black napkins. For a Halloween party, place them on a cake stand for a fun centerpiece. You can also stick a lollipop stick into each treat and arrange them in a vase for a “bouquet” of jack-o-lanterns. My kids went crazy for that presentation.
Complementary Dishes: These treats pair wonderfully with warm apple cider or a mug of hot chocolate. For a full Halloween spread, serve them alongside spider web dip with pretzel sticks or mummy hot dogs for a savory contrast.
Storage Instructions: Store the treats in an airtight container at room temperature for up to 2 days. Do not refrigerate them—the cold air makes them hard and stale. If you need to store them longer, you can freeze them. Wrap each treat individually in plastic wrap, then place in a freezer bag. They will keep for up to 3 months. Thaw at room temperature for about 20 minutes before serving.
Flavor Development: These treats are best fresh, but they still taste great on day two. The marshmallow flavor mellows slightly, and the cereal softens a bit. Honestly, some people prefer them day-old because they are easier to bite into. The faces might smudge a little, but that just adds to the Halloween charm.
Nutritional Information & Benefits
Let’s be real—these are treats, not health food. But here is the breakdown so you know what you are getting.
Estimated Nutritional Values (per treat, based on 12 servings):
- Calories: 180
- Total Fat: 6g
- Saturated Fat: 3.5g
- Cholesterol: 15mg
- Sodium: 160mg
- Total Carbohydrates: 32g
- Dietary Fiber: 0g
- Sugars: 18g
- Protein: 1g
Health Benefits: While these are not exactly a superfood, Rice Krispies are fortified with iron and B vitamins. The butter adds a small amount of vitamin A. And let’s be honest—the real benefit here is the joy they bring. A little treat now and then is part of a balanced life. I always tell my kids that Halloween is about fun, not nutrition. We eat our veggies the rest of the year.
Dietary Considerations: This recipe is naturally nut-free and can be made gluten-free and vegan with simple substitutions. It contains dairy (butter) and gluten (cereal, though most is gluten-free). Always check labels if you are serving to someone with allergies.
Conclusion
These Kid-Approved Rice Krispie Jack-O-Lantern Treats are everything a Halloween recipe should be: simple, fun, and absolutely delicious. They come together in minutes, use ingredients you probably already have, and are guaranteed to make your kids smile. I love this recipe because it reminds me that the best Halloween memories don’t come from perfect, bakery-style treats. They come from sticky fingers, lopsided jack-o-lantern faces, and the sound of kids laughing in the kitchen.
I encourage you to make these your own. Let your kids draw the faces. Try different colors or shapes. Add sprinkles or chocolate drizzle. The beauty of this recipe is that it is forgiving and flexible. You cannot really mess it up.
So grab a box of cereal and some marshmallows, and get ready for some Halloween fun. I would love to hear how yours turn out! Leave a comment below with your favorite jack-o-lantern face design, or share a photo of your treats. And if you try a fun variation, tell me about it—I am always looking for new ideas. Happy Halloween, friends!
Frequently Asked Questions
Can I use homemade marshmallows for this recipe?
You can, but I do not recommend it. Homemade marshmallows have a different moisture content and may not melt as smoothly. Stick with store-bought for the best texture.
How do I keep the treats from getting too hard?
The key is not to overheat the marshmallows and not to press the mixture too firmly into the pan. Low heat and gentle hands are your best friends here.
Can I make these treats ahead of time?
Yes! You can make them up to 2 days in advance. Store them in an airtight container at room temperature. Wait to draw the faces until right before serving for the best look.
What if I don’t have orange gel food coloring?
You can use liquid food coloring, but the color will be less vibrant and the treats may be slightly softer. Start with 10 to 15 drops and add more until you get the shade you want.
Can I freeze these treats?
Absolutely. Wrap each treat individually in plastic wrap, then place in a freezer bag. They will keep for up to 3 months. Thaw at room temperature for about 20 minutes before serving.
Pin This Recipe!
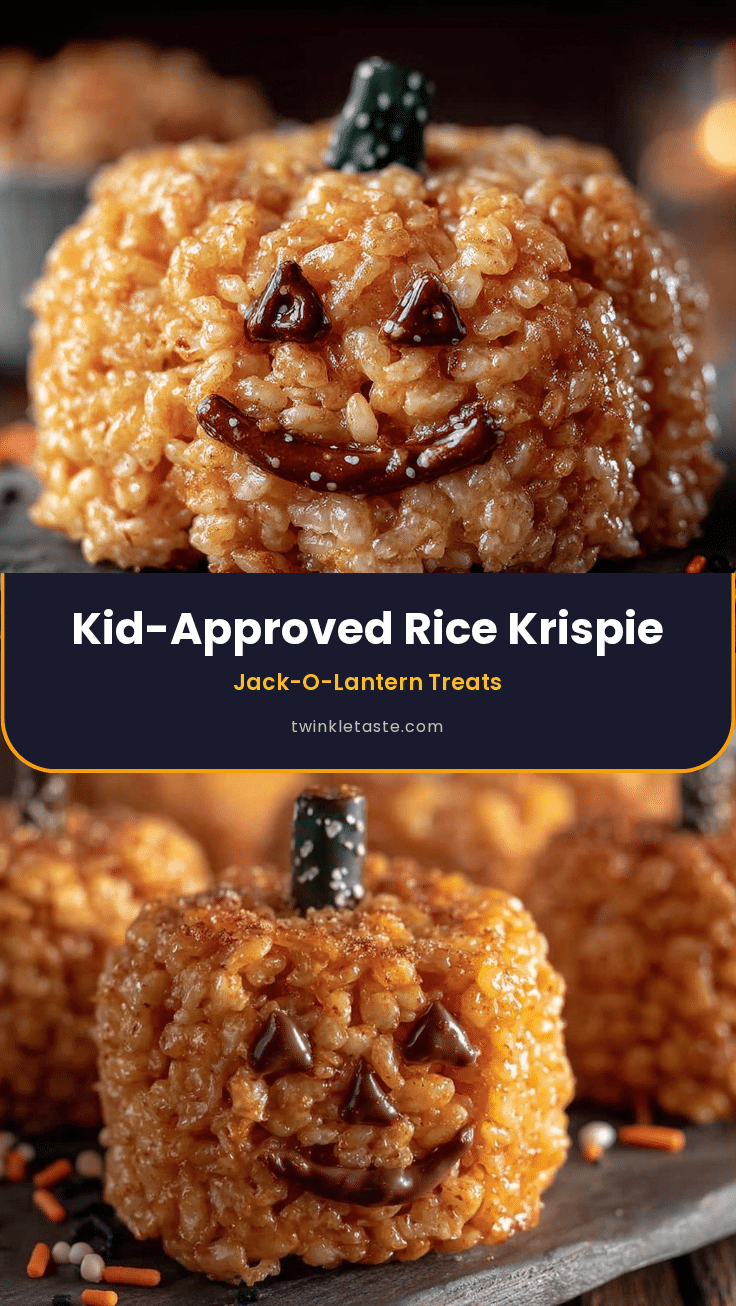
Kid-Approved Rice Krispie Jack-O-Lantern Treats: Easy Halloween
These Kid-Approved Rice Krispie Jack-O-Lantern Treats are quick, easy, and perfect for Halloween parties. Made with simple pantry ingredients, they are a guaranteed hit with kids and adults alike.
- Prep Time: 20 minutes
- Cook Time: 10 minutes
- Total Time: 30 minutes
- Yield: 12 servings 1x
- Category: Dessert
- Cuisine: American
Ingredients
- 3 tablespoons unsalted butter, plus more for greasing
- 1 package (10 ounces) regular marshmallows (or about 40 large marshmallows)
- 6 cups Rice Krispies cereal (or any crispy rice cereal)
- 1/2 teaspoon orange gel food coloring (or to taste)
- Black decorating gel (for drawing jack-o-lantern faces)
- Nonstick cooking spray (for easy cleanup)
Instructions
- Prep your pan. Line a 9×13-inch baking pan with parchment paper, leaving some overhang on the sides. Lightly grease the parchment with butter or nonstick spray.
- Melt the butter. In a large saucepan over medium-low heat, melt the 3 tablespoons of butter. Stir occasionally until fully liquid and starting to bubble gently, about 2 minutes.
- Add the marshmallows. Pour the entire bag of marshmallows into the saucepan. Stir constantly until completely melted and smooth, about 4 to 5 minutes. Do not walk away.
- Add the orange color. Remove the saucepan from the heat. Stir in the orange gel food coloring until evenly distributed. Start with 1/4 teaspoon, then add more if desired (about 1/2 teaspoon total).
- Mix in the cereal. Add the 6 cups of Rice Krispies cereal all at once. Fold gently until the cereal is evenly coated with the marshmallow mixture, about 1 to 2 minutes. Be careful not to crush the cereal.
- Press into the pan. Transfer the mixture to the prepared pan. Lightly grease your hands with butter or nonstick spray. Press the mixture evenly into the pan. Do not press too hard.
- Let them set. Allow the treats to cool at room temperature for about 30 minutes. Do not refrigerate.
- Cut into shapes. Once set, lift the treats out of the pan using the parchment overhang. Use a round cookie cutter (about 2.5 inches) to cut out circles, or cut into squares with a knife. You should get about 12 to 15 shapes.
- Draw the faces. Use the black decorating gel to draw jack-o-lantern faces on each treat (classic triangle eyes and a jagged smile).
- Let the faces set. Allow the decorating gel to dry for about 10 minutes before serving or stacking.
Notes
For best texture, use fresh marshmallows. Do not overmix the cereal. Butter your hands generously before pressing the mixture into the pan. Use gel food coloring for a vibrant orange without extra moisture. These treats are best made the day you plan to serve them. Store in an airtight container at room temperature for up to 2 days. Do not refrigerate.
Nutrition
- Serving Size: 1 treat
- Calories: 180
- Sugar: 18
- Sodium: 160
- Fat: 6
- Saturated Fat: 3.5
- Carbohydrates: 32
- Protein: 1
Keywords: Rice Krispie treats, Halloween, jack-o-lantern, easy, kid-friendly, no-bake


