I was standing in the baking aisle of our local grocery store last October, staring at a display of candy eyeballs, when the strangest thing happened. My son, who was maybe six at the time, tugged my sleeve and whispered, “Mom, we should make witch fingers.” And just like that, I was transported back to my own childhood—sitting cross-legged on my neighbor Mrs. Kowalski’s linoleum kitchen floor, watching her roll out dough for what she called “witches’ claws” every Halloween. She’d let me press the almond slivers into the dough for the fingernails, and I remember thinking it was the most magical thing I’d ever done. I couldn’t tell you what her actual recipe was—she passed away years ago—but the feeling of those afternoons, the smell of butter and cinnamon, the way she’d laugh when I made the fingers too fat or too skinny, that stuck with me. Honestly, I’d tried to recreate that memory a dozen times and always came up short. But standing there with my own kid, looking at those googly eyes, I thought, maybe I don’t need her exact recipe. Maybe I just need to make my own version, with my own kid. So I grabbed a bag of pretzel rods, some white chocolate, and a tube of green gel food coloring, and I figured it out as I went. Let me tell you, the first batch was a hot mess—the chocolate was too thin, the almonds kept sliding off, and I may have used way too much food coloring, turning the whole thing a sort of swampy green. But my son didn’t care. He thought they were perfect. And honestly, that’s the whole point, isn’t it? Maybe you’ve been there, trying to recreate a memory for your own family and realizing it doesn’t have to be perfect—it just has to be yours. These Witch Finger Pretzel Rods are that for us now. They’re simple, they’re silly, and they’re exactly the kind of kitchen disaster-turned-tradition that makes Halloween special.
Why You’ll Love This Recipe
Let’s be real for a second—most Halloween treats look amazing on Pinterest and then take three hours to make and fall apart the second you try to move them. These Witch Finger Pretzel Rods are not that. I’ve tested this recipe at least four times (and failed twice, but we don’t talk about those), and what I’ve landed on is a foolproof, kid-friendly activity that actually works.
- Quick & Easy: From start to finish, you’re looking at about 20 minutes of active time. The hardest part is waiting for the chocolate to set, and even that’s only 15 minutes in the fridge.
- Simple Ingredients: You need exactly five things—pretzel rods, white chocolate chips, green food coloring, slivered almonds, and a little coconut oil. That’s it. No weird specialty items.
- Perfect for Halloween Parties: Whether it’s a classroom treat, a spooky movie night snack, or just something fun to do on a rainy October afternoon, these fit the bill. They’re portable, they don’t get soggy, and kids absolutely lose their minds over them.
- Crowd-Pleaser: I brought a batch to my son’s kindergarten Halloween party, and they were gone in five minutes. The teachers even asked for the recipe. Plus, they’re naturally gluten-free if you use certified gluten-free pretzels.
- Unbelievably Delicious: Here’s the thing—salty pretzels + sweet white chocolate + buttery almonds is a combo that works any time of year. The green color is just for fun. The flavor is legitimately good.
What makes this recipe different from all the other witch finger tutorials out there? It’s the technique. I figured out that adding a tiny bit of coconut oil to the white chocolate makes it smooth enough to dip without being too thin. And pressing the almond on at a slight angle, rather than straight on, makes it look way more like a real fingernail. These aren’t just cute—they’re actually delicious and they hold up. That’s the kind of recipe I want to share with you.
What Ingredients You Will Need
This recipe uses simple, mostly pantry-staple ingredients to deliver a treat that’s equal parts spooky and scrumptious. You probably already have most of these in your kitchen, which is exactly how I like to roll.
- Pretzel Rods (1 standard bag, about 12-16 rods): These are the “fingers.” Look for thick, sturdy pretzel rods that won’t break easily when you dip them. I’ve tried a few brands, and I honestly prefer the store-brand ones from Target or Walmart—they’re usually thicker and more uniform. If you can only find thin ones, just be extra gentle when dipping.
- White Chocolate Chips (1 cup, about 6 oz): This is what gives the pretzels that creepy green color. I recommend using a good-quality brand like Ghirardelli or Guittard for the smoothest melt. The cheaper chips sometimes have waxy coatings that don’t melt as nicely. If you’re dairy-free, there are some great vegan white chocolate chips out there—I’ve used the Enjoy Life brand and they work perfectly.
- Green Gel Food Coloring (about 1/4 teaspoon): This is non-negotiable for the witchy look. I strongly recommend gel food coloring over liquid drops—liquid can seize your chocolate and make it grainy. I use Americolor brand, but any gel works. Start with a tiny amount and add more until you get that perfect swampy green.
- Slivered Almonds (about 1/2 cup): These become the fingernails. Look for slivered almonds that are relatively flat and uniform in size. If you only have whole almonds, you can slice them lengthwise yourself—it’s a little fussy but doable. For a nut-free version, try using sliced dried apricots or even small pieces of green apple skin (though those won’t last as long).
- Coconut Oil (1 teaspoon): This is my secret weapon. Adding a tiny bit of coconut oil to the white chocolate when you melt it makes the coating smooth, shiny, and thin enough to coat the pretzels evenly without getting clumpy. You can also use vegetable shortening if you don’t have coconut oil.
- Optional: Green Sanding Sugar or Sprinkles: If you want to add a little texture or sparkle, you can roll the dipped pretzels in green sanding sugar before the chocolate sets. I skip this most of the time because I like the smooth look, but my kids love the sparkly version.
That’s everything. Five ingredients (six if you count the sprinkles), zero stress. I love recipes like this—where the whole is so much more than the sum of its parts.
Equipment Needed
You don’t need any fancy gadgets for this one. Here’s what you’ll need to pull it off:
- Microwave-Safe Bowl: For melting the white chocolate. I use a glass Pyrex measuring cup because the spout makes dipping easier, but any microwave-safe bowl works.
- Baking Sheet: Lined with parchment paper or a silicone baking mat. The parchment is key—without it, the chocolate will stick and you’ll be peeling pretzels off your pan for an hour.
- Spatula or Spoon: For stirring the chocolate and for helping to coat the pretzels if needed.
- Small Knife or Toothpick: For making little knuckle lines on the pretzels before the chocolate sets. I use a toothpick—it makes the thinnest, most realistic lines.
- Refrigerator Space: You’ll need room for the baking sheet to sit flat while the chocolate sets. About 15 minutes is all it takes.
If you don’t have a microwave, you can melt the white chocolate in a double boiler on the stove. Just be careful not to get any water in the chocolate—it will seize up and become unusable. I learned that the hard way, and let me tell you, there’s nothing sadder than a bowl of ruined chocolate.
Preparation Method
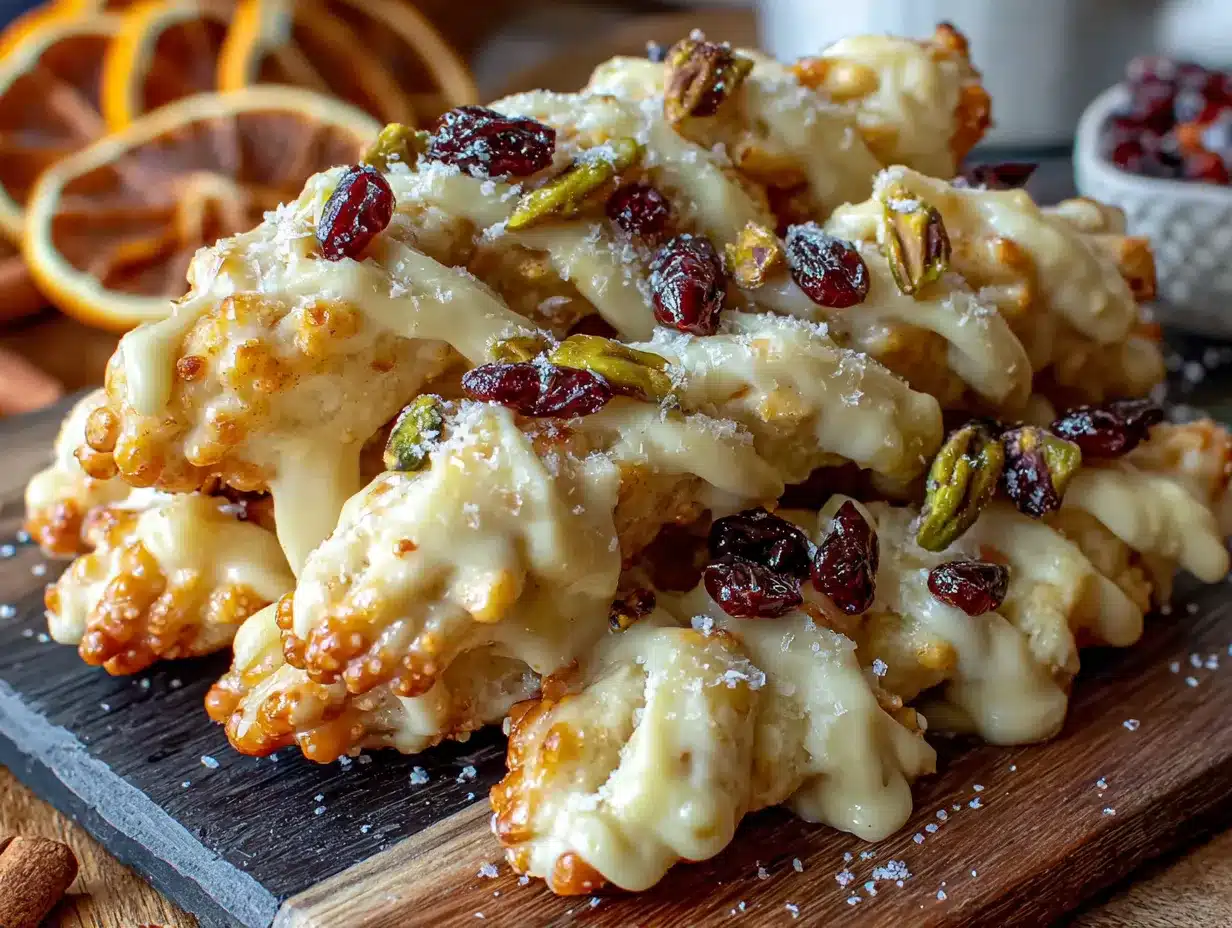
Alright, let’s get to the fun part. Here’s how to make these creepy little fingers step by step. I’ve included all the little tricks I’ve picked up along the way.
- Prep Your Workspace (5 minutes): Line a large baking sheet with parchment paper. Lay out your pretzel rods, slivered almonds, and a small bowl of green sanding sugar if you’re using it. Having everything ready before you start melting chocolate will save you a lot of stress. Trust me on this—I once tried to dig almonds out of the pantry while holding a bowl of melted chocolate, and it was not pretty.
- Melt the White Chocolate (2-3 minutes): Place 1 cup of white chocolate chips and 1 teaspoon of coconut oil in a microwave-safe bowl. Microwave in 30-second intervals, stirring well after each interval, until the chocolate is smooth and completely melted. This usually takes about 2 minutes total. Don’t rush this—overheating white chocolate will make it seize up and turn grainy. It should be warm, not hot.
- Add the Green Color (1 minute): Stir in about 1/4 teaspoon of green gel food coloring. Start with less—you can always add more, but you can’t take it away. I like to aim for a color that’s a little lighter than I think I want, because it always darkens slightly as it cools. Stir until the color is completely uniform. If you see streaks, keep stirring.
- Dip the Pretzels (10 minutes): Hold a pretzel rod by one end and dip it into the melted green chocolate, leaving about an inch undipped at the top (that’s the “wrist” area, and it looks more realistic with a little bare pretzel showing). Gently twist the pretzel as you lift it out to let the excess chocolate drip off. Place it on the parchment-lined baking sheet. Repeat with all the pretzels. Work quickly—the chocolate will start to thicken as it cools.
- Add the Fingernails (5 minutes): While the chocolate is still wet, press a slivered almond onto the tip of each pretzel rod. Press it at a slight angle, like a real fingernail, with the pointed end extending just past the end of the pretzel. Gently press down so it sticks. Don’t push too hard or the almond will sink into the chocolate and disappear.
- Create Knuckle Lines (3 minutes): Using a toothpick or the tip of a small knife, gently drag two or three lines across the chocolate coating to create “knuckles.” I make mine about halfway down the dipped portion. The lines should be shallow—just enough to create a crease. If you go too deep, you’ll expose the pretzel underneath, which is fine for a rustic look but not as polished.
- Set the Chocolate (15 minutes): Place the baking sheet in the refrigerator for about 15 minutes, or until the chocolate is completely firm to the touch. Don’t leave them in longer than 20 minutes or the pretzels can start to absorb moisture and get soft.
- Serve or Store: Once the chocolate is set, your Witch Finger Pretzel Rods are ready to serve. They’re best eaten within 24 hours, but they’ll keep in an airtight container at room temperature for up to 3 days.
Cooking Tips & Techniques
I’ve made these enough times to know exactly what can go wrong, so let me save you some trouble. Here are the things I wish someone had told me before my first attempt.
Don’t Overheat the Chocolate. White chocolate is temperamental. It burns easily and turns into a grainy, unusable mess. Always melt it in short bursts and stir between each one. If it starts to look thick or clumpy, you’ve gone too far. At that point, you can try whisking in a tiny bit more coconut oil, but honestly, it’s usually better to start over.
Work in Small Batches. If you’re making a double batch, melt the chocolate in two separate rounds. The chocolate will start to set as you work, and if you’re trying to dip 30 pretzels from one bowl, the last ones will have thick, clumpy coating. Melting fresh chocolate halfway through keeps everything smooth and easy.
Temperature Matters. Your kitchen temperature affects how the chocolate sets. If it’s a warm day, the chocolate might take longer to firm up. Pop them in the fridge for a few extra minutes if needed. If it’s cold and dry, they might set on the counter in 10 minutes. Just keep an eye on them.
The Almond Angle. This is the detail that makes or breaks the realism. Press the almond on at a slight upward angle, like a fingernail growing out from the fingertip. If you press it straight on, it looks more like a weird almond stuck to a pretzel. I learned this by comparing my first batch (straight, silly-looking) to my second batch (angled, genuinely creepy). The angle makes all the difference.
Get the Kids Involved. This is supposed to be fun, right? Let the kids press the almonds on and draw the knuckle lines. Will some of them look wonky? Absolutely. But that’s part of the charm. My son’s first batch had almonds pointing in every direction, and we laughed about it for weeks. Perfection is overrated. Connection is what matters.
Variations & Adaptations
One of the best things about this recipe is how easy it is to adapt. Here are a few ways to switch it up based on what you have on hand or who you’re feeding.
Nut-Free Version: If you’re making these for a classroom or a party with kids who have nut allergies, skip the almonds. Instead, use a small sliver of dried apricot or a piece of green apple skin for the fingernail. The apple skin version is especially fun because it adds a little tartness that contrasts with the sweet chocolate. Just keep in mind that the apple will start to brown after a few hours, so these are best eaten right away.
Chocolate Lovers’ Version: Not a fan of white chocolate? No problem. Use dark or milk chocolate chips instead, and skip the green food coloring. They won’t look like witch fingers anymore, but they’ll taste incredible. You can call them “monster claws” or “goblin fingers” instead. My husband actually prefers this version—he says the white chocolate is too sweet for him.
Spooky Sparkle Version: Before the chocolate sets, roll the dipped pretzels in black or orange sanding sugar. It gives them a sparkly, magical look that kids absolutely love. I did this for a Halloween party last year, and they looked like they belonged in a fairy tale. Just make sure you roll them immediately after dipping, before the chocolate starts to set.
Dip the Tips: For a slightly different look, only dip the tip of each pretzel rod (about an inch) instead of the whole thing. This creates a “fingertip” effect that’s a little more subtle. My daughter prefers this version because she says the full-coated ones are “too much chocolate.” I don’t understand that logic, but I respect it.
Serving & Storage Suggestions
These Witch Finger Pretzel Rods are best served at room temperature, straight from the fridge or counter. The chocolate should be firm but not hard, and the pretzel should still have that satisfying crunch.
For presentation, I like to arrange them in a tall glass jar or a small vase, with the “fingernails” pointing up. It looks like a bouquet of creepy fingers, which is exactly the vibe you want for Halloween. You can also lay them out on a platter, arranged in a fan pattern, for a more traditional snack spread.
These pair beautifully with other Halloween treats—think popcorn balls, caramel apples, or a bowl of candy corn. For a spooky movie night, serve them alongside a warm mug of apple cider or hot chocolate. The salty-sweet combo is perfect for munching.
Storage: Store any leftover pretzels in an airtight container at room temperature for up to 3 days. Do not refrigerate them after the initial set—the fridge can make the pretzels soft and stale. If you live in a humid climate, you might want to add a silica gel packet to the container to keep them crisp. I’ve also frozen them successfully for up to a month—just layer them in a freezer-safe container with parchment paper between layers, and thaw at room temperature for about 15 minutes before serving.
One thing I’ve noticed: these actually taste better the next day. The flavors meld together, and the chocolate develops a slightly creamier texture. So if you’re making them for a party, don’t stress about making them fresh—they’ll be just as good (if not better) the day after.
Nutritional Information & Benefits
Let’s be honest—these are a treat, not a health food. But here’s the breakdown if you’re curious. Per pretzel rod (based on a standard recipe with 16 rods), you’re looking at approximately 180 calories, 10 grams of fat, 22 grams of carbohydrates, and 3 grams of protein. The white chocolate adds sugar, but the pretzels provide a little bit of sodium and iron.
If you’re looking for a slightly healthier version, you can use dark chocolate instead of white—dark chocolate has more antioxidants and less sugar. You can also use gluten-free pretzel rods if you’re serving someone with celiac disease or a gluten sensitivity. The almonds add a small amount of healthy fats and vitamin E, which is a nice bonus.
From a wellness perspective, I think the real benefit here is the experience. This is a recipe that gets kids into the kitchen, teaches them a little bit about food science (why does chocolate seize? why does coconut oil make it smoother?), and creates a memory that lasts longer than the treat itself. That’s a kind of nutrition that doesn’t show up on a label.
Conclusion
These Witch Finger Pretzel Rods have become a Halloween tradition in our house, and I hope they become one in yours too. They’re simple enough to make on a busy weekday, fun enough to get the whole family involved, and delicious enough that you’ll find yourself sneaking one (or three) from the container when no one’s looking.
What I love most about this recipe is that it’s forgiving. If the chocolate gets a little thick, add a drop more coconut oil. If the almonds slide off, just press them back on. If the knuckle lines look more like chicken scratch than actual knuckles, who cares? They’re witch fingers. They’re supposed to look a little weird. The whole point is to have fun and make something that brings a smile to your kids’ faces.
I’d love to hear how yours turn out. Did you try a fun variation? Did your kids come up with a new way to decorate them? Drop a comment below and let me know—I read every single one, and I love seeing your photos. And if you’re looking for more Halloween fun, be sure to check out our spiderweb dip recipe or these mummy pizza bites for a full spooky spread.
Happy Halloween, and happy snacking!
Frequently Asked Questions
Can I make these Witch Finger Pretzel Rods ahead of time?
Absolutely! You can make them up to 3 days in advance. Store them in an airtight container at room temperature. I actually think they taste better the next day, so making them ahead is a great idea for party prep.
My white chocolate seized up and turned grainy. What went wrong?
This usually happens when the chocolate gets too hot or when a tiny bit of water gets into the bowl. Always melt white chocolate in short 30-second bursts, and make sure your bowl and utensils are completely dry. If it does seize, you can try whisking in a teaspoon of coconut oil or vegetable shortening to smooth it out.
Can I use milk chocolate instead of white chocolate?
Yes, but they won’t look like witch fingers anymore since you can’t dye milk chocolate green. They’ll look more like “chocolate claws” or “monster fingers.” They’re still delicious, and my husband actually prefers this version.
How do I keep the almonds from falling off?
Press the almond into the chocolate while it’s still very wet, and press firmly enough that the almond is slightly embedded. If the chocolate has started to set, the almond won’t stick as well. Work quickly, and if you need to, dip the almond itself in a little chocolate before pressing it on for extra adhesion.
Are these safe for kids with nut allergies?
Not in their original form, since they use almonds. But you can easily make a nut-free version by replacing the almonds with small slivers of dried apricot or pieces of green apple skin. Just make sure to use certified nut-free pretzel rods and check your white chocolate label for any nut contamination warnings.
Pin This Recipe!

Easy Witch Finger Pretzel Rods for Halloween Fun
These Witch Finger Pretzel Rods are a simple, kid-friendly Halloween treat made with pretzel rods, white chocolate, and slivered almonds. They’re quick to make, delicious, and perfect for parties or spooky movie nights.
- Prep Time: 20 minutes
- Cook Time: 0 minutes
- Total Time: 35 minutes
- Yield: 12-16 servings 1x
- Category: Dessert
- Cuisine: American
Ingredients
- 1 standard bag pretzel rods (about 12–16 rods)
- 1 cup white chocolate chips (about 6 oz)
- 1/4 teaspoon green gel food coloring
- 1/2 cup slivered almonds
- 1 teaspoon coconut oil
- Optional: green sanding sugar or sprinkles
Instructions
- Prep Your Workspace: Line a large baking sheet with parchment paper. Lay out pretzel rods, slivered almonds, and green sanding sugar if using.
- Melt the White Chocolate: Place 1 cup white chocolate chips and 1 teaspoon coconut oil in a microwave-safe bowl. Microwave in 30-second intervals, stirring well after each, until smooth and completely melted (about 2 minutes total).
- Add the Green Color: Stir in about 1/4 teaspoon green gel food coloring until uniform. Start with less and add more if needed.
- Dip the Pretzels: Hold a pretzel rod by one end and dip into the melted green chocolate, leaving about an inch undipped at the top. Gently twist as you lift to let excess drip off. Place on parchment-lined baking sheet. Repeat with all pretzels.
- Add the Fingernails: While chocolate is still wet, press a slivered almond onto the tip of each pretzel rod at a slight angle, with pointed end extending past the pretzel. Press gently to adhere.
- Create Knuckle Lines: Using a toothpick or small knife, gently drag 2-3 shallow lines across the chocolate coating to create knuckles, about halfway down the dipped portion.
- Set the Chocolate: Place baking sheet in refrigerator for about 15 minutes, until chocolate is completely firm.
- Serve or Store: Once set, serve immediately or store in an airtight container at room temperature for up to 3 days.
Notes
Don’t overheat white chocolate; melt in short bursts. Work in small batches if doubling. Press almonds at an angle for realistic fingernails. For nut-free version, use dried apricot slivers or green apple skin. These taste even better the next day.
Nutrition
- Serving Size: 1 pretzel rod
- Calories: 180
- Sugar: 14
- Sodium: 200
- Fat: 10
- Saturated Fat: 5
- Carbohydrates: 22
- Fiber: 1
- Protein: 3
Keywords: Halloween treats, witch fingers, pretzel rods, white chocolate, kid-friendly, easy Halloween recipe, spooky snacks


