Let me tell you, these aren’t your grandma’s deviled eggs—though she’d probably approve of the filling. These Quick Spooky Spider Deviled Eggs for Halloween are the perfect balance of creepy and cute, and they come together faster than you’d think. I mean, honestly, the hardest part is not eating all the filling before you pipe it onto the eggs.
- Quick & Easy: From start to finish, you’re looking at about 20 minutes of active prep time. The eggs do the hard work of boiling while you get the rest ready.
- Simple Ingredients: You probably already have everything in your fridge. Eggs, mayo, mustard, paprika—and black olives for the spiders. That’s it.
- Perfect for Halloween Parties: Whether it’s a classroom party, office potluck, or just a spooky movie night at home, these little guys steal the show every single time.
- Crowd-Pleaser: Kids go wild for them, and adults appreciate that they’re actually delicious—not just a gimmick.
- Unbelievably Delicious: Here’s the thing—the olive spiders add this briny, salty pop that complements the creamy filling in a way you wouldn’t expect. It’s not just a Halloween trick; it’s a treat.
What makes these different from every other spider deviled egg recipe out there? It’s all in the technique. I spent three batches figuring out the perfect way to slice the olives so the spiders actually stay put and don’t look like sad, squished bugs. Plus, I’ll show you my trick for getting the filling silky smooth without any lumps—because nobody wants lumpy spider eggs.
This is the kind of recipe that makes you feel like a Halloween hero without spending all day in the kitchen. You get to walk into the party with a platter of something that looks like it took hours, when really, you threw it together between folding laundry and answering emails. Trust me, I’ve been there.
What Ingredients You Will Need
This recipe uses simple, everyday ingredients to create something that looks far more complicated than it actually is. The magic is all in the presentation, not the grocery list.
- 12 large eggs (hard-boiled and peeled—I’ll share my foolproof method below)
- 1/3 cup mayonnaise (I prefer Duke’s for its tangy kick, but any brand works)
- 1 teaspoon yellow mustard (or Dijon if you want a sharper flavor)
- 1/2 teaspoon white vinegar (this is my secret weapon for brightness)
- 1/4 teaspoon salt (plus more to taste)
- 1/8 teaspoon black pepper
- 1/2 teaspoon paprika (smoked paprika adds a lovely depth, but regular works too)
- 1 can (6 ounces) large black olives (you need the big ones for the spider bodies—small olives make sad, tiny spiders)
- Optional: 1 tablespoon sweet pickle relish (my grandmother always added this, and I love the little pops of sweetness)
For the garnish, you’ll want a light dusting of paprika on top, and maybe some fresh chives if you’re feeling fancy. But honestly, the olives do all the decorating work for you.
Ingredient selection tip: Look for eggs that are at least a week old—they peel much easier than super fresh ones. I know it sounds backwards, but it’s true. And for the olives, get the jumbo pitted ones if you can find them. The bigger the olive, the more convincing your spider looks.
Substitution guidance: If you’re not a mayo fan, you can swap in plain Greek yogurt for a tangier, lighter filling. Just know the texture will be a little less rich. For a dairy-free version, use vegan mayo—I’ve tested it with Follow Your Heart brand and it worked beautifully.
Equipment Needed
You don’t need anything fancy here, which is part of the beauty. Here’s what you’ll need:
- Medium saucepan with a lid (for boiling the eggs)
- Large bowl filled with ice water (the ice bath is non-negotiable for easy peeling)
- Sharp knife and cutting board (a dull knife will smash the olives instead of slicing them)
- Small mixing bowl for the filling
- Fork or potato masher (for mashing the yolks—I prefer a fork because it gives me more control)
- Piping bag or zip-top bag (for filling the eggs neatly)
- Small paring knife (for slicing the olive spiders—trust me on this one)
Budget-friendly tip: Don’t have a piping bag? No problem. Just snip a tiny corner off a zip-top bag and use that. It works exactly the same, and you can toss it when you’re done. I’ve been doing this for years and honestly prefer it to actual piping bags.
Preparation Method
Alright, let’s get into the nitty-gritty. I’ve made these more times than I can count, so I’ve got all the little tricks dialed in.
-
Hard-boil the eggs. Place the eggs in a single layer in your saucepan and cover them with cold water by about an inch. Bring the water to a rolling boil over high heat. Once it’s boiling hard, cover the pot, turn off the heat, and let it sit for exactly 12 minutes. Set a timer—I’ve ruined too many batches by getting distracted.
-
Ice bath time. While the eggs are sitting, fill your large bowl with ice and cold water. As soon as the 12 minutes are up, use a slotted spoon to transfer the eggs to the ice bath. Let them chill for at least 10 minutes. This stops the cooking and makes peeling a million times easier.
-
Peel the eggs. Gently tap each egg on the counter to crack the shell all over, then roll it between your palms to loosen the shell. Start peeling from the wider end—there’s usually an air pocket there that helps you get under the membrane. Rinse any stubborn bits under cold water.
-
Slice the eggs in half. Using a sharp knife, cut each egg lengthwise. Wipe the knife clean between cuts for the neatest edges. Gently pop the yolks out into your mixing bowl. Arrange the white halves on a serving platter, cut side up.
-
Make the filling. Mash the yolks with a fork until they’re completely crumbly—no big chunks allowed. Add the mayonnaise, mustard, vinegar, salt, pepper, and paprika. Mix until everything is smooth and creamy. If you’re using relish, stir it in now. Taste it and adjust the seasoning. I always add just a pinch more salt than I think I need.
-
Fill the eggs. Spoon the filling into your piping bag or zip-top bag. Snip off the tip—about 1/4 inch wide. Pipe the filling into each egg white, mounding it slightly. You want it to look generous, not skimpy. A little swirl on top looks nice, but it’s not necessary.
-
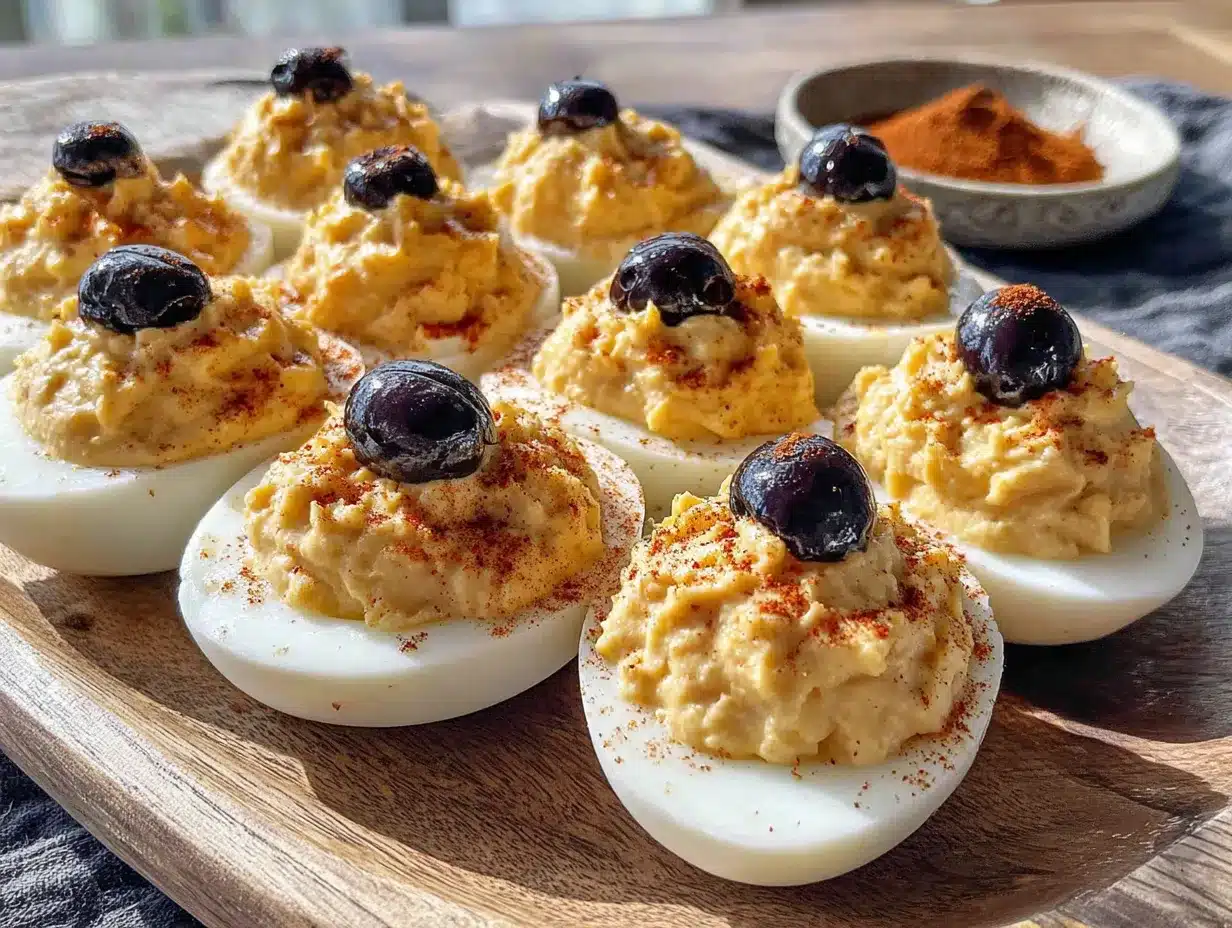
Make the spiders. This is the fun part. Drain the black olives and pat them dry with a paper towel. Using your paring knife, slice each olive in half lengthwise. One half becomes the spider body. Take the other half and slice it into thin strips lengthwise—these are the legs. You should get about 6 thin strips from each half. Arrange a spider body on top of each deviled egg, then gently press 4 leg strips on each side. They should curve slightly, like a spider creeping along.
-
Finish and serve. Dust the whole platter with a light sprinkle of paprika. It adds color and makes the spiders pop. Refrigerate for at least 30 minutes before serving so everything sets up nicely.
Sensory cue: When you’re mashing the yolks, you want them to feel like wet sand before you add the wet ingredients. If they’re still powdery, keep mashing. The filling should be thick enough to hold its shape when piped, but soft enough to spread easily.
Cooking Tips & Techniques
I’ve made every mistake in the book with deviled eggs, so let me save you the trouble.
The biggest mistake? Overcooking the eggs. If you see that greenish-gray ring around the yolk, you’ve gone too far. That 12-minute sit time after boiling? It’s magic. The yolks come out perfectly yellow and creamy every time.
Another thing I learned the hard way: Cold eggs are easier to peel than warm ones. I once tried to rush the process and peeled an egg while it was still warm. Let’s just say it looked like a crime scene. Give them the full 10 minutes in the ice bath. Your patience will be rewarded.
For the olive spiders: Use a really sharp paring knife. Dull blades will squish the olives and you’ll end up with mushy blobs instead of legs. If your knife is dragging, stop and sharpen it. I keep a cheap sharpener in my drawer just for this.
Timing strategy: You can boil and peel the eggs up to 3 days ahead. Keep them in the fridge, unpeeled, in a covered container. The day of your party, just slice, fill, and decorate. It takes maybe 15 minutes. This is my go-to move for Halloween—it makes the whole thing feel effortless.
Pro tip for consistency: Let the filled eggs chill for at least 30 minutes before adding the spiders. The filling firms up, so the olive legs don’t slide around. I learned this after watching a spider slowly slide off an egg and into the abyss of my serving platter.
Variations & Adaptations
One of the things I love about this recipe is how easy it is to tweak. Here are some variations I’ve tried and loved:
- Spicy Spider Eggs: Add 1/2 teaspoon of hot sauce or a pinch of cayenne to the filling. The heat plays wonderfully with the briny olives. I made these for a friend’s Halloween party and they disappeared first.
- Avocado Deviled Spider Eggs: Swap half the mayo for mashed avocado. The filling turns this gorgeous pale green color, and it tastes amazing. Just know you’ll want to serve these the same day—avocado doesn’t keep well.
- Bacon Spider Eggs: Sprinkle crispy crumbled bacon over the filling before you add the olive spiders. Because everything is better with bacon, right? My husband requests these every year.
- Herb-Infused Filling: Stir in a tablespoon of finely chopped fresh dill or chives. It adds a freshness that cuts through the richness. I did this on a whim one year and now I can’t go back.
- Gluten-Free Note: This recipe is naturally gluten-free, which makes it a safe bet for parties where you’re not sure about dietary restrictions.
My personal favorite variation: I once made these with smoked paprika and a tiny drizzle of truffle oil in the filling. They were completely over-the-top for a Halloween party, but honestly? They were incredible. The earthy truffle with the smoky paprika and salty olives—it was like a fancy restaurant version of a childhood classic.
Serving & Storage Suggestions
These spider deviled eggs are best served chilled, right out of the fridge. The cold filling holds its shape better, and the olive spiders stay put. Arrange them on a dark platter if you have one—the contrast makes the spiders look even more dramatic against the creamy filling.
What to serve with them: They pair beautifully with other Halloween finger foods like mini mummy hot dogs, pumpkin-shaped cheese crackers, or a bowl of “witches’ brew” punch. For a heartier spread, add them to a grazing board with cured meats, pickles, and crusty bread.
Storage instructions: Leftover deviled eggs will keep in the fridge for up to 2 days in an airtight container. Here’s the thing though—the olives might get a little soft after a day. They’re still perfectly edible, just not as crisp. I usually only make as many as I think we’ll eat in one sitting.
Reheating? Don’t. These are served cold. If they’ve been sitting out at a party for more than 2 hours, it’s time to toss them. Food safety first, always.
How flavors develop: The filling actually gets better after a few hours in the fridge. The flavors meld together and the texture firms up perfectly. That’s why I always make the filling a few hours ahead. By party time, they’re at their absolute best.
Nutritional Information & Benefits
Per serving (2 deviled egg halves):
- Calories: 180
- Protein: 10g
- Fat: 15g
- Carbohydrates: 2g
- Fiber: 0g
- Sugar: 1g
Eggs are a fantastic source of high-quality protein and contain all nine essential amino acids. They’re also rich in choline, which supports brain health. The olives add healthy monounsaturated fats and a good dose of vitamin E.
Dietary considerations: This recipe is naturally gluten-free and low-carb. If you’re watching your cholesterol, you can use a mix of whole eggs and egg whites—just know the filling won’t be as rich. For a lower-fat version, use light mayo. The taste is still great, just a little less indulgent.
My take on it: I don’t make deviled eggs thinking they’re a health food, but I do feel good about serving something that’s actually real food—no preservatives, no weird additives. It’s protein-packed enough to keep the kids from crashing after all that Halloween candy, which is a win in my book.
Conclusion
Look, I get it—Halloween can be stressful. Between the costumes, the decorations, and the candy shopping, the last thing you need is a complicated recipe that takes all afternoon. That’s why these Quick Spooky Spider Deviled Eggs for Halloween have become my secret weapon. They look like you spent hours, but they’re really just deviled eggs with a clever garnish. And honestly? They taste amazing.
I love that this recipe lets me show up to the party with something that makes people smile—and then keeps them coming back for seconds because it’s genuinely delicious. The olive spiders are just the cherry on top. Or, you know, the legs on the spider.
So go ahead and make these your own. Add bacon, spice them up, or keep them classic. The beauty is in how simple they are. And when someone asks, “How did you make those little spiders?” you can just smile and say, “It’s easier than you think.”
I’d love to hear how yours turn out! Drop a comment below—tell me if you tried any variations, or if your kids helped make the spiders. And if you’re feeling generous, share this post with a friend who needs a last-minute Halloween idea. We’re all in this together, right?
Frequently Asked Questions
Can I make these spider deviled eggs a day ahead?
Absolutely! You can assemble them fully up to 24 hours in advance. Just cover them tightly with plastic wrap and refrigerate. I’d recommend adding a light dusting of fresh paprika right before serving to keep them looking vibrant.
How do I keep the olive spiders from falling off?
This is the most common question I get! Make sure your filling is thick enough to hold its shape—if it’s too runny, the legs will slide. Also, gently press the olive pieces into the filling rather than just placing them on top. Chilling the filled eggs for 30 minutes before adding the spiders helps a ton.
Can I use something other than black olives for the spiders?
Sure thing! Sliced black olives are the classic choice, but you can use kalamata olives for a more intense flavor. For a different look, try using small slices of bell pepper or even cooked beet slices. Just make sure whatever you use is firm enough to hold its shape.
My deviled eggs always turn out runny. What am I doing wrong?
Runny filling usually means one of two things: too much mayo, or the yolks weren’t fully cooked. Make sure your eggs are hard-boiled all the way through—no soft centers. And start with less mayo than you think you need. You can always add more, but you can’t take it out.
How long can these sit out at a Halloween party?
Food safety rule of thumb: deviled eggs should not sit at room temperature for more than 2 hours. If your party runs longer, put out a small batch at a time and keep the rest in the fridge. I use a small platter and refresh it every hour or so—keeps things safe and the eggs looking fresh.
Pin This Recipe!

Easy Spooky Spider Deviled Eggs for Halloween

These Quick Spooky Spider Deviled Eggs for Halloween are the perfect balance of creepy and cute, and they come together faster than you’d think. The olive spiders add a briny, salty pop that complements the creamy filling in a way you wouldn’t expect.
- Prep Time: 20 minutes
- Cook Time: 12 minutes
- Total Time: 32 minutes
- Yield: 24 deviled egg halves (12 servings of 2 halves each) 1x
- Category: Appetizer
- Cuisine: American
Ingredients
- 12 large eggs
- 1/3 cup mayonnaise
- 1 teaspoon yellow mustard
- 1/2 teaspoon white vinegar
- 1/4 teaspoon salt
- 1/8 teaspoon black pepper
- 1/2 teaspoon paprika
- 1 can (6 ounces) large black olives
- Optional: 1 tablespoon sweet pickle relish
Instructions
- Hard-boil the eggs: Place eggs in a single layer in a saucepan, cover with cold water by an inch. Bring to a rolling boil over high heat, cover, turn off heat, and let sit for exactly 12 minutes.
- Ice bath: While eggs sit, fill a large bowl with ice and cold water. Transfer eggs to ice bath and chill for at least 10 minutes.
- Peel the eggs: Tap each egg to crack shell, roll between palms, peel starting from the wider end. Rinse under cold water.
- Slice eggs in half lengthwise with a sharp knife. Pop yolks into a mixing bowl. Arrange whites on a serving platter.
- Make filling: Mash yolks with a fork until crumbly. Add mayonnaise, mustard, vinegar, salt, pepper, and paprika. Mix until smooth and creamy. Stir in relish if using. Adjust seasoning.
- Fill eggs: Spoon filling into a piping bag or zip-top bag, snip off 1/4-inch tip. Pipe filling into each egg white, mounding slightly.
- Make spiders: Drain olives and pat dry. Slice each olive in half lengthwise. One half is the spider body. Slice the other half into thin strips (legs). Place a spider body on each egg, press 4 leg strips on each side.
- Finish and serve: Dust with paprika. Refrigerate for at least 30 minutes before serving.
Notes
For easy peeling, use eggs that are at least a week old. Chill filled eggs for 30 minutes before adding spiders to prevent legs from sliding. Can be assembled up to 24 hours in advance.
Nutrition
- Serving Size: 2 deviled egg halves
- Calories: 180
- Sugar: 1
- Sodium: 320
- Fat: 15
- Saturated Fat: 3
- Carbohydrates: 2
- Protein: 10
Keywords: Halloween, deviled eggs, spider, appetizer, party, easy, spooky


