My neighbor, a retired baker named Mrs. Gable, watched me struggle with a batch of sticky, misshapen cookies one October afternoon. She didn’t say anything at first, just leaned on the fence separating our yards, wiping her hands on a flour-dusted apron. Then she disappeared into her house and came back with a tin, the lid slightly dented. “These aren’t fancy,” she said, handing it over. “But they make people smile.” Inside were spider cookies, their chocolate legs looking like they were mid-scuttle across the wax paper. I had never seen anything quite like it. That was the moment I stopped trying to make perfect, bakery-window cookies and started making cookies that had a little personality. Honestly, that tin of slightly crooked spiders taught me more about baking than any cookbook ever did. Maybe you’ve been there, staring at a recipe that looks impossible, only to have someone show you a simpler, more joyful way. That’s exactly what these spider cookies are all about.
The combination of a soft, chewy peanut butter base with crunchy, dark chocolate legs is just… perfect. I mean, it’s the kind of cookie that disappears before you can even put them on the plate. Let me tell you, when you bring a tray of these to a Halloween party, you become an instant hero. They look complicated, like you spent hours piping legs, but the secret is so simple it’s almost silly. I’ve been making them for years now, tweaking Mrs. Gable’s original recipe to make it even easier for a crowd. They’ve become my go-to for every spooky gathering, from neighborhood potlucks to my daughter’s classroom parties. It’s the recipe that keeps on giving, honestly. And every time I pull that dented tin out of my cabinet, I think of her and that simple, generous act of sharing a recipe that was never meant to be a secret.
Why You’ll Love This Recipe
These spider cookies are more than just a Halloween treat; they’re a guaranteed conversation starter. I’ve tested this recipe more times than I can count, and it’s been given the seal of approval by everyone from picky toddlers to my grandmother’s bridge club. Here’s why they’re a total winner:
- Quick & Easy: These come together in under 30 minutes from start to finish. The “legs” are made from store-bought chocolate cookies, so there’s no extra baking or piping involved. Perfect for a last-minute Halloween party or a fun weekend activity with the kids.
- Simple Ingredients: You probably have everything you need in your pantry right now. No fancy extracts, no hard-to-find decorations. Just good old peanut butter, sugar, eggs, and chocolate.
- Perfect for Halloween: They are the undisputed star of any spooky spread. They’re spooky, cute, and delicious. They fit right in next to the carved pumpkins and fake cobwebs.
- Crowd-Pleaser: I’ve never met anyone who didn’t love these. They’re a hit with kids and adults alike. The peanut butter and chocolate combo is a classic for a reason, and the playful presentation makes everyone smile.
- Unbelievably Delicious: The texture is the real magic. You get a soft, chewy peanut butter cookie base, and then you bite into a crunchy, rich chocolate leg. It’s a flavor and texture explosion that’s just next-level comfort food.
What makes this recipe different from the rest? It’s the clever shortcut. Instead of making chocolate dough and shaping legs, we use pre-made chocolate wafer cookies. This saves so much time and mess, and it gives the cookies a perfectly uniform, crunchy leg that’s way more stable than anything you could pipe. It’s a smart, creative twist that makes a show-stopping treat totally doable for any home baker. This isn’t just another peanut butter cookie; it’s the one that makes you close your eyes after the first bite and smile.
What Ingredients You Will Need
This recipe uses simple, wholesome ingredients to deliver big, bold flavor without any fuss. Most of these are pantry staples, which makes this a great recipe to whip up on a whim. Here’s what you’ll need:
- For the Spider Cookie Base:
- 1 cup (250g) creamy peanut butter (I recommend Skippy or Jif for the best texture and sweetness; natural peanut butter that separates can make the cookies too oily)
- 1 cup (200g) granulated sugar
- 1 large egg (room temperature for easier mixing)
- 1 teaspoon vanilla extract
- For the Spider Legs and Eyes:
- 24 chocolate wafer cookies (like Nabisco Famous Chocolate Wafers or a store-brand equivalent; they are thin, crisp, and perfect for breaking into legs)
- 60 candy eyeballs (available at most craft stores or online; you can also use small white frosting dots with a tiny black sprinkle for the pupil)
- 1/4 cup (60g) semi-sweet chocolate chips (for “glue”)
- 1 teaspoon coconut oil or vegetable shortening (to thin the chocolate for dipping)
Ingredient Selection Tips & Sourcing Notes: For the best results, use a standard, no-stir peanut butter. The natural kind can be too runny and cause the cookies to spread too much. If you can’t find chocolate wafer cookies, you can substitute with thin chocolate graham crackers or even chocolate-covered pretzel sticks, though the texture will be slightly different. The candy eyeballs are a must for the “spider” look, but if you can’t find them, you can make your own by piping a tiny dot of white royal icing and adding a black nonpareil in the center.
Substitution Guidance: For a nut-free version, you can use sunflower seed butter (like SunButter) in place of peanut butter. Be aware that the color will change to a greenish-brown, but the taste will still be great. For a gluten-free option, ensure your chocolate wafer cookies are certified gluten-free (some brands are). You can also use a gluten-free chocolate sandwich cookie, like a gluten-free Oreo, but scrape out the cream filling first.
Equipment Needed
You don’t need any fancy gadgets to make these spider cookies, which is part of their charm. Here’s what you’ll need:
- Baking Sheets: Two large, rimmed baking sheets. Line them with parchment paper or a silicone baking mat for easy cleanup. I prefer parchment paper because it’s disposable.
- Mixing Bowls: One medium bowl for the cookie dough and one small, microwave-safe bowl for melting the chocolate.
- Electric Mixer (Optional): A hand mixer or stand mixer makes creaming the peanut butter and sugar a breeze, but you can absolutely do it by hand with a sturdy wooden spoon. It just takes a little more elbow grease.
- Measuring Cups and Spoons: For accurate ingredient measurements. A kitchen scale is even better for the peanut butter and sugar.
- Spatula: A rubber spatula for scraping down the sides of the bowl.
- Cookie Scoop (Optional): A 1.5-tablespoon cookie scoop helps create uniform cookies that bake evenly. If you don’t have one, just use a spoon and your hands to roll the dough into balls.
- Small Knife or Toothpick: To help break the chocolate wafer cookies into leg pieces.
- Piping Bag or Small Zip-Top Bag: For drizzling the melted chocolate “glue.”
I’ve made these with just a fork and a bowl before, and they turned out great. The most important thing is the baking sheet. A dark, non-stick sheet can cause the bottoms to brown too quickly, so I recommend a light-colored, aluminum baking sheet for the most even results. If you’re on a budget, the dollar store often has perfectly good mixing bowls and spatulas that will do the job just fine.
Preparation Method
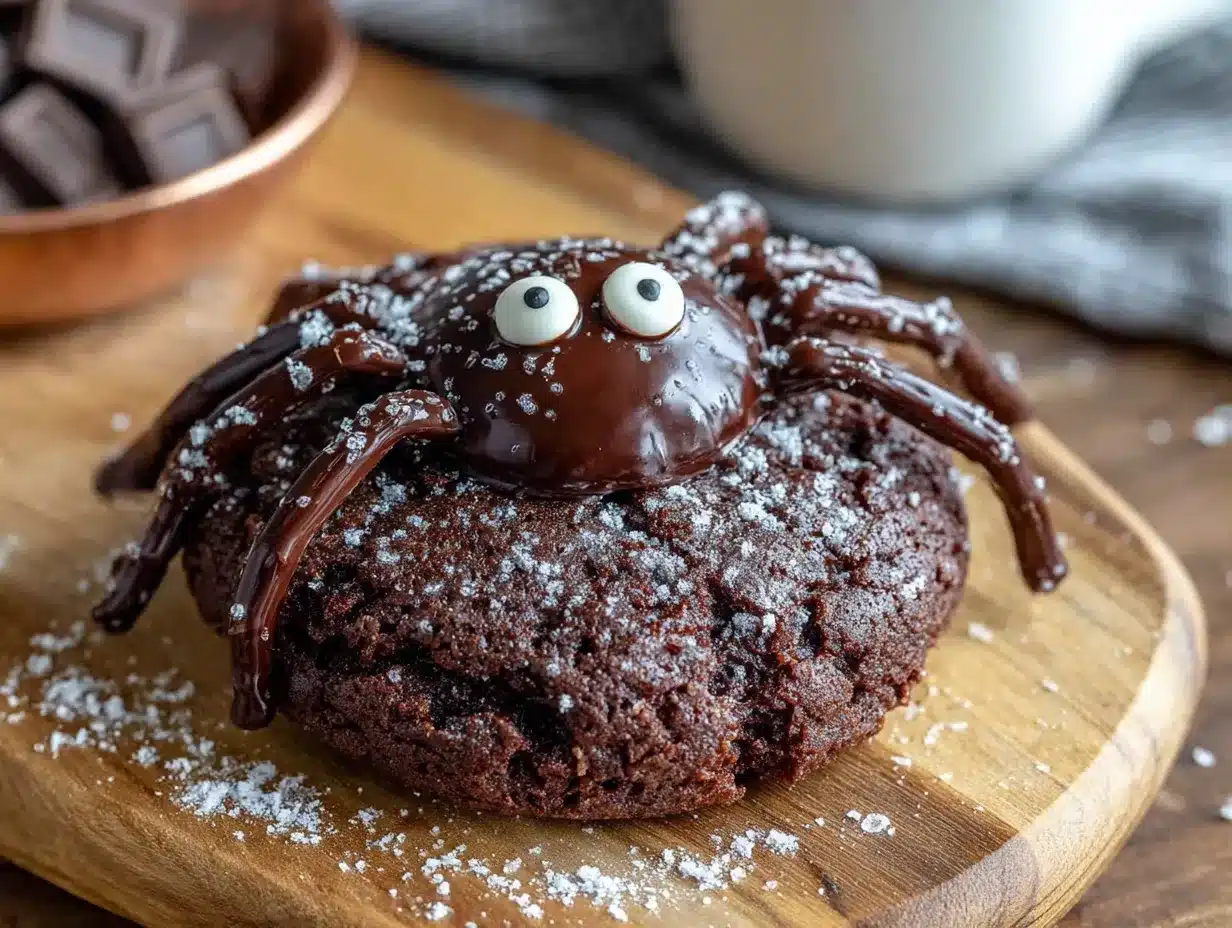
Let’s get to the fun part! Here’s how to make these creepy-crawly cookies step by step. I’ll walk you through it so you feel like I’m right there in the kitchen with you.
-
Preheat and Prepare: Preheat your oven to 350°F (175°C). Line two large baking sheets with parchment paper or silicone baking mats. This is non-negotiable for easy cleanup and preventing sticking.
-
Make the Cookie Dough: In a medium mixing bowl, combine 1 cup of creamy peanut butter and 1 cup of granulated sugar. Beat them together with an electric mixer on medium speed, or by hand with a wooden spoon, until the mixture is well combined and looks like a thick, crumbly paste. It should take about 1-2 minutes. Add 1 large egg and 1 teaspoon of vanilla extract, and mix again until the dough is smooth, soft, and comes together in a ball. It will be a little sticky, but it should hold its shape when you squeeze it.
-
Shape the Cookies: Using a 1.5-tablespoon cookie scoop or your hands, roll the dough into 24 even-sized balls. Place them on the prepared baking sheets, spacing them about 2 inches apart. They will spread a little, but not too much. Now, here’s the trick: use a fork to gently flatten each ball in a crisscross pattern, just like you would for classic peanut butter cookies. Don’t press them too thin; you want them to be about 1/2-inch thick.
-
Bake the Bases: Bake the cookies for 8-10 minutes, or until the edges are just set and lightly golden. The centers will still look soft and slightly underdone—that’s perfect! Over-baking will make them dry. Let them cool on the baking sheet for 5 minutes. This is crucial because they are very fragile when hot. After 5 minutes, carefully transfer them to a wire rack to cool completely. They will firm up as they cool.
-
Prepare the Spider Legs: While the cookies are cooling, it’s time to make the legs. Take your 24 chocolate wafer cookies. Each cookie will make 4 spider legs. Gently break each wafer cookie into 4 equal pieces along the natural perforations (if they have them) or just carefully break them into quarters. You’ll have 96 small, rectangular pieces. Set them aside.
-
Make the Chocolate “Glue”: In a small, microwave-safe bowl, combine 1/4 cup of semi-sweet chocolate chips and 1 teaspoon of coconut oil or shortening. Microwave in 30-second intervals, stirring after each, until the chocolate is completely melted and smooth. This usually takes about 60-90 seconds total. Be careful not to overheat it, or the chocolate will seize. Let it cool for a minute.
-
Assemble the Spiders: This is where the magic happens. Spoon the melted chocolate into a small piping bag or a small zip-top bag. If using a zip-top bag, snip a tiny corner off. Now, take a completely cooled cookie base. Pipe a small dot of melted chocolate on the back of the cookie. This will be the spider’s body. Quickly press 4 chocolate wafer pieces into the chocolate on each side of the cookie to create the legs. They should fan out slightly. Hold them in place for a few seconds until the chocolate sets. Repeat for all 24 cookies.
-
Add the Eyes: Using the remaining melted chocolate, pipe a tiny dot on the top of the cookie body. Press two candy eyeballs into the chocolate. The chocolate acts as the glue. Let the assembled spiders sit at room temperature for about 15-20 minutes, or until the chocolate “glue” is completely set and the legs are firmly attached. You can speed this up by placing them in the refrigerator for 5-10 minutes.
Troubleshooting Tip: If your cookie dough is too sticky to roll, pop it in the refrigerator for 15 minutes to firm up. If the chocolate “glue” starts to thicken while you’re working, just microwave it for another 10 seconds to thin it out again. And if a leg breaks, don’t worry! Just use another wafer piece. No one will notice in the final, spooky presentation.
Cooking Tips & Techniques
Over the years, I’ve learned a few things the hard way, so let me save you some trouble. These tips will help you get perfect spider cookies every single time.
Don’t Over-Bake the Base: This is the most common mistake. Because these cookies are so simple, it’s easy to think they need more time. They don’t. Pull them out when the edges are set but the centers are still soft. They will continue to cook on the hot baking sheet. Over-baked cookies are dry and crumbly, and they won’t hold the legs as well. I’ve done it. I’ve cried over a batch of dry, sad spiders. Learn from my pain!
Cool Completely Before Assembling: I know it’s tempting to start sticking legs on warm cookies, but resist the urge. The warm cookie will melt your chocolate “glue,” and the legs will just slide right off. Patience is a virtue, especially in baking. Let those cookies cool completely on a wire rack. I usually make the dough, bake the cookies, and then clean up the kitchen while they cool. It’s a great way to multitask.
Use a Light Hand with the Chocolate: You don’t need a huge blob of chocolate to attach the legs. A small, pea-sized dot is plenty. Too much chocolate will ooze out from under the legs and make a mess. Less is more here. The same goes for the eyes. A tiny dab is all you need.
Break the Wafers Carefully: Chocolate wafers are delicate. To get clean breaks, use a small, sharp knife to score the wafer along the line you want to break, then gently snap it. If you just try to break them with your hands, you’ll end up with a pile of chocolate dust. I’ve been there. It’s not a good time.
Work in an Assembly Line: This is a great strategy for a crowd. Bake all the cookies first. Then, break all the wafers. Then, melt the chocolate. Then, assemble. This flow is much more efficient than doing one cookie at a time. I set up a little assembly line on my kitchen counter, and I can knock out a batch of 24 spiders in about 10 minutes.
Variations & Adaptations
Once you’ve mastered the basic spider cookie, the possibilities are endless. Here are a few of my favorite ways to switch things up.
Peanut Butter Free: For a nut-free version that’s still delicious, swap the peanut butter for sunflower seed butter. The color will turn a slightly olive green, which actually looks kind of creepy and perfect for Halloween! You can also use a soy-based “butter” like WowButter. The texture will be similar, and the cookies will still be soft and chewy.
Dark Chocolate Lovers: For an even richer, more decadent spider, use dark chocolate wafer cookies for the legs. The bitterness of the dark chocolate pairs beautifully with the sweet, salty peanut butter base. You can also use a dark chocolate drizzle for the “glue” instead of semi-sweet. It gives the whole thing a more sophisticated, adult-friendly flavor.
Gluten-Free Spider: To make these cookies gluten-free, you need to be careful with two things: the peanut butter (ensure it’s certified gluten-free) and the chocolate wafers. Look for a gluten-free chocolate wafer cookie, or use gluten-free chocolate graham crackers. I’ve also used gluten-free chocolate sandwich cookies (like Glutino’s) after scraping out the cream filling. They work perfectly as legs.
Spicy Spider: This is a fun one for a party. Add 1/4 teaspoon of cayenne pepper and 1/2 teaspoon of ground cinnamon to the cookie dough along with the sugar. The subtle heat from the cayenne sneaks up on you and is a fantastic contrast to the sweet chocolate. I call them “Fire-Breathing Spiders,” and they’re always a hit with the adults.
Monster Mash-Up: Instead of spider legs, use the same technique to make other creepy creatures. Use mini pretzel sticks for “Frankenstein’s monster” bolts, or use candy corn for “vampire teeth.” The peanut butter cookie base is a perfect canvas for all kinds of Halloween creativity. I once made a whole batch of “Mummy” cookies by drizzling white chocolate over the top and adding two candy eyes. The kids went wild.
Serving & Storage Suggestions
These spider cookies are best served at room temperature, which makes them perfect for a party. You can arrange them on a platter, and they’ll look like they’re crawling across the table. It’s a fantastic visual effect.
Presentation Tips: For maximum spooky effect, arrange the cookies on a dark-colored platter or a cake stand. You can even scatter a few fake plastic spiders around them for extra creepiness. I like to place them on a bed of crushed chocolate cookies to look like “dirt.” If you’re making them for a potluck, transport them in a single layer in a shallow container. Don’t stack them, or the legs will break off. I learned that one the hard way after a very sad car ride.
What to Serve Alongside: These cookies are sweet and rich, so they pair wonderfully with a glass of cold milk, a hot apple cider, or a pumpkin spice latte. For a Halloween party, serve them alongside other spooky treats like monster mouth apples or a bowl of creepy dirt dessert. They also make a fantastic addition to a Halloween candy and cookie buffet.
Storage Instructions: Store the fully assembled spider cookies in an airtight container at room temperature for up to 5 days. Do not refrigerate them, as the moisture in the fridge can make the cookies soggy and the chocolate legs soft. If you need to store them for longer, you can freeze the un-assembled cookie bases. Bake and cool the cookies, then place them in a freezer-safe bag or container for up to 3 months. When you’re ready to serve, thaw them at room temperature, then assemble the legs and eyes. The flavors actually get better after a day or two as they meld together.
Reheating: You don’t need to reheat these cookies, but if you want a warm, gooey experience, you can pop one in the microwave for 5-7 seconds. Be careful not to melt the chocolate legs! Honestly, they are perfect at room temperature, and the texture of the cookie is at its best that way.
Nutritional Information & Benefits
Let’s be real: these are a treat, not a health food. But they do have a few redeeming qualities. Here’s a general breakdown for one spider cookie based on the recipe as written:
| Nutrient | Amount per Cookie |
|---|---|
| Calories | ~180 |
| Fat | 10g |
| Saturated Fat | 3g |
| Carbohydrates | 20g |
| Sugar | 14g |
| Protein | 5g |
| Fiber | 1g |
Health Benefits of Key Ingredients: The peanut butter provides a good source of protein and healthy fats, which can help keep you feeling full. It also contains vitamin E and magnesium. The dark chocolate in the wafer cookies and the “glue” contains antioxidants called flavonoids. Of course, these benefits are balanced by the sugar and butter content, so moderation is key.
Dietary Considerations: This recipe is naturally dairy-free if you use dairy-free chocolate chips and ensure your wafer cookies are dairy-free. It is also egg-free if you use a flax egg (1 tablespoon flaxseed meal + 3 tablespoons water) in place of the large egg. It is gluten-free with the right substitutions. Potential Allergens: Peanuts, eggs, and gluten (depending on the wafers). Always check your labels if you are cooking for someone with allergies.
Personal Wellness Perspective: I believe in balance. These spider cookies are a fun, celebratory treat that brings joy to a holiday. They aren’t something I eat every day, but I feel no guilt about enjoying one (or two) on Halloween. They are part of a happy, healthy life that includes both nourishing meals and delightful indulgences. The joy they bring to a party is a form of nourishment in itself.
Conclusion
These spider cookies are the perfect blend of spooky, delicious, and ridiculously easy. They are a testament to the fact that you don’t need to be a professional baker to create something that looks and tastes incredible. The clever shortcut of using chocolate wafer cookies for legs is a game-changer, and the soft, chewy peanut butter base is pure comfort. I honestly can’t imagine a Halloween without them.
I encourage you to make this recipe your own. Don’t be afraid to experiment with different flavors, colors, and decorations. Use white chocolate for the “glue” to make ghost spiders, or add a drop of green food coloring to the dough for a truly monstrous look. The most important thing is to have fun with it and share the joy with the people you love. That’s what this recipe is all about.
I would absolutely love to see your creations! Please leave a comment below and tell me how your spider cookies turned out. Did you try a fun variation? Did your kids help you make them? Share your photos and tag me on social media. Your feedback and creativity are what make this community so special. Now go forth and bake some wonderfully creepy cookies!
Frequently Asked Questions
Can I use natural peanut butter?
I don’t recommend it. Natural peanut butter that separates can make the cookies too oily and cause them to spread too much. For the best texture and consistency, use a standard, no-stir peanut butter like Skippy or Jif.
Can I make these spider cookies ahead of time?
Absolutely! You can bake the cookie bases up to 3 days in advance and store them in an airtight container at room temperature. Assemble the legs and eyes on the day you plan to serve them for the freshest look and crunchiest legs.
My chocolate legs keep falling off. What am I doing wrong?
This usually happens for two reasons. First, the cookie base might still be warm. Make sure they are completely cool before you start assembling. Second, the chocolate “glue” might be too thin or too thick. If it’s too thick, add a tiny bit more coconut oil. If it’s too thin, let it cool for a minute to thicken up.
Can I freeze the fully assembled spider cookies?
I don’t recommend freezing the assembled cookies. The moisture from freezing can make the chocolate legs soft and the cookie base soggy. It’s much better to freeze the un-assembled bases and then add the legs and eyes after thawing.
Can I use a different type of cookie for the legs?
Yes! While chocolate wafer cookies are ideal, you can use thin chocolate graham crackers, chocolate-covered pretzel sticks, or even shortbread cookies if you’re in a pinch. Just keep in mind that the texture and appearance will be slightly different. The chocolate wafers give the most realistic “spider leg” look.
Pin This Recipe!
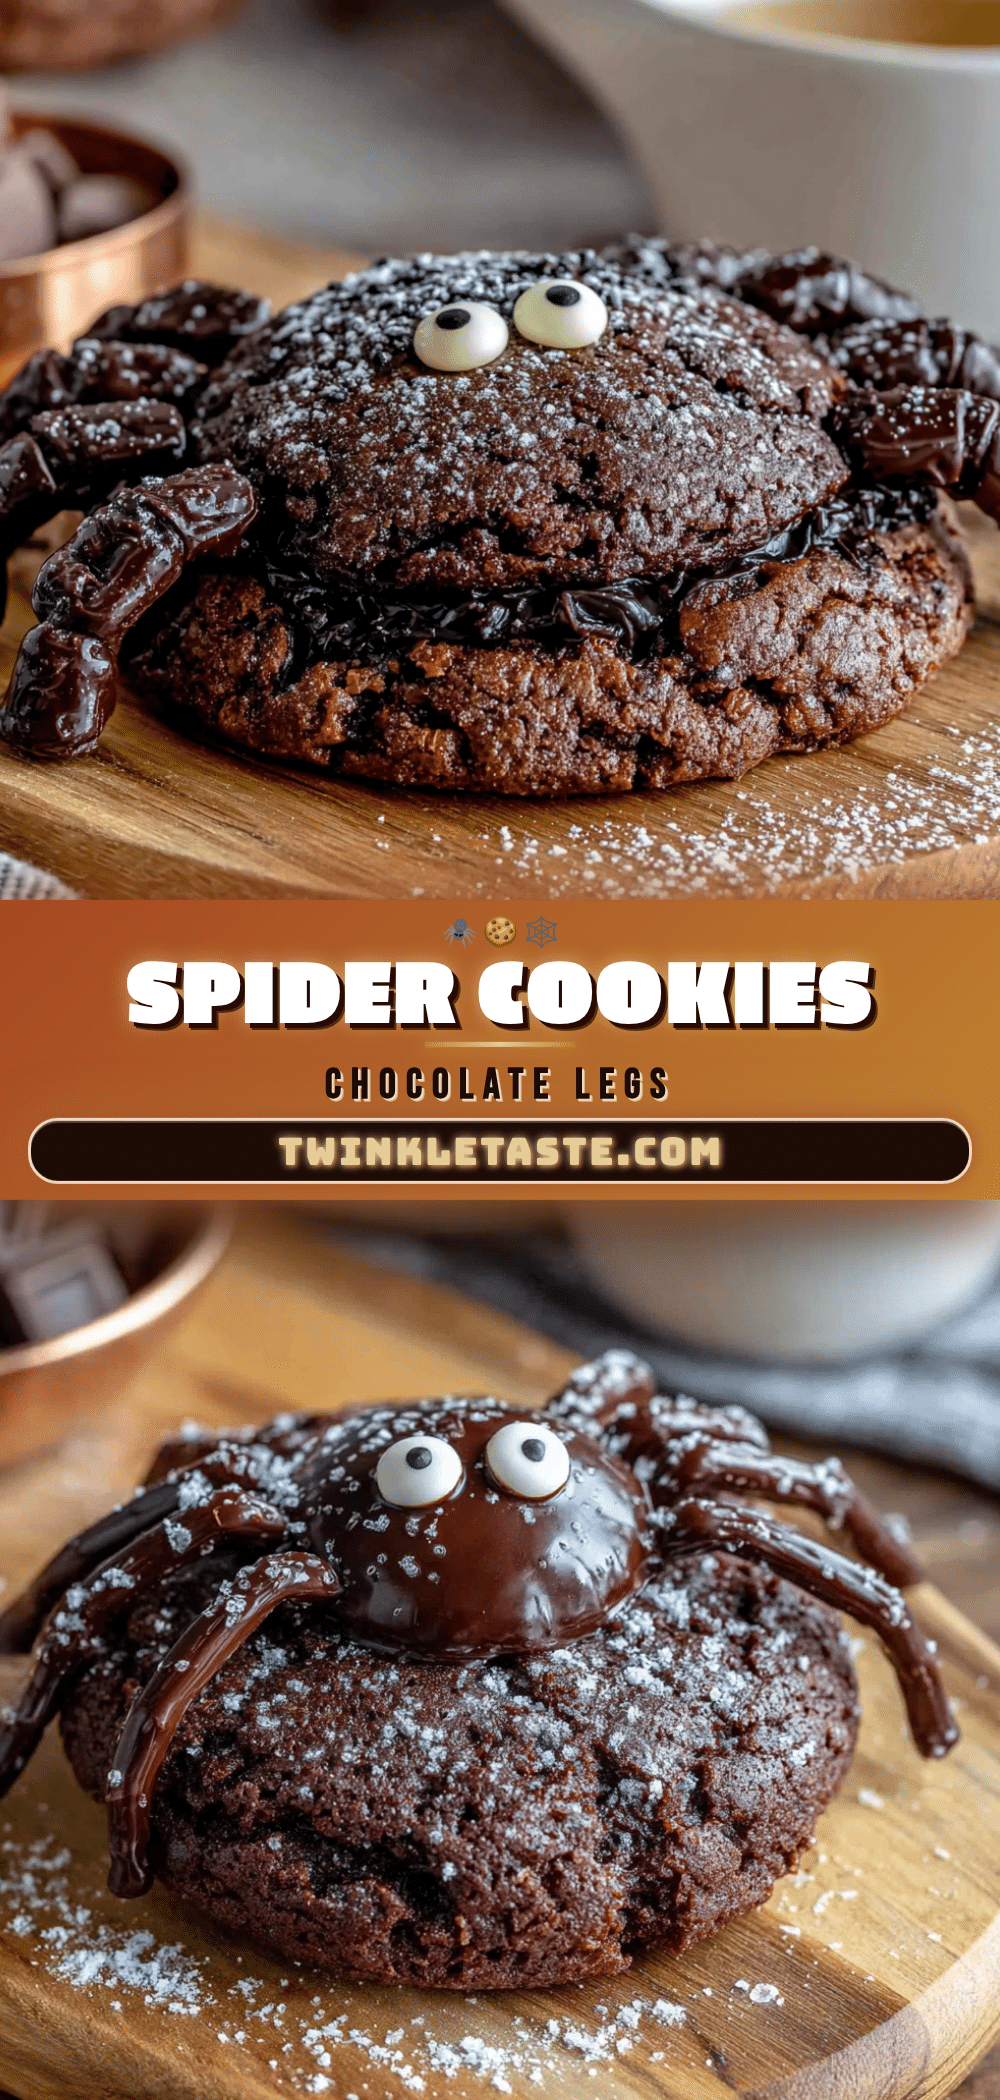
Spider Cookies with Chocolate Legs: Easy Halloween Treat
These spider cookies are a fun and easy Halloween treat featuring a soft, chewy peanut butter base with crunchy chocolate wafer legs and candy eyes. They come together in under 30 minutes and are sure to be a hit at any spooky gathering.
- Prep Time: 15 minutes
- Cook Time: 10 minutes
- Total Time: 25 minutes
- Yield: 24 servings 1x
- Category: Dessert
- Cuisine: American
Ingredients
- 1 cup (250g) creamy peanut butter (recommend Skippy or Jif)
- 1 cup (200g) granulated sugar
- 1 large egg, room temperature
- 1 teaspoon vanilla extract
- 24 chocolate wafer cookies (like Nabisco Famous Chocolate Wafers)
- 60 candy eyeballs
- 1/4 cup (60g) semi-sweet chocolate chips
- 1 teaspoon coconut oil or vegetable shortening
Instructions
- Preheat oven to 350°F (175°C). Line two large baking sheets with parchment paper or silicone baking mats.
- In a medium mixing bowl, combine peanut butter and sugar. Beat with an electric mixer on medium speed or by hand until well combined and crumbly, about 1-2 minutes.
- Add egg and vanilla extract; mix until dough is smooth, soft, and comes together in a ball. It will be slightly sticky.
- Roll dough into 24 even-sized balls (about 1.5 tablespoons each). Place on prepared baking sheets, spacing 2 inches apart. Flatten each ball with a fork in a crisscross pattern to about 1/2-inch thick.
- Bake for 8-10 minutes, until edges are set and lightly golden. Centers will still look soft. Cool on baking sheet for 5 minutes, then transfer to a wire rack to cool completely.
- While cookies cool, prepare spider legs: gently break each chocolate wafer cookie into 4 equal pieces (you’ll have 96 pieces). Set aside.
- In a small microwave-safe bowl, combine chocolate chips and coconut oil. Microwave in 30-second intervals, stirring after each, until melted and smooth (about 60-90 seconds). Let cool for 1 minute.
- Spoon melted chocolate into a small piping bag or zip-top bag with a tiny corner snipped off. Pipe a small dot of chocolate on the back of a cooled cookie. Press 4 wafer pieces into the chocolate on each side to create legs, fanning them out slightly. Hold for a few seconds until set. Repeat for all cookies.
- Pipe a tiny dot of chocolate on top of each cookie body and press two candy eyeballs into the chocolate. Let assembled spiders sit at room temperature for 15-20 minutes until chocolate is set, or refrigerate for 5-10 minutes to speed up.
Notes
Use standard no-stir peanut butter for best texture. Do not over-bake; cookies should be soft in the center. Cool completely before assembling to prevent chocolate from melting. If dough is too sticky, refrigerate for 15 minutes. For nut-free, substitute sunflower seed butter. For gluten-free, use certified gluten-free wafer cookies.
Nutrition
- Serving Size: 1 spider cookie
- Calories: 180
- Sugar: 14
- Fat: 10
- Saturated Fat: 3
- Carbohydrates: 20
- Fiber: 1
- Protein: 5
Keywords: spider cookies, Halloween cookies, peanut butter cookies, chocolate legs, easy Halloween treat, no-bake legs, kid-friendly


