I had never made a black velvet cupcake until last October. Not one. For years, I’d scroll past Halloween recipes with that dramatic dark crumb and think, “That’s cute, but probably tastes like food coloring and regret.” I mean, I’d been burned before by holiday baking that looked incredible and tasted like nothing. You know that feeling when you bite into something that’s all show and no go? The worst.
Then my neighbor’s kid knocked on my door on a random Tuesday afternoon holding a plastic jack-o’-lantern bucket. “Trick or treat early?” I joked. She just stared at me blankly. Her mom came running up the walk, laughing, holding a plate of black cupcakes with orange swirl frosting. “We’re practicing for Halloween,” she said, shoving one into my hand before I could make an excuse. I took a bite to be polite. Honestly, I was ready to fake a smile and toss the rest.
But then something weird happened. I took a second bite on purpose. The texture was so soft it barely held together, and the flavor—rich, tangy, deeply chocolatey without being heavy—caught me completely off guard. I asked for the recipe, expecting a complicated list of special ingredients. She shrugged and said, “One bowl. Ten minutes. You probably have everything.” I didn’t believe her. So I went home and tested it myself that same night. By the time the kitchen timer went off, I had black velvet cupcakes cooling on my counter and a very confused look on my face. I had been wrong. Really wrong. And honestly? I was kind of thrilled about it.
These Easy One-Bowl Black Velvet Halloween Cupcakes are the reason I stopped being a holiday baking snob. They come together in one bowl—no stand mixer, no sifting, no nonsense—and they deliver that dramatic black crumb everyone wants for Halloween parties, school bake sales, or just eating while watching scary movies in your pajamas. The vinegar and buttermilk work together to create a tender, almost velvety texture (hence the name), and the cocoa keeps it tasting like an actual dessert, not a science experiment. If you’ve been skeptical about black velvet anything, let me tell you—this one changed my mind. Maybe it’ll change yours too.
Why You’ll Love These Cupcakes
Let me be real with you for a second. I’ve tested this recipe at least six times since that fateful Tuesday afternoon. I made them for my book club, for a Halloween party, and just because I wanted something sweet on a rainy Sunday. Every single time, they disappeared faster than I expected. Here’s why these Easy One-Bowl Black Velvet Halloween Cupcakes keep winning people over:
- One Bowl, No Fuss: You don’t need a mixer, a sifter, or a separate bowl for dry and wet ingredients. Everything goes into one bowl, you whisk it together, and you’re done. It takes about ten minutes to get them into the oven.
- Simple Pantry Ingredients: No weird specialty flours or hard-to-find extracts. You probably have all of these in your kitchen right now—flour, sugar, cocoa, baking soda, vinegar, buttermilk, oil, eggs, and vanilla. The only “special” thing is black food coloring, and you can find that at any grocery store or online.
- Perfect for Halloween Baking: These are the kind of cupcakes that make people stop and go, “Wait, those are black?” The color is dramatic without being gimmicky, and the flavor backs it up. They’re great for classroom parties, Halloween night, or just celebrating the season.
- Crowd-Pleasing Flavor: Unlike some black velvet recipes that taste mostly like coloring, these have a genuine chocolate flavor with a tangy buttermilk finish. Kids love the color, adults love the taste. It’s a win-win.
- Unbelievably Tender Crumb: The combination of buttermilk and vinegar creates a reaction with the baking soda that gives these cupcakes a soft, velvety texture. They’re not dense or heavy—they’re light and almost melt-in-your-mouth.
I think what makes this recipe different from all the other black velvet recipes out there is the balance. It’s not trying to be overly fancy or complicated. It’s just a really good chocolate cupcake that happens to be black. The vinegar isn’t there for flavor—it’s there to react with the baking soda and create that tender crumb. The buttermilk adds richness without making it heavy. And the black food coloring? It’s just enough to make it look spooky without staining your teeth for days. Trust me, I learned that the hard way with my first attempt.
These cupcakes are the kind that make you feel like you’ve got your act together, even if you’re just throwing them together after work. They’re comforting, they’re fun, and they taste like Halloween should taste—a little bit spooky, a whole lot delicious.
What Ingredients You Will Need
This recipe uses simple, everyday ingredients to create something that looks and tastes like you spent way more effort than you actually did. The magic is in how they work together, not in how complicated they are. Here’s what you’ll need:
For the Cupcakes
- All-purpose flour, 1 ½ cups (190g): Regular all-purpose flour works perfectly here. No need for cake flour or bread flour—just your standard pantry staple. I use Gold Medal or King Arthur, but any brand works fine.
- Granulated sugar, 1 cup (200g): White sugar gives these cupcakes the right sweetness and helps with that tender texture. You can reduce it to ¾ cup if you prefer less sweet cupcakes, but I wouldn’t go lower than that.
- Unsweetened cocoa powder, ¼ cup (20g): Use natural cocoa powder, not Dutch-process. The natural cocoa is more acidic, which helps react with the baking soda and vinegar. I prefer Hershey’s or Ghirardelli for consistent results.
- Baking soda, 1 teaspoon: This is your leavening agent. Make sure it’s fresh—if it’s been sitting in your cabinet for over a year, grab a new box. Trust me, stale baking soda is the number one reason cupcakes don’t rise properly.
- Salt, ½ teaspoon: Just regular table salt or fine sea salt. Don’t skip it—salt balances the sweetness and enhances the chocolate flavor.
- Buttermilk, 1 cup (240ml): Full-fat buttermilk gives the best texture and flavor. If you don’t have buttermilk, you can make a quick substitute by adding 1 tablespoon of white vinegar or lemon juice to 1 cup of milk and letting it sit for 5 minutes. I’ve done this plenty of times when I forgot to buy buttermilk, and it works great.
- Vegetable oil, ½ cup (120ml): Oil keeps these cupcakes moist longer than butter does. You can use canola, sunflower, or any neutral-flavored oil. I avoid olive oil here—the flavor is too strong.
- Large eggs, 2, room temperature: Room temperature eggs mix more evenly into the batter. If you forgot to take them out ahead of time, place them in a bowl of warm water for 5 minutes. Works like a charm.
- White vinegar, 1 tablespoon: This reacts with the baking soda to create bubbles that make the cupcakes rise. Don’t worry—you won’t taste it at all. The vinegar flavor completely disappears during baking.
- Vanilla extract, 2 teaspoons: Pure vanilla extract is worth the splurge here. Imitation vanilla works in a pinch, but the flavor won’t be as rich. I use Nielsen-Massey or simply organic.
- Black gel food coloring, 1 to 2 tablespoons: Gel food coloring is much more concentrated than liquid drops, so you get a deeper color without adding too much liquid. I use Americolor Super Black or Wilton Color Right. Start with 1 tablespoon and add more if you want it darker. You can also use black cocoa powder for a natural black color, but it’s harder to find and more expensive.
For the Cream Cheese Frosting (Optional but Highly Recommended)
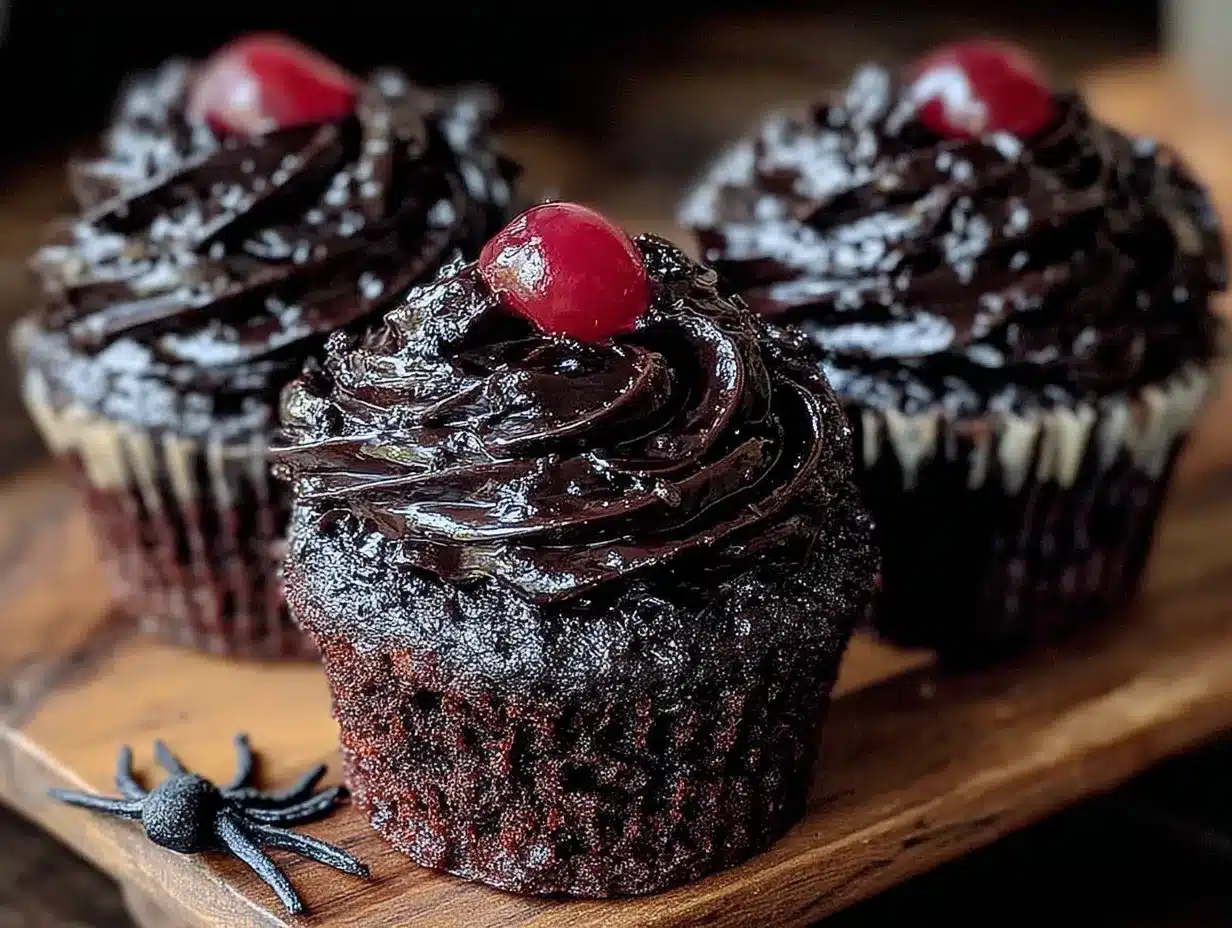
- Cream cheese, 8 oz (226g), softened: Full-fat cream cheese gives the best texture. Let it sit out for at least 30 minutes before using. I use Philadelphia—it’s consistent and reliable.
- Unsalted butter, ½ cup (113g), softened: Make sure your butter is soft but not melted. If it’s too cold, your frosting will be lumpy. If it’s too warm, it’ll be runny. Aim for that Goldilocks zone where it gives slightly when you press it.
- Powdered sugar, 3 to 4 cups (360-480g): Start with 3 cups and add more if you want a stiffer frosting. Sift it if you want to avoid lumps, but honestly, I rarely bother and it turns out fine.
- Vanilla extract, 1 teaspoon: For flavor. You can also add a pinch of salt if you like a sweet-salty balance.
- Orange gel food coloring (optional): For that Halloween look. A little goes a long way.
Equipment Needed
You don’t need a fancy kitchen to make these Easy One-Bowl Black Velvet Halloween Cupcakes. Here’s what you’ll actually use:
- Large mixing bowl: Any big bowl works. I use a glass one because it’s easy to see when the batter is fully mixed, but metal or ceramic is fine too.
- Whisk or wooden spoon: A whisk is faster and helps break up lumps, but a wooden spoon works perfectly fine. I’ve used both and honestly, the spoon is easier to clean.
- Standard 12-cup muffin tin: This recipe makes exactly 12 cupcakes. If you only have a 6-cup tin, just bake in batches.
- Paper cupcake liners: Use Halloween-themed ones for extra fun. I like the foil-lined ones because they peel off easier, but any paper liners work.
- Measuring cups and spoons: For accuracy. I know some bakers eyeball it, but for this recipe, precise measurements matter because of the chemical reactions.
- Cooling rack: Letting cupcakes cool completely before frosting is crucial. If you frost them while they’re warm, the frosting will melt into a puddle. Learn from my mistakes.
- Electric mixer (hand or stand): For the cream cheese frosting. You can whisk it by hand if you’re patient, but an electric mixer makes it much easier and fluffier.
- Piping bag or zip-top bag: For decorating. If you don’t have a piping bag, just snip the corner off a zip-top bag. It’s not fancy, but it works.
If you don’t have a cooling rack, you can use a wire oven rack or even just a clean kitchen towel laid flat. I’ve done both in a pinch. The important thing is that air circulates around the cupcakes so they cool evenly. If you leave them in the pan, they’ll keep baking from the residual heat and can dry out.
Preparation Method
Okay, let’s get to the good part. Here’s how to make these Easy One-Bowl Black Velvet Halloween Cupcakes step by step. I’ve included all the little details I wish someone had told me the first time I made them.
- Preheat your oven to 350°F (175°C). Line your muffin tin with paper liners. This is a small step, but it makes a big difference. If you skip preheating, your cupcakes won’t rise properly, and nobody wants flat cupcakes.
- In your large mixing bowl, whisk together the flour, sugar, cocoa powder, baking soda, and salt. Make sure there are no lumps, especially in the cocoa powder. I use a whisk and go in circles for about 30 seconds. You don’t need to sift—just whisk thoroughly.
- Add the buttermilk, vegetable oil, eggs, vinegar, vanilla extract, and black gel food coloring. Pour them all in at once. Don’t worry about the order—remember, this is a one-bowl recipe. The less fuss, the better.
- Whisk everything together until just combined. This is the most important part. You want to mix until you can’t see any more streaks of flour, but no more than that. Overmixing develops the gluten and makes cupcakes tough and dense. I usually whisk for about 20-30 seconds, scraping the bottom and sides once. The batter will be thin—that’s normal. Don’t panic.
- Divide the batter evenly among the 12 cupcake liners. I use a ¼-cup measuring cup or a large cookie scoop to get even portions. Fill each liner about ⅔ to ¾ full. If you overfill them, they’ll spill over the edges and make a mess. Trust me, I’ve cleaned up that mess more than once.
- Bake for 18 to 22 minutes. Start checking at 18 minutes. Insert a toothpick into the center of a cupcake—if it comes out clean or with just a few moist crumbs, they’re done. If it’s wet with batter, give them another 2 minutes. My oven runs hot, so mine are usually done at 19 minutes. Every oven is different, so keep an eye on them.
- Let the cupcakes cool in the pan for 5 minutes. This lets them set so they don’t fall apart when you move them. After 5 minutes, transfer them to a cooling rack to cool completely. Don’t skip this step—if you leave them in the pan too long, the bottoms can get soggy.
- While the cupcakes cool, make the cream cheese frosting. In a separate bowl, beat the softened cream cheese and butter together until smooth and creamy. About 2 minutes on medium speed. Scrape down the sides once or twice.
- Gradually add the powdered sugar, 1 cup at a time. Beat on low speed at first to avoid a sugar cloud (I learned this the messy way), then increase to medium. Add the vanilla extract and beat until light and fluffy. If you want orange frosting, add a few drops of orange gel coloring and mix until evenly colored.
- Once the cupcakes are completely cool, frost them. I like to use a piping bag with a star tip for that classic bakery look, but you can also just spread the frosting with a knife. Top with Halloween sprinkles, candy eyeballs, or crushed Oreos for a “dirt” effect.
A quick note about the black food coloring: if you want super dark cupcakes, add the full 2 tablespoons. If you prefer a more subtle gray-black, stick with 1 tablespoon. I’ve done both, and honestly, the flavor doesn’t change—just the color intensity. Also, the color deepens as the cupcakes cool, so don’t panic if they look a little lighter when they first come out of the oven.
Cooking Tips & Techniques
I’ve made these Easy One-Bowl Black Velvet Halloween Cupcakes enough times to have a few tricks up my sleeve. Here’s what I’ve learned the hard way so you don’t have to:
Don’t overmix the batter. I cannot stress this enough. The first time I made these, I whisked enthusiastically for a full minute because I wanted a perfectly smooth batter. The result? Dense, tough cupcakes that barely rose. The gluten in the flour develops as you mix, and too much mixing makes them rubbery. Mix until you don’t see flour streaks, then stop. It’s okay if there are a few tiny lumps—they’ll bake out.
Use room temperature ingredients. Cold eggs and cold buttermilk don’t mix as evenly into the batter, which can lead to uneven texture. If you’re in a hurry, warm the buttermilk in the microwave for 15 seconds and place the eggs in a bowl of warm water for 5 minutes. It makes a real difference.
Measure your flour correctly. The most common mistake in baking is using too much flour. Spoon the flour into your measuring cup and level it off with a knife. Don’t scoop directly from the bag—that packs the flour down and you can end up with 20-30% more flour than you need. I learned this from a baking class years ago, and it changed everything.
Check your baking soda freshness. Baking soda loses its potency over time. To test if yours is still active, drop a teaspoon into a small bowl of vinegar. If it fizzes vigorously, it’s good. If it barely bubbles, get a new box. Old baking soda is the reason many homemade cupcakes turn out flat and dense.
Let the cupcakes cool completely before frosting. I know it’s tempting to rush this step, especially when the kitchen smells amazing and you want to eat one immediately. But warm cupcakes will melt cream cheese frosting into a sweet, buttery puddle. I’ve done it. It’s disappointing. Give them at least 30 minutes on a cooling rack.
Timing strategy: Make the cupcakes a day ahead if you’re planning a party. They actually taste better the next day—the flavors meld and the texture becomes even more tender. Store them unfrosted in an airtight container at room temperature, then make the frosting and decorate the day you’re serving them. This takes so much stress off party day.
Variations & Adaptations
One of the best things about this recipe is how easy it is to adapt. Here are some variations I’ve tried and loved:
Gluten-Free Version: Swap the all-purpose flour with a 1:1 gluten-free baking flour blend. I’ve used Bob’s Red Mill and King Arthur’s gluten-free blends with great results. The texture is slightly more delicate, so handle them gently. Everything else stays the same.
Vegan Adaptation: Use a flax egg (1 tablespoon ground flaxseed mixed with 3 tablespoons water per egg) instead of regular eggs, and substitute the buttermilk with 1 cup of unsweetened almond milk mixed with 1 tablespoon of apple cider vinegar. Use vegan butter and vegan cream cheese for the frosting. I tested this for a friend’s vegan Halloween party, and honestly, they were just as good as the original.
Black Cocoa Version: If you want a deeper, more intense chocolate flavor without using as much food coloring, substitute 2 tablespoons of the regular cocoa powder with black cocoa powder. Black cocoa has a darker color and a slightly Oreo-like flavor. It’s available at specialty baking stores or online. This is my personal favorite variation—the cupcakes come out almost pitch black with just a tiny bit of food coloring.
Different Frosting Options: Not a cream cheese fan? Try a simple buttercream frosting (1 cup butter, 4 cups powdered sugar, 2 tablespoons milk, 1 teaspoon vanilla) or a chocolate ganache. For a spooky look, use a dark chocolate ganache and top with crushed graham crackers for a “graveyard dirt” effect.
Mini Cupcake Version: Use a mini muffin tin and bake for 10 to 12 minutes instead of 18 to 22. This makes about 36 mini cupcakes. They’re perfect for parties where people want to try multiple treats without committing to a full-size cupcake.
Flavor Twist: Add ½ teaspoon of peppermint extract along with the vanilla for a chocolate-mint version. Or try ½ teaspoon of orange extract for a chocolate-orange combo that feels very Halloween. I did the orange version last year and topped them with candy corn—huge hit.
Serving & Storage Suggestions
These Easy One-Bowl Black Velvet Halloween Cupcakes are best served at room temperature. The cream cheese frosting softens slightly, and the cake is at its most tender. If you’ve refrigerated them, let them sit out for about 20 minutes before serving.
Presentation Ideas: Arrange them on a black or orange platter for maximum Halloween vibes. Add some fake spiderwebs or plastic spiders around the platter for a spooky touch. I once served them on a cake stand with battery-operated tea lights around the base, and everyone thought they were store-bought. Little touches like that go a long way.
What to Serve With Them: These cupcakes pair beautifully with a glass of cold milk, a hot cup of coffee, or a warm mug of apple cider. If you’re serving them at a Halloween party, set up a hot chocolate bar alongside them—the combination is unbeatable.
Storage Instructions: Store frosted cupcakes in an airtight container in the refrigerator for up to 4 days. Let them come to room temperature before serving for the best texture. Unfrosted cupcakes can be stored at room temperature in an airtight container for up to 3 days, or frozen for up to 3 months.
Freezing Tips: To freeze unfrosted cupcakes, let them cool completely, then wrap each one individually in plastic wrap and place them in a freezer-safe bag. When you’re ready to use them, thaw at room temperature for about an hour, then frost as usual. I do this every year before Halloween—bake a double batch, freeze half, and frost them fresh the day of the party. It’s a lifesaver.
Reheating Note: If you want that just-baked warmth, microwave an unfrosted cupcake for 10 to 15 seconds. Don’t microwave frosted cupcakes—the frosting will melt. I learned this one the hard way during a late-night snack session.
One thing I love about these cupcakes is that the flavor actually improves after a day. The buttermilk and cocoa have time to meld, and the texture becomes even more velvety. So if you can resist eating them all immediately, they’ll reward your patience.
Nutritional Information & Benefits
I’m not going to pretend these are health food—they’re cupcakes, after all. But there are a few bright spots in the nutritional profile. Here’s a rough estimate per cupcake (with cream cheese frosting):
- Calories: Approximately 380-420
- Fat: 20-22g
- Carbohydrates: 48-52g
- Protein: 5-6g
- Sugar: 35-38g
- Fiber: 1-2g
Ingredient Benefits: The cocoa powder contains antioxidants called flavonoids, which have been linked to heart health. Buttermilk provides calcium and probiotics (if using cultured buttermilk). And hey, the eggs add a little protein. It’s not a salad, but it’s not empty calories either.
Dietary Considerations: These cupcakes contain dairy (buttermilk, cream cheese, butter), eggs, and gluten. For dairy-free and vegan options, check the variations section above. They are nut-free if you use the standard ingredients, which makes them a good option for school parties where nut allergies are a concern.
Portion Perspective: One cupcake is a reasonable serving for a treat. The key is enjoying them mindfully—sitting down, taking your time, and really tasting that velvety crumb and tangy frosting. I find that when I do that, one cupcake is plenty satisfying. When I eat them standing over the kitchen counter? Suddenly three have disappeared. We’ve all been there.
Conclusion
These Easy One-Bowl Black Velvet Halloween Cupcakes are proof that you don’t need a complicated recipe or a kitchen full of fancy equipment to make something truly special. They’re quick enough for a last-minute school party, impressive enough for a Halloween bash, and delicious enough that you’ll find yourself making them even when it’s not October.
What I love most about this recipe is how forgiving it is. It doesn’t demand perfection. You can overmix a little (though try not to), you can use a different frosting, you can add sprinkles or leave them plain—and they still turn out amazing. That’s the kind of recipe that earns a permanent spot in your rotation.
I hope you give these a try and make them your own. Maybe you’ll add a pinch of cinnamon to the batter, or top them with candy corn, or skip the frosting altogether and dust them with powdered sugar for a ghostly look. However you make them, I’d love to hear about it. Drop a comment below and let me know how yours turned out—did you stick with the classic cream cheese frosting, or did you try something wild? Share your photos on social media and tag me so I can see your spooky creations. Happy Halloween, and happy baking!
Frequently Asked Questions
Can I make these cupcakes without the black food coloring?
Absolutely. They’ll just be regular chocolate cupcakes—still delicious, just not black. If you want a darker color without artificial coloring, try using black cocoa powder instead of regular cocoa. It gives a deep, dark brown that looks almost black, especially when paired with a dark frosting.
Why did my cupcakes turn out dense and flat?
This usually happens for one of three reasons: overmixing the batter, using old baking soda, or measuring the flour incorrectly. Make sure your baking soda is fresh, spoon your flour into the measuring cup instead of scooping, and mix only until the flour disappears. If you do all three, you should get light, fluffy cupcakes.
Can I use liquid food coloring instead of gel?
You can, but you’ll need a lot more to get the same deep black color. Liquid food coloring is much less concentrated, so you might end up adding 3 to 4 tablespoons, which can thin out the batter and affect the texture. Gel food coloring is really the way to go—it’s more concentrated and doesn’t add extra liquid.
How far in advance can I make these cupcakes?
You can bake the cupcakes up to 3 days ahead and store them unfrosted in an airtight container at room temperature. Or freeze them for up to 3 months. Make the frosting the day you plan to serve them for the best texture and flavor. I often bake the cupcakes on a Friday night and frost them Saturday morning for a weekend party.
Can I turn this into a cake instead of cupcakes?
Yes! Pour the batter into two greased and floured 8-inch round cake pans and bake at 350°F for 25 to 30 minutes, or until a toothpick comes out clean. You’ll need to double the frosting recipe to have enough for a layer cake. The baking time will be longer, so start checking at 25 minutes.
Pin This Recipe!
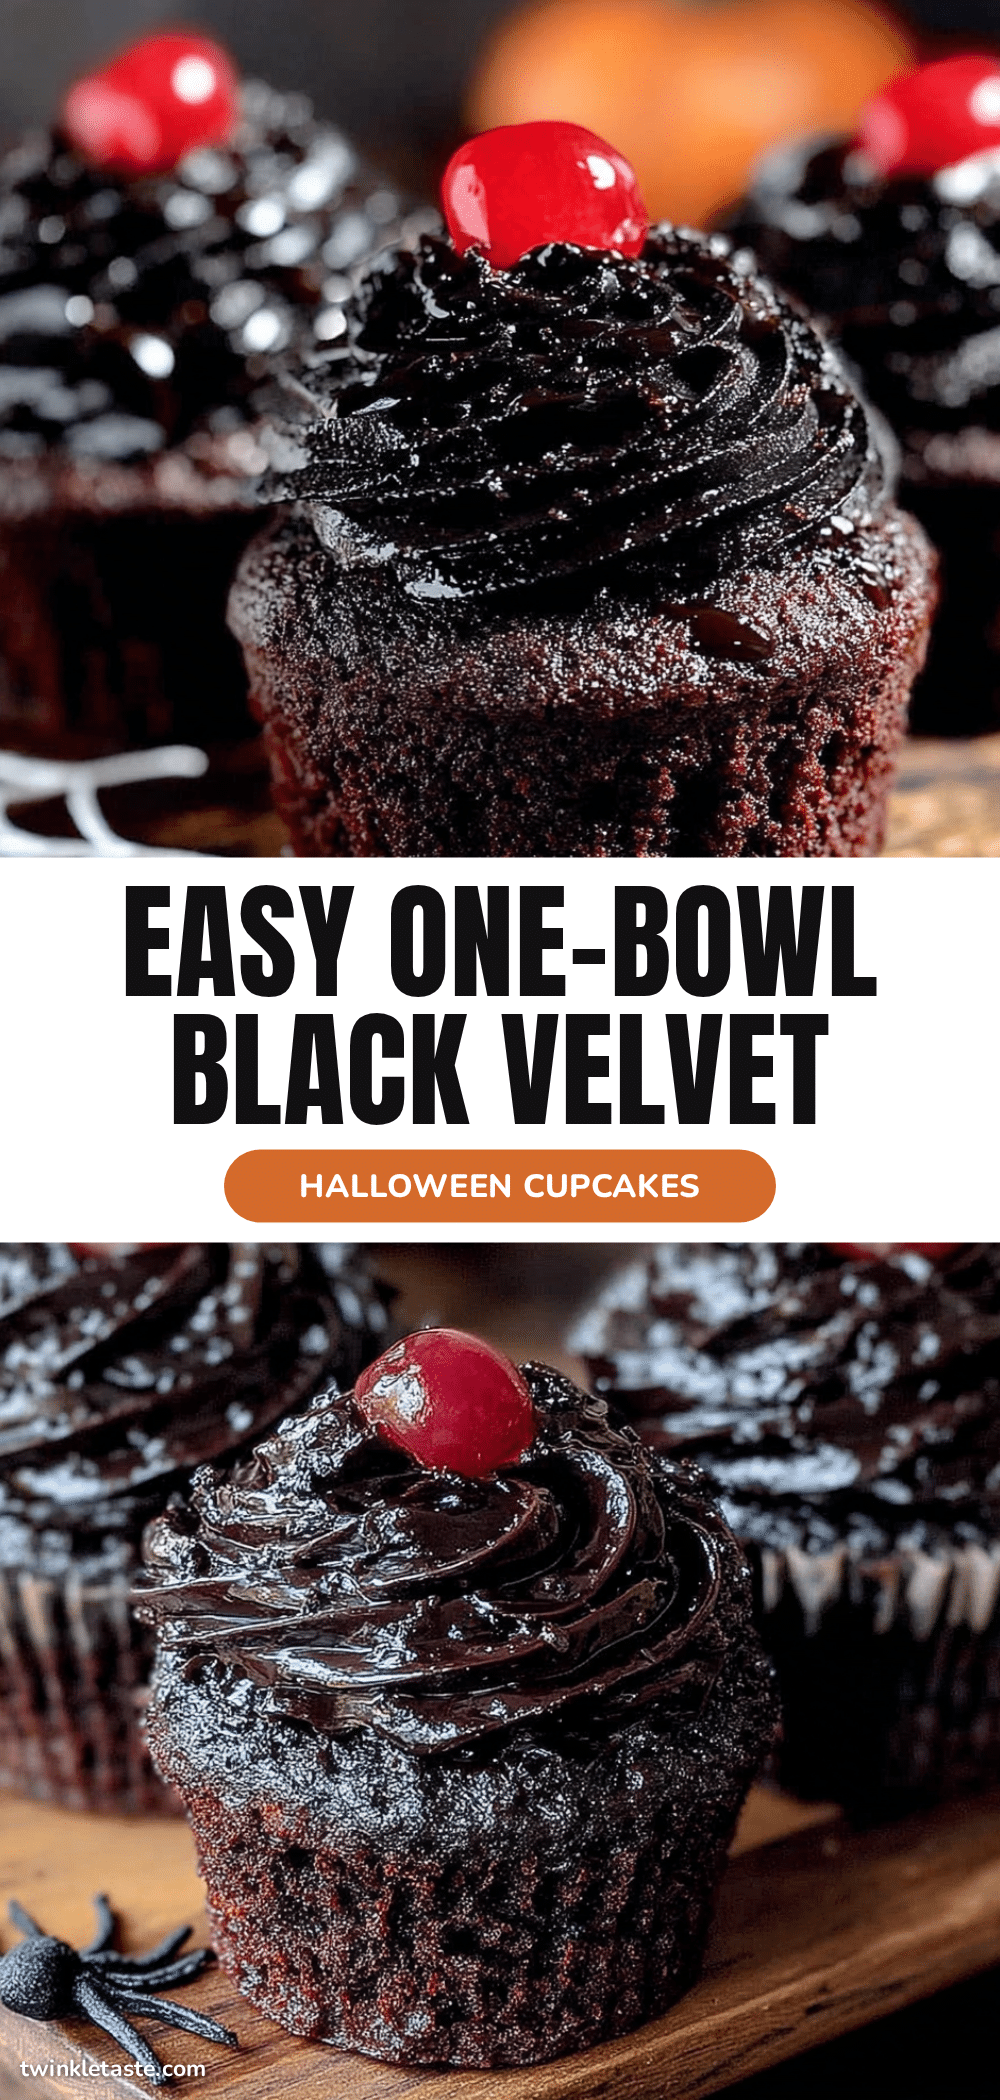
Easy One-Bowl Black Velvet Halloween Cupcakes
These Easy One-Bowl Black Velvet Halloween Cupcakes come together in one bowl with simple pantry ingredients, delivering a dramatic black crumb and a tender, velvety texture. Perfect for Halloween parties, school bake sales, or a cozy night in, they’re proof that holiday baking can be both impressive and effortless.
- Prep Time: 10 minutes
- Cook Time: 18 to 22 minutes
- Total Time: 28 to 32 minutes
- Yield: 12 cupcakes 1x
- Category: Dessert
- Cuisine: American
Ingredients
- 1 ½ cups (190g) all-purpose flour
- 1 cup (200g) granulated sugar
- ¼ cup (20g) unsweetened cocoa powder (natural, not Dutch-process)
- 1 teaspoon baking soda
- ½ teaspoon salt
- 1 cup (240ml) buttermilk (full-fat preferred)
- ½ cup (120ml) vegetable oil (or canola/sunflower)
- 2 large eggs, room temperature
- 1 tablespoon white vinegar
- 2 teaspoons vanilla extract
- 1 to 2 tablespoons black gel food coloring
- For the Cream Cheese Frosting:
- 8 oz (226g) cream cheese, softened
- ½ cup (113g) unsalted butter, softened
- 3 to 4 cups (360-480g) powdered sugar
- 1 teaspoon vanilla extract
- Orange gel food coloring (optional)
Instructions
- Preheat your oven to 350°F (175°C). Line a standard 12-cup muffin tin with paper liners.
- In a large mixing bowl, whisk together the flour, sugar, cocoa powder, baking soda, and salt until no lumps remain.
- Add the buttermilk, vegetable oil, eggs, vinegar, vanilla extract, and black gel food coloring. Whisk until just combined (about 20-30 seconds). Do not overmix; a few small lumps are okay.
- Divide the batter evenly among the 12 cupcake liners, filling each about ⅔ to ¾ full.
- Bake for 18 to 22 minutes, or until a toothpick inserted into the center comes out clean or with a few moist crumbs. Let cool in the pan for 5 minutes, then transfer to a wire rack to cool completely.
- While the cupcakes cool, make the cream cheese frosting: In a separate bowl, beat the softened cream cheese and butter together until smooth and creamy (about 2 minutes). Gradually add the powdered sugar, 1 cup at a time, beating on low speed to avoid a sugar cloud, then increase to medium. Add the vanilla extract and beat until light and fluffy. If desired, add a few drops of orange gel food coloring and mix until evenly colored.
- Once the cupcakes are completely cool, frost them using a piping bag or a knife. Decorate with Halloween sprinkles, candy eyeballs, or crushed Oreos if desired.
Notes
For super dark cupcakes, use the full 2 tablespoons of black gel food coloring. The color deepens as the cupcakes cool. Do not overmix the batter to avoid dense cupcakes. Use room temperature ingredients for best texture. Cupcakes can be made a day ahead and stored unfrosted at room temperature; frost the day of serving.
Nutrition
- Serving Size: 1 cupcake
- Calories: 380420
- Sugar: 3538
- Fat: 2022
- Carbohydrates: 4852
- Fiber: 12
- Protein: 56
Keywords: black velvet cupcakes, Halloween cupcakes, one-bowl cupcakes, chocolate cupcakes, cream cheese frosting, easy Halloween dessert


