My neighbor, a retired schoolteacher named Mrs. Kowalski, watched me fumbling with a bag of instant oatmeal packets in my kitchen one Tuesday morning. She didn’t say anything at first. Then she tapped on my back door and handed me a mason jar filled with something that looked creamy and smelled like a bakery. “Try this,” she said, “it’s just oats and a little patience.” That was the first time I ever had overnight oats, and honestly, I haven’t touched a packet since. Her version was simple—just oats, milk, and a drizzle of honey—but it sparked something in me. I started experimenting, trying different combinations, and this peanut butter banana version is the one that stuck. It’s the one my friends ask for when they come over for brunch, the one I make when I want to feel like I have my life together even when I don’t.
I mean, let’s face it—mornings can be chaotic. You’re rushing around, trying to get everyone out the door, and the last thing you want to do is stand over a stove. That’s why this recipe is a game-changer. You throw everything in a jar the night before, and by morning, you’ve got a creamy, satisfying breakfast that tastes like dessert. Maybe you’ve been there, staring into the fridge at 7 a.m., wondering what to feed a hungry crowd. This is your answer.
What I love most about this recipe is how it brings people together. I’ve made it for lazy Sunday brunches, for post-workout recovery meals with friends, and even for a quick breakfast before a road trip. It’s the kind of dish that feels special without requiring any fuss. And honestly, it’s become my go-to for potlucks and gatherings because everyone—kids, adults, picky eaters—loves it. The peanut butter and banana combo is just one of those magical pairings that never gets old.
Why You’ll Love This Recipe
Let me tell you why this recipe has earned a permanent spot in my weekly rotation. After testing it dozens of times—sometimes with different milks, different sweeteners, even different oats—I can confidently say this version is the best. It’s been approved by my family, my neighbors, and even a few skeptical friends who thought “cold oatmeal” sounded weird. Trust me, one bite and they were hooked.
- Quick & Easy: This comes together in under 10 minutes. Seriously. You just stir everything in a jar, pop it in the fridge, and forget about it until morning. Perfect for busy weeknights when you’re already thinking about tomorrow’s breakfast.
- Simple Ingredients: You probably already have everything in your kitchen. Oats, milk, peanut butter, a banana, and a little maple syrup or honey. No fancy grocery trips needed.
- Perfect for Hosting: This is a lifesaver when you have guests. Make a big batch the night before, and in the morning you’ve got a beautiful, crowd-ready breakfast without any cooking. Just grab some bowls and let everyone serve themselves.
- Crowd-Pleaser: I’ve served this at brunches, potlucks, and even a casual dinner party as a dessert option. It always gets rave reviews. Kids love it, adults love it, and it’s easy to customize for different tastes.
- Unbelievably Delicious: The texture is what gets me every time. The oats soften overnight and soak up all that creamy peanut butter and banana flavor. It’s like eating a peanut butter banana smoothie with a spoon, but way more satisfying.
What makes this recipe different from the rest? It’s the balance. A lot of overnight oat recipes are either too watery or too thick. This one hits that sweet spot—creamy but not mushy, sweet but not cloying. The trick is mashing the banana into the mixture rather than just slicing it on top. That way, the banana flavor infuses every single bite. Plus, using a mix of milk and yogurt gives it that extra richness that makes it feel indulgent.
This isn’t just another version of overnight oats. It’s the kind that makes you close your eyes after the first bite. It’s comfort food reimagined—healthier, faster, but with the same soul-soothing satisfaction. And when you’re hosting, it’s the perfect way to impress your guests without any stress.
What Ingredients You Will Need
This recipe uses simple, wholesome ingredients that come together to create something truly special. Most of these are pantry staples, which is one of the reasons I love it so much. Here’s what you’ll need and why each ingredient matters.
- Rolled Oats: 1 cup (90g). Use old-fashioned rolled oats, not quick oats. Rolled oats have a better texture and hold up well overnight without turning mushy. I prefer Bob’s Red Mill for consistent results, but any brand works fine.
- Milk: 1 cup (240ml). Any milk works here—whole milk for creaminess, almond milk for a dairy-free option, or oat milk for extra oat flavor. I usually go with 2% because it’s what I have on hand.
- Plain Greek Yogurt: 1/2 cup (120g). This adds creaminess and a little tang that balances the sweetness. It also boosts the protein content, making this breakfast more satisfying. Use dairy-free yogurt if needed.
- Peanut Butter: 1/4 cup (60g). Creamy or crunchy, your choice. I love using natural peanut butter with no added sugar because it lets the banana sweetness shine. Skippy or Jif work great too if that’s what you have.
- Ripe Banana: 1 large banana. The riper the better! Spotted bananas are perfect because they’re naturally sweeter and mash easily. This is the key to getting that intense banana flavor without adding extra sugar.
- Maple Syrup or Honey: 2 tablespoons (30ml). Just a little sweetness to tie everything together. Maple syrup adds a warm, caramel-like note, while honey gives a floral sweetness. Both work beautifully.
- Chia Seeds: 1 tablespoon (12g). Optional but highly recommended. Chia seeds help thicken the oats and add a boost of fiber and omega-3s. Plus, they give that nice pudding-like texture.
- Vanilla Extract: 1 teaspoon (5ml). A little vanilla goes a long way in enhancing the flavors. It makes everything taste more dessert-like without any extra sugar.
- Pinch of Salt: Just a tiny pinch. Salt balances the sweetness and brings out the peanut butter flavor. Don’t skip it!
Substitution Guidance: If you’re gluten-free, make sure to use certified gluten-free oats. For a nut-free version, swap the peanut butter with sunflower seed butter or tahini. And if you don’t have chia seeds, you can leave them out—the oats will still thicken, just not as much. I’ve also made this with coconut milk and a drizzle of coconut cream on top for a tropical twist, and it was fantastic.
Equipment Needed
You don’t need much for this recipe, which is part of its charm. Here’s what I use:
- Mason Jars or Airtight Containers: Four 8-ounce jars work perfectly for single servings. I love using wide-mouth mason jars because they’re easy to fill and clean. If you’re making a big batch for a crowd, a large bowl with a lid works great too.
- Mixing Bowl and Whisk: A medium bowl and a whisk for combining the wet ingredients. A fork works in a pinch, but a whisk gets everything smooth and lump-free.
- Fork or Potato Masher: For mashing the banana. I usually just use a fork because it’s one less thing to wash.
- Measuring Cups and Spoons: Standard set for accuracy. I’ve eyeballed it before and ended up with oats that were too soupy, so measuring is worth it.
- Spatula: For scraping every last bit of peanut butter into the mixture. Waste not, want not.
If you don’t have mason jars, any container with a tight-fitting lid works. I’ve used old pasta sauce jars, plastic meal prep containers, and even a big glass bowl covered with plastic wrap. The key is that it’s airtight so the oats stay fresh and don’t absorb any fridge odors.
Preparation Method
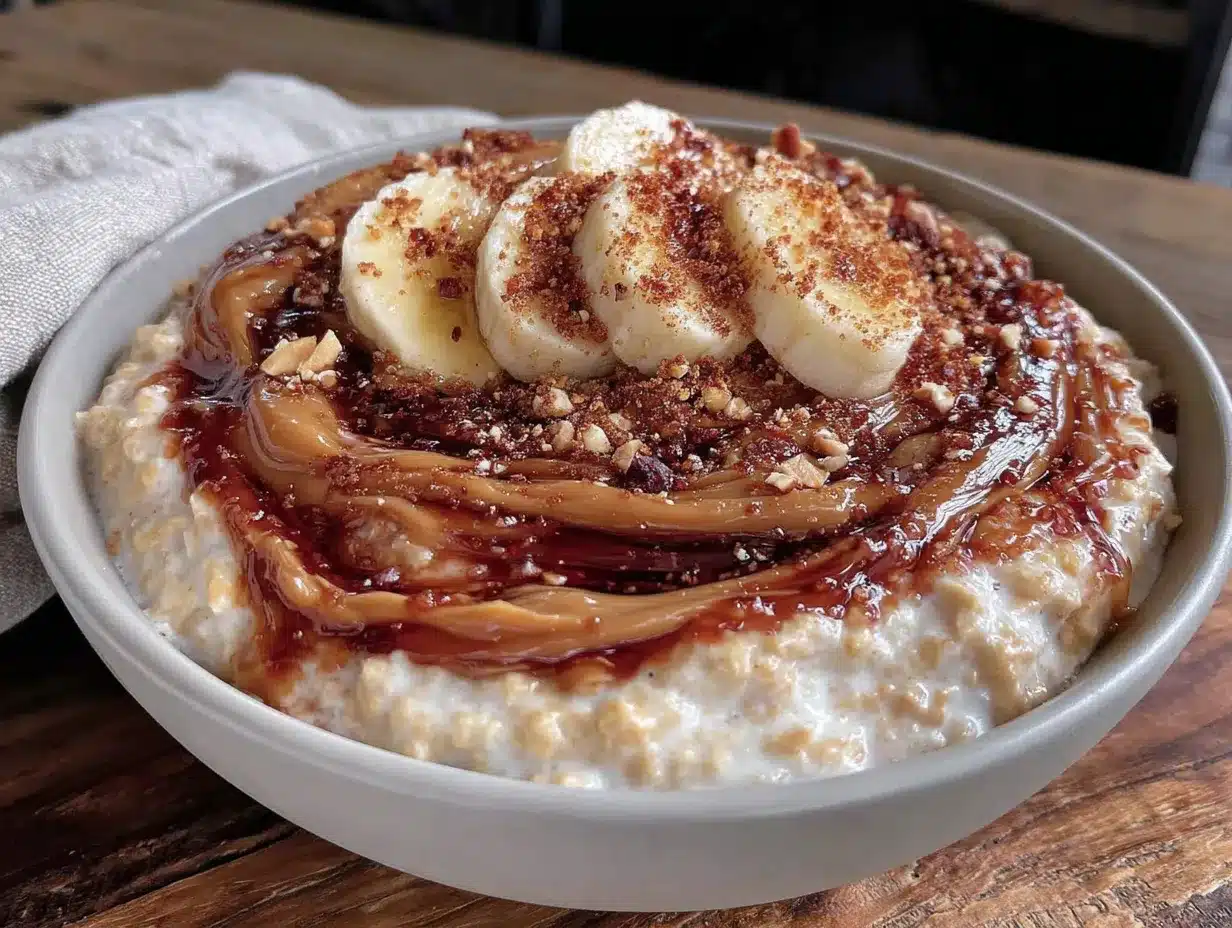
This is the easy part. Follow these steps, and you’ll have breakfast ready for the next four days—or one big crowd tomorrow morning.
- Mash the banana: In a medium bowl, mash the ripe banana with a fork until it’s mostly smooth. A few small chunks are fine—they add little bursts of banana flavor. (Pro tip: if your banana isn’t super ripe, you can microwave it for 15 seconds to soften it up.)
- Combine the wet ingredients: Add the milk, Greek yogurt, peanut butter, maple syrup, and vanilla extract to the bowl with the mashed banana. Whisk everything together until the peanut butter is fully incorporated and the mixture is smooth. This takes about 30 seconds of vigorous whisking. Don’t rush it—lumps of peanut butter are not fun to bite into.
- Add the dry ingredients: Stir in the rolled oats, chia seeds, and a pinch of salt. Mix until everything is evenly distributed. The mixture will look quite liquid at this point, but that’s normal. The oats will absorb the liquid overnight.
- Divide into jars: Pour the mixture evenly into your four jars or containers. Leave about an inch of space at the top because the oats will expand slightly as they soak. If you’re using a single large container, just pour it all in.
- Seal and refrigerate: Screw on the lids tightly and place the jars in the refrigerator. Let them sit for at least 6 hours, but overnight (8-12 hours) is ideal. The longer they sit, the creamier they get. I’ve let them go up to 3 days, and they’re still perfect.
- Serve and garnish: In the morning, give the jar a good stir. The oats will have thickened into a creamy, pudding-like consistency. If they’re too thick for your liking, stir in a splash of milk to loosen them up. Top with sliced banana, a drizzle of peanut butter, a sprinkle of chia seeds, or a few chopped peanuts for crunch. Serve cold straight from the fridge, or let it sit at room temperature for 10 minutes if you prefer it less chilly.
Timing Note: The active prep time is about 10 minutes. The overnight rest is 6-12 hours. So total time from start to breakfast is about 10 minutes of work plus overnight chilling. Perfect for busy hosts who want to spend more time with guests and less time in the kitchen.
Troubleshooting: If your oats turn out too watery, you probably used too much milk or not enough oats. Next time, try reducing the milk by a couple of tablespoons. If they’re too thick, stir in a little extra milk before serving. And if they’re not sweet enough, add a drizzle of honey or maple syrup right before eating.
Cooking Tips & Techniques
After making this recipe more times than I can count, I’ve picked up a few tricks that make a big difference. Let me share them with you.
Don’t skip the mash. I know it’s tempting to just slice the banana and throw it in, but mashing it first is crucial. When you mash the banana, it releases all that natural sweetness and flavor into the liquid, infusing every single oat. Sliced banana just sits on top and doesn’t integrate the same way. Trust me on this one—I learned the hard way after making a batch that tasted like plain oats with banana on top.
Use room temperature ingredients. This is a small thing, but it makes a difference. If your milk and yogurt are straight from the fridge, they don’t mix as smoothly with the peanut butter. Let them sit on the counter for 10 minutes before you start. Or, if you’re in a rush, microwave the milk for 15 seconds. It helps everything come together in a silky, lump-free mixture.
Layer your toppings strategically. If you’re making these for a gathering, don’t add the toppings until right before serving. Sliced banana will brown if it sits overnight, and crunchy toppings like nuts or granola will get soggy. Keep the jars plain in the fridge and set out a toppings bar so guests can customize their own. It’s a fun, interactive way to serve breakfast.
Make them in a big bowl for a crowd. Instead of individual jars, make the whole batch in a large bowl or a 9×13 baking dish. Cover it with plastic wrap and refrigerate overnight. In the morning, scoop it into bowls and let everyone add their own toppings. It’s way less fussy than dealing with individual jars, and it feels more communal.
Double the recipe for leftovers. These keep beautifully in the fridge for up to 4 days. So if you’re hosting a weekend gathering, make a double batch on Thursday night. You’ll have breakfast ready for Friday, Saturday, and Sunday without lifting a finger. Plus, the flavors get even better after a day or two as the oats really soak everything in.
Variations & Adaptations
One of the best things about this recipe is how versatile it is. Here are some of my favorite variations that I’ve tried over the years.
Chocolate Peanut Butter Banana Oats: Add 1 tablespoon of unsweetened cocoa powder to the mixture along with the dry ingredients. The chocolate and peanut butter combo is absolutely divine. I like to top it with a few dark chocolate chips for extra indulgence. This version is a huge hit at brunch—it feels like dessert for breakfast.
Vegan Version: Use plant-based milk (oat milk is my favorite here) and dairy-free yogurt. Swap the honey for maple syrup to keep it fully vegan. The texture is just as creamy, and honestly, I’ve served this to non-vegans who couldn’t tell the difference. It’s that good.
High-Protein Version: Add a scoop of vanilla or unflavored protein powder to the mixture. You might need to add an extra tablespoon or two of milk to keep the consistency right. I’ve done this with both whey and plant-based protein powders, and it works great. Perfect for post-workout breakfasts or feeding active guests.
Seasonal Berry Twist: In the summer, I love adding a handful of fresh berries—strawberries, blueberries, or raspberries—right into the mixture before refrigerating. They burst as the oats soak, adding little pockets of fruity flavor. In winter, use frozen berries (no need to thaw) for the same effect.
Nut-Free Option: Swap the peanut butter for sunflower seed butter or tahini. Sunflower seed butter gives a slightly different flavor but is just as creamy. Just be aware that sunflower seed butter can sometimes turn green when combined with baking soda (not an issue here since there’s no baking soda), so you’re safe.
Serving & Storage Suggestions
This recipe is designed to be served cold, straight from the fridge. The texture is like a thick, creamy pudding—almost like a chilled porridge. I love it that way, but if you prefer warm oats, you can microwave a serving for 30-45 seconds. Just stir it well afterward because the heat can cause the oats to clump.
Presentation for Guests: When I’m hosting, I like to set up a toppings bar. I put out small bowls of sliced bananas, chopped peanuts, chocolate chips, shredded coconut, a drizzle of honey, and a little extra peanut butter. Guests can customize their own jars, and it always gets people talking. It’s also a great conversation starter—everyone compares their combinations.
What to Serve Alongside: These oats are hearty enough to be a meal on their own, but if you’re serving a bigger brunch spread, they pair beautifully with fresh fruit salad, a side of crispy bacon or sausage, and a pot of coffee or tea. For a lighter option, serve them with a simple green smoothie or a cup of herbal tea.
Storage: Store the oats in airtight containers in the refrigerator for up to 4 days. I don’t recommend freezing them because the texture changes when thawed—the oats can become mushy and watery. If you need to make them further in advance, prep the dry ingredients (oats, chia seeds, salt) in a jar and the wet ingredients (mashed banana, milk, yogurt, peanut butter, maple syrup, vanilla) in another. Combine them the night before you want to eat them.
Reheating: If you want to eat these warm, microwave a single serving for 30-45 seconds, stirring halfway through. Or, transfer to a small saucepan and warm over low heat for 2-3 minutes, stirring frequently. Add a splash of milk if they get too thick.
Flavor Development: Here’s a little secret—these oats actually taste better on day two. The flavors meld together more, and the oats get even creamier. So if you’re making them for a weekend gathering, starting them on Thursday means they’ll be at their peak on Saturday morning. I’ve had guests ask for the recipe after tasting day-old oats, thinking I did something special. Nope, just time.
Nutritional Information & Benefits
Per serving (one jar, without toppings): approximately 350 calories, 12g protein, 45g carbohydrates, 14g fat, 8g fiber, 18g sugar (naturally occurring from banana and maple syrup).
This recipe is packed with good-for-you ingredients. The rolled oats provide complex carbohydrates and soluble fiber, which helps keep you full and supports heart health. The peanut butter adds healthy fats and protein, making this a balanced breakfast that sustains energy levels. Bananas are rich in potassium and vitamin B6, which support muscle function and mood regulation. And the Greek yogurt adds probiotics for gut health plus extra protein—about 15g per serving total, which is impressive for a plant-forward breakfast.
Dietary Considerations: This recipe is naturally vegetarian. It can easily be made vegan (use plant-based milk and yogurt, swap honey for maple syrup) and gluten-free (use certified gluten-free oats). It’s also nut-free if you use sunflower seed butter instead of peanut butter. For lower sugar, reduce the maple syrup to 1 tablespoon and use an extra-ripe banana for sweetness.
Potential Allergens: Contains peanuts and dairy (if using regular yogurt and milk). Can be adapted as noted above.
From a wellness perspective, I love that this recipe feels indulgent while actually being quite nutritious. It’s the kind of breakfast that makes you feel good—satisfied, energized, and ready to take on the day. And when you’re hosting, it’s nice to offer something that’s both delicious and nourishing for your guests.
Conclusion
This overnight peanut butter banana oats recipe has become a staple in my kitchen for a reason. It’s simple, forgiving, and always delivers. Whether you’re making it for yourself on a busy weekday morning or scaling it up for a crowd of hungry guests, it never disappoints. The combination of creamy oats, rich peanut butter, and sweet banana is just one of those perfect pairings that works every time.
I encourage you to make this recipe your own. Play with the toppings, try different nut butters, add a sprinkle of cinnamon or a dash of nutmeg. The beauty of overnight oats is that they’re endlessly customizable. And honestly, that’s what makes them so fun to share with others. Everyone can build their perfect jar.
I’d love to hear how yours turn out! Drop a comment below and let me know what toppings you used, or tag me in your photos on social media. Did you try the chocolate version? Add some berries? I’m always looking for new ideas to try. And if you’re hosting a gathering soon, give this recipe a shot—your guests will thank you, and you’ll get to enjoy a stress-free morning with them.
Happy cooking, and here’s to many delicious breakfasts ahead!
Frequently Asked Questions
Can I use quick oats instead of rolled oats?
You can, but the texture will be much softer and mushier. Rolled oats hold their shape better and give a creamier, more satisfying texture. If you only have quick oats, reduce the soaking time to 4-6 hours and expect a porridge-like consistency.
How long do these oats last in the fridge?
They stay fresh for up to 4 days in an airtight container. The texture actually improves after the first day as the flavors meld together. Just give them a good stir before serving, and add a splash of milk if they’ve thickened too much.
Can I make these without yogurt?
Absolutely. Replace the yogurt with an equal amount of milk. The texture will be slightly less creamy and the protein content will be lower, but they’ll still be delicious. You can also use a dairy-free yogurt alternative if needed.
Why did my oats turn out watery?
This usually happens when there’s too much liquid relative to the oats. Next time, try using slightly less milk or adding an extra tablespoon of chia seeds, which help absorb excess liquid. Also, make sure you’re using rolled oats, not steel-cut oats, which require more liquid and longer soaking.
Can I heat these up in the microwave?
Yes! Microwave a single serving for 30-45 seconds, stirring halfway through. The oats will warm up nicely without becoming mushy. If you’re heating a larger batch, do it in 30-second intervals, stirring between each, until it reaches your desired temperature.
Pin This Recipe!
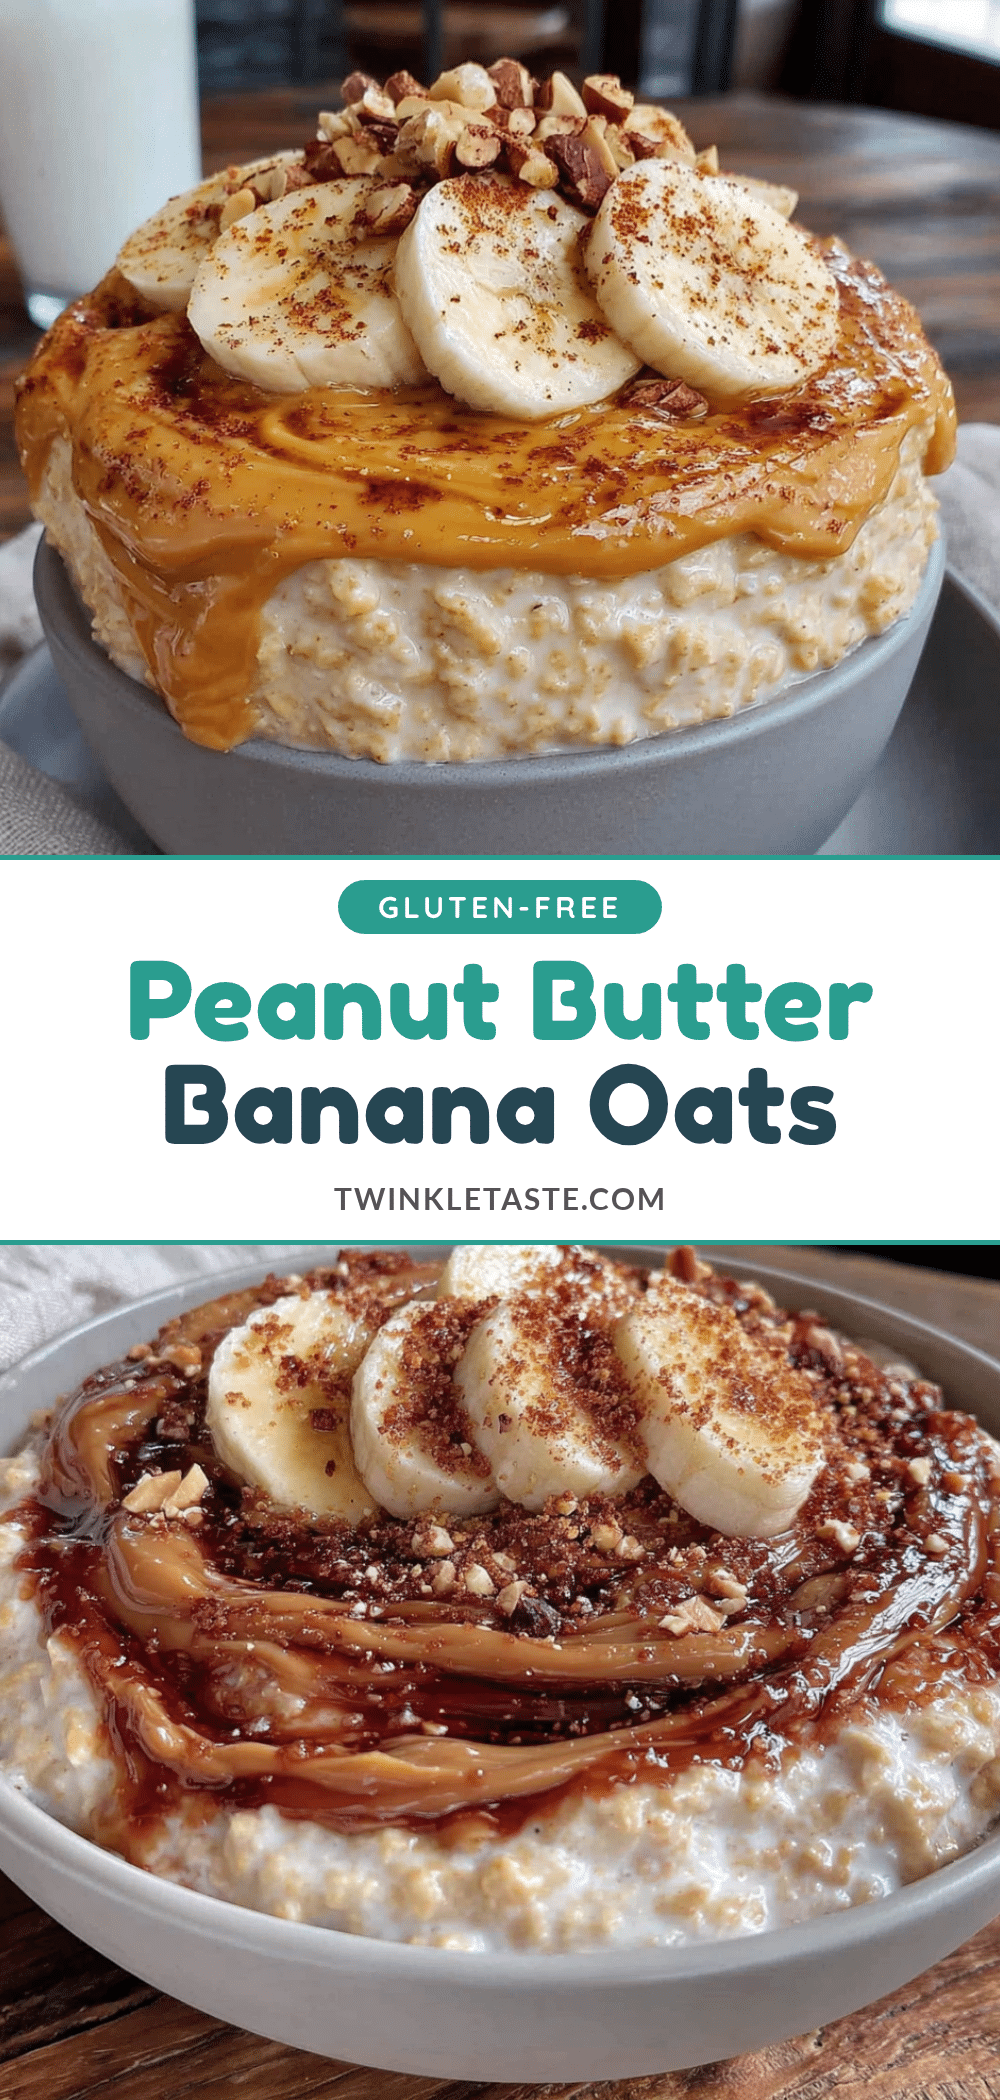
Best Overnight Peanut Butter Banana Oats Recipe
Creamy, no-cook overnight oats with peanut butter and banana, perfect for busy mornings or hosting brunch. This easy recipe comes together in 10 minutes and tastes like dessert for breakfast.
- Prep Time: 10 minutes
- Cook Time: 0 minutes
- Total Time: 10 minutes plus overnight chilling
- Yield: 4 servings 1x
- Category: Breakfast
- Cuisine: American
Ingredients
- 1 cup (90g) rolled oats
- 1 cup (240ml) milk (any kind)
- 1/2 cup (120g) plain Greek yogurt
- 1/4 cup (60g) peanut butter (creamy or crunchy)
- 1 large ripe banana
- 2 tablespoons (30ml) maple syrup or honey
- 1 tablespoon (12g) chia seeds (optional)
- 1 teaspoon (5ml) vanilla extract
- Pinch of salt
Instructions
- Mash the ripe banana in a medium bowl with a fork until mostly smooth.
- Add milk, Greek yogurt, peanut butter, maple syrup, and vanilla extract. Whisk until smooth and fully combined.
- Stir in rolled oats, chia seeds, and a pinch of salt until evenly distributed.
- Divide mixture evenly into four 8-ounce jars or airtight containers, leaving about an inch of space at the top.
- Seal lids tightly and refrigerate for at least 6 hours, preferably overnight (8-12 hours).
- In the morning, stir the oats. If too thick, add a splash of milk. Top with sliced banana, a drizzle of peanut butter, chia seeds, or chopped peanuts. Serve cold or let sit at room temperature for 10 minutes.
Notes
For best texture, use rolled oats (not quick oats). Mash banana thoroughly for even flavor. Oats keep in fridge up to 4 days; flavors improve after day one. For a warm breakfast, microwave a serving for 30-45 seconds.
Nutrition
- Serving Size: 1 jar (about 1 cup)
- Calories: 350
- Sugar: 18
- Sodium: 150
- Fat: 14
- Saturated Fat: 3
- Carbohydrates: 45
- Fiber: 8
- Protein: 12
Keywords: overnight oats, peanut butter banana oats, no-cook breakfast, healthy breakfast, make-ahead breakfast, brunch recipe


